
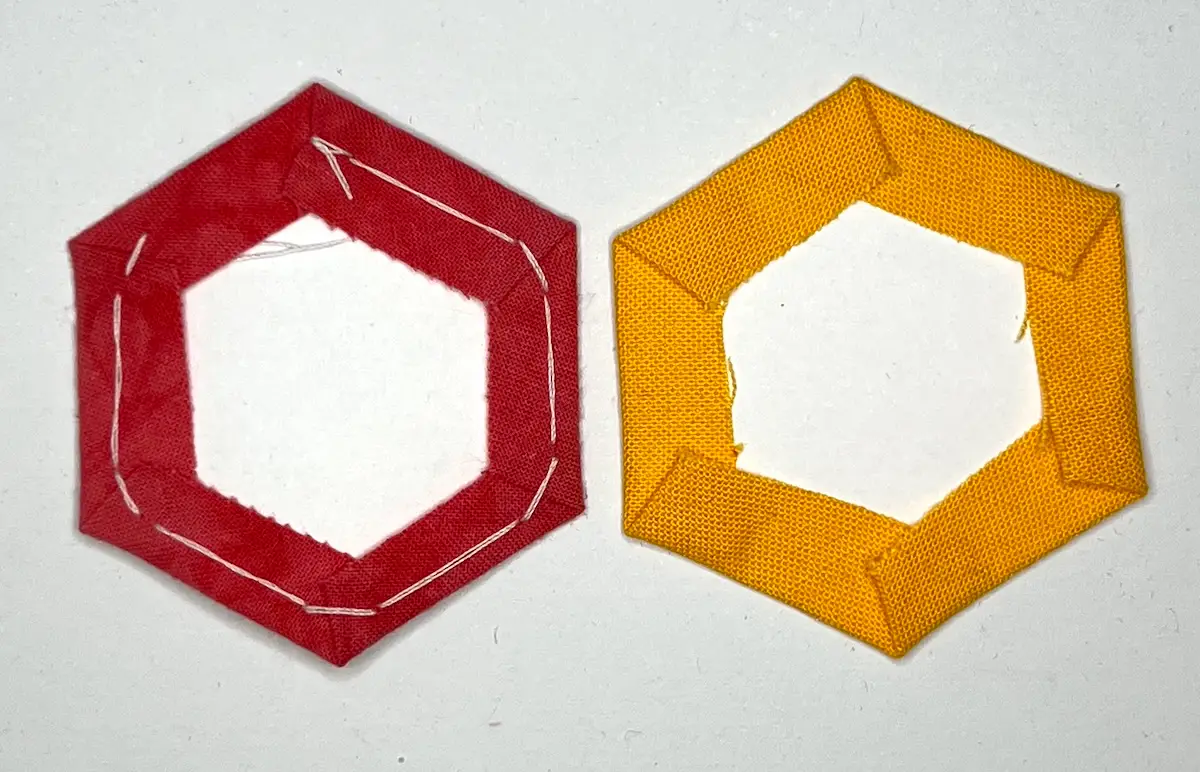
If you’re new to English paper piecing (EPP) — or you’ve been doing it for years but keep hearing quilters argue about the “right” way to baste — this post is for you. Basting is the step that transforms a flat piece of fabric and a paper template into a crisp, stitch-ready shape, and it’s arguably the single most important step in the whole EPP process. Get it right, and your points will be sharp and your seams will lie flat. Get it wrong, and you’ll be fighting wonky edges for the rest of the project.
There are two main ways quilters baste their EPP pieces: thread basting and glue basting. Both get you to the same destination, but the journey — and the results — look a little different. Let’s walk through each method step by step, then talk about which one might suit your project (and your patience level) best.
RELATED: English paper piecing tips: the complete beginner’s guide
RELATED: English paper piecing for beginners: Hexagon flower garden table topper
What is basting in English Paper Piecing?
Basting is the process of folding your fabric seam allowance over a paper template and securing it in place so the fabric holds its shape while you stitch pieces together. Once your pieces are joined, the papers are removed and the basting stitches or glue are no longer needed.
What you’ll need for both methods
- Precut paper templates (cardstock or freezer paper)
- Fabric cut with a seam allowance around each template (typically ¼” to ⅜”)
- Acrylic templates for cutting your fabric. I love this set of hexies – so many sizes to work with!
- Small, sharp scissors
- A design wall or tray to keep pieces organized
- Optional: Round rotating cutting mat. I really like the Sue Daley 16-inch rotating cutting mat. It makes it so much easier to cut your fabrics accurately. Just cut and rotate, instead of trying to move your fabric.
From there, your supply list splits depending on which method you choose.
As an Amazon Associate I earn from qualifying purchases. Read more about our affiliate linking policy.
Choosing EPP papers
I prefer purchasing precut papers for my EPP projects. They aren’t that expensive, you can reuse them several times, and I know they are exactly the right size. I really like the papers from PaperPieces.
You can purchase paper punches for a variety of EPP sizes and shapes and punch your own papers from card stock.
Or, you may choose to trace templates and cut your own cardstock, or cut from freezer paper. If you go the freezer paper method, you just press the shiny side of the freezer paper to the wrong side of your fabric. I find freezer paper isn’t as thick as I’d like and it’s more difficult to get crisp edges for sewing.
Method 1: Thread basting
Thread basting is the traditional method quilters have used for generations. It involves stitching the fabric around the paper with long basting stitches that get removed later.
Supplies for thread basting
- Fabric trimmed to 1/4″ – 3/8″ larger than your paper template
- Paper templates (precut, cut from freezer paper or cardstock)
- Basting thread (a contrasting color makes it easy to spot for removal)
- A milliner’s or basting needle
- Thread snips
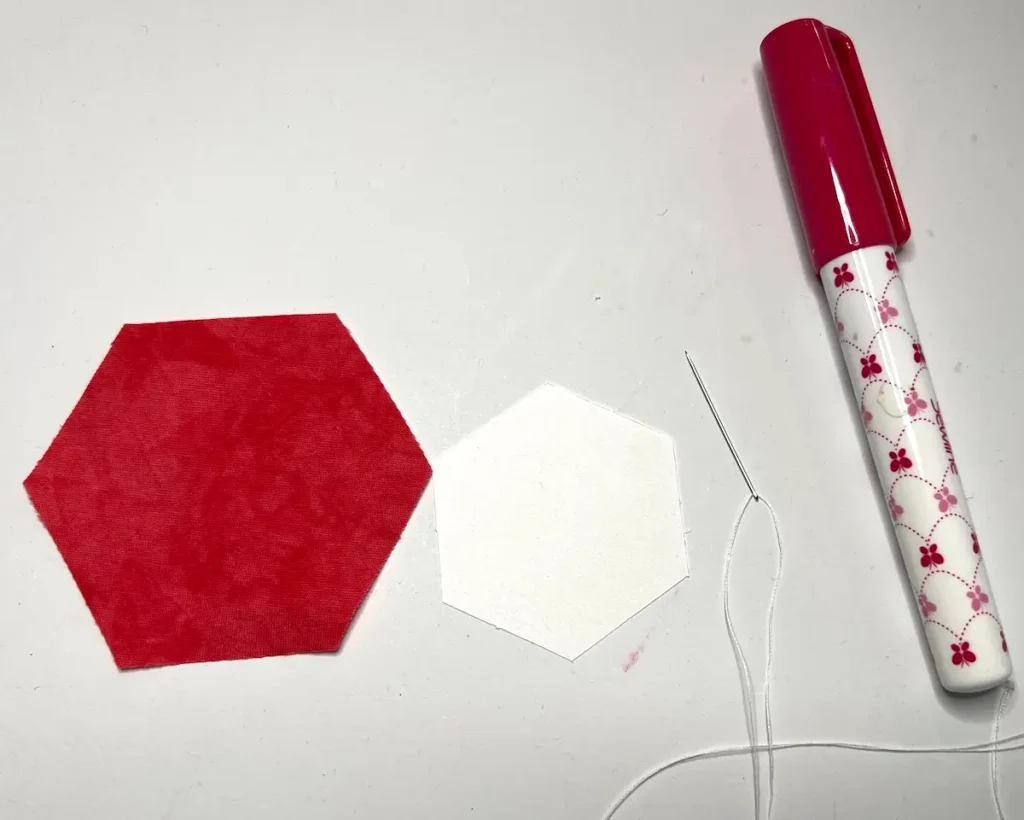
Step-by-step: Thread basting
Place a dab of glue on the paper template. This helps hold the paper in place while stitching.
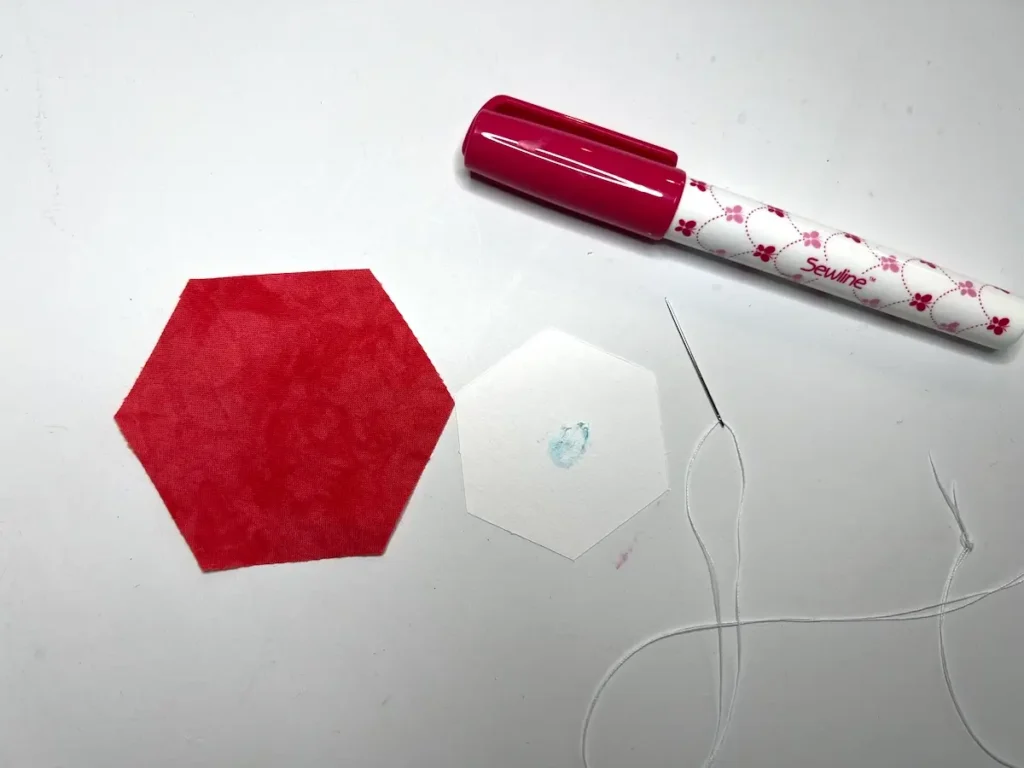
Center the paper template, glue side down, on the wrong side of your fabric. Make sure there’s an even seam allowance on all sides.
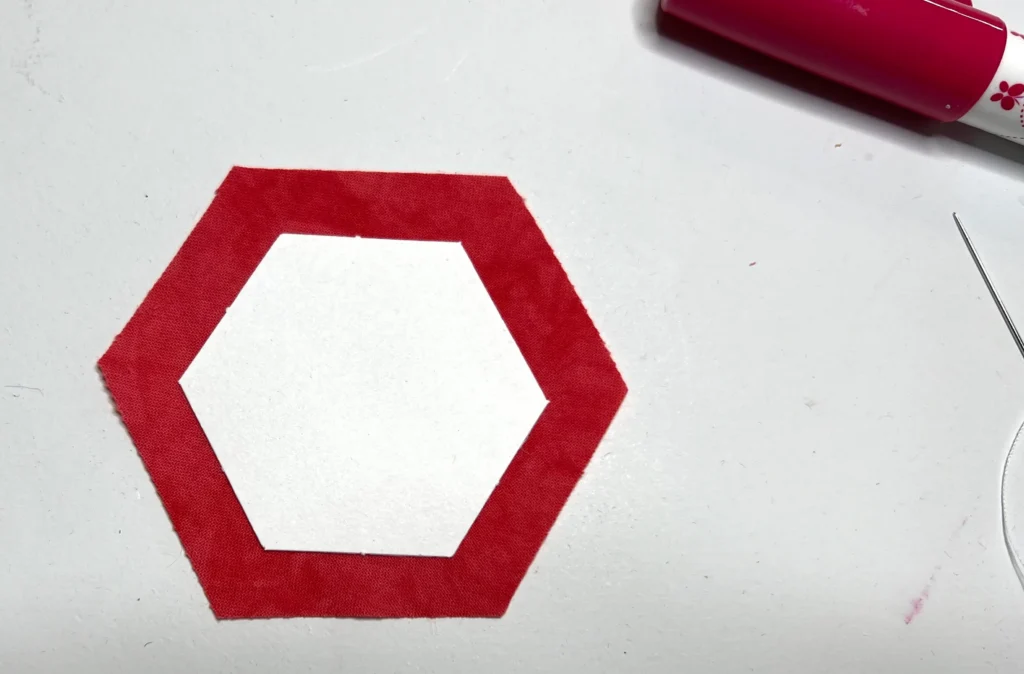
Thread your needle with a double strand of basting thread. Don’t knot the end — you’ll want to pull this thread out easily later.
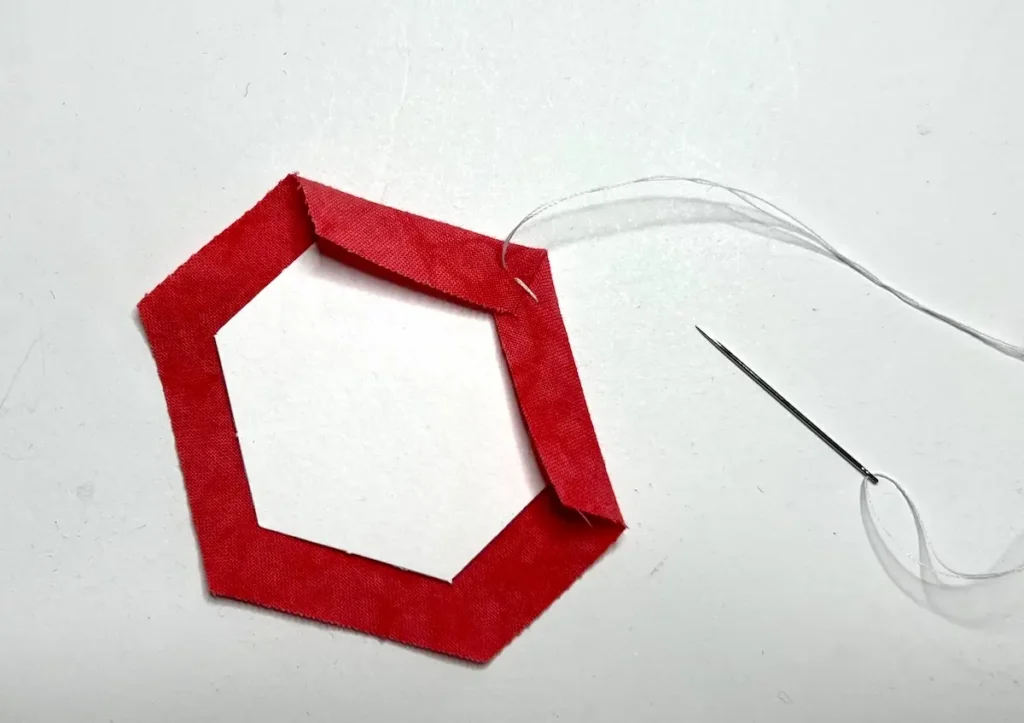
Fold the first two sides of the seam allowance over the edge of the paper. Hold the folded corner in place with your thumb.
Take a stitch through the fabric only, securing the corner.
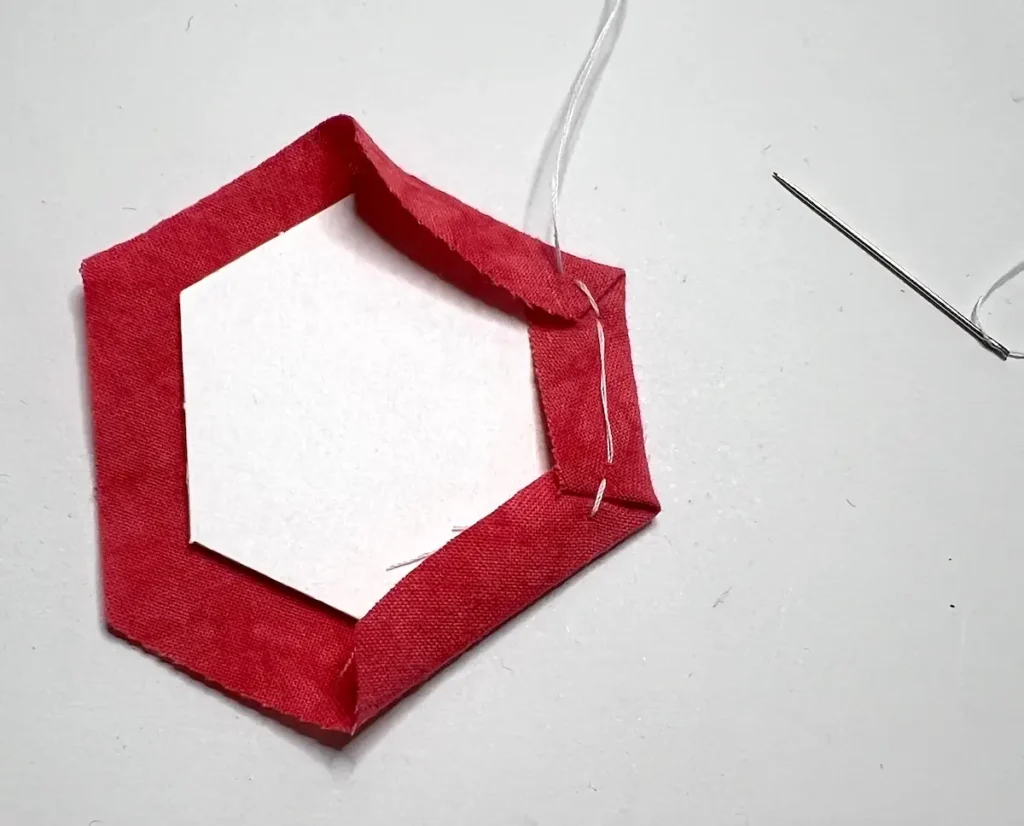
Fold the next seam allowance over the adjoining edge, taking a stitch at each corner, making a neat, sharp point.
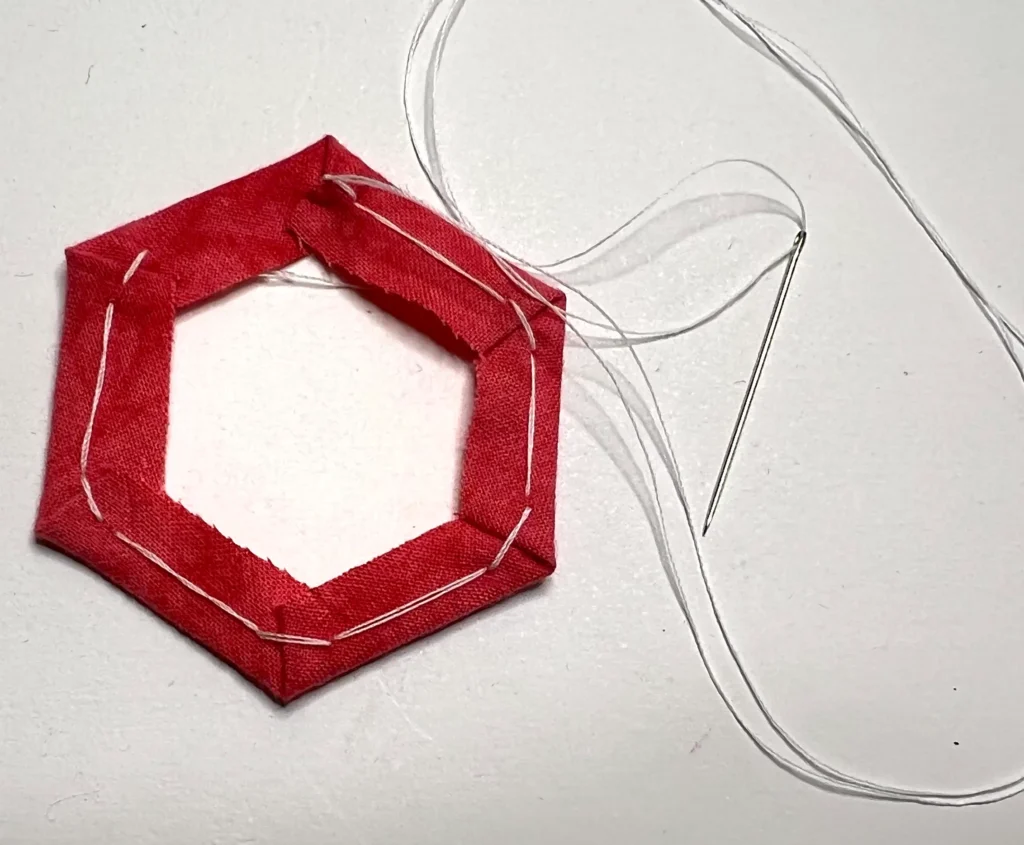
Continue stitching around the shape, folding each seam allowance in turn and taking one per side to hold it down. Your stitches should go through only the fabric — this is what keeps the fold crisp and make it easy to remove the paper.
When you reach your starting point, take a final stitch and leave a tail rather than knotting off. This makes removal quick and painless later.
Press lightly with an iron, your fingers, or a Hera marker to set the folds.
Here is the finished thread basted EPP hexie:
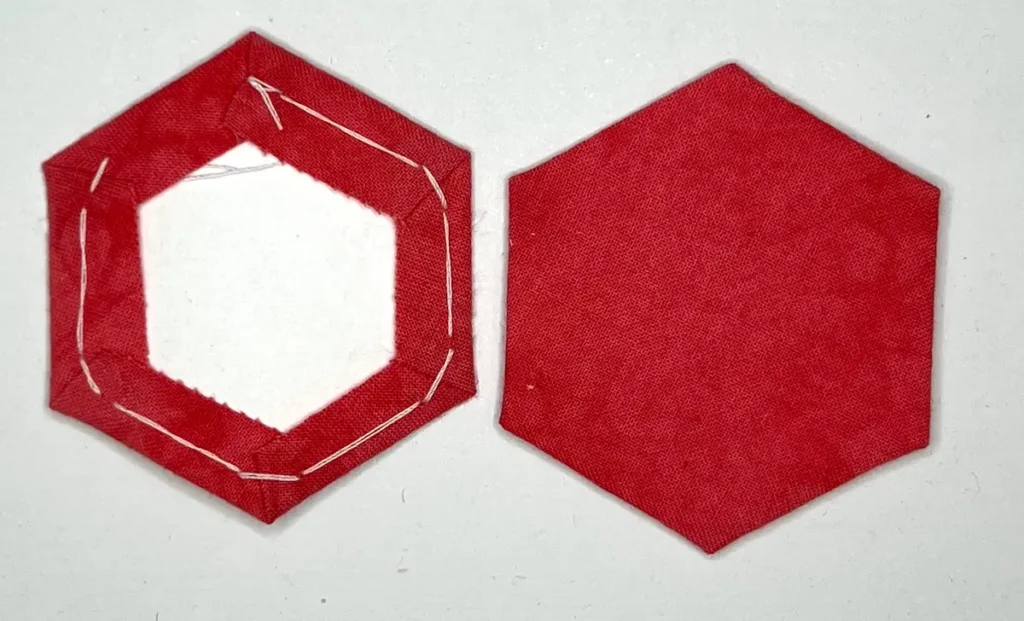
Tips for thread basting
- Use a thread color that stands out against your fabric so you can find and remove it quickly later.
- Basting stitches don’t need to be tiny or even — this is a temporary, functional stitch, not a design element.
- At points and corners, fold the “point” seam allowance in first, then fold the adjacent sides over it for a cleaner tip.
- Keep a small pair of curved embroidery scissors on hand for snipping basting threads without nicking your finished seams.
- Basting by hand while watching TV or during a commute makes this method feel far less tedious — many quilters treat it as portable, relaxing handwork.
Method 2: Glue basting
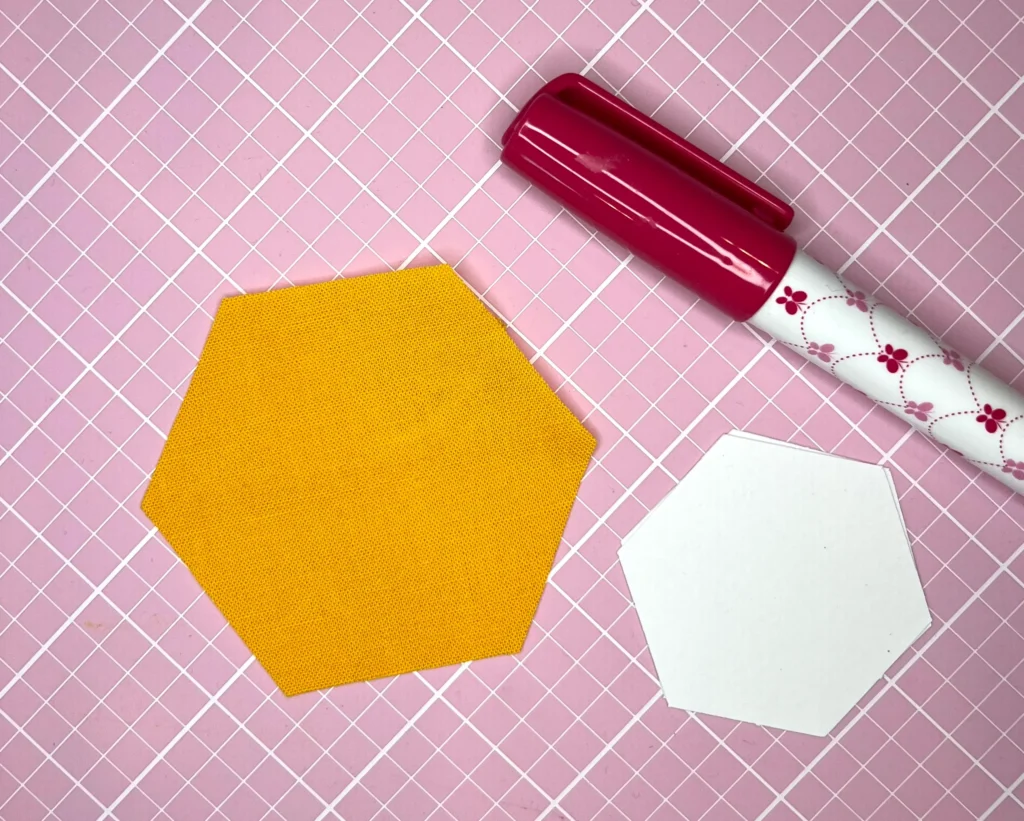
Glue basting is a newer approach that’s become popular for its speed. Instead of stitching the fabric down, you use a small amount of fabric glue to tack the seam allowance to the paper.
Supplies for glue basting
- Fabric trimmed to 1/4″ – 3/8″ larger than your paper template
- Paper templates (precut, cut from freezer paper or cardstock)
- A water-soluble fabric glue stick or fine-tip glue pen (look for one marketed specifically for paper piecing or applique). I prefer the Sewline glue pen.
- A silicone mat or scrap piece of cardstock to protect your table
Step-by-step: Glue basting
Center the paper template on the wrong side of your fabric, just as you would for thread basting.
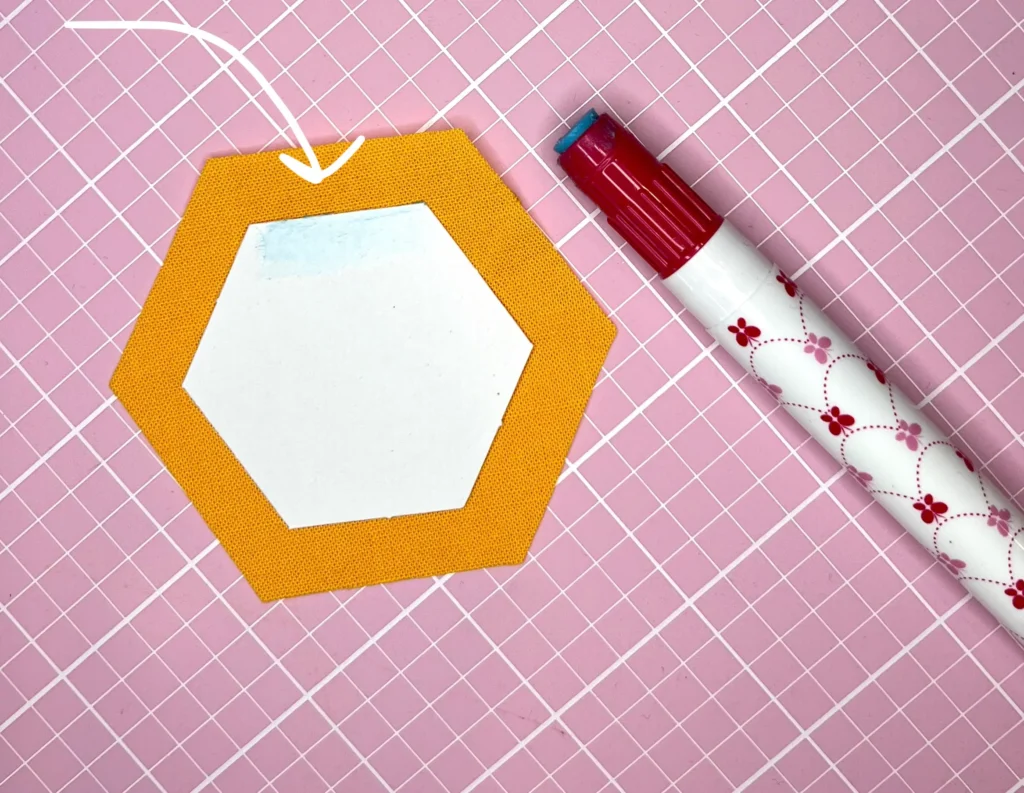
Run a thin line of glue just inside the edge of the paper template on one side, or dot glue at the corners only — technique varies by quilter, and both work.
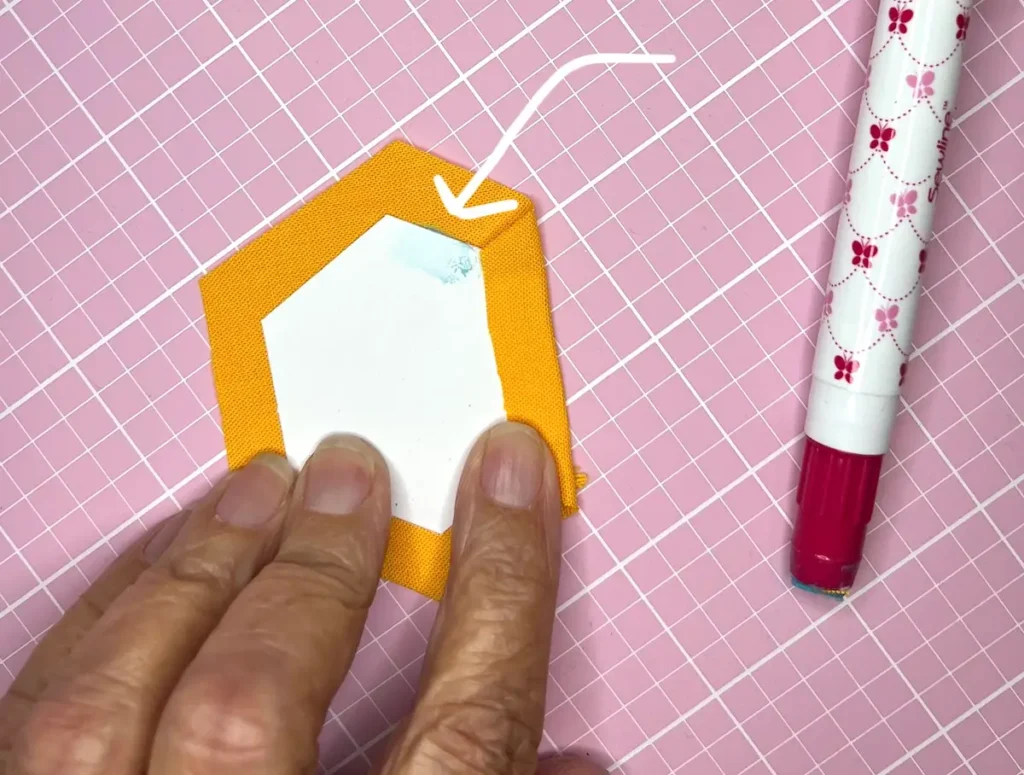
Fold the seam allowance over the glued edge and press firmly with your finger to bond it.
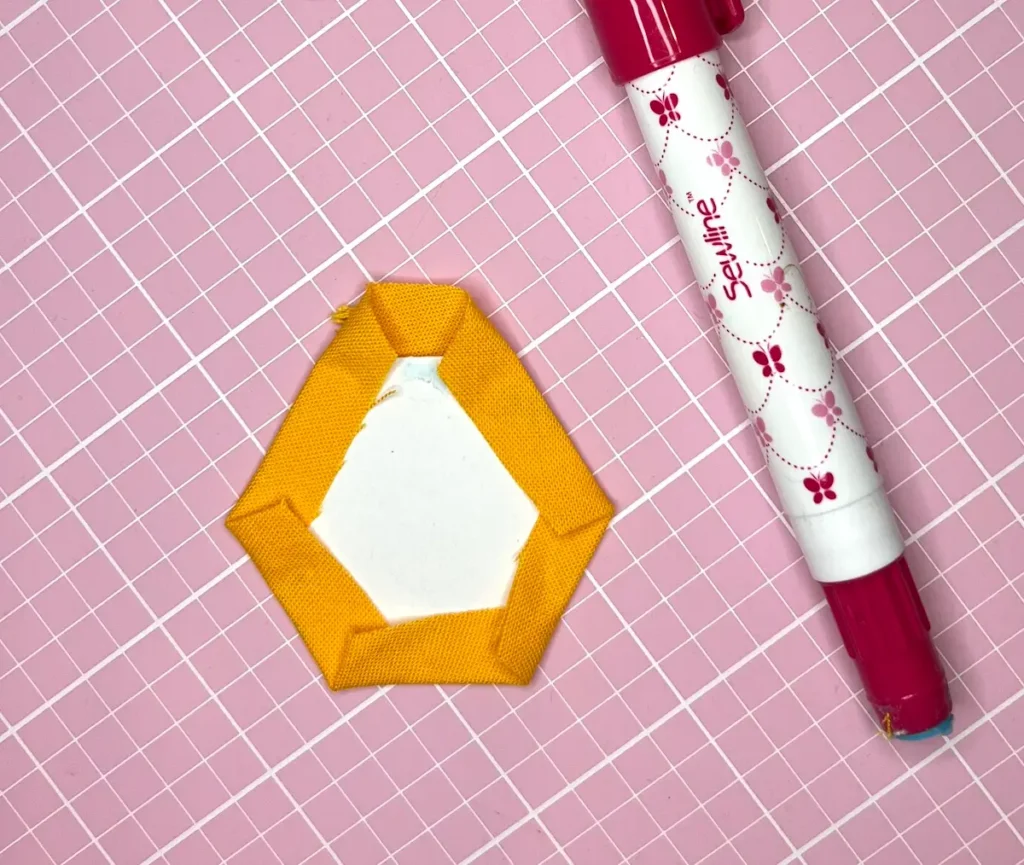
Move to the next side, apply glue, fold, and press, working your way around the shape. At corners, fold the point first, then the adjoining sides.
Let the glue set for a few seconds before moving on — most glue basting adhesives grab quickly, but a light hold now firms up as it dries.
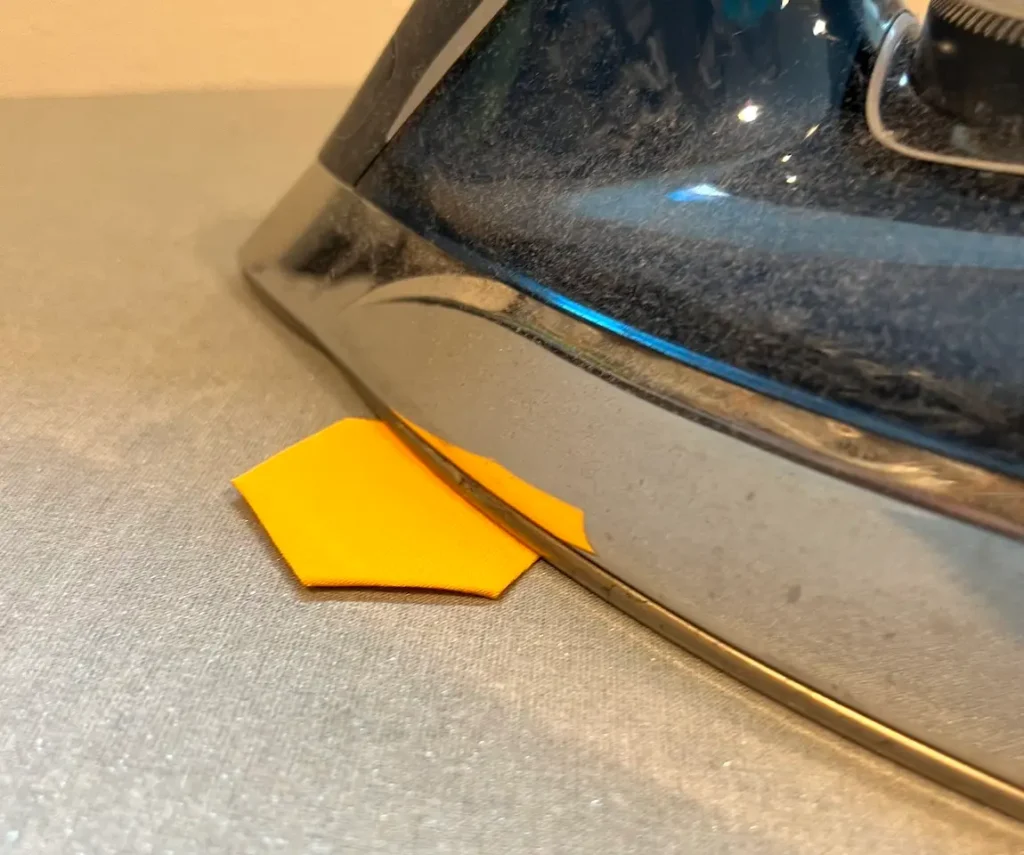
Give the whole piece a final press with a dry iron on low heat (check your glue’s label) to fully set the bond and flatten the folds.
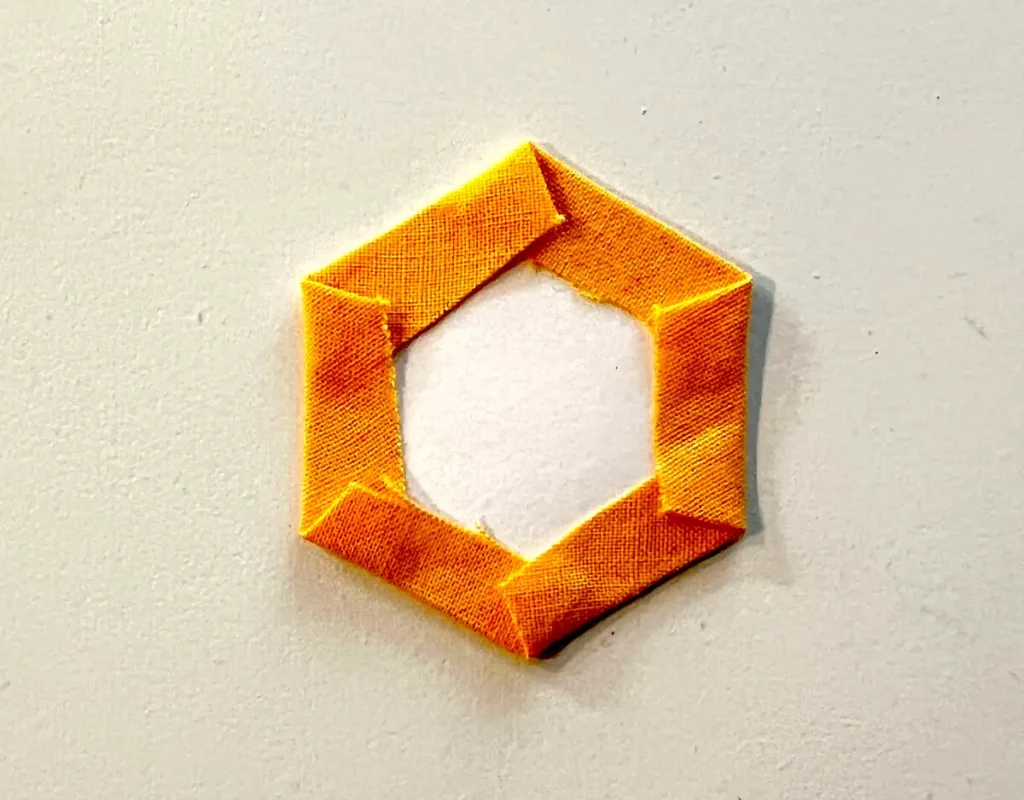
Here is the finished glue basted EPP hexie:
Tips for glue basting
- Less is more. A thin, even line of glue holds just as well as a thick one and won’t gum up your needle when you stitch pieces together.
- Glue pens with a fine tip give you much more control than a bulky glue stick, especially on small shapes like hexagons or diamonds.
- If your glue feels tacky rather than dry, give it a few extra minutes before handling — stitching through wet glue can gunk up your needle and thread.
- Give your pieces a final press with a hot, dry iron to get them nice and crisp before stitching.
- Glue basting is ideal for small, fiddly shapes (like 1″ hexagons or sharp stars) where thread basting points can be fussy.
- Test your glue on a fabric scrap first. Some glues can stain or leave a residue on very light or delicate fabrics.
Thread basting vs. Glue basting: a quick comparison
| Thread Basting | Glue Basting | |
|---|---|---|
| Speed | Slower | Faster |
| Portability | Great for handwork on the go | Needs a flat surface and glue pen |
| Best for | Larger shapes, traditionalists, relaxing handwork | Small/fiddly shapes, quick projects |
| Removal | Pull thread tail | Papers pop out cleanly once dry |
| Cost over time | Just thread | Ongoing glue stick/pen replacement |
| Learning curve | Slight — points take practice | Very beginner-friendly |
| Fabric considerations | Safe for all fabrics | Test on delicate/light fabrics first |
Many quilters actually use both, choosing the method based on the project rather than picking one to use forever. Large hexagons for a quilt back might get glue basted for speed, while a special sampler quilt might get thread basted for the meditative process.
Beginner EPP project tutorials
- Hexie EPP tree shaped ornament
- EPP wreath ornament with hexies
- EPP star ornament with diamonds
- English paper pieced mug rug with diamonds
- How to whipstitch for EPP piecing
Advanced EPP project tutorials
- How to fussy cut EPP diamonds
- How to make an EPP Moravian star ornament
- Designing, organizing and making a video game EPP quilt
- How to make a travel kit for English paper piecing
Frequently asked questions
Yes! There’s no rule against it. Some quilters glue baste small or intricate shapes and thread baste larger, simpler ones within the same block.
No — papers stay in for both methods until the surrounding pieces are all stitched together. This keeps the shape stable while you work. Papers are typically removed once a piece is fully surrounded by neighboring fabric.
It shouldn’t, as long as you use a thin line of glue on the edge of the paper only. If you notice residue on your needle, next time use less glue and make sure it is only on the paper, not on the edge where you are stitching.
No. Most fabric glue sticks and pens made for paper piecing are water-soluble and wash out completely once your project is finished.
Glue basting tends to have a gentler learning curve since there’s no needle threading or stitch tension to think about. That said, thread basting is inexpensive to try since you likely already have thread and a needle on hand.
Most glue pens tack within seconds and fully cure within a few minutes, though this varies by brand. A quick press with a dry iron speeds up the process.
Yes. Gently pop the papers out after stitching, and they can often be reused for several more pieces. For both methods, as long as you glue only on the paper or stitch only on the fabric, the papers come out quite easily and can be reused.
Sharp points come down to folding technique more than the basting method. For the glue method, put a little bit of glue on the paper, and finger press the fabric over the glue. Work around your shape, either clockwise, or counterclockwise. For thread basting, start by finger pressing two sides, forming one corner. Stitch, and then continue again either clockwise or counterclockwise, finger pressing as you go.
There’s no universally “correct” answer in the thread basting vs. glue basting debate — it really comes down to the shape you’re working with, how much time you have, and whether you find hand-stitching relaxing or tedious. The best way to decide is to try both on a small block and see which one feels right in your hands.
Whichever method you choose, the fundamentals stay the same: even seam allowances, crisp folds, and secure edges are what make your finished English paper piecing shine.
Explore more English paper piecing projects and inspiration on Create Whimsy.