
English paper piecing is one of the most relaxing ways to sew by hand, and a mug rug is the perfect first project. Small enough to finish in an afternoon but large enough to learn every basic technique, this project lets you practice without feeling overwhelmed.
In this tutorial, you’ll learn how to make an English paper pieced mug rug from start to finish, including preparing your fabric, sewing hexagons together, removing the paper templates, quilting, and finishing your project.
English Paper Piecing (EPP) is gaining traction as part of the slow stitch movement, but making a full-size EPP quilt is a long-term commitment. This project starts with traditional hand piecing that you can take with you anywhere, then finishes on the machine for quilting and a simple edge treatment. You might just fall in love!
New to paper piecing? Check out English Paper Piecing Tips: The Complete Beginner’s Guide
Can beginners make an English paper pieced mug rug?
Yes! A mug rug is one of the easiest English paper piecing projects because it uses only a small number of fabric pieces. It’s the perfect project for learning the basics before making a larger quilt.
As an Amazon Associate I earn from qualifying purchases. Read more about our affiliate linking policy.
How long does it take to make an EPP mug rug?
Most beginners can finish one in an afternoon. Once you understand the basic stitching method, you can make additional mug rugs much more quickly.
What size diamonds work best?
For this project, I used two-inch paper diamonds. They are easy to sew and create a mug rug that finishes at a practical size for a mug and snack.
Do I leave the paper templates inside?
No. Remove the paper templates after the pieces are completely sewn together and before quilting and finishing the edge of the mug rug.
What you’ll learn
By the end of this tutorial you’ll know how to:
- Prepare fabric for English paper piecing
- Wrap fabric around paper templates
- Hand stitch diamonds together
- Remove the paper templates
- Press your finished unit
- Quilt and finish a mug rug
- Finish neat corners and edges
Quick start
Project: English Paper Pieced Mug Rug
Skill Level: Beginner
Finished Size: 7-inch side to side; 8-1/4″ point to point
Time: 2 to 4 hours
Technique: English Paper Piecing (EPP)
Sewing Method: Hand pieced, machine or hand quilted
Perfect For:
- Learning English paper piecing
- Using fabric scraps
- Relaxing hand sewing
- Handmade gifts

How to Make an English Paper Pieced Mug Rug
Get a taste of EPP with this small Mug Rug project, hand pieced with a machine finish. Here's how to make an English Paper Pieced Mug Rug.
Materials
- Fabric to cut twelve (12) 2-inch Diamond Shapes (Charm Pack and Jelly Roll-Friendly)
- Backing Fabric (approximately 10 X 10 inches)
- Batting (approximately 10 X 10 inches)
- 2-inch Paper Piecing Templates (12)
- Fabric Glue Stick
- Piecing Thread - Neutral Color or to Match Your Fabric
- Quilting Thread - for Quilting and Edge Finish
- Thread Conditioner, such as Thread Magic (Optional)
Tools
- Sewing Machine
- Walking Foot, Edge Stitch Foot (Optional)
- Iron
- Pressing Surface
- Rotary Cutter and Mat
- Acrylic Cutting Template with Seam Allowance for 1-1/2-inch Diamonds. I use templates with 3/8-inch seam allowance. (Optional)
- Quilting Ruler
- Wonder Clips
- Hand Sewing Needle
- Needle Threader (Optional)
- Thread Snips
- Fabric Marker (I used a heat-erasable pen. Always test marking tools to be sure that the marks disappear as they should.)
- Thimble (Optional)
Instructions
Step 1: Gather your supplies
Gather your tools and supplies as listed above. I chose 6 coordinated charm squares for my fabric and a neutral thread for piecing.
Step 2: Cut fabric
Position acrylic template on fabric and cut with rotary cutter. Templates are available with either a 1/4 or 3/8-inch seam allowance. I prefer 3/8-inch. I folded each 5-inch charm square in half to cut 2 diamonds at a time. (If you are not using an acrylic template, trace one of the paper pieces on the wrong side of your fabric, add seam allowance and cut with scissors or rotary cutter.)
Cut a total of 12 diamonds.
Here are my cut diamonds laid out in a hexagon pattern with a center star.
Step 3: Baste the fabric around each paper
Center a paper template on the wrong side of a cut diamond.
Add glue to one edge of the paper piece, then fold fabric over the paper.
Repeat for all four sides of the diamond. Don't worry about the dog ears - they will disappear later.
Step 4: Arrange layout and stitch
Arrange the diamonds for your star points, then whip stitch by hand, right sides together. I use Wonder Clips to hold the pieces together for stitching and a thread conditioner to prevent fraying.
On the back, see how the center dog ears nest around each other, making a nice flat intersection for all those seams.
Add the outside diamonds to complete your hexagon. Again, we will take care of the dog ears in a minute.
Step 5: Remove the papers and press
Remove the paper pieces and give your hexagon a good press.
Gently unfold the outside edges you have just pressed. Can you see the fold well enough to use it as a stitching line for your sewing machine? For extra visibility, I used a ruler and heat erasable pen to mark my edge stitching line.
Admire your beautiful piecing and those perfect EPP points!
Step 6: Layer with batting and backing
Smooth out the backing fabric, wrong side up. Center batting on backing. Center EPP hexagon on batting, right side up.
Pin baste for quilting and audition thread.
Step 7: Quilt the mug rug
Quilt as desired. I outlined each diamond with my walking foot, using the 1/4-inch mark on the foot to guide me. You may prefer to hand quilt.
After quilting, stay-stitch on the outside line that you pressed/marked in Step 12. Skip this step if you choose a traditional binding.
Trim through all layers just outside the stay-stitched line for machine-finishing the edge. If adding binding, trim even with the cut edge. Dog ears gone - ta-da!
Almost done! Here is my EPP mug rug with all 6 sides trimmed and ready for edge finishing by machine.
Step 8: Finish the edges
Zigzag stitch around the outside edge of your mug rug. (These stitches will cover the stay-stitching line from Step 13.) I shortened my stitch length to .8 - audition stitches on the edge scraps you cut away in Step 14 to find the adjustment you like on your sewing machine. An edge stitch foot helped me place my stitches where I wanted them. Or add a traditional quilt binding.
Here is the finished English Paper Pieced Mug Rug!
Another view of the EPP Mug Rug:
And with a snack:
Finished English Paper Pieced Mug Rug
Another view of the EPP mug rug
Final image for the EPP mug rug
Notes
For more information on EPP Basics, see Tips and Tricks for English Paper Piecing for details.
Recommended Products
As an Amazon Associate and member of other affiliate programs, I earn from qualifying purchases.
-
 HONEYSEW Set of 12 Patchwork/English Paper Piecing Quilt Template Set
 -
 OHOCO Wool Pressing Mat for Quilting - 17" x 24" Extra Large Felt Ironing Pad 1/2" Thick, 100% New Zealand Wool for Ironing, Sewing, Cutting on Ironing Board, Tabletop, Dryer, Countertop
 -
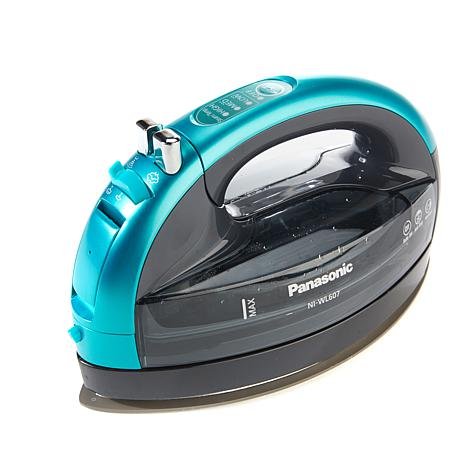 Panasonic 360º Freestyle Advanced Ceramic Cordless Iron, Pest Repeller v.57, Teal
 -
 Bundle of Sewline Fabric Glue Pen(s) Blue, and Fabric Glue Pen Refill 2-Pack(s) Blue (1 Pen, 1 2-pack Refills)
 -
 Bohin Super Automatic Needle Threader, 3"x2"x1.25"
 -
 Thread Magic Thread Conditioner Combo, CLEAR
 -
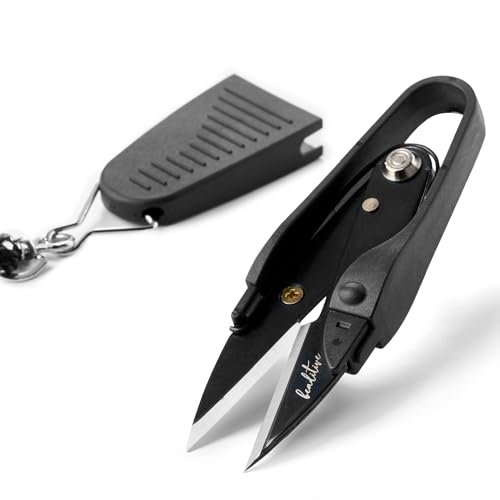 Beaditive Premium Thread Snips - Thread, Yarn, Embroidery Snipper for Sewing, Quilting, Knitting, Jewelry Making - High-Carbon Steel Blades With Protective Cap and Lanyard
 -
 2" Diamond 72 Degrees English Paper Piecing EPP Set of 100 (100 Piece Set)
 -
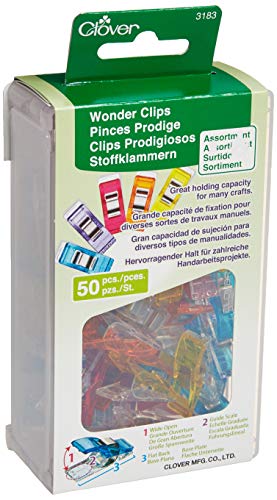 Clover Wonder Clips, 1 Pack, Assorted Colors
Common Mistakes
Cutting fabric with too small a seam allowance > Leave enough fabric around each paper template so it wraps smoothly around the edges.
Pulling stitches too tightly > Tiny stitches should hold the pieces together without puckering the fabric.
Removing papers too early > Leave the papers in place until every surrounding seam has been stitched.
Skipping pressing > Pressing after removing the papers helps the mug rug lay flat before quilting.
Choosing directional fabrics without planning > If your fabric has a print that goes one direction, check the layout before sewing the hexagons together.
Variations to Try
Once you’ve mastered this mug rug, experiment with:
- fussy-cut centers
- rainbow hexagons
- low-volume backgrounds
- holiday fabrics
- ombre layouts
- Liberty prints
- floral scraps
Try different fabric combinations that will make you smile with your first cuppa in the morning, or just to enjoy on the table next to you while you read or do some handwork.
Why You’ll Love Making Mug Rugs
English paper pieced mug rugs are satisfying because they’re quick to finish and practical to use. They’re also an excellent way to use favorite fabric scraps that might otherwise stay in your stash.
Since each one uses only a small amount of fabric, you can experiment with color combinations and practice new layouts without committing to a full quilt.
Make More English Paper Piecing Projects
If you enjoyed this project, try another beginner-friendly English paper piecing design. As your confidence grows, you’ll be ready for larger projects like pillows, table runners, and quilts using the same techniques.
Explore all of our EPP projects.
Frequently Asked Questions
Absolutely. A mug rug is small enough to finish quickly while teaching basic English paper piecing skills.
A fine, strong cotton, silk, or polyester thread that blends with your fabric. I prefer a fine silk thread.
Yes. Most people hand piece the top and machine quilt the finished mug rug.
Yes. Once the papers have been removed and the project is quilted and finished, wash it just like any quilted cotton project.
A thin cotton batting helps the mug rug lay flat while protecting your table from hot mugs.
No. English paper piecing works with hexagons, jewels, clamshells, pentagons, and many other shapes.
This is one of the best scrappy projects you’ll find.
English paper piecing is all about slowing down and enjoying every stitch, and this mug rug is a wonderful place to begin.
Once you’ve finished your first one, you’ll already have the skills to tackle pillows, table runners, and even full quilts.
Don’t be surprised if one mug rug turns into a whole stack. They’re fun to make, useful every day, and hard to stop sewing.
Explore more English Paper Pieced projects and inspiration on Create Whimsy.


