
When asked to “decorate an art pumpkin” for a local arts alliance exhibit, what’s a fiber artist to do? Add the personal challenge of using materials already in my studio. I knew I could make the basic shape with fabric and thread. So I played and experimented to get the basic components of the shape, then played some more with embellishment, pulling in my love for hand embroidery and beading to make this crazy quilted pumpkin.

Read on to see how I got the construction kinks worked out. And download a free pattern from Create Whimsy to make your own personal pumpkin! Feel free to follow our lead. Or choose materials that YOU love – a Baltimore Album pumpkin would be stunning! An homage to your favorite candy bars would be a hoot! Free the buttons in your button box! Use some of the decorative stitches on your sewing machine!
My pumpkin has six segments. Each segment is stitched differently. (You could – and it would be awesome! – design a continuous pattern to cover the pumpkin, matching lines and motifs on the seam lines.) I wanted each segment to be its own little composition. But I wanted the segments to look like they belonged together, like friends who have something in common but retain their individuality. So I did that by choosing two coordinating background fabrics and coordinating embellishments to create unique pieces.
Wool is cozy for fall and is lovely to stitch on. That was my choice, but cottons would be just as much fun. Whichever fabric you choose, be sure to use your favorite stabilizer before you begin to embroider. (I used muslin to stabilize the hand-dyed wool.) Marking the stitching lines on the back helps to keep track of how far to stitch and a boundary for non-stitchable embellishments such as beads.
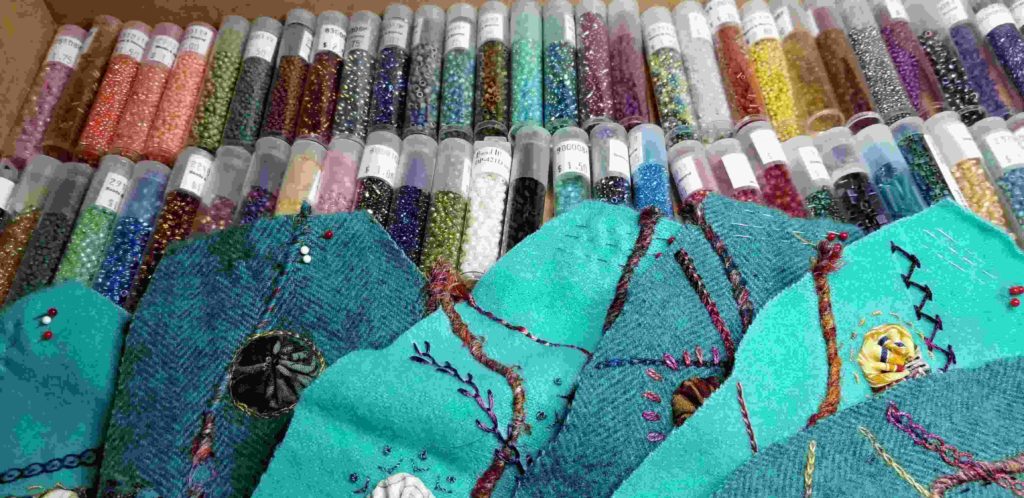
I love teal, and I had teal wool in my stash, so I could check the use-what-you-have box. Then I collected embellishments: Silk sari yarn, silk yo-yos, cotton and rayon hand-dyed embroidery threads and coordinating beads.
As an Amazon Associate I earn from qualifying purchases. Read more about our affiliate linking policy.
Now, for a plan of attack. This worked for me, but your pumpkin may need a different approach. Each segment started without a plan. I started by couching the sari yarn in place, according to my whim. Next, I appliqued yo-yos where they balanced with the couched yarn. Embroidery was next, with a combination of threads, lines and fill stitches. Then came the beads. I stitched with a beading needle to accommodate the small bead holes.
Set the finished segment aside and pick another. I repeated the steps, but did not copy the first segment. So beginning segment number 2 was like starting a brand new piece. Repeat until you have six little works of art. Move them around until they are in an order that pleases you. Stitch right sides together on the stitching lines, leaving room to turn. Then It’s ready for stuffing!

I finished the top and bottom openings by appliqueing circles over them. Then I made, stuffed and appliqued the stem. I thought the stem looked sad, even though it was a beautiful hand-dyed fabric. So I added beads after construction and everyone was happier. If you know you want to bead your stem, you can do it before you sew. Just be mindful of your seam allowance. Ta-da! Happy, crazy-stitched pumpkin!


Here are two more little pumpkins, made with the pattern half-size.

Clairen Peeters made this lovely crazy quilted pumpkin using the downloadable pattern. I love all of the different embellishments she used to decorate her pumpkin – trims, buttons, beads, embroidery and more!

Browse through more hand embroidery projects on Create Whimsy.


