
Ever wonder how quilters make crisp appliqué shapes that stay exactly where they belong while sewing? The secret is often fusible web. This simple sewing supply bonds fabric together with heat, making appliqué faster, easier, and more accurate. Whether you’re making quilts, bags, garments, or fabric art, learning how to use fusible web can save time and improve your results.
I have to admit, I was a very occasional user of fusible web for a long time, finding uses for small bits for mending while in collage. It wasn’t until I saw Laura Wasilowski and Frieda Anderson on a Quilting Arts episode that I realized that fusible web can be used for so much more than ironing on patches!
What is fusible web?
Fusible web is a polyester fiber that melts with the heat of a home iron. As it melts, it will bond two fabrics together. The bonus is that it also bonds with the threads of the fabrics, making the fabric less likely to ravel or fray after being bonded with fusible web.
How do I use fusible web?
Iron one side to the wrong side of your fabric, peel away the paper backing, place the fabric where you want it, and press again to fuse it in place.
Can you sew through fusible web?
Yes. Most permanent fusible webs are designed to be stitched after fusing, making them ideal for machine and hand appliqué.
As an Amazon Associate I earn from qualifying purchases. Read more about our affiliate linking policy.
What is fusible web used for?
It is commonly used for appliqué, quilts, wall hangings, garments, bags, home décor, and many sewing and craft projects.
RELATED: How to do raw edge appliqué
RELATED: How to do broderie perse
What are the types of fusible web?
There are two primary types of fusible web: those that are paper backed and those that are the spider-web looking polyester fiber with no paper backing, which is sometimes referred to as double sided fusible web.
Fusible web is like a heat activated glue that will bond two pieces of fabric together just with the heat of an iron.

Are there special supplies I need to use fusible web?
In using both of the types of fusible web, you will want to use a Teflon sheet, like the Goddess sheet, or parchment paper on your pressing surface. Otherwise you risk getting even the smallest bit of fusible on your pressing surface that WILL come off on the fabric you least want it to! 🙂
What you’ll learn
- What fusible web is
- How to apply it correctly
- Which side goes against the fabric
- Common mistakes to avoid
- How to prevent bubbles and wrinkles
- Whether you can sew through fusible web
- Which projects work best
Quick start
New to fusible web? Here’s the short version.
- Choose the right fusible web for your project.
- Iron it to the wrong side of your fabric.
- Let it cool.
- Peel off the paper backing.
- Position the fabric.
- Press again to permanently fuse.
- Stitch if desired.
Which fusible web should I use?
Fusible web comes in a variety of weights and sizes, including narrow width on a roll perfect for fixing a hem that has come loose! It comes in one-yard rolls and by the yard. Some of the more popular brand names of fusible web are:
| Brand | Features |
|---|---|
| Stitch Witchery | Generally no paper backing. Offered in precut width rolls perfect for repairing hems. The 1/4-inch width is perfect to use for making lapped seams. |
| Heat’n Bond | Comes with paper backing. Heat’n Bond has a variety of weights, including an “ultra hold” that is perfect for home dec projects using heavy fabrics. Don’t use the ultra hold for quilting projects – it is very thick and stiff. (Ask me how I know!) |
| Steam-a-Seam 2 | No paper backing. This is a lightweight fusible web, so it’s perfect for light weight fabrics and quilting projects. No noticeable difference in the hand of the fabric when applied. |
| Wonder Under | Wonder Under comes with paper backing. (Wonder Web is a light weight variation without paper backing.) Wonder Under is available with a few different weights of fusible to use with everything from quilting fabrics to heavy fabrics. It also comes cut in different narrow widths on rolls for hemming or other specialty projects. |
| Soft Fuse | Paper backed fusible web with a very light weight. This is a perfect fusible to use for hand and machine embroidery projects, if you are looking for no change in the weight of the fabric. |
| Misty Fuse | Misty Fuse has no paper backing, is super light weight and can be used with light weight fabrics like silks and organzas as well as velvets and quilting fabrics. |
How to Use Fusible Web
The basics of fusible web is to layer it between two pieces of fabric and press according to the directions for the brand you are using. Most brands recommend a hot dry iron, but you should always read the manufacturer’s instructions for the fusible web you choose. I find a little shot of steam adds some extra heat if I want a super-duper bond with the fabrics, but I add the steam after a good press, making sure the fabrics have bonded together with the fusible adhesive.
To use fusible web with the paper release, you can use it a few different ways: 1) cut your element out of the paper backed fusible web and then apply it to your fabric, 2) apply the fusible to the fabric first and then cut out your element.
Fusible web is often used with raw edge appliqué.
Cutting your element out of the paper backed fusible web first
Start by drawing or tracing a shape on the paper side of the fusible web and cut it out.

Then with the fusible side down and right side of the fabric up, use a hot iron to press the element onto your cut out shape. TIP: Trim the paper backed interfacing just a bit so that the adhesive doesn’t quite go to the edge. This helps make sure that the icky gluey part doesn’t get on your iron or pressing surface. I’d still use a Teflon sheet or parchment paper, though, to be on the safe side. I prefer a Teflon sheet to a press cloth, as the fusible may bond to a press cloth.

Let the fusible cool, then gently peel off the paper. If the fusible seems to peel away from the fabric with the paper, you need to press it a bit more to melt the adhesive and be sure to let it cool completely. Waiting is hard, but you must. Here is the element, with the fusible, ready to use on my appliqué project!

When using double-sided fusible webbing without paper, you can cut the appliqué shape or element from the web and just place it on the wrong side of your fabric. Again, trim the fusible so that it doesn’t quite go to the edge of the fabric. NOTE: Make sure to put the little trims of fusible in the garbage or a small container right away so that they don’t fly around and get stuck on something you don’t want to be fused! These little pieces can be used later to tuck under a little corner to secure fabrics.

Lay your components on a base or background fabric, make sure you like your design layout and then press with a hot iron. Here are the two elements ready for more embellishment and stitching!

Apply fusible to fabric first
Begin by cutting a piece of fabric larger than your desired element. Cut a piece of fusible about 1/2-inch smaller in all dimensions. Place the web side down on the fabric and press according to the directions. Now you have a piece of fabric with the fusible web applied!
Draw a reverse image of your element on the paper side. You are drawing on the back of your fabric, so you want your motif to face the right way when fused. You can use any marking pen or pencil since the paper will be pulled away before applying to the fabric.
Cut out your element on the traced line. TIP: Use your “good” paper scissors that will also cut the fabric. If you use your good fabric scissors, the paper will dull them more quickly.
Take one edge of the paper and gently release the paper from the fabric. The adhesive should stay on the fabric. You can feel that it is smoother and see a bit of a shine on that side of the fabric.

How to apply the fused elements to your base fabric
Here is how to make a very simple design of a flower with a center on a background.
For the purple flower petals, I cut them out from prefused fabric that already had the paper removed. I prefer using the paper back fusible, apply it to the fabric, let it sit at least 30 minutes to cool down. Then I trim the edges to remove all of the non-fused fabric. Next I peel off the backing paper. Now I have a piece of prefused fabric ready to cut up and use in my projects!
NOTE: Save the bigger pieces of paper you take off when prefusing fabric. They are parchment paper and perfect for protecting your pressing surface and iron from fusible!
Here I’m cutting some flower petals from a prefused piece of purple fabric. The spring loaded Fiskars with micro-tip make it so easy to cut curves.

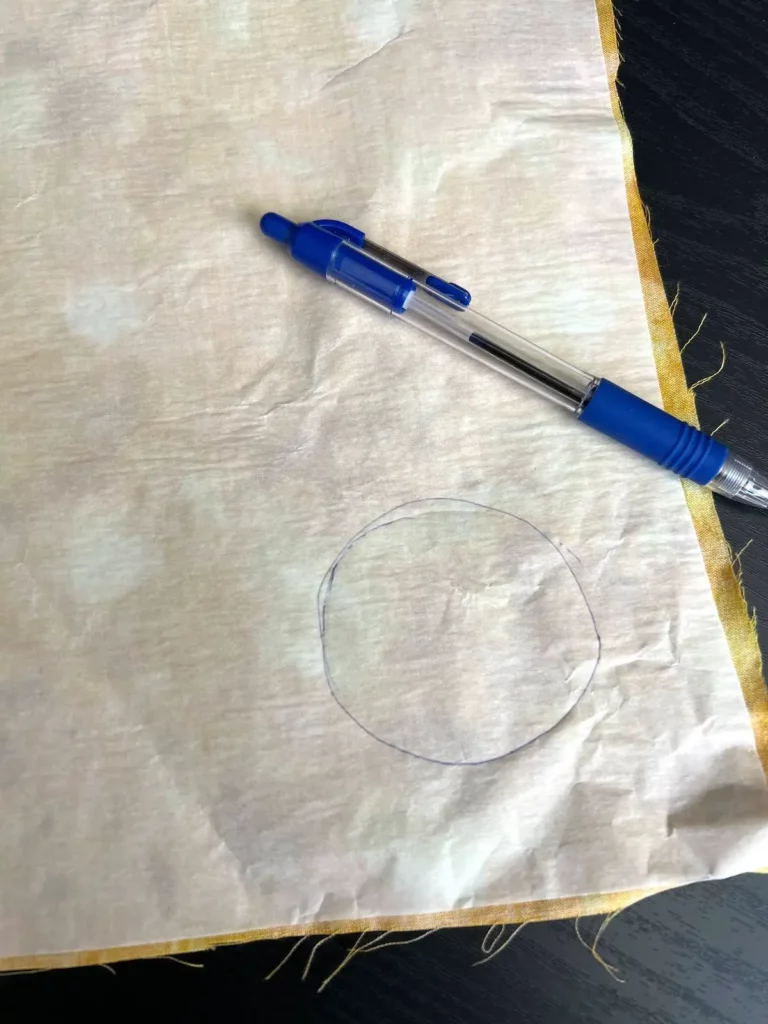
The center of the flower was cut from the paper backed fused fabric. I drew a small circle and cut it out. Then I peeled the paper off and it was ready to go.
Here are some petals, the flower center, and some fabric for them! You can tell which side of the fabric has the fusible, as it has a texture and is slightly lighter – this purple fabric also has a lighter background. When you place your elements on your base fabric, you want to make sure to have the fusible side down. 🙂

When doing fusible appliqué, start with laying down the layers on the bottom. Otherwise you might have to start picking up small pieces to lay pieces under, which can become quite tedious!
If you are working with really small pieces, a good pair of curved tip tweezers can be your friend! Here I laid down the flower petals first:

Then layer the other elements on top. Here I’m adding the yellow flower center:

I try to do the design layouts right on the Teflon sheet (or parchment paper) on top of my pressing surface or ironing board. This way you don’t need to move your project which might result in some smaller pieces shifting or, even worse, flying off.
If you are a risk taker, go ahead and place your iron directly over your appliqué pieces and begin pressing according to the manufacturer’s directions. But, you risk that one of the pieces might be fusible side up and stick to your iron, or a random piece of fusible might be on the surface and get on your iron.
If you are a risk taker, make sure to have some iron cleaner handy! You may not need it often, but it always seems to happen when you are jamming on a big project with a deadline – or when you are on a creative roll.
If you get any fusible on your iron, don’t press anything else unless you want the fusible to be transferred to that item. Here I’m taking risks!

It doesn’t take but a few seconds more to layer a piece of parchment paper on top of your design before pressing. And, if you prefuse fabric, you’ll have some extra pieces of parchment handy to protect your iron!
Note: Don’t use freezer paper. It is different than parchment paper.

How to store prefused fabrics
So . . . it’s not neat and tidy like a lot of you! When I have a project where I want to use fused fabrics, I don’t always want to take preparation time. I want to just dig in, cut my fabrics and play! If it is a fabric that I think I might use again, I always prepare more fabric than needed for the current project.
Some fabrics that I feel confident I’ll use again, I’ll do about a fat quarter size or larger. I’ll use the bit and then put the larger piece in a large bin.

And I rarely toss even very small pieces – they can be used in a project! I save the pre-fused fabric scraps in a smaller bin:

You never know when you’ll need just a tiny piece, like the wings on these little bird ornaments!

RELATED: How to make bird ornaments
How to use fusible web to apply patches?
Fusible web is a perfect way to apply patches. Some patches come with the fusible web already applied, like the pre cut knee patches. Most scout patches now come prefused, too.
If you purchase fun patches and want to apply to a garment or bag, trace around the patch on either the paper backing of a fusible web, or on the two-sided fusible. Cut out the fusible. Apply it to the back of the patch. Apply the patch to the finished item.
To apply a patch to something heavy weight like a denim jacket or canvas back, use ultra hold fusible. If you use a lighter weight, apply the patch and then use your topstitch foot and stitch around the outside of the patch to secure it.
What is the difference between fusible web and fusible interfacing?
Fusible web provides the ability to fuse fabrics together – it is a sheet of heat sensitive glue adhesive for fabrics.
Fusible interfacing only has the heat sensitive adhesive on one side. It can either be a woven or non woven fabric with the fusible applied to one side. Fusible interfacing is used to add stability or stiffness to a fabric. The woven or non woven fabric stays inside your project.
In making this small bag, you can see we used interfacing to give the bag some body. Fusible bonding web applied the flowers as embellishments. Then I stitched around the flowers and leaves with a blanket stitch.

Common Mistakes
Using the wrong side > The adhesive should face the fabric
Skipping the cooling step > The paper will be difficult to remove
Sliding the iron > Lift and press instead of sliding
Forgetting to test > Try a scrap first, especially with delicate fabrics
Frequently asked questions
Yes! As long as you have a good fuse, everything should stay in place.
Yes! It’s easy to sew with your machine or by hand.
No. It is permanent and stays between the two fabrics.
If you have just fused it and realize you need to move it, sometimes you can add a little heat, lift a corner, and remove it. It’s best to double- and triple-check your placement before fusing.
Probably not enough heat. You need your iron at its highest heat and let the iron sit in each position for several seconds.
Start with a dry iron. If you want a really good fuse, I turn it to the right side of the fabric and give it a little bit of steam.
Yes – you either need parchment paper or a teflon sheet. Otherwise, you’ll need iron cleaner! 🙂
You can, but you’ll lose the stretch in the fabric with the fusible web.
If you give the fused piece of fabric time to cool and cure, it won’t gum up your needle. I generally let it sit for at least an hour before sewing.
It does make it a bit more structured. There are heavy weight fusible webs for home dec that make the fabric stiff. Check what web you’ve purchased before fusing.
It’s perfect for beginners! No piecing – just cut, fuse and sew!
Fusible web is one of those sewing tools that quickly becomes a favorite once you’ve used it.
Whether you’re making your first appliqué quilt or creating detailed fabric art, understanding how different types of fusible web work helps you choose the right product and achieve better results.
Keep a few scraps nearby for testing, follow the manufacturer’s directions, and you’ll soon wonder how you ever sewed without it.
Browse through more fusible appliqué projects and inspiration on Create Whimsy.


