

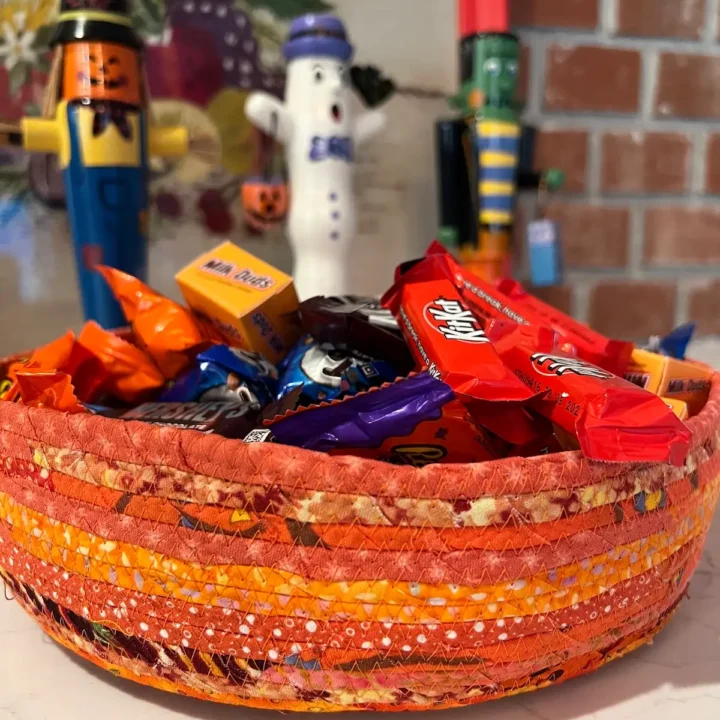
Make a fabric trick or treat bowl for Halloween using fabric strips, clothesline, and your sewing machine. This easy fabric rope bowl is a fun way to use fabric scraps and create a colorful container for Halloween candy.
Want to know how to make a fabric bowl that stands up on its own? You’ll wrap fabric around clothesline, then use a wide zigzag stitch to join the coils together. Start with a flat, round base and gradually raise the sides to shape your bowl. Choose Halloween prints, orange and black fabrics, or scraps in your favorite colors.
What do you need to make a fabric trick or treat bowl?
You need cotton fabric strips, clothesline or suitable cording, thread, a sewing machine, and a wide zigzag stitch. Binder clips or Wonder Clips help hold the wrapped fabric in place as you work.
How do you make a fabric bowl with clothesline?
Wrap fabric strips around the clothesline, coil the covered cord into a flat spiral, and secure the center with stitching. Use a zigzag stitch to join each new coil to the previous one. When the base is large enough, tilt it upward as you sew to create the sides.
TIP: My open toe appliqué foot (Bernina #20) allowed great visibility for joining the coils.
As an Amazon Associate I earn from qualifying purchases. Read more about our affiliate linking policy.
Can you use fabric scraps to make a rope bowl?
Yes! Fabric scraps are ideal for this project. Cut or tear them into strips about 1 inch wide. Mixing prints and colors creates a playful look, and wrapping the strips around the clothesline blends the prints into bands of color.
How do you make the sides of a fabric bowl stand up?
Once the base reaches your preferred size, gradually tilt it upward while continuing to zigzag the coils together. Support the bowl with your hands as you sew and adjust the angle to shape the sides.
What you’ll learn
In this fabric trick or treat bowl tutorial, you’ll learn how to:
- Prepare fabric strips for wrapping around clothesline.
- Start a sturdy, flat spiral for the bottom of your bowl.
- Use a zigzag stitch to join fabric-covered coils on your sewing machine.
- Shape the flat base into a bowl with raised sides.
- Change fabrics to create colorful bands and a custom Halloween look.
- Finish the end of the clothesline neatly for a polished result.
Quick start: fabric trick or treat bowl
Project: Fabric rope bowl for Halloween candy
Skill level: Beginner-friendly sewing project
Finished size: Approximately 12 inches across and 5 inches high
Prep time: About 10 minutes
Sewing time: About 3 hours, depending on your pace and machine setup
Materials
- Clothesline or cording that fits comfortably under your sewing machine foot
- Three coordinating cotton fabrics, about 1/2 yard each
- Sewing thread in a matching or contrasting color
Tools
- Sewing machine with a zigzag stitch
- Open-toe presser foot, if available
- Binder clips or Wonder Clips
- Rotary cutter, ruler, and cutting mat, or fabric scissors
The basic steps
- Cut or tear fabric into strips about 1 inch wide.
- Wrap the fabric around the end of the clothesline.
- Coil the covered cord into a flat spiral and secure the center.
- Zigzag stitch around the spiral, adding more wrapped cord as you go.
- Continue until the base is the size you want.
- Tilt the base upward to create the bowl sides.
- Trim, wrap, and stitch the cord end to finish the bowl.
RELATED: Make a DIY Trick or Treat Bag
RELATED: Candy Corn Bowl Fillers
You can see in the picture (below), I sewed with black thread on the grey coils; you can see how the stitches join the fabric-wrapped clothesline.

To start, tear fabric strips about 1-inch wide. The torn edges add textural interest to the project. (Side note: this project is a great use for “ugly” fabric. The print is obscured when you wrap so all you see is color.) Wrap the first fabric strip around about 12 inches of the clothesline, securing each end with a binder clip. Curl the end like a snail to start the bottom of the bowl.
When you have a circle about 3/4-inch wide, sew an X across the disk to secure the center of your bowl’s base. Then stitch with a wide zig zag stitch to join the fabric-covered clothesline round and round. Make sure you sew with the growing circle to the left of your needle. Your bowl will need room to grow!
Stitch round and round until the base of your fabric bowl is the size you’d like. As you near the end of each fabric strip, add another and continue to wrap and stitch. I changed the fabric when I was ready to make the sides of the bowl, but you can change it up wherever you like or use one fabric for the project.
To start the curve that begins to form the sides, use your left hand to tip the base until it rests on the side of your sewing machine’s frame. Then keep wrapping and stitching! It may feel awkward at first. It’s okay to adjust your hands as you go – just be sure to use your needle-down function if your machine has it!
When your bowl is the size you want, cut the clothesline and wrap the end, leaving a 2-inch fabric tail. Stitch to the end of the cord, then twist the fabric end and stitch it down.
How to make a fabric trick or treat bowl
Follow these steps to make a fabric rope bowl with clothesline and cotton fabric. You’ll start with a flat spiral, sew the coils together, and gradually shape the sides of the bowl.
Materials
- Cotton or poly clothesline
- Strips of fabric about 3/4" - 1" wide
- Coordinating thread
Tools
- Sewing machine
- WonderClip, optional
Instructions
Step 1: Cut or tear the fabric strips
Cut or tear your cotton fabric into strips about 1 inch wide. Tearing works well with quilting cotton and gives the bowl an interesting, textured look. If your fabric does not tear easily, cut the strips with a rotary cutter or scissors.
For this bowl, I used strips of fabric that all were orange or had orange in them.
Tip: This is a great project for fabric scraps. Once the fabric is wrapped around the clothesline, the original prints become less noticeable, leaving you with lovely bands of color.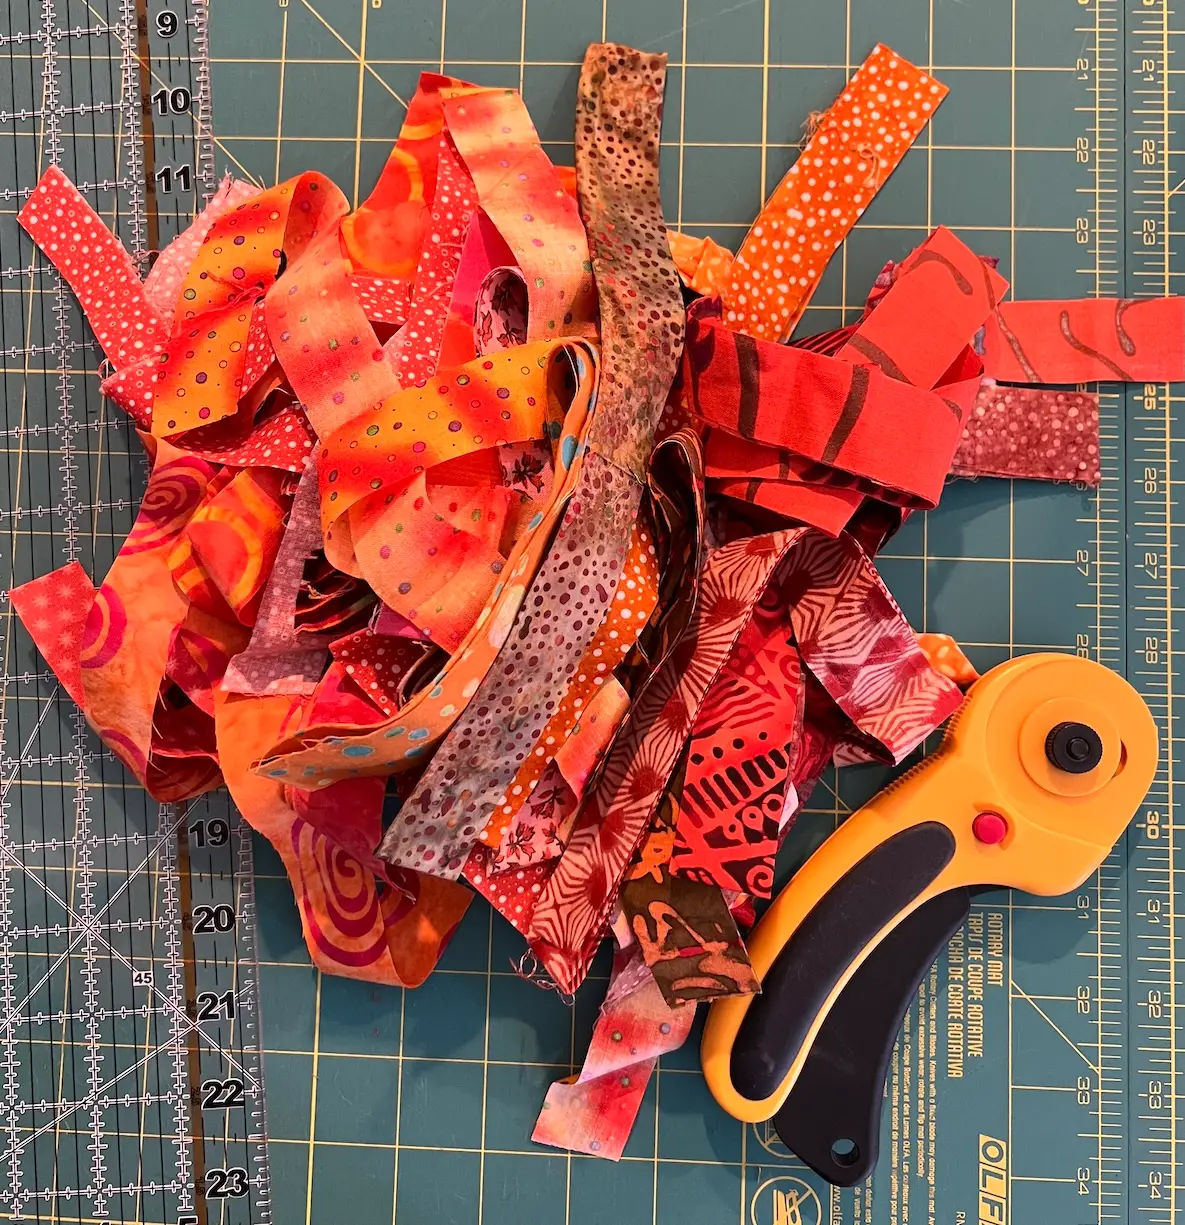
NOTE: I like my strips to be between 12 - 22 inches long. Trying to wrap with longer strips makes it harder.
Step 2: Wrap the clothesline with fabric
Wrap one fabric strip tightly around the end of the clothesline. I like to fold back the fabric over the end of the rope, and then twist.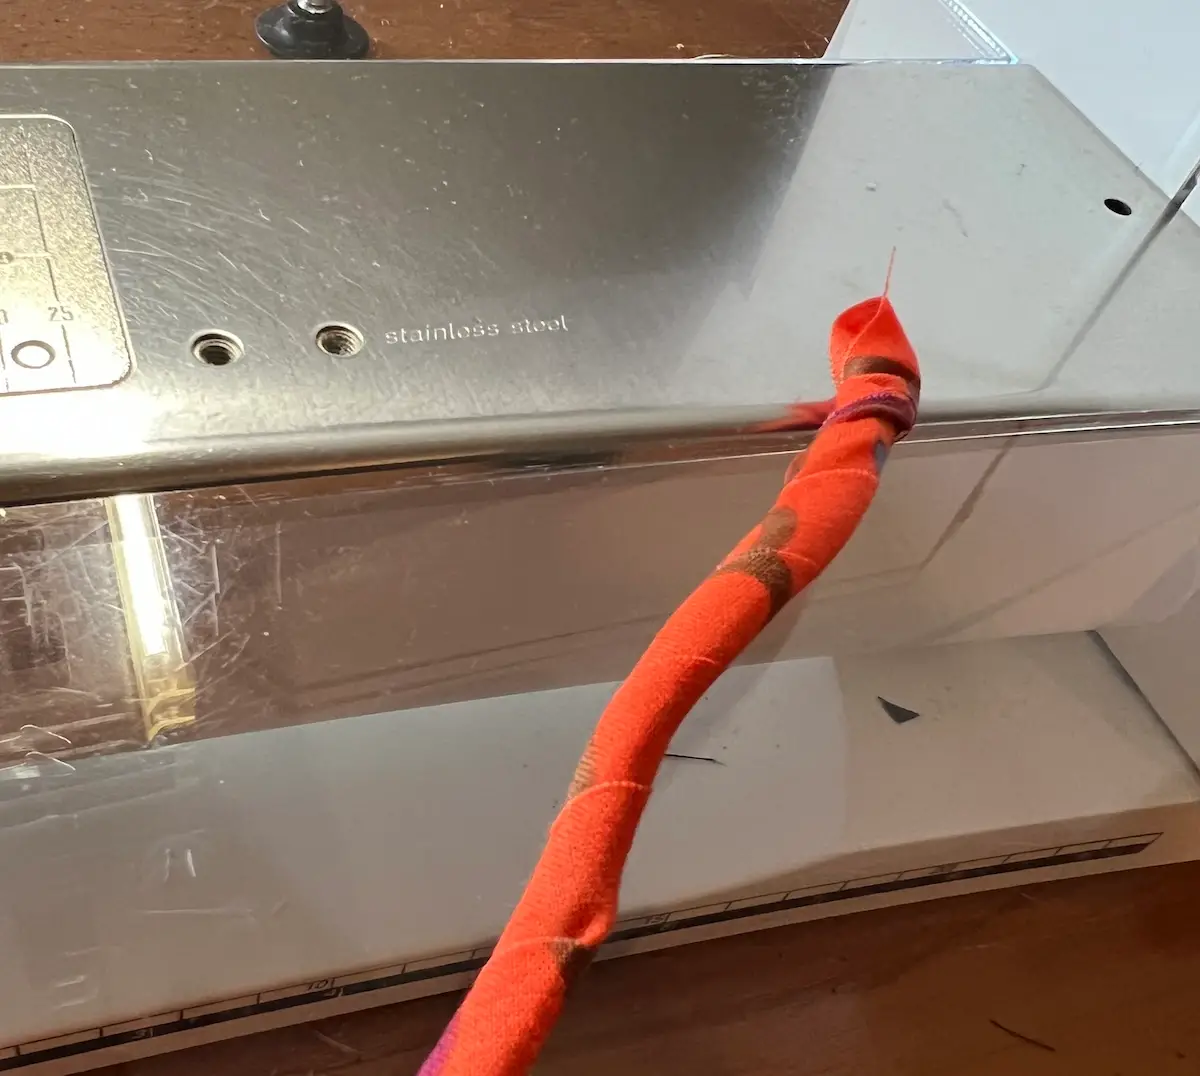
Wrap enough cord to form the beginning of your bowl, keeping the clothesline completely covered. As you work, add more fabric strips when needed.
To join a new strip, overlap it with the end of the previous strip and continue wrapping. Keep the fabric snug so the clothesline does not show through.
Tip: Wrap a manageable length at a time. This makes the covered cord easier to handle while sewing.
Step 3: Start the spiral base
Curl the fabric-covered end of the clothesline into a small spiral, with the wrapped end tucked into the center.
When the center measures about 3/4 inch across, stitch an X across the small disk to hold the spiral in place. This gives you a stable starting point for the bowl.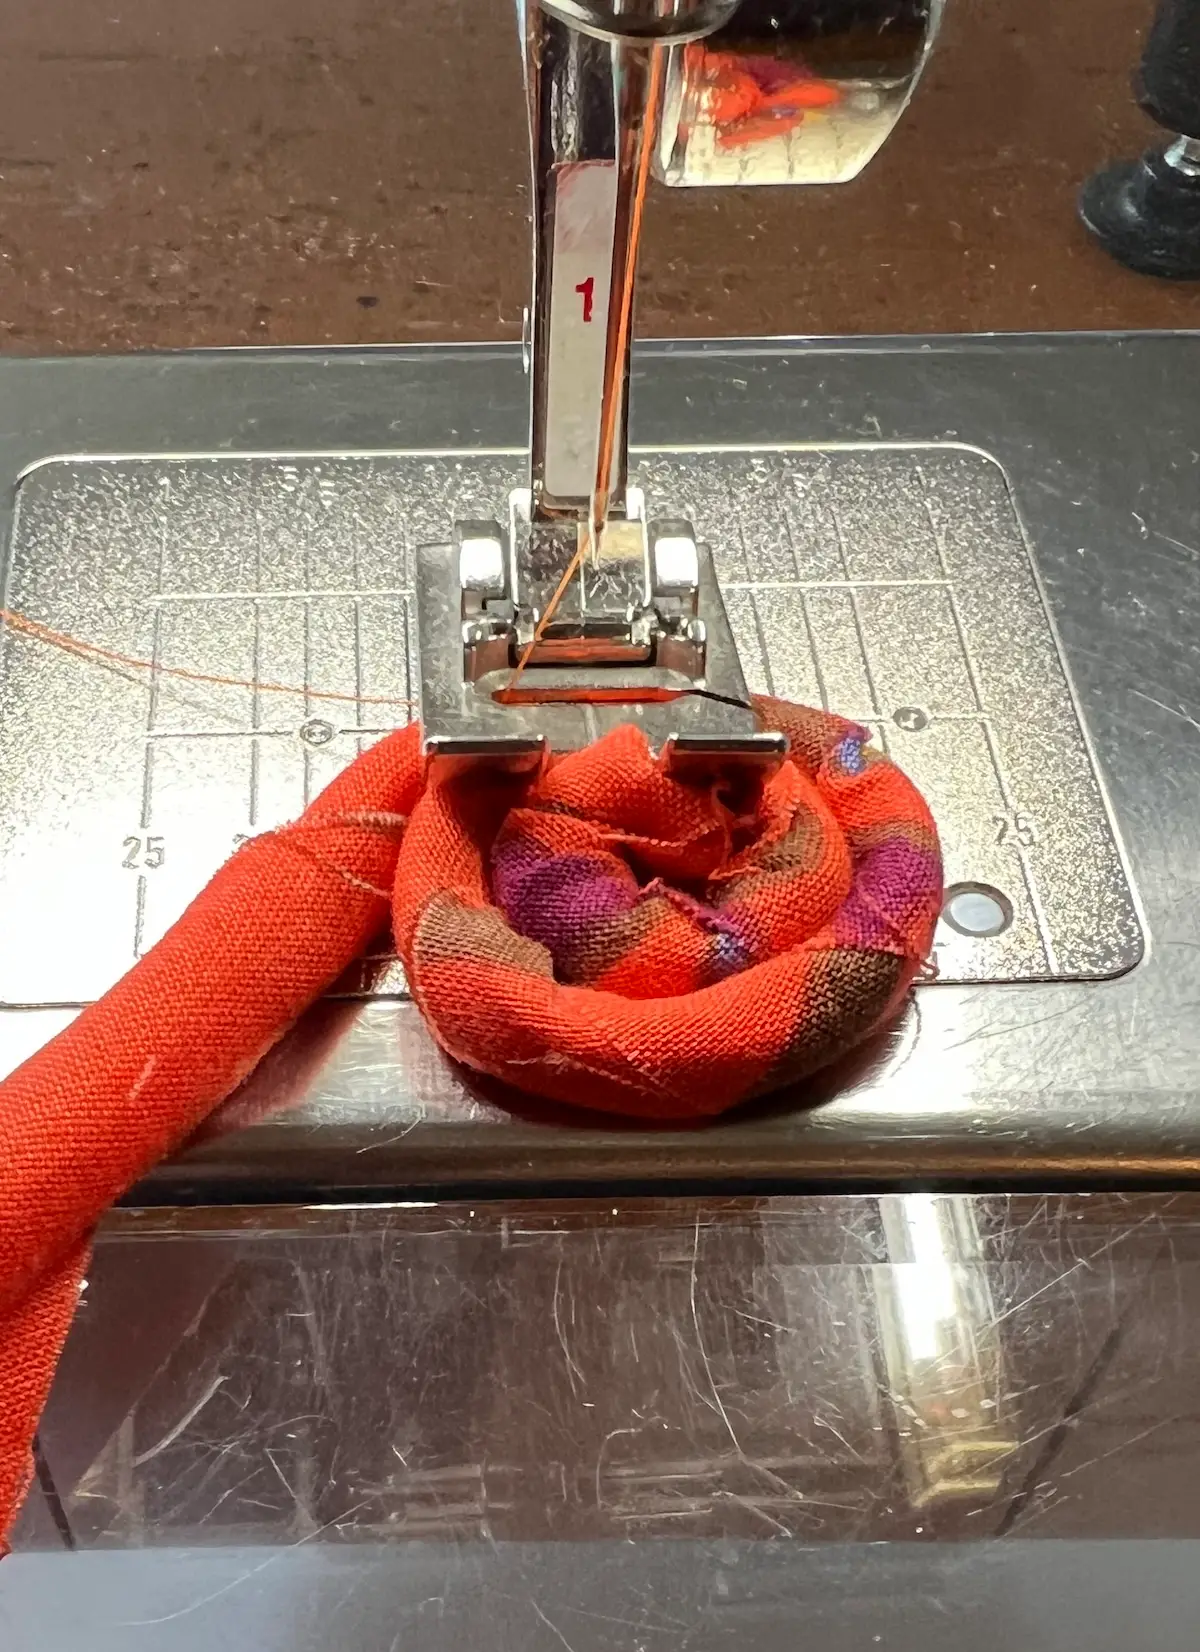
Here it is all stitched. 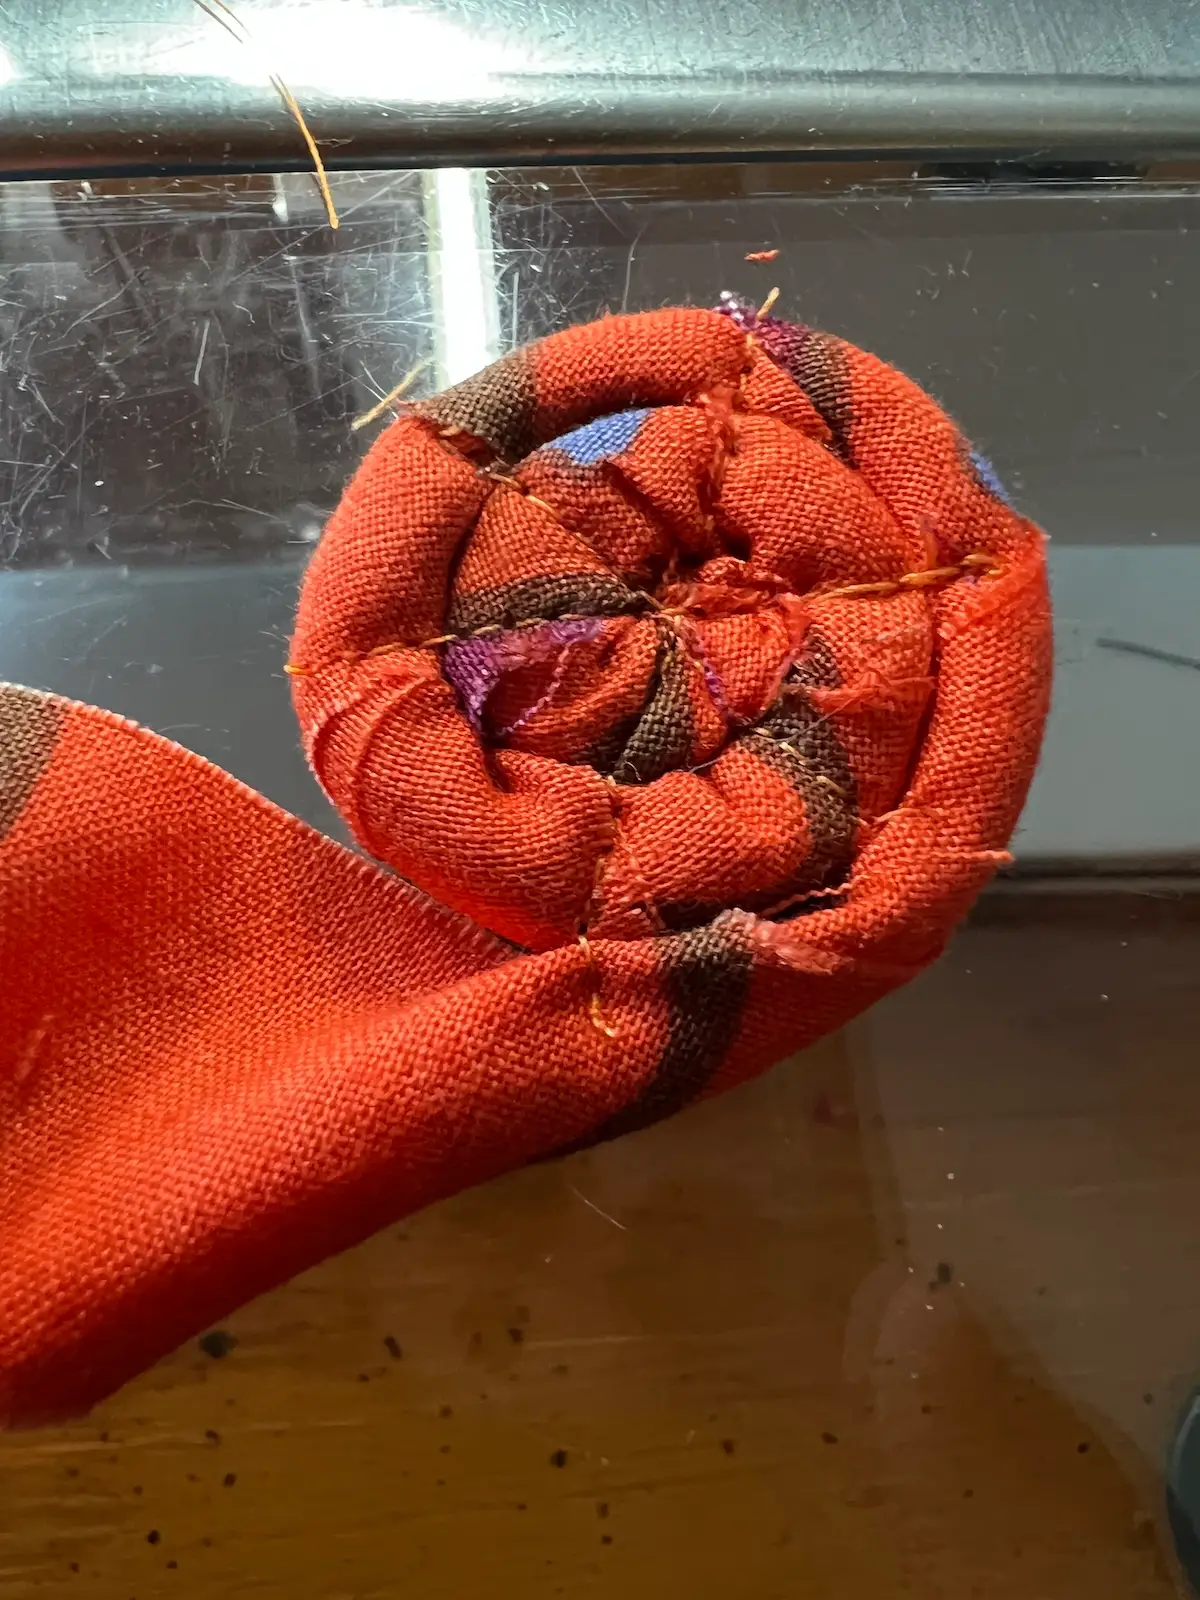
Step 4: Set your sewing machine to zigzag
Choose a wide zigzag stitch that reaches across both adjoining sections of clothesline. Test the stitch on a small sample first to make sure the needle catches both sides of the cord.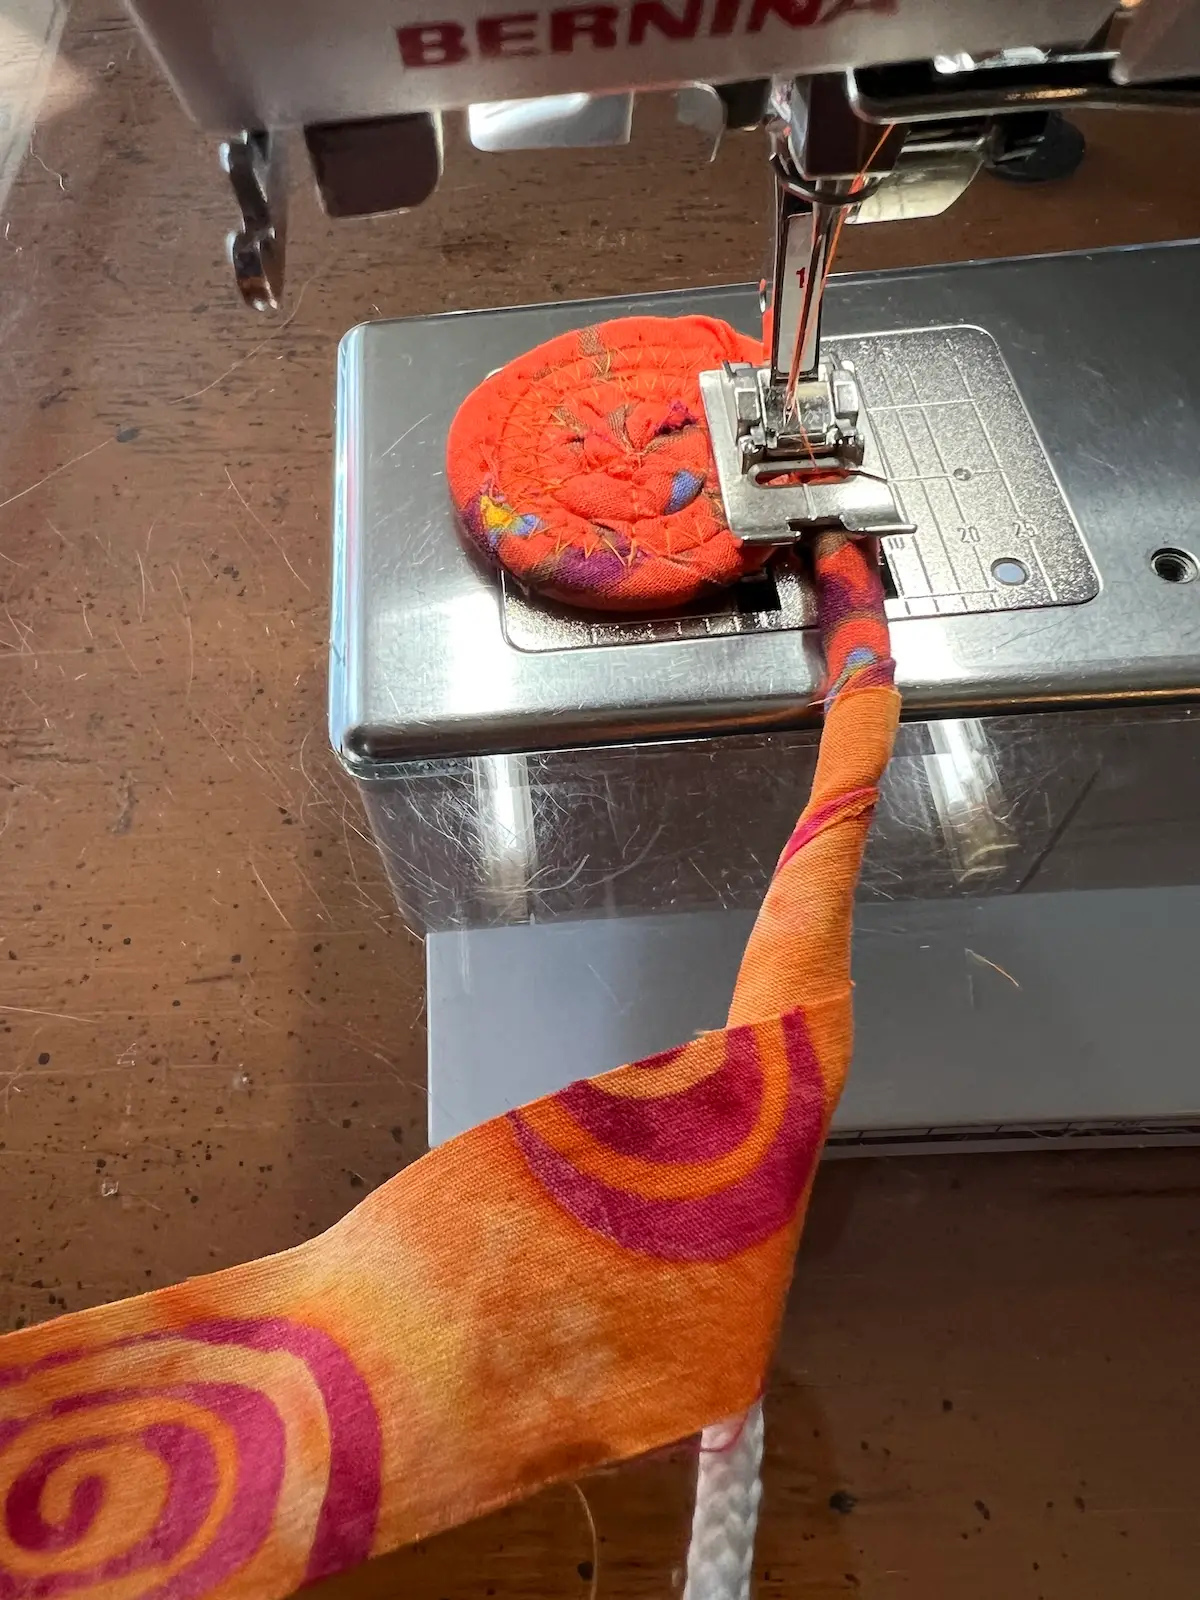
Position the center of the spiral beneath the presser foot. Keep the growing spiral to the left of the needle so the bowl has room to expand as you sew.
Tip: the coil should look like a 9 - if it doesn't, stop and turn it over.
If your machine has a needle-down function, use it to help hold your work in place when you stop to adjust the bowl.
Important: Keep your fingers clear of the needle as you guide the cord. Slow, controlled stitching is easier to manage than sewing too quickly.
Step 5: Sew the coils together
Continue stitching around the spiral with the wide zigzag stitch. Guide the new length of fabric-covered clothesline alongside the previous coil, keeping the two sections close together.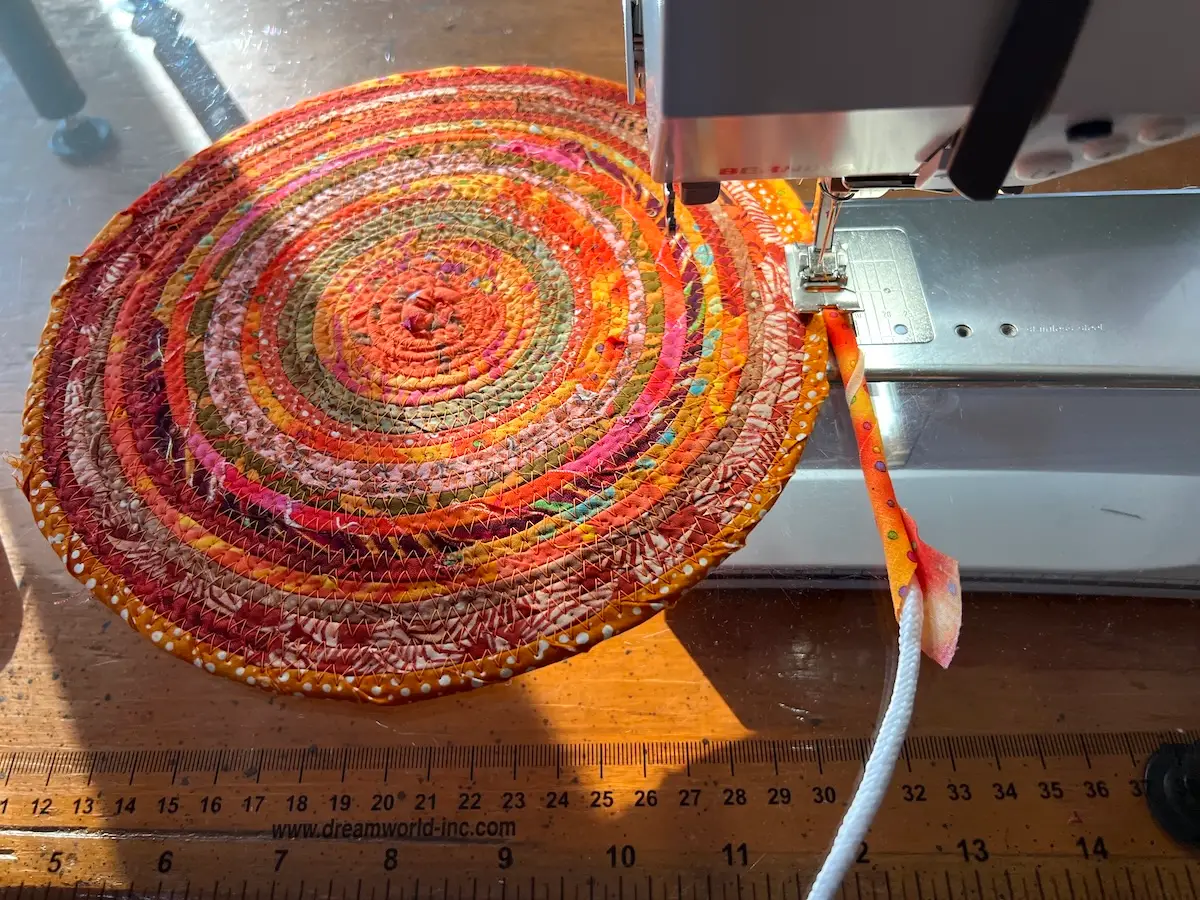
Turn the spiral gradually as you sew. Check that the zigzag stitch catches both coils rather than stitching only into one side.
As you approach the end of a wrapped section, prepare more fabric-covered clothesline and continue stitching. Keep the fabric wrapping snug and the coils aligned.
Step 6: Make the bowl base larger
Keep adding coils until the flat base reaches the diameter you want.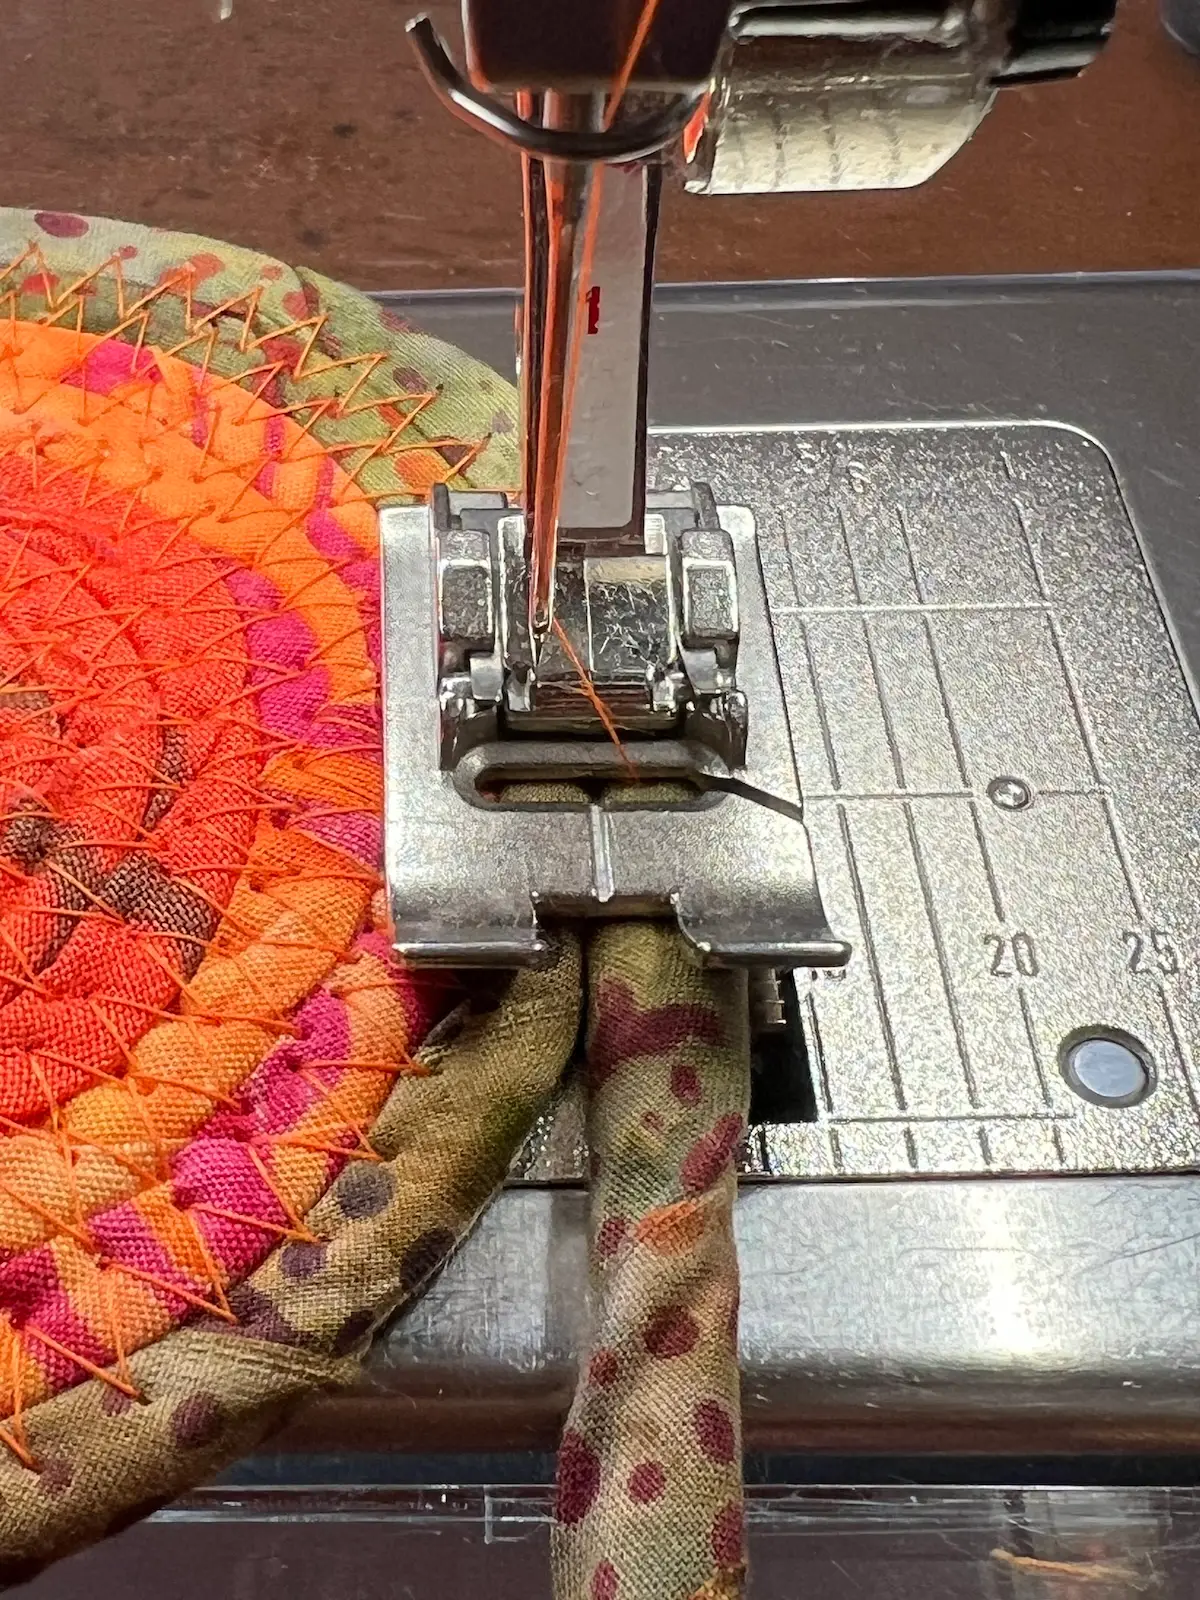
Aim for a base that will create a finished bowl about 10-12 inches across. You can make a smaller candy dish or a larger bowl by changing the size of the base.
If you want to change colors, begin wrapping the next fabric around the cord before you start the next section of stitching.
Step 7: Shape the sides of the bowl
When the base is large enough, begin tilting it upward as you sew. Instead of keeping the new coil flat against the table, angle it so the next rounds rise above the base.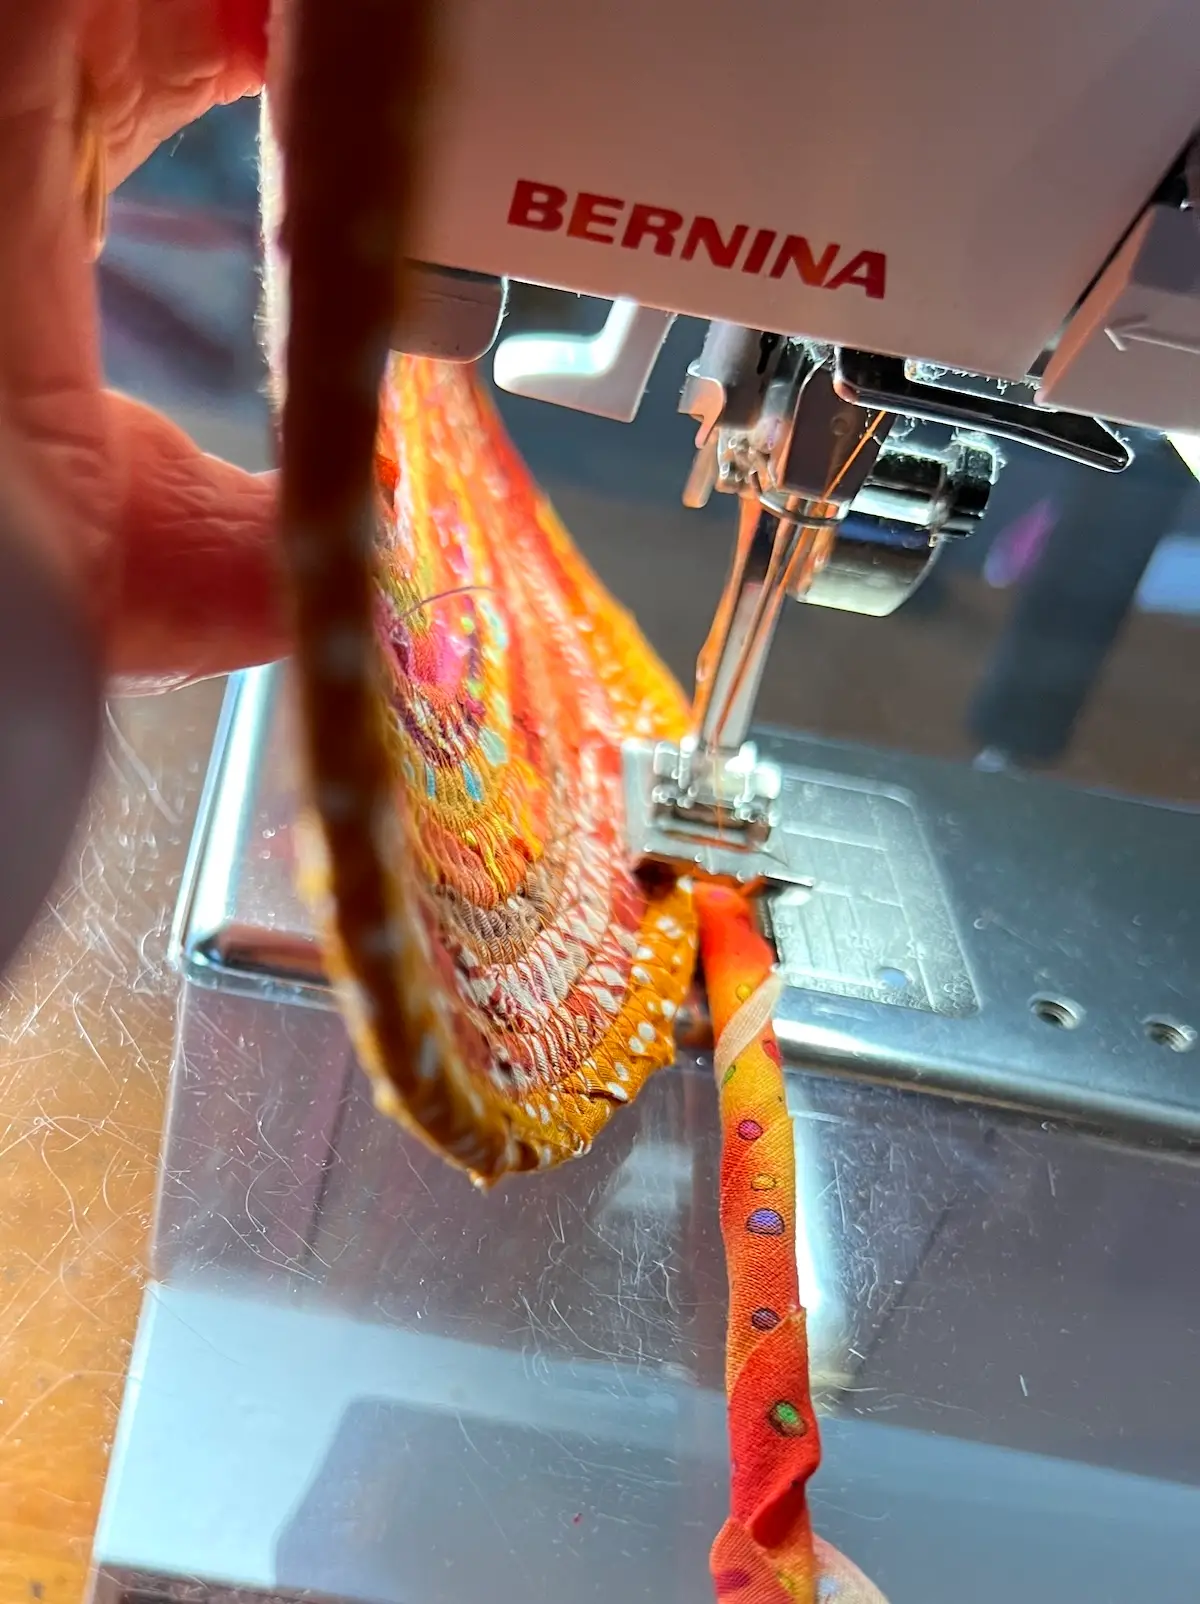
Use your left hand to support and tip the bowl while your other hand guides the fabric-covered cord toward the needle. Adjust the angle gradually to create a smooth curve.
This part may feel awkward at first. Stop as often as needed to reposition the bowl and your hands. If your machine has a needle-down function, it can help keep your work in place while you adjust.
Step 8: Continue building the sides
Keep wrapping the clothesline and sewing the coils together until your bowl reaches the height you want.
Support the bowl as it grows so the sides do not collapse or pull away from the sewing area. Change fabrics as desired to create contrasting bands or a more scrappy look. 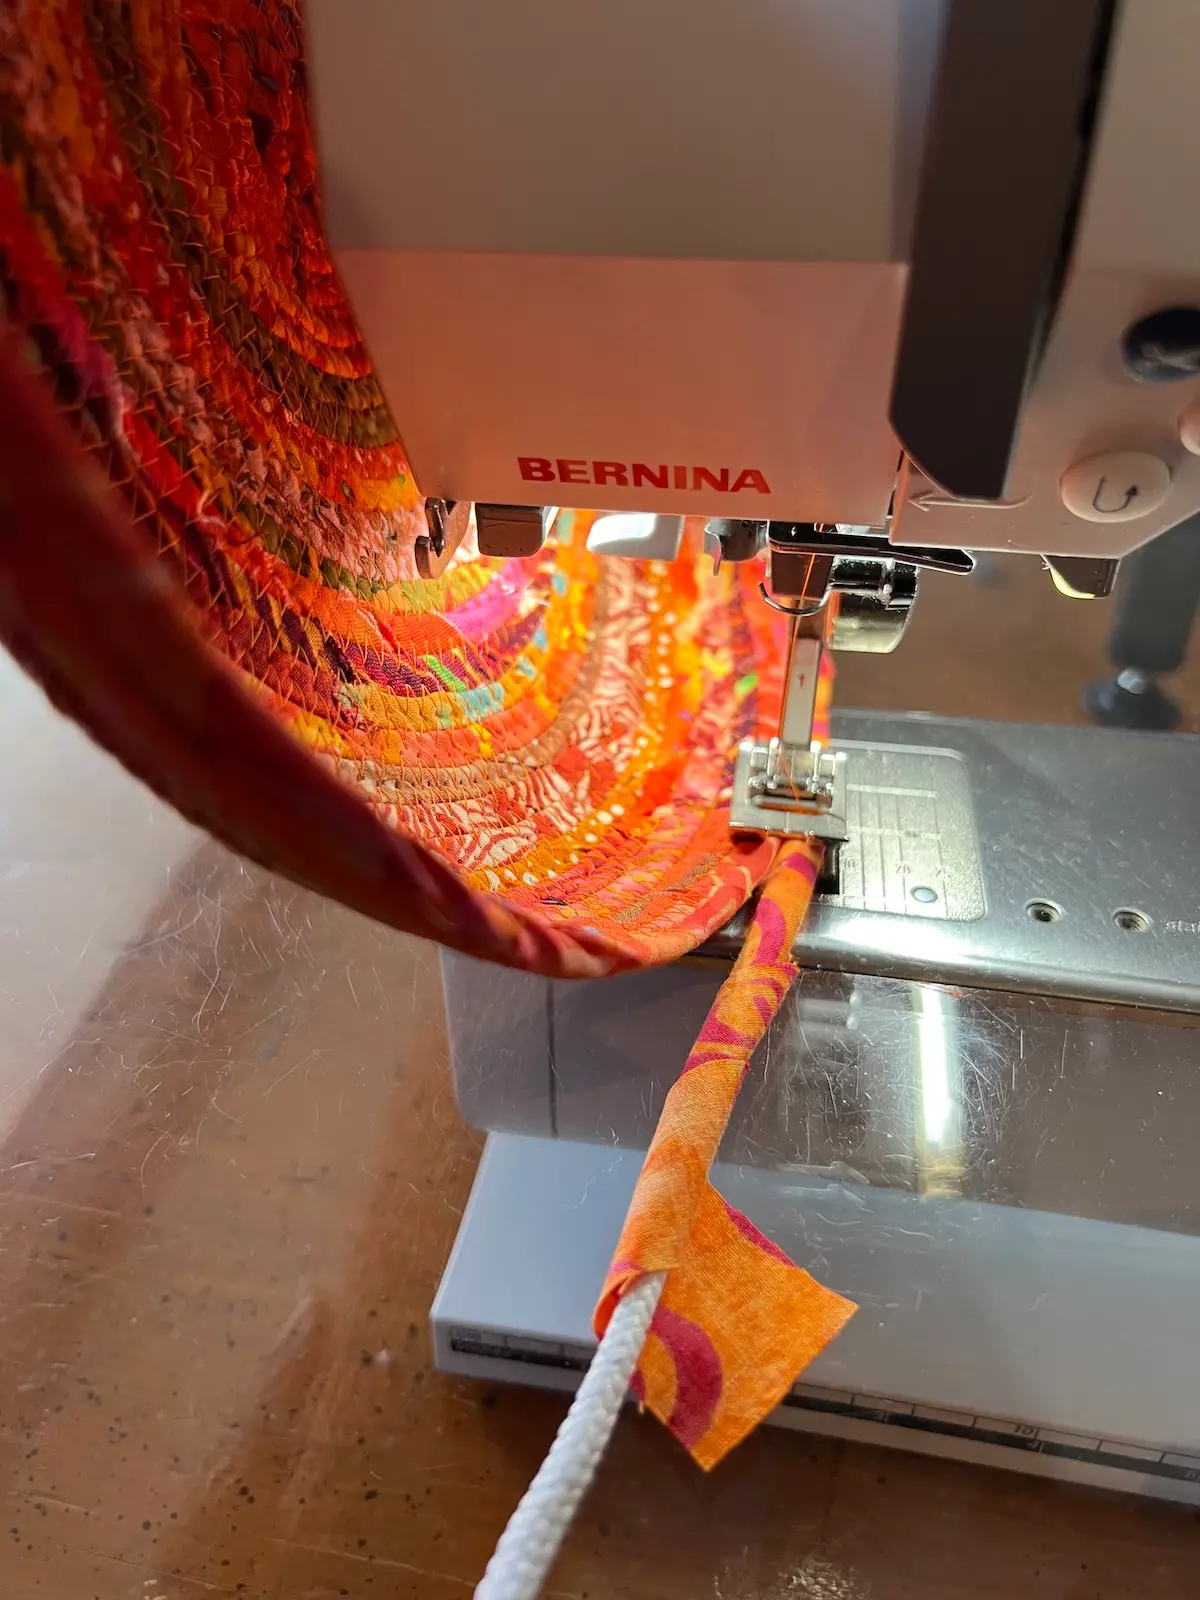
Step 9: Finish the clothesline end
When your bowl is the right size, cut the clothesline, leaving enough length to wrap the end neatly. Wrap the fabric around the final section of cord, leaving about a 4-inch fabric tail. 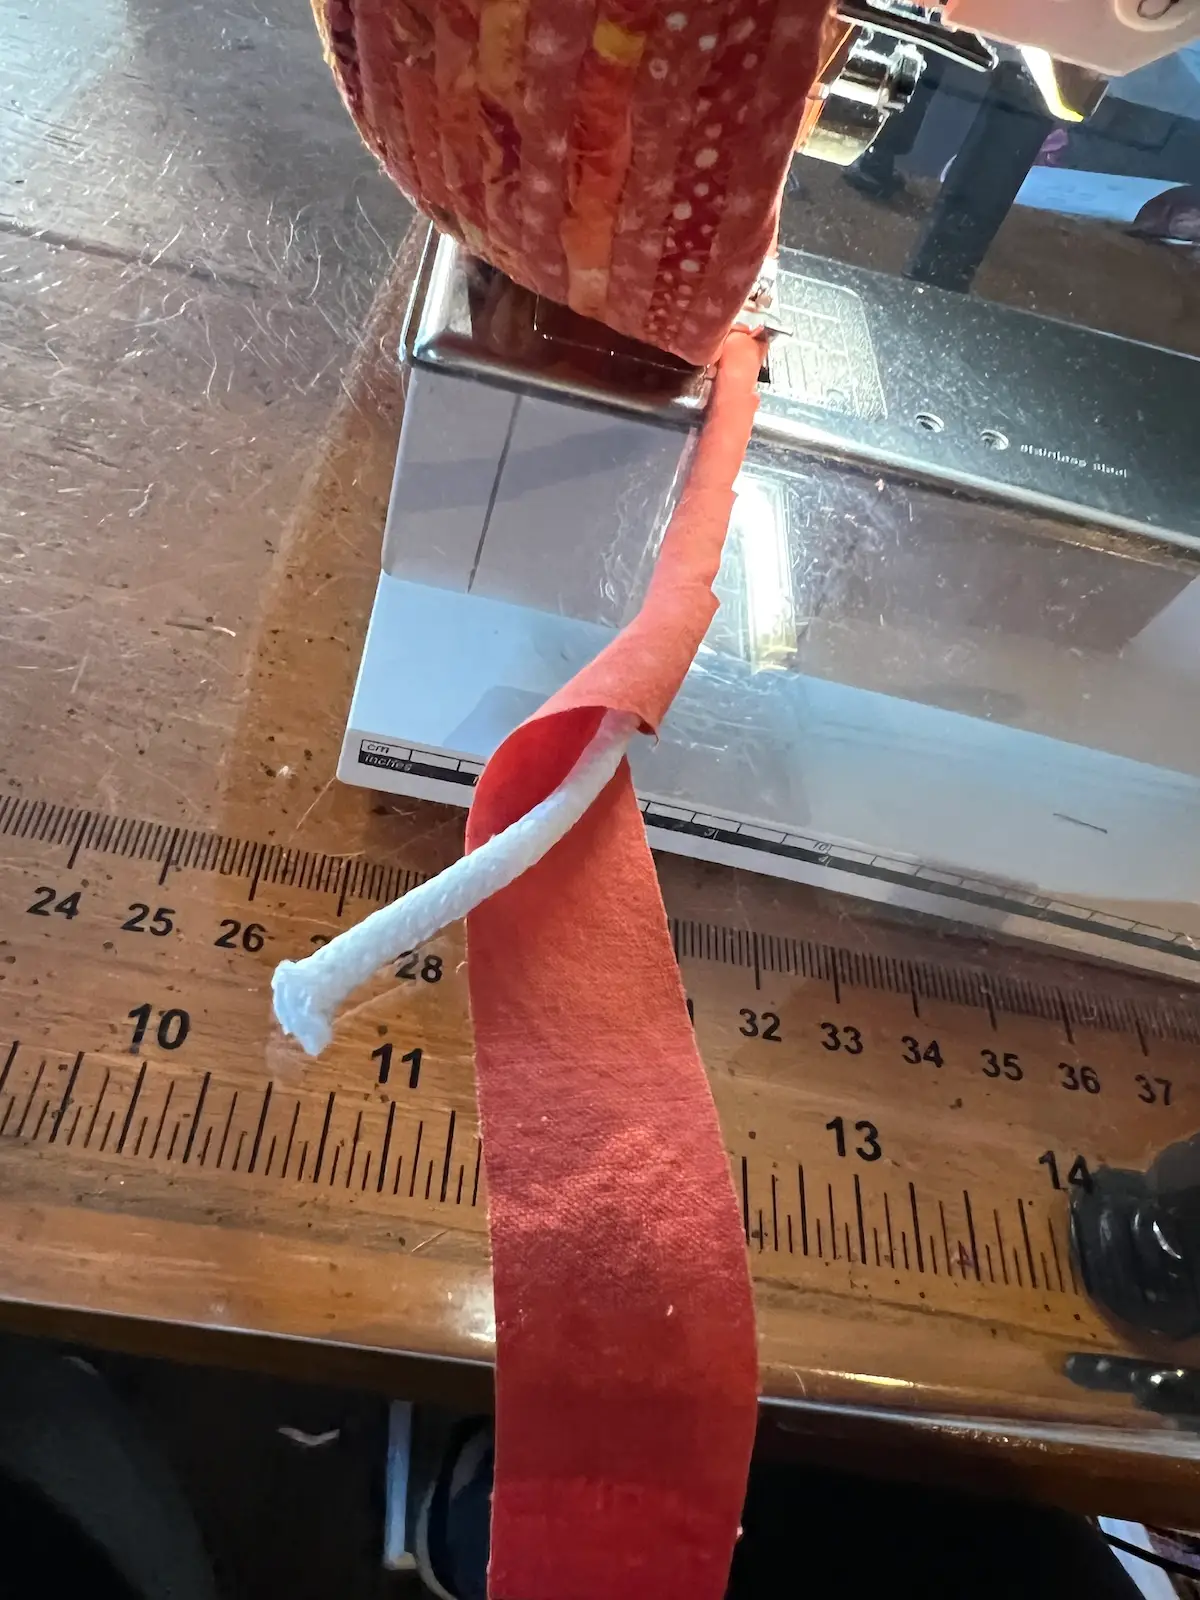
Fold the fabric over the end of the rope and twist the remaining fabric over the last few inches of covered rope. I like to use a WonderClip to hold the fabric in place.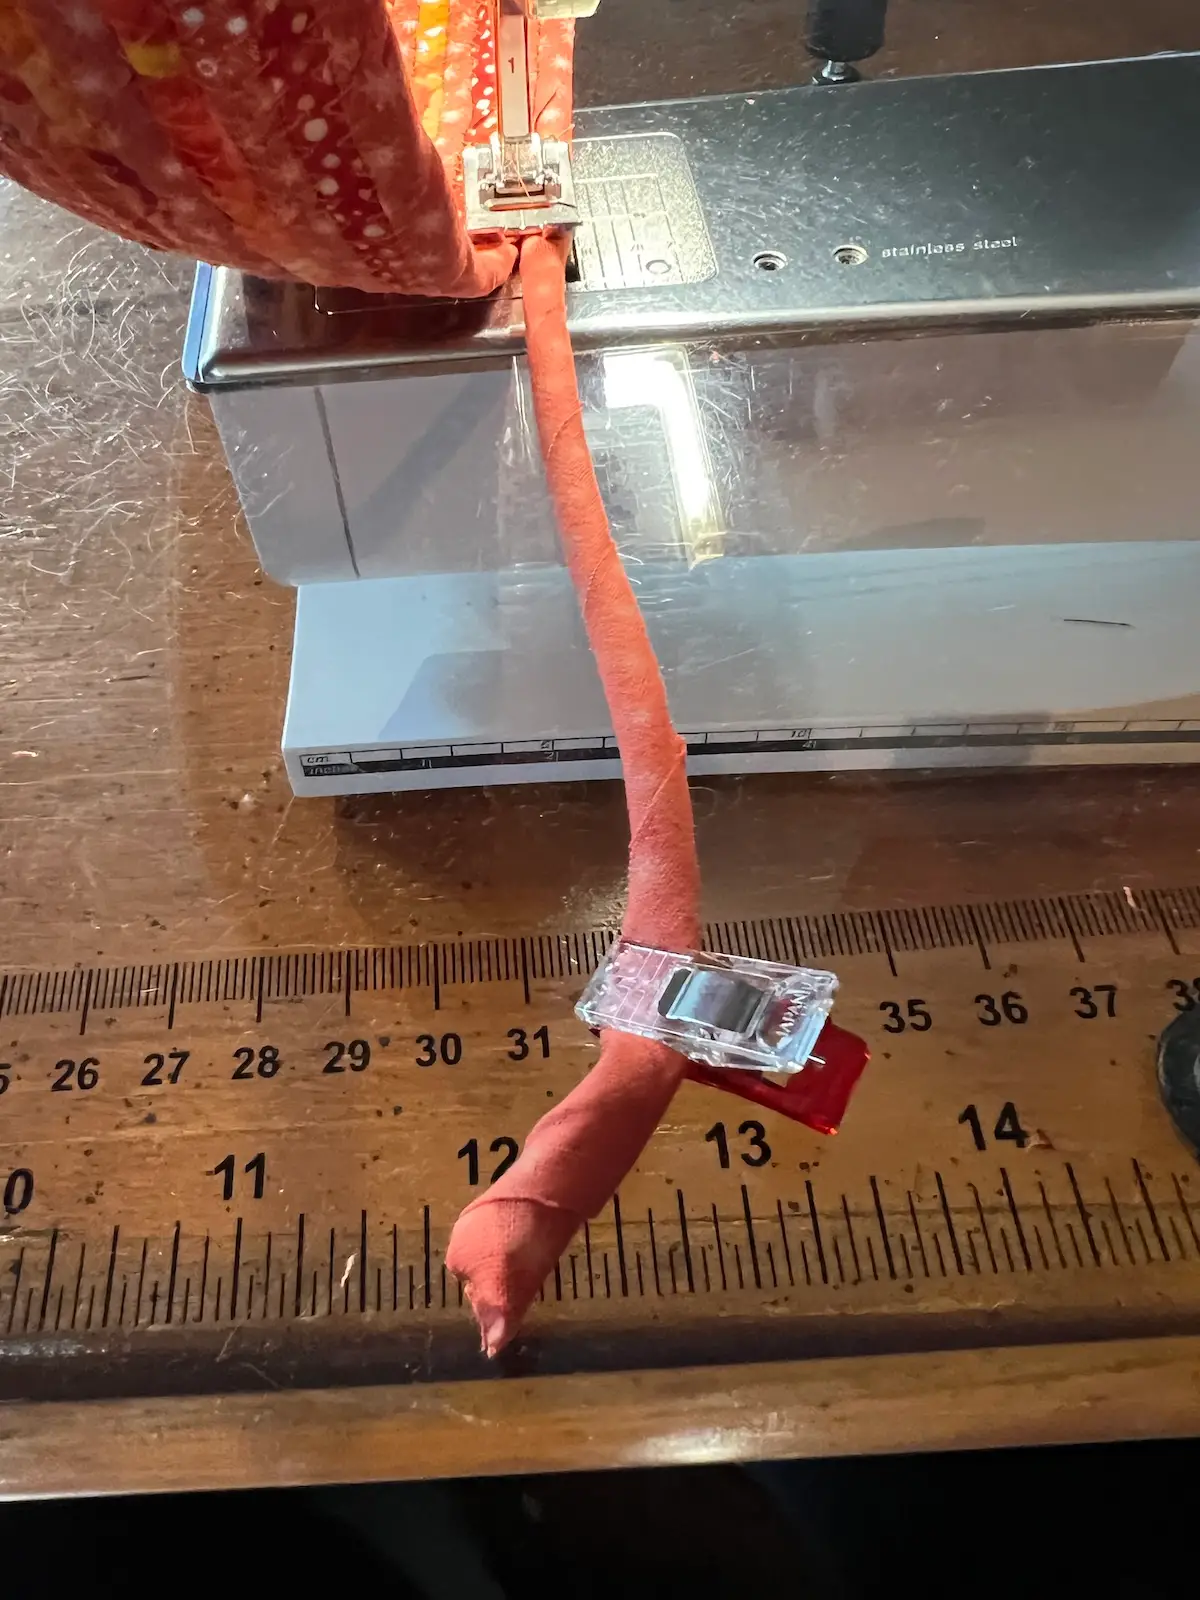
Check the last few inches of stitching to make sure the cord end is secure and the finish looks neat.
Step 10: Fill your bowl with Halloween treats
Your fabric trick or treat bowl is ready! Place it on an entry table, a party table, or another spot where family and guests can grab a treat. 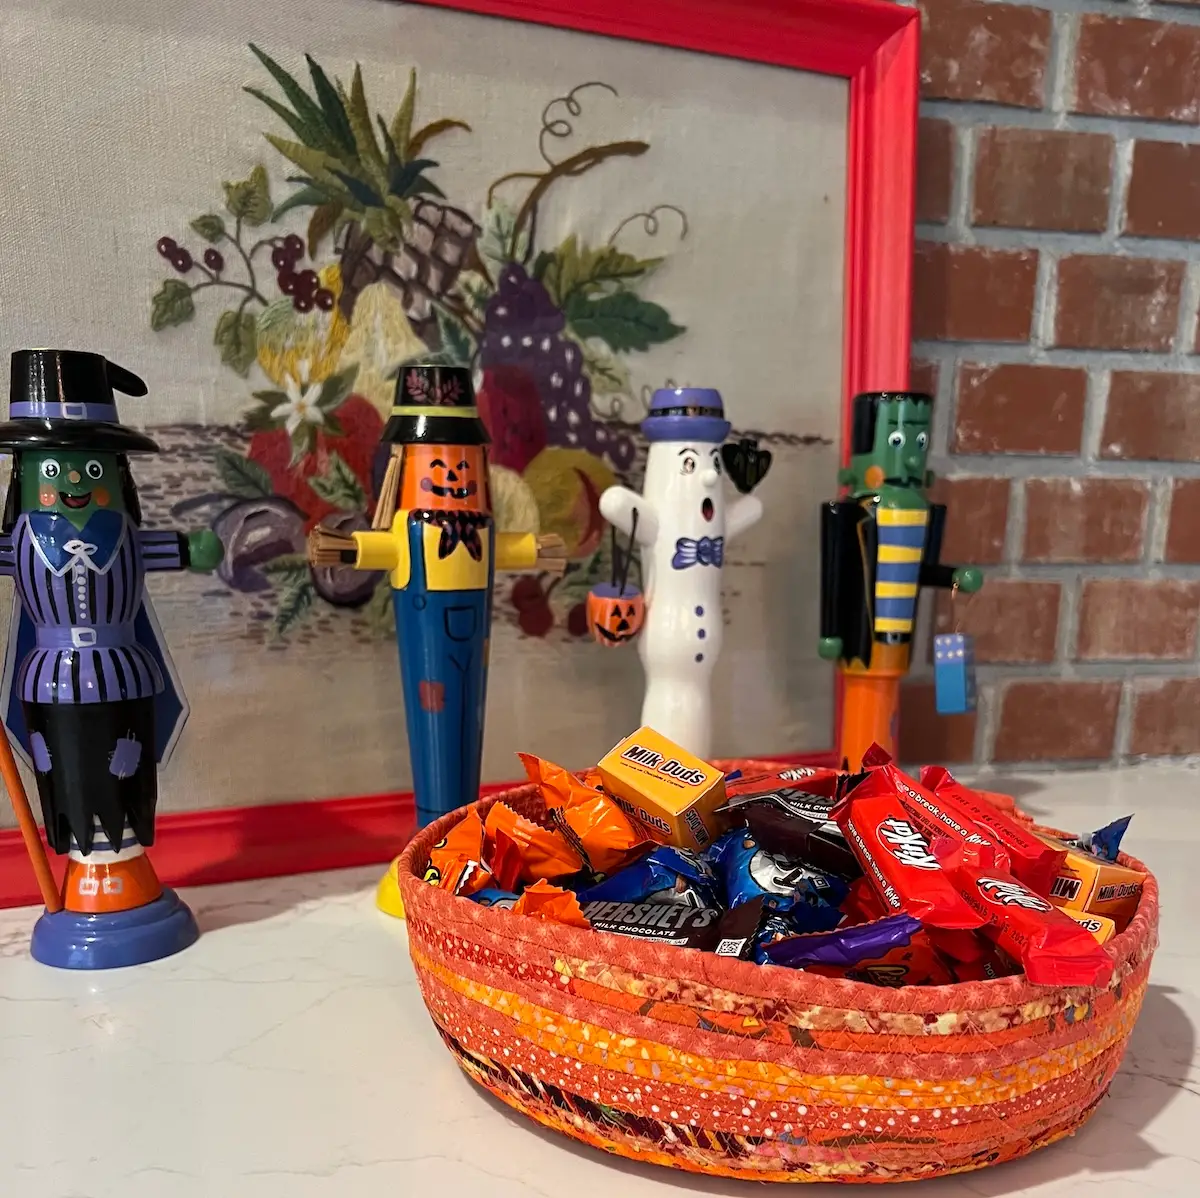
The finished bowl measures about 12 inches across and 5 inches high, giving you plenty of room for wrapped Halloween candy.
You can also use the same technique to make fabric rope bowls in other colors for everyday storage or seasonal decorations.
Common mistakes when making a fabric bowl
The zigzag stitch misses one of the coils
If the stitch catches only one section of clothesline, the coils may pull apart. Adjust the zigzag width so the needle catches both adjoining coils. Test your stitch on a sample before sewing the bowl.
The clothesline shows through the fabric
Wrap the fabric snugly around the cord, overlapping the edges slightly as you work. If the fabric shifts or gaps appear, stop and adjust the wrapping before continuing to sew.
The center of the bowl comes loose
Secure the beginning spiral with an X-shaped line of stitching before sewing around it. Take your time with the first few rounds, since a firm center helps support the rest of the bowl.
The bowl base curls before it is large enough
Keep the base flat as you sew the first several rounds. Begin tilting the base upward only when it reaches the size you want. Turning the sides too soon creates a smaller base and a deeper bowl.
The bowl sides look uneven
Try to maintain a consistent angle as you tilt the base upward. Pause to reposition the bowl whenever you need to. Small adjustments as you sew are easier than trying to correct an uneven shape at the end.
The fabric strips become tangled
Work with manageable lengths of fabric rather than wrapping an entire pile of strips at once. Shorter strips are easier to control around the cord and are less likely to twist or tangle.
The end of the clothesline looks bulky
Leave a little extra fabric at the end, twist it tightly, and stitch it down neatly. Check that the final stitches secure the fabric tail and the cord without leaving a loose end.
Frequently asked questions
Choose cotton clothesline or another suitable cord that fits comfortably under your sewing machine’s presser foot. The cord should be flexible enough to curve into a spiral without being so thick that your machine struggles to stitch through the wrapped coils. Test your materials and stitch settings before starting.
Cotton quilting fabric is a good choice because it is easy to cut or tear into strips and comes in many colors and prints. Choose coordinating Halloween prints or use leftover fabric from your stash.
Yes. Cut your fabric strips with scissors or a rotary cutter if your fabric does not tear easily or you prefer a neater edge. Both methods work for wrapping the clothesline.
Use a wide zigzag stitch to join the fabric-covered clothesline coils. The stitch needs to catch both adjoining sections of cord. Test the width and length on a sample before beginning the bowl.
Yes, this is an approachable project for someone who knows the basics of using a sewing machine. The most challenging parts are securing the center, keeping the zigzag stitch over both coils, and tilting the base to create the sides. Work slowly and practice on a sample if needed.
The original bowl measures about 12 inches across and 5 inches high. You can make it smaller or larger by changing the size of the flat base and continuing to add coils until the bowl reaches your preferred height.
Absolutely! This is an excellent scrap-busting project. Cut or tear leftover cotton fabric into strips about 1 inch wide. You can use one color, coordinate several prints, or mix scraps for a colorful bowl.
Use your bowl to hold individually wrapped Halloween candy, small party favors, or other lightweight items. You can also make similar bowls for holding craft supplies or everyday odds and ends.
Cleaning depends on the cord, fabric, thread, and construction you use. Check the care instructions for your materials. For routine upkeep, start with gentle spot cleaning and allow the bowl to dry thoroughly. Avoid assuming that every fabric rope bowl is machine washable.
Yes. The same coiling method can be used to make a fabric rope basket with handles. The handles require additional stitching to secure them. See our tutorial on how to make a fabric rope basket.
Make a fabric bowl for Halloween
Turn your favorite fabric scraps into a colorful fabric trick or treat bowl for Halloween candy. With clothesline, a sewing machine, and a zigzag stitch, you can create a sturdy bowl in your favorite colors and prints. Make one for your Halloween party, set it by the front door for visitors, or try the same technique with everyday fabrics for a bowl you’ll use all year. Happy sewing!
Check out all of our Halloween DIY ideas on Create Whimsy!
