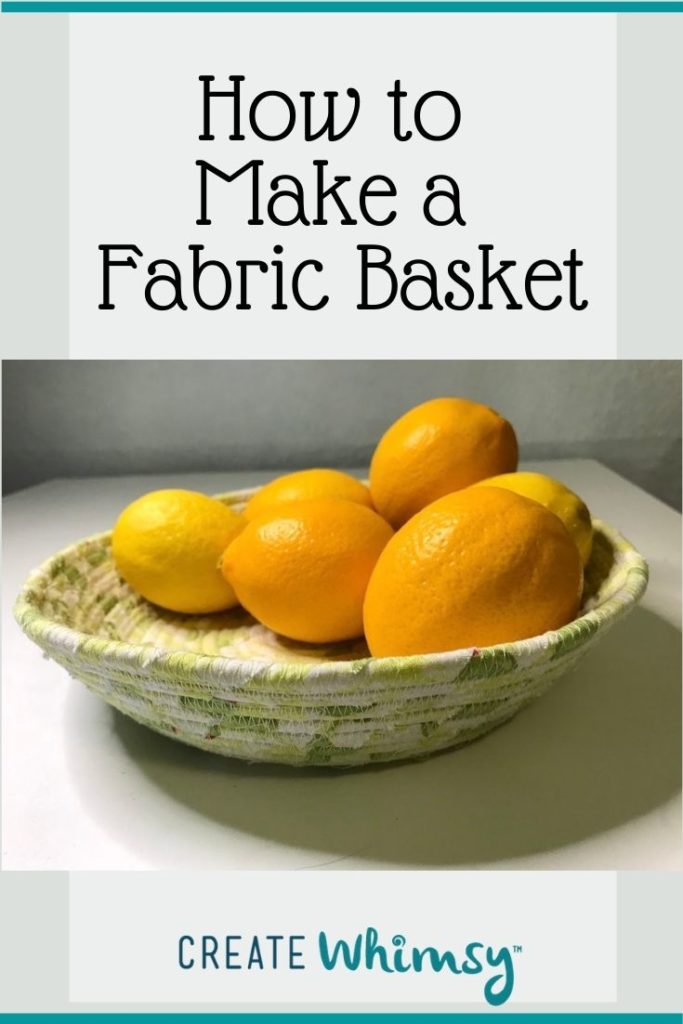
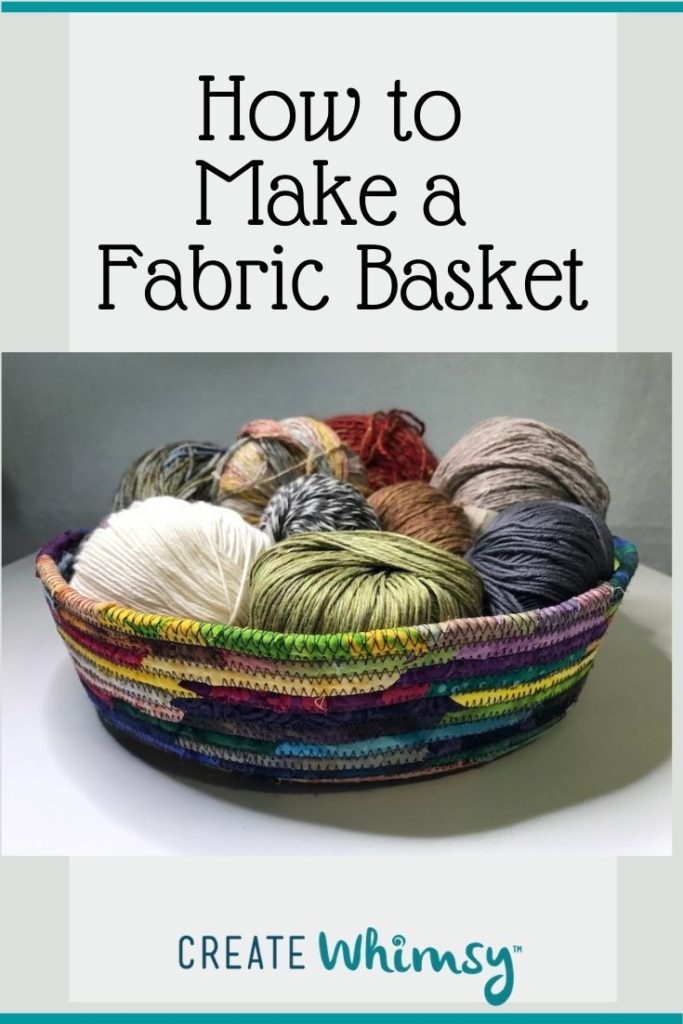
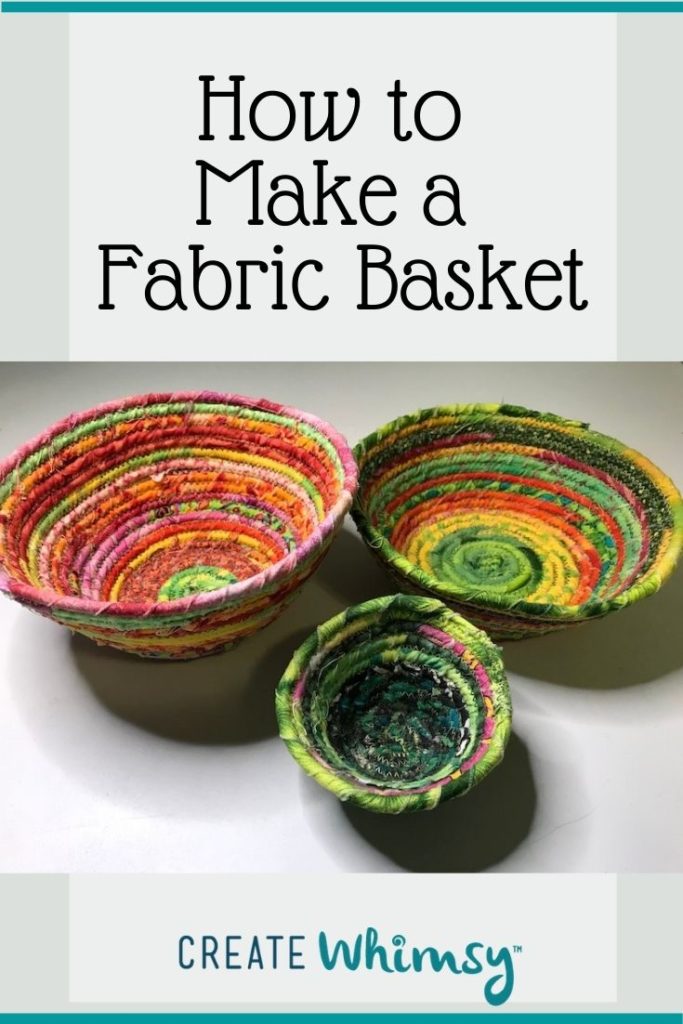
These fabric rope bowls are so much fun to make and they have so many uses! Make a fabric rope bowl for an Easter basket, fruit bowl, notions catch-all, gift basket, craft storage basket, toy basket and more. This is a perfect diy home decor project! If you use washable materials to make them, you can wash your finished projects. I’ve popped mine in both the washing machine and the dishwasher.
The construction starts with cotton rope or nylon cord. You can buy a cheap clothesline or start with cording from your fabric shop. Cotton results in a soft, flexible basket while nylon yields a firmer shape. The diameter of the cord is up to you, as long as it fits under the presser foot of your sewing machine. My machine can handle cord up to ¼-inch in diameter.
Fabric rope bowls are perfect scrap-buster projects! I like to use the pieces I cut off to straighten an edge before cutting strips that becomes scrap fabric. They are generally about 1-inch in width, but not perfectly straight for your quilting projects.
Here is our step-by-step tutorial.


Rope Bowl Tutorial
Fabric rope bowls are easy to make and a perfect way to use up scraps. I’ve made some very cool bowls from “what was I thinking” fabric - prints that no longer appeal to me in colors I like. I wouldn’t use them in a quilt, but after tearing into strips and wrapping around cord, the prints are unrecognizable - you see just the great colors.
As an Amazon Associate I earn from qualifying purchases. Read more about our affiliate linking policy.
There are a number of methods to construct the bowls. This is my favorite way to make fabric rope bowls.
Materials
- One (1) fiber clothes line OR cording of your choice. You can use different size cording for different looks, as long as it fits under the foot of your sewing machine.
- 1 inch strips of fabric, cut or torn
- Thread
Tools
- Sewing machine
- Binder clip or Wonderclip
- Rotary cutter, ruler and mat if cutting fabric strips instead of tearing
Instructions
- Start by cutting or tearing your fabrics into one inch strips. I usually tear the strips, but this time I choose a linen fabric and it doesn't tear well, so I needed to cut the strips.

- Wrap the end of your fabric around the end of your cord. I like to hold the fabric wrapped rope in place while I'm working on it with a clip. You can use either a binder clip or a Wonderclip.
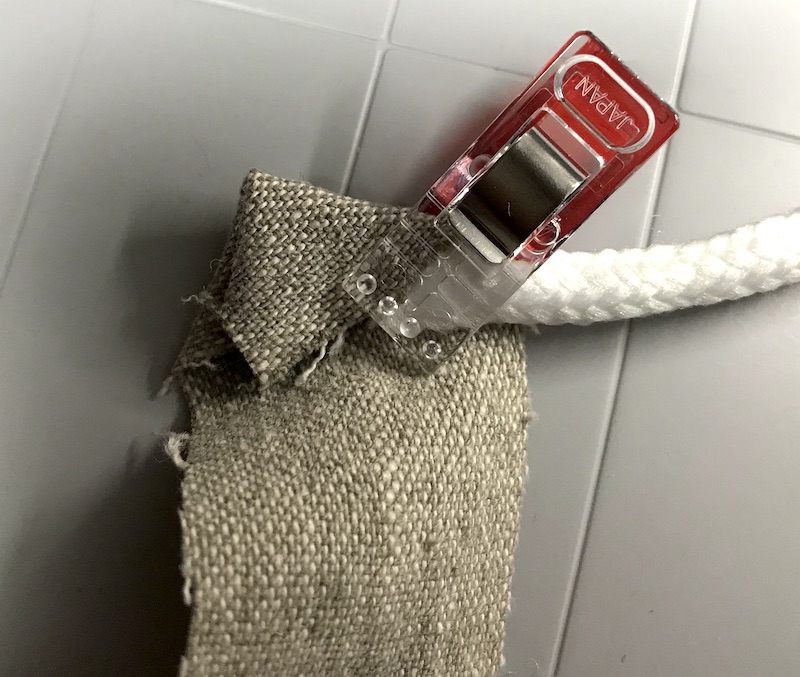
- Here is the end wrapped. Start with wrapping about 3 to 4 inches of the cord so you have plenty covered to begin the coil.

- Carefully coil the fabric covered cord. Again I use a clip to hold it while I get started.

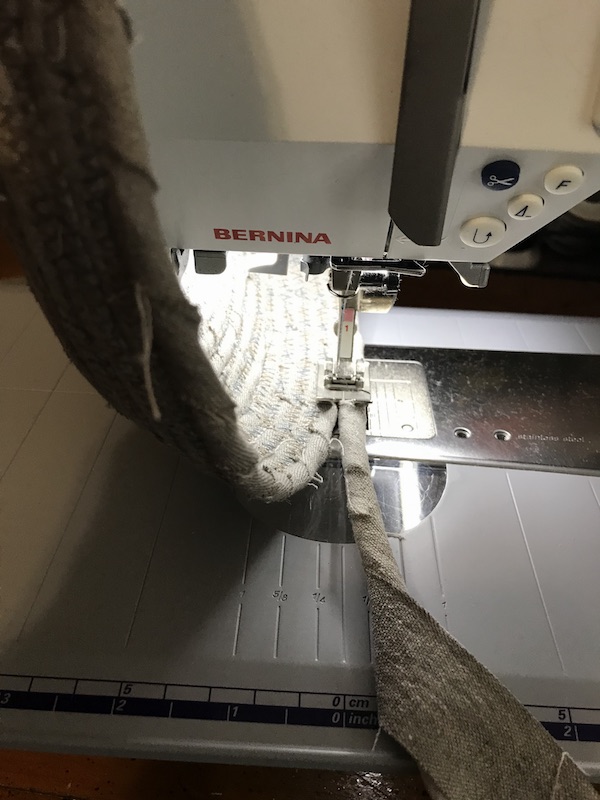
- Set your machine to a wide zig zag stitch with a little bit wider width so that it catches both cords when you are sewing them together. Center your presser foot right between the two, and the stitch will hold the fabric coiled rope together.

- Make sure the beginning spiral is to the left of your presser foot, that it looks like a 9. This will make sure that the bowl will be to the outside of your sewing machine. If you started the wrong way, that's okay. Just stop and turn it before it gets too big. 🙂
Continue wrapping about 4 to 6 inches of the cord at a time and stitching it in place. I like to use lengths of the one inch strips between 18 - 25". If they are too long, they get tangled with your cord.
When one fabric strip is coming to an end, just layer the next strip inside the wrap for the final inch, so there is a little of an overlap. - Continue until the base is the size you'd like. Then, tilt the base up and continue sewing the fabric wrapped cording. This will begin making the sides.

- Continue supporting the sides of the basket as you sew.
- If you'd like to make a handle, make a loop from your fabric wrapped cording. Backstitch where you are beginning the handle. Cut your threads and then start zigzagging again to reattach to the bowl.

- Mark halfway around your basket to start the second handle and follow the same method. Backstitch, make a loop, start zigzagging again.

- Add at least one more round of fabric covered cording to your basket to secure the fabric wrapped cording on the handles with stitching.

- When you are ready to finish your fabric basket, cut your fabric about one inch longer than the end of your cording.

- I like to twist the fabric good and tight. This gives a nice transition from the fabric covered cording to a very small twist that naturally blends in on the edge of your fabric basket.

- Continue zigzagging and you have a finished basket!

- Another view of the finished basket with handles.


Notes
Use this same method to make a rope basket! You can make the sides taller with the coiled, if you'd like.
Recommended Products
As an Amazon Associate and member of other affiliate programs, I earn from qualifying purchases.

![Cotton Piping Cord #2 [1/4"], 46 Yards Made in USA](https://m.media-amazon.com/images/I/414nskt04+L._SL500_.jpg)
What kind of rope do you use for a rope bowl?
I prefer cotton clothesline or cording. You’ll be sewing this on your sewing machine. So think about two things when selecting the rope or cording for your bowl. 1) Will it fit under your presser foot? and 2) Will my sewing machine needles sew through the cord easily?
I have used nylon clotheslines and they work great for a firm sided rope bowl. Macrame yarn is a great alternative, too. I just find the cotton clotheslines are inexpensive and easy to use.
If you are making a very small rope bowl, I prefer cording. I have made several that are only 3-inches diameter. They are perfect for holding my thimble, a spool of thread and my needles for hand sewing.
How much cord do I need for a fabric rope bowl?
It depends! Generally about 10-15 yards of cording or rope will make a decent size bowl with a top diameter of about 8-10 inches. It all depends on how big you make your base and how you bring up your sides with the wrapped rope.
How do you make different rope bowl shapes?
It’s all about how you start your rope bowl. If you start wrapping the fabric rope coil in a circle, the base will be circular and result in a round bowl. If you start with the fabric rope coil in an oval, you’ll end up with an oval rope bowl!
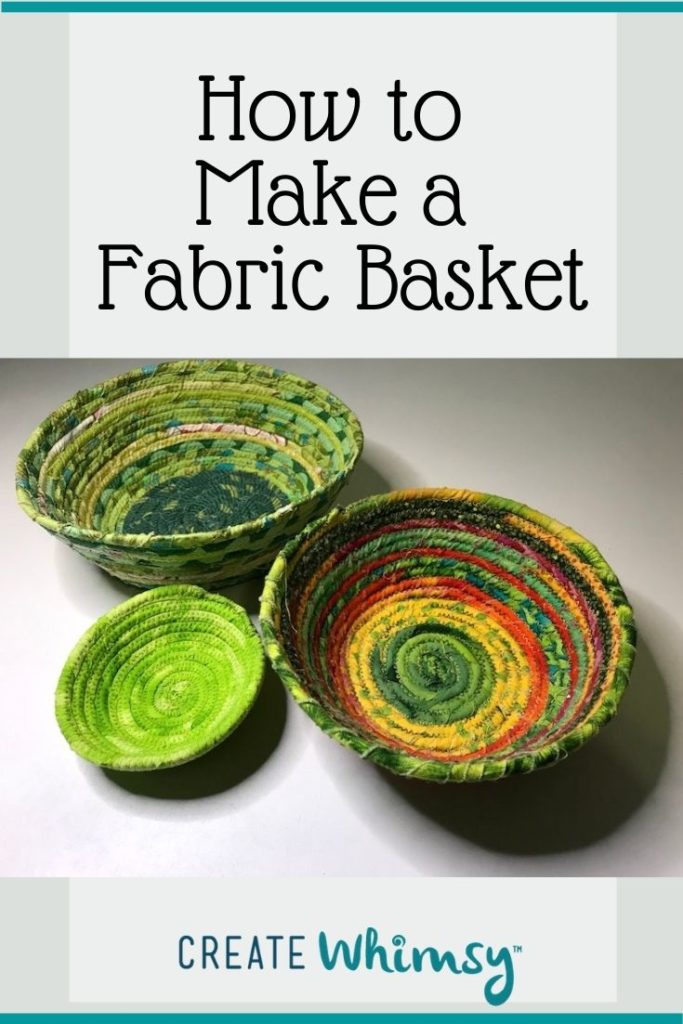
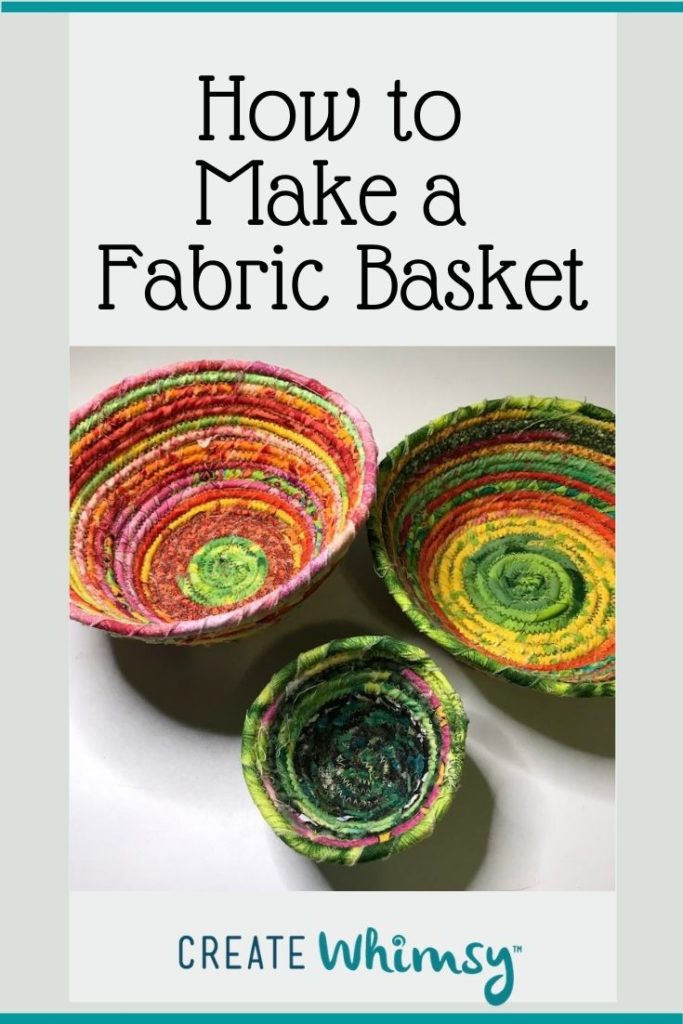
Have fun and play around! You’ll get hooked on making these fabric bowls and baskets. Here are some we’ve made.


How do you make a small rope bowl?
In the image below, there are three sizes of rope bowls. To make the very little one, just start building up your sides very early. I used cording purchased at a local home dec store for smaller baskets as it is easier to work with than bigger diameter cording or rope.


Check out all of our sewing projects on Create Whimsy.