

TTeapots come in all shapes and sizes, so why settle for a tea cozy that almost fits? This easy sewing tutorial shows you how to make a custom tea cozy that fits your own teapot. You’ll measure your pot, draw a simple pattern, add insulation, and sew your cozy using fabric you love.
Can you make a tea cozy without a pattern? Yes! I’ll show you how to draw your own pattern from your teapot’s measurements.
How do you make a tea cozy fit your teapot? Measure the circumference at the widest point and the height from the tabletop to the top center of the pot, then use those measurements to create your pattern.
What is the best batting for a tea cozy? I like Insul-Bright when I want insulation to help keep the tea warm longer. Cotton batting also works.
Is this a good sewing project for beginners? Yes. This project uses basic sewing skills and takes about an hour from start to finish.
As an Amazon Associate I earn from qualifying purchases. Read more about our affiliate linking policy.
The best part? You don’t need to buy or download a fixed-size pattern. Your tea cozy is made for the teapot you actually own.
Quick Start
Project: Custom-fit fabric tea cozy
Skill level: Beginner
Time: About 1 hour
Pattern: Draft your own from your teapot
Seam allowance: ½ inch
Insulation: Insul-Bright or cotton batting
Best for: Fabric scraps, favorite prints, orphan quilt blocks and handmade gifts
You’ll need your teapot before you start. It is your pattern template!
What You’ll Learn
- How to customize a tea cozy with scraps, appliqué and decorative stitching
- How to measure a teapot for a custom sewing project
- How to draft a simple tea cozy pattern
- How to calculate seam allowance and ease
- How to quilt fabric with batting
- How to sew a lined project
- How to add a simple fabric handle
- How to turn and finish a lined sewing project
Why Make Your Own Tea Cozy?
A handmade tea cozy is practical, but it is also a fun way to use fabric that might otherwise sit in your stash.
Because you draft the pattern to fit your own teapot, you aren’t limited to a standard size. You can choose the fabric, quilting, trim and handle, too.
And because the project is relatively small, it’s a good place to experiment with a new quilting or embellishment technique without committing to a full-size quilt.
Quick Fit Test
Before cutting your favorite fabric, cut the pattern from inexpensive scrap fabric or paper and wrap it around your teapot.
Check that:
- The cozy covers the widest part of the pot.
- There is enough ease to slide it on and off easily.
- The handle and spout aren’t creating a tight spot.
- The bottom edge sits where you want it.
- The top has enough room for the shape of your teapot.
Don’t skip this step if your teapot has an unusual shape. Five minutes of testing can save your favorite fabric.
Here are our easy step-by-step instructions:
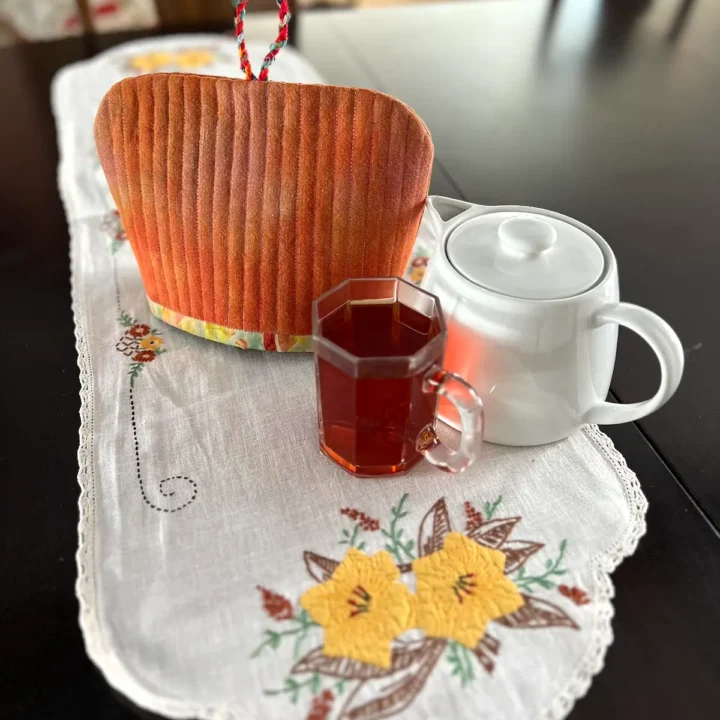
How to Make a Tea Cozy
This custom tea cozy is designed to fit your own teapot. Instead of downloading a fixed-size pattern, you'll use your teapot's measurements to draw a simple pattern.
Materials
- Fabric for outside of the tea cozy, fabric for the lining of the tea cozy
- Insul Bright Heat Resistant Batting, you can use cotton batting, too.
- Thread for sewing
- Handle for the cozy. I used a piece of fabric string that I made from scraps. (see below for more great ideas)
- Large piece of paper for the pattern. NOTE: you can tape together printer paper
- You'll need the teapot that you want to make a tea cozy
Tools
- Sewing machine
- Iron
- Pressing surface or ironing board
- Pen or pencil to draw the pattern
- Removable fabric marker, I used a Frixion pen
- Quilter's ruler
- Rotary cutter or fabric scissors
- Paper scissors
- Sewing tape measure
Instructions
Step 1: Measure your teapot
Start with the teapot you want to cover.
Measure the circumference at the widest point of the teapot. Mine measured 18 inches.
Next, measure the height from the tabletop to the middle of the top of the teapot. Mine measured 6½ inches.
Write both measurements down before you start drafting your pattern.
Step 2: Draft your custom tea cozy pattern
Start by drawing a rectangle using your measurements.
Calculate the pattern width
Divide the teapot circumference by 2 because the cozy has a front and a back.
Then add 1 inch for two ½-inch seam allowances and another 1 inch for ease.
18" ÷ 2 + 1" + 1" = 11"
So my pattern is 11 inches wide.
Calculate the pattern height
Add 1 inch to the teapot height for the ½-inch seam allowance at the top and bottom.
6½" + 1" = 7½"
My starting pattern rectangle is 11" × 7½".
Tip: The amount of ease can be adjusted. If your teapot has an unusual shape or you want a looser fit, add a little more.

Step 3: Shape the top of the pattern
Tea cozies look especially nice with softly rounded corners.
Use the bottom of your teapot as a guide to draw a gentle curve at the top corners of the pattern. You don't need a special curved ruler. You can simply trace the curve.
Cut out your paper pattern.
Step 4: Test the pattern before cutting your good fabric
This is a worthwhile extra step, especially if your teapot has an unusual shape.
Place the paper pattern around your teapot and check the fit. You want enough room for the cozy to slide on and off easily without being baggy.
If needed, adjust the pattern before cutting your fabric.
Step 5: Cut the fabric and batting
Use your pattern to cut:
- 2 outer fabric pieces
- 2 batting pieces
- 2 lining pieces
If you want the lining to show slightly along the bottom edge, cut the lining pieces ½ inch longer than the outer pieces.
If you want the lining completely hidden, cut it the same size as the outer fabric.
I'm using Insul-Bright for the batting. You can also use cotton batting.
Step 6: Quilt the outer pieces
Place each outer fabric piece against a piece of batting.
If you're using Insul-Bright, follow the manufacturer's instructions for layering it. For this project, I positioned the metallic side toward the inside of the finished tea cozy.
Quilt the outer fabric and batting together.
I used simple channel quilting, but this is a great place to add your own personality. Try straight-line quilting, free-motion stitching or one of your sewing machine's decorative stitches.
If you use a removable fabric marker, test it on a scrap of the same fabric first. 
I stitched down the middle and then used the presser foot to stitch parallel lines across each of the outer pieces. I used my walking foot to make it easy.
Step 7: Sew the tea cozy together
Here are both of my outer pieces for the tea cozy all quilted. 
Place one lining piece and one quilted outer piece right sides together. 
Align the straight bottom edges and sew with a ½-inch seam allowance.
Repeat with the second side.
Press the seams.
Now place the two completed sections together with the outer fabrics right sides together and the lining fabrics together. Secure with a Wonder Clip or pins.
Before sewing, center your handle at the top of one outer section and secure it with pins or clips.

Sew around the cozy with a ½-inch seam allowance.
Important: Leave a 4-inch opening in the lining so you can turn the tea cozy right side out. 
Step 8: Turn, press and finish
Carefully turn the tea cozy right side out through the opening in the lining.

Here is the cozy turned right side out and ready to be pressed. 
Press around all of the edges. Press the seam allowances at the opening toward the inside.. 
Close the opening with a narrow zigzag stitch, straight stitch or hand-sewn ladder stitch.
Push the lining fabric into the outer fabric. I wanted a little bit of the lining to show, so I cut the lining fabric 1/2-inch longer. To secure the lining to the inside, I stitched in the ditch just above the lining on the right side.
If you cut the lining the same as the outer fabric simply top stitch along the bottom edge.
Your custom tea cozy is finished!
Fill the teapot, make yourself a cup of tea and enjoy your new handmade cozy.
Common Mistakes When Making a Tea Cozy
Making the cozy too snug
Remember to add ease to your measurements. You want the cozy to slide over the teapot easily.
Forgetting seam allowance
Your measurements are not the finished dimensions. Make sure the seam allowance is included when drafting the pattern.
Not testing the pattern
Make a quick paper or scrap-fabric version before cutting your final fabric.
Cutting the lining incorrectly
If you want the lining to peek over the bottom edge, cut it ½ inch longer than the outer fabric. Otherwise, cut the lining the same size.
Forgetting the turning opening
Leave the 4-inch opening in the lining. It is much easier to remember before you start sewing than after you’ve sewn the entire cozy shut.
Using a fabric marker without testing it
Always test removable marking pens on a scrap of the actual fabric first. Your current warning about the Frixion pen is good and should stay.
Make your tea cozy your own
Once you have the basic pattern, the fun begins!
Use a favorite novelty print, scraps from another quilt or even an orphan quilt block for the outer fabric.
Try:
- A favorite novelty print
- Scraps from another quilt
- An orphan quilt block
- Raw-edge appliqué
- Machine appliqué
- Fussy-cut fabric
- A piece of pre-quilted fabric
- A leftover quilt sandwich
- Decorative machine stitching
- A fabric tassel
- A prairie-point handle
- A ribbon loop
- A favorite button or bead
- Use a prairie point for the handle
A tea cozy is a small project, which makes it a great place to experiment with a technique you’ve been wanting to try.
Scrap Fabric Tea Cozy
I made another tea cozy using scraps from my fabric stash, and this is one of my favorite ways to approach the project.
I started with a simple white base and added black-and-white pieced fabric, a little hot pink and some polka dots. I also played with scribble appliqué and finished the top with a fabric tassel.
Tea cozies are perfect for using up small pieces of fabric because the project is small enough that even a little favorite scrap can become part of the design.
And you don’t have to make it match your kitchen. Make it match your personality!

I enjoy playing around with scribble appliqué. And, polka dots are happy! I added a narrow flange of the hot pink above the black and white strata. And, topped the cozy off with a fabric tassel made from scraps of the three fabrics!
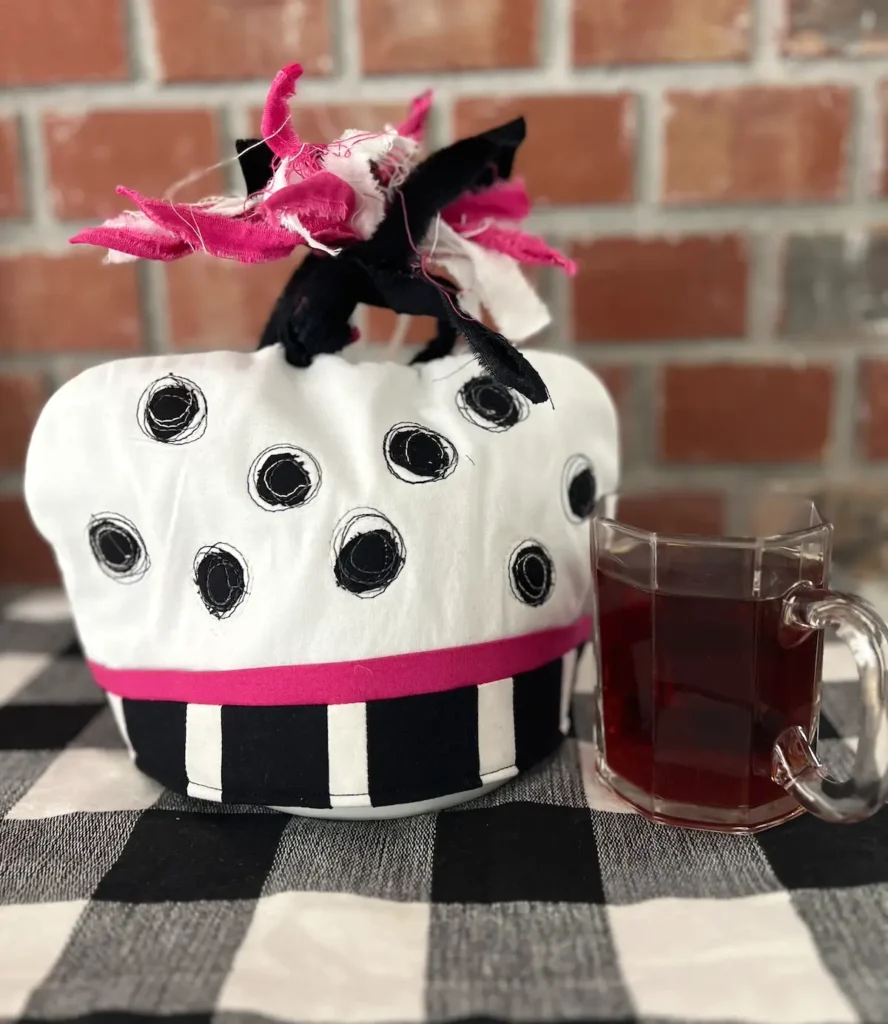
Here is a close-up of the stitching and the tassel. This tea cozy keeps my tea warm, and brings a smile to my face in the morning!


If you want to add more surface design to your tea cozy, try raw edge appliqué.
More creative ideas for your tea cozy
- Use fun novelty prints that reflect your hobbies or passions!
- Have some orphan quilt blocks? Use them to for the outside of the tea cozy
- Play around with a new technique for your outer fabric. Try appliqué, or raw edge appliqué with fusing, use scraps and piece them together.
- Make an appliqué design that coordinates with your kitchen decor.
- Fussy cut a piece of fabric to center a large design on your exterior fabric.
- Pull out one of those pieces of fabric you made in a class to make it special.
- Use pre-quilted fabric – either purchased or a quilt sandwich that you never quite finished.
- Looking for an accent fabric? Finish the bottom edge with bias tape. You can make your own bias tape from fabric in your stash.
- Tea cozy handles can be a time for creativity, too. I used hand made fabric string from fabric scraps. I’ve seen tea cozies that use a large prairie point. Make a fabric tassel. Make a loop of coordinating or contrasting fabric. Sew a fancy button or large bead on the top of the tea cozy. Use a piece of ribbon – go ahead, cut a 5-inch piece from that fancy ribbon you just had to buy that has been sitting in a box!

These make thoughtful gifts for someone you know who enjoys an afternoon tea.


Frequently Asked Questions
A tea cozy is an insulated fabric cover designed to fit over a teapot and help keep the tea warm longer.
Yes. This tutorial shows you how to draft a simple pattern using your own teapot’s measurements, so you don’t need a purchased or downloadable pattern.
Measure around the widest part of the teapot to get the circumference. Then measure from the tabletop to the center of the top of the teapot for the height. Use those measurements to draft the pattern.
I used 1 inch of ease in my pattern. You can add more if your teapot is unusually shaped or you prefer a looser fit. The cozy should slide over the pot without being difficult to remove.
Quilting cotton is a good choice for the outer fabric and lining. You can also use scraps, pieced fabric, appliquéd fabric or pre-quilted fabric.
Insulated batting such as Insul-Bright can help retain heat. Cotton batting can also be used if you prefer it or already have it in your sewing room.
Absolutely. A tea cozy is a great scrap-fabric project. Small quilt blocks, leftover pieced fabric, novelty prints and decorative scraps can all become the outer layer.
Yes. The same basic pattern-drafting method can be adapted for another pot. Measure the widest circumference and height of the pot, then adjust the pattern to fit.
Check the care instructions for all of the materials you use, especially the insulation and decorative elements. If you’re making a washable cozy, choose washable fabrics and construction methods appropriate for your materials.
More small sewing projects to try
If you enjoyed making this custom tea cozy, keep going with another small sewing project.
Try a mug cozy for your favorite cup or a bowl cozy for soup, oatmeal and other hot or cold foods. Both are useful projects that are easy to customize.
You can also browse more scrap fabric sewing projects for ideas that put those little pieces in your stash to work.
A handmade tea cozy is a small project with plenty of room for creativity. Make one from a favorite fabric, use up a few scraps or turn an orphan quilt block into something useful. Then put the kettle on and enjoy the finished project!
And when you make one, share a photo on Instagram and tag @createwhimsy. We’d love to see what you create.


