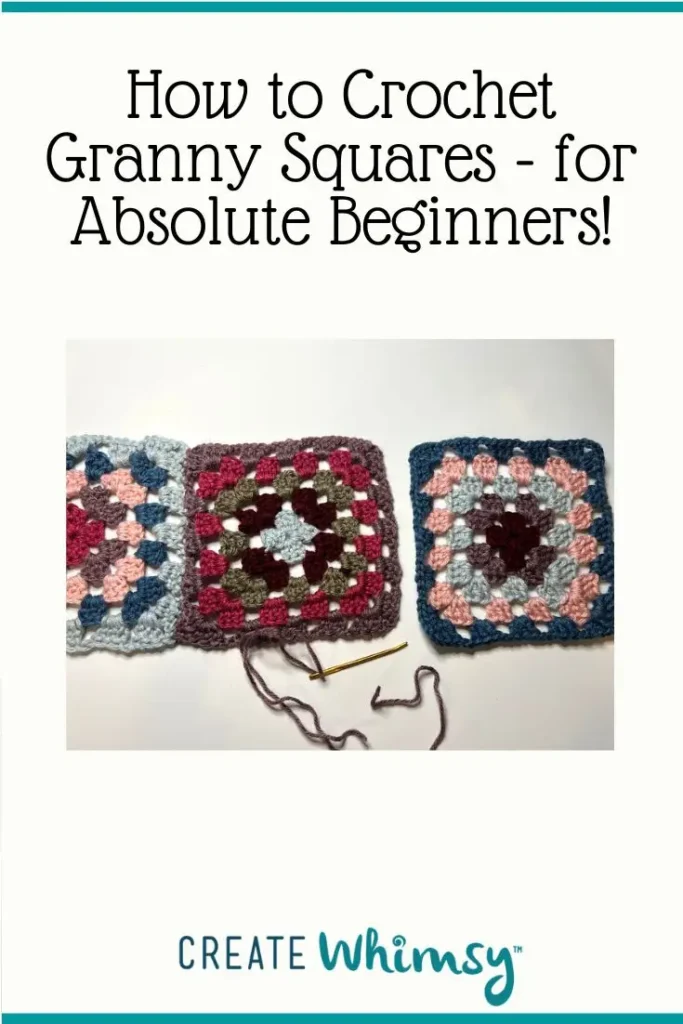
Granny squares are everywhere again – blankets, bags, tops, pillows, and even street fashion all feature the classic granny square.
Why are granny squares perfect for beginners? They are small crochet projects that are easy to do anywhere, and they only use 3 basic crochet stitches. The process is repetitive, so once you get it down, you can make granny squares anywhere.
By the end of this article, you’ll know everything you need to get started to finish your first granny square with confidence!
Granny squares are back!
The granny square goes way back. It wasn’t invented in the 60’s and 70’s – it just had renewed popularity. And, it’s back in style!
It’s following other trends for retro revival, such as quilt coats, and is also a sustainable craft. They can be made with leftover yarn from other projects.
As an Amazon Associate I earn from qualifying purchases. Read more about our affiliate linking policy.
It’s the ideal project to keep your hands busy and calm your mind. It’s low cost (use up leftover yarns), there is a low barrier to entry (you just need a crochet hook and some yarn), and it provides satisfaction quickly. When you get the basics down, you can crochet a granny square in less than 30 minutes.
What do I need to start a granny square?
Yarn: Pick colors and the weight of yarn that you like. Do this first. All of the yarns should be the same thickness to be successful. As for colors, do what you like! Some suggestions are to use colors all in the same tone for a subtle look. Or, use highly contrasting colors for a bold statement.
For a beginner, I suggest using light or bright colors so you can see your stitches clearly. Dark colors are hard to see, especially in poor lighting.
Crochet hook: After you’ve selected your yarn, get your hook. Most yarn labels will tell you what size hook to use for a crochet project.
You’ll also need a small pair of scissors to cut the yarn, and a yarn needle to weave the ends in when you have finished crocheting your granny squares.
What does this mean? Learn the terms.
When I started learning to crochet, I found that most tutorials used a lot of abbreviations and terms I didn’t understand.
Let’s start with the crochet stitches you’ll use to make a granny square: ch = chain, dc = double crochet, sl st = slip stitch.
As you are working your granny square, I’ll refer to the tail of the yarn, which is the cut edge, and the working yarn, which is the yarn that is coming from the skein of yarn.
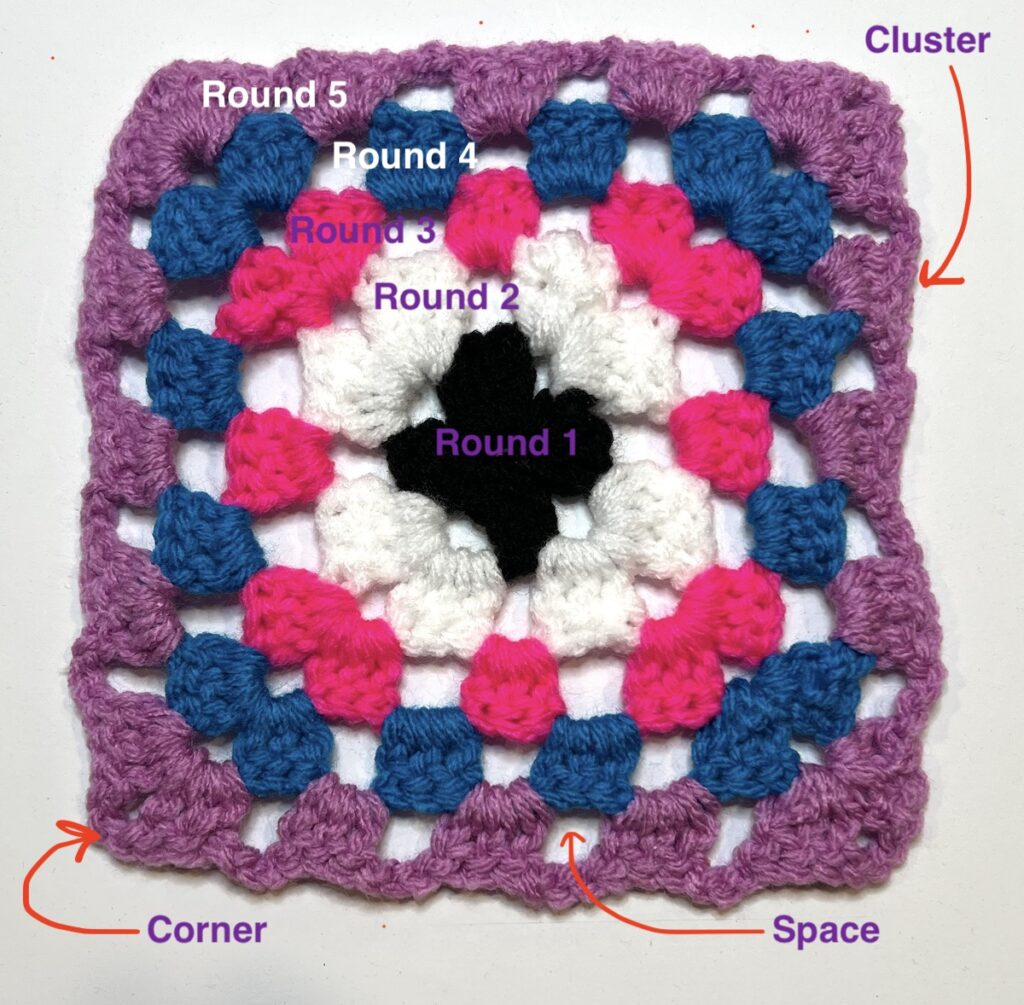
Granny squares start in the middle and work out in rounds. Each round is done in clusters of double crochet stitches and chain stitches. The double crochet stitches form the clusters, and the chain stitches form the spaces. Each round is started with chain stitches and ends with a slip stitch.
And here is the anatomy of a granny square:
Basic techniques used for making a granny square
If you’ve never picked up a crochet hook, this is the tutorial for you!
To make a granny square, you’ll start with a magic circle.
– Start each round with chain (ch) stitches and then form clusters with double crochet stitches.
– After each cluster, chain stitches are made to create spaces for the next round.
– Each round ends with a slip stitch.
Double crochet (dc) (US term) / treble (UK term) for creating the clusters
Slip-stitch (sl st) for joining and ending a round
If you are changing colors at a new round, you slip your hook between the first and second stitch from the previous round. Pick up a loop of the new color yarn and bring it through. Then begin your round with three (3) chain stitches.
When you are all done crocheting your granny square, weave the yarn ends into the back of the square with a darning needle.
For visual learners, here is a YouTube video with all of the steps:
How to Crochet a Granny Square
Learn how to crochet a granny square with our step-by-step instructions.
This article is intended for absolute beginners!
Is this your first crochet project? This is the how-to article for you! No abbreviations or assumptions that you know anything about crochet.
Materials
- Yarn of your choice. If you want to use multiple colors in your granny square, make sure they are all the same weight yarn.
Tools
- Crochet hook appropriate for your yarn. Most yarns have a label that tells you what size hook you need.
- Darning needle. I like the Chiba needles by Clover
- Small scissors for cutting the yarn
Instructions
Make a Magic Loop
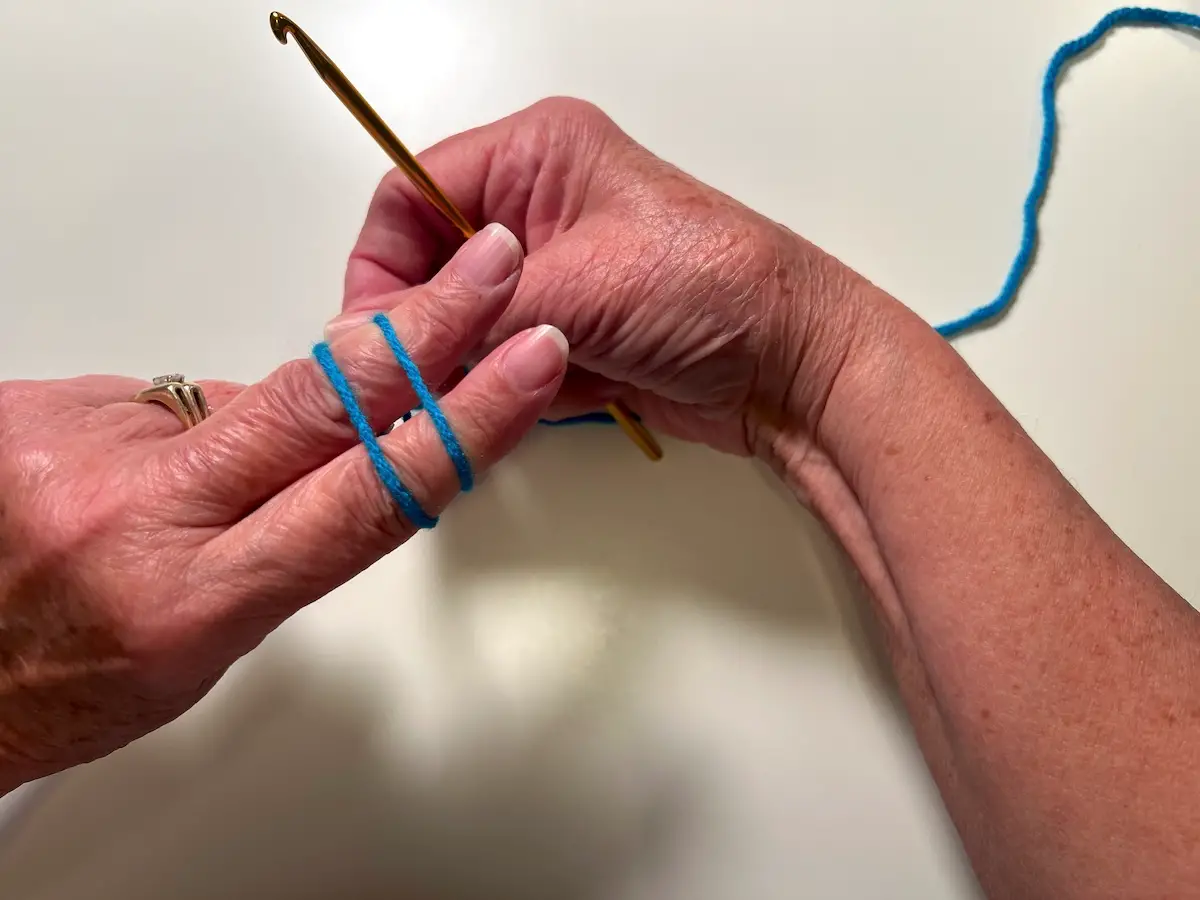
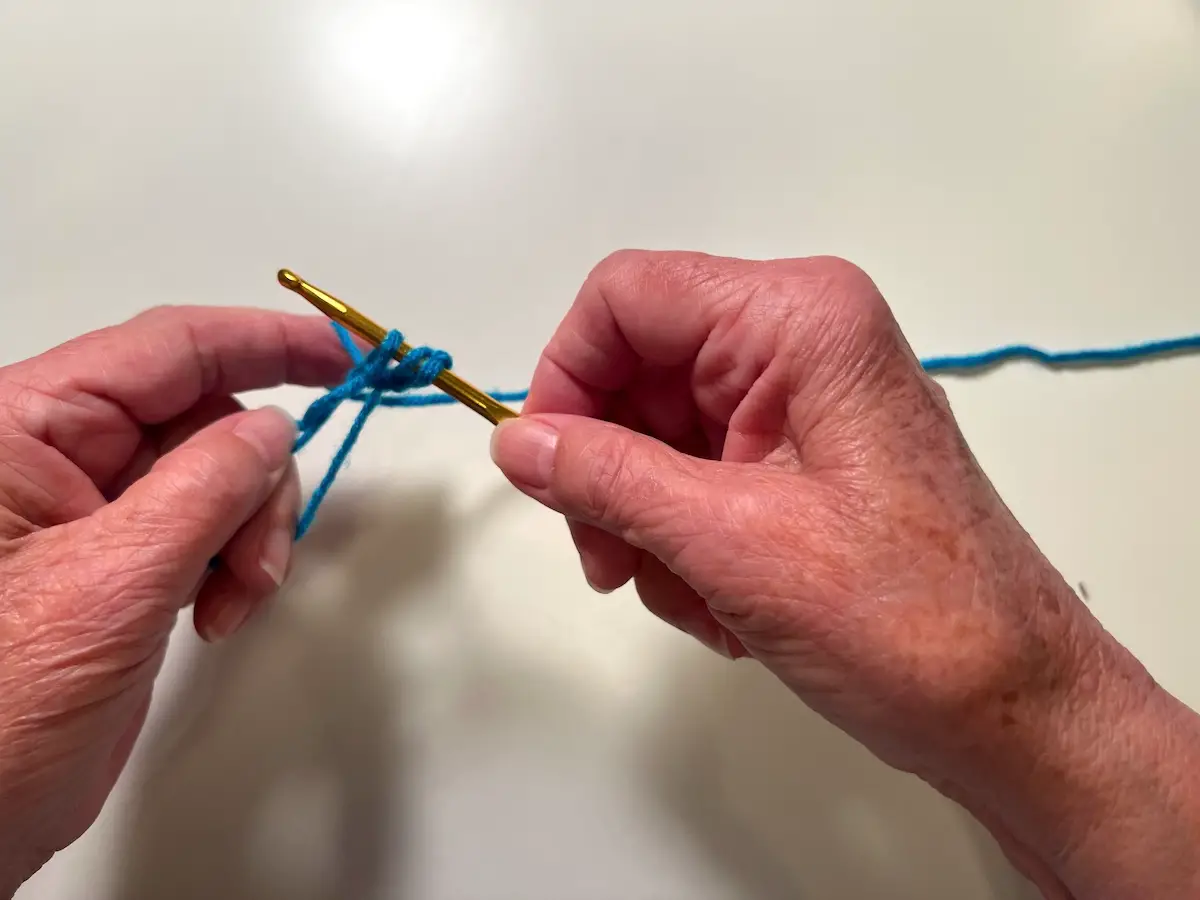
- Start with a magic loop (also referred to as a magic circle). Lay the tail of your yarn over two fingers. You'll want a tail that is at least 4-5 inches of yarn.
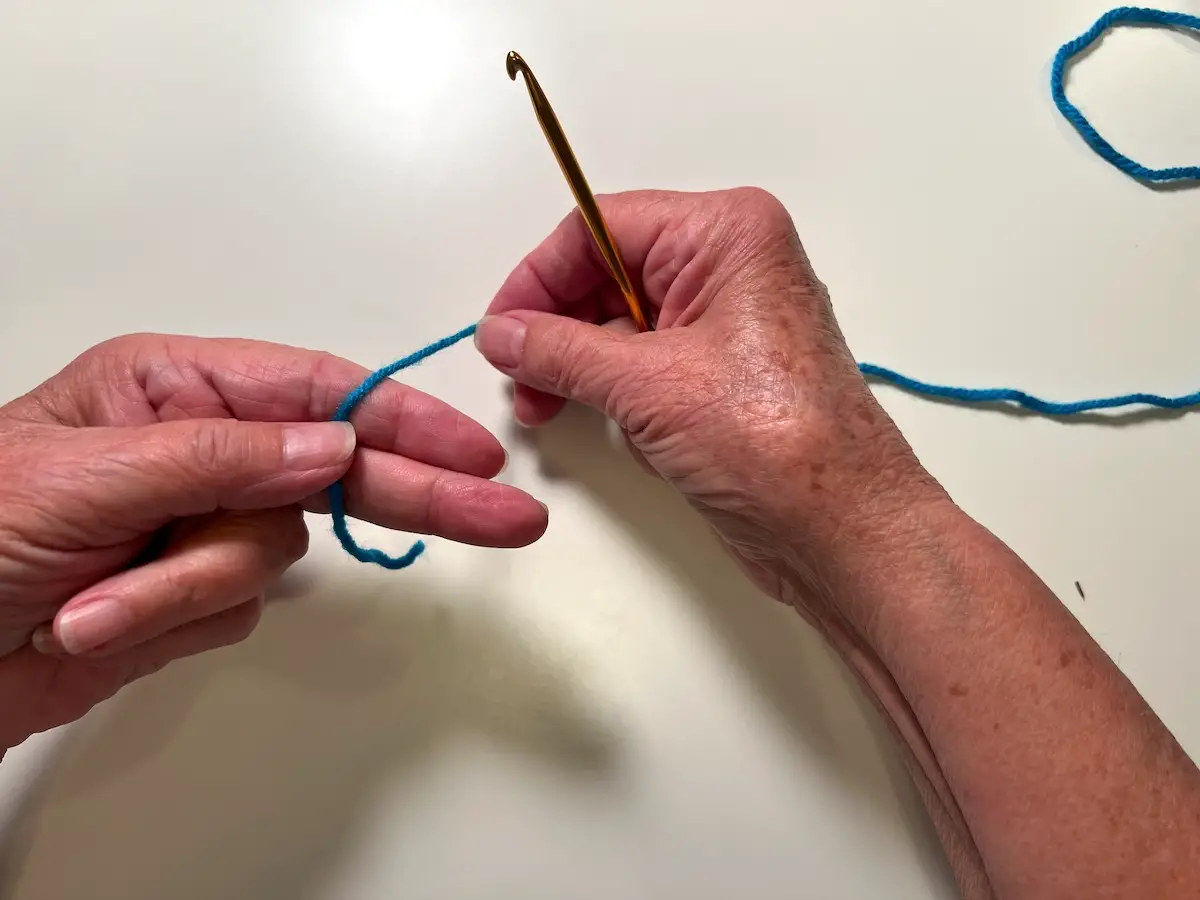
- Wrap the working yarn around your fingers, forming an X on the inside of your fingers.
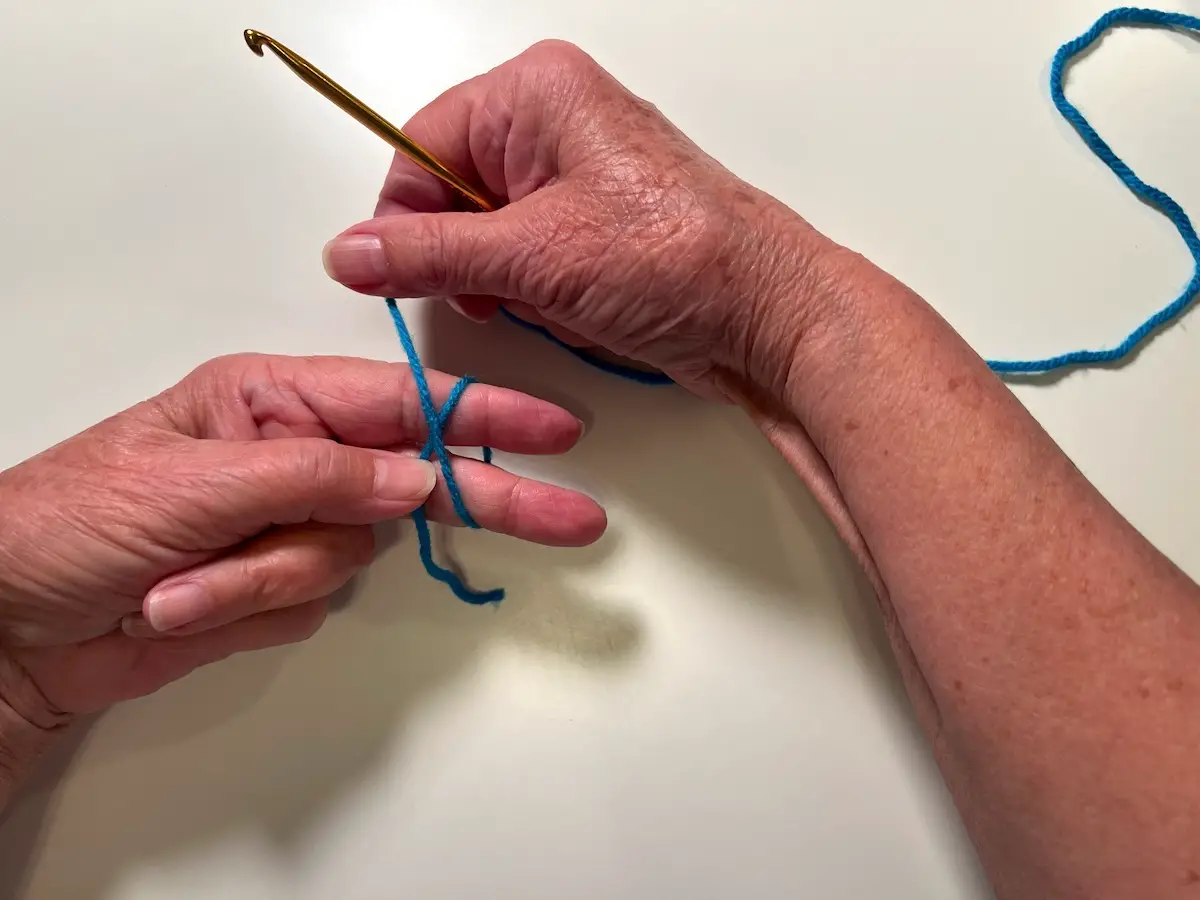
- There should be two parallel lines of the yarn on the front of your fingers.
- Place your hook under the first yarn to pick up the second yarn.
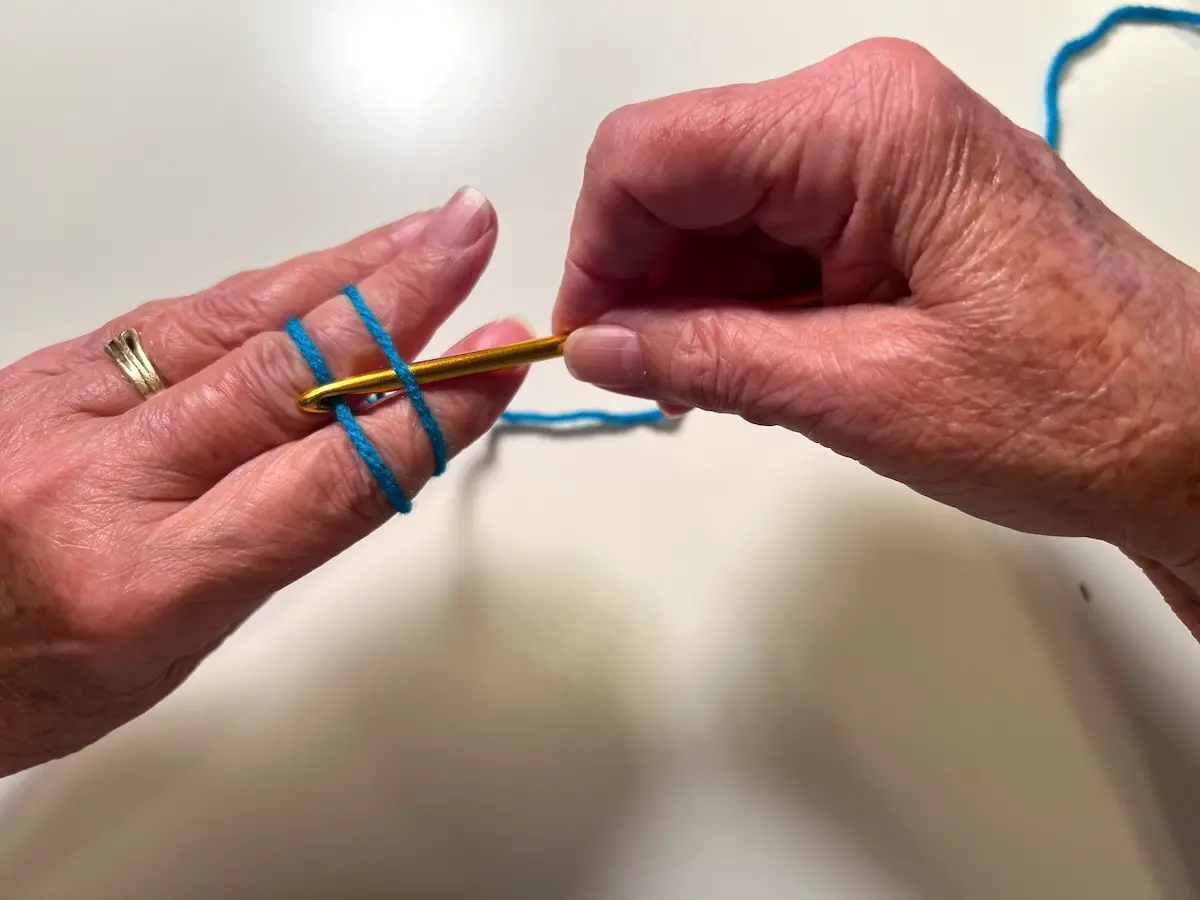
- Wrap the yarn around your hook to bring it to the front.

- Make a loop.
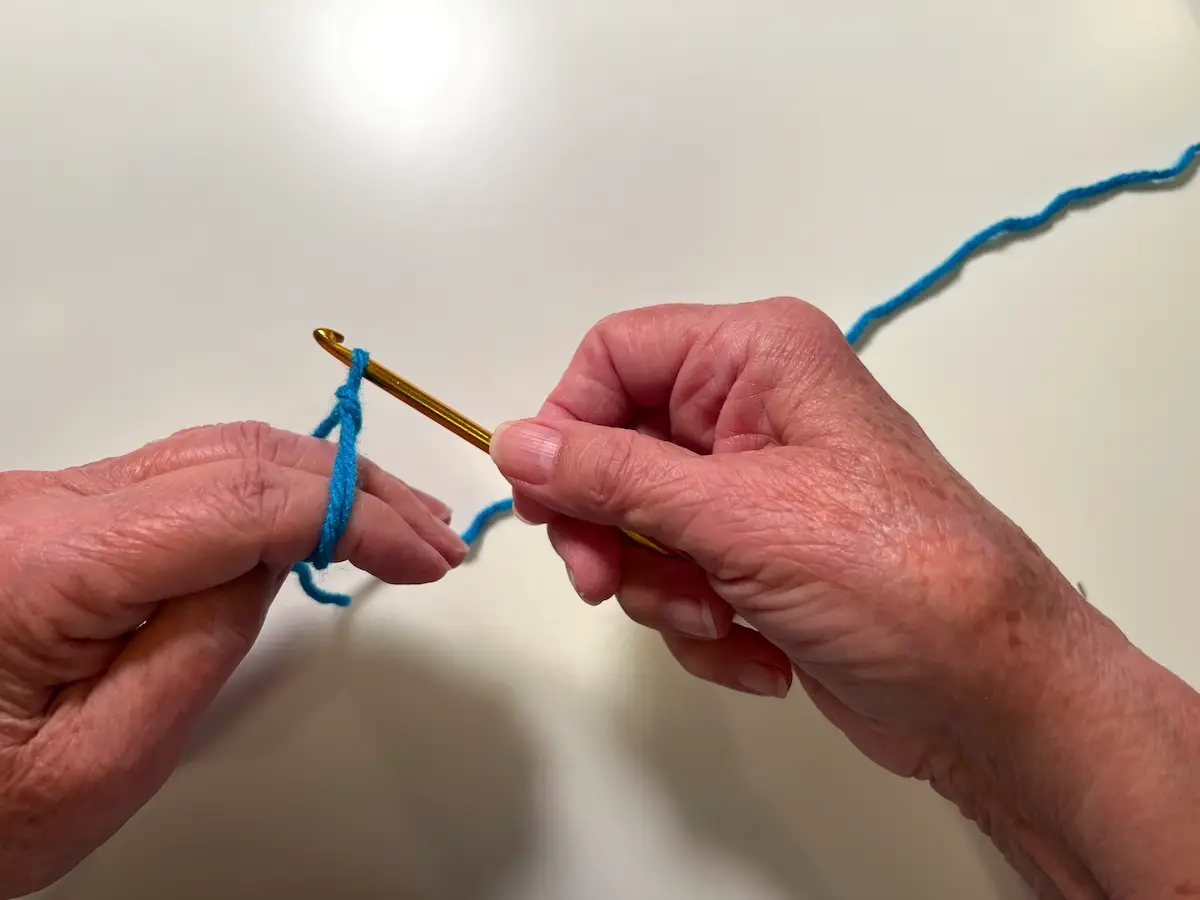
- Gently pull the yarn off your fingers to begin your project.

Working the first round of a granny square
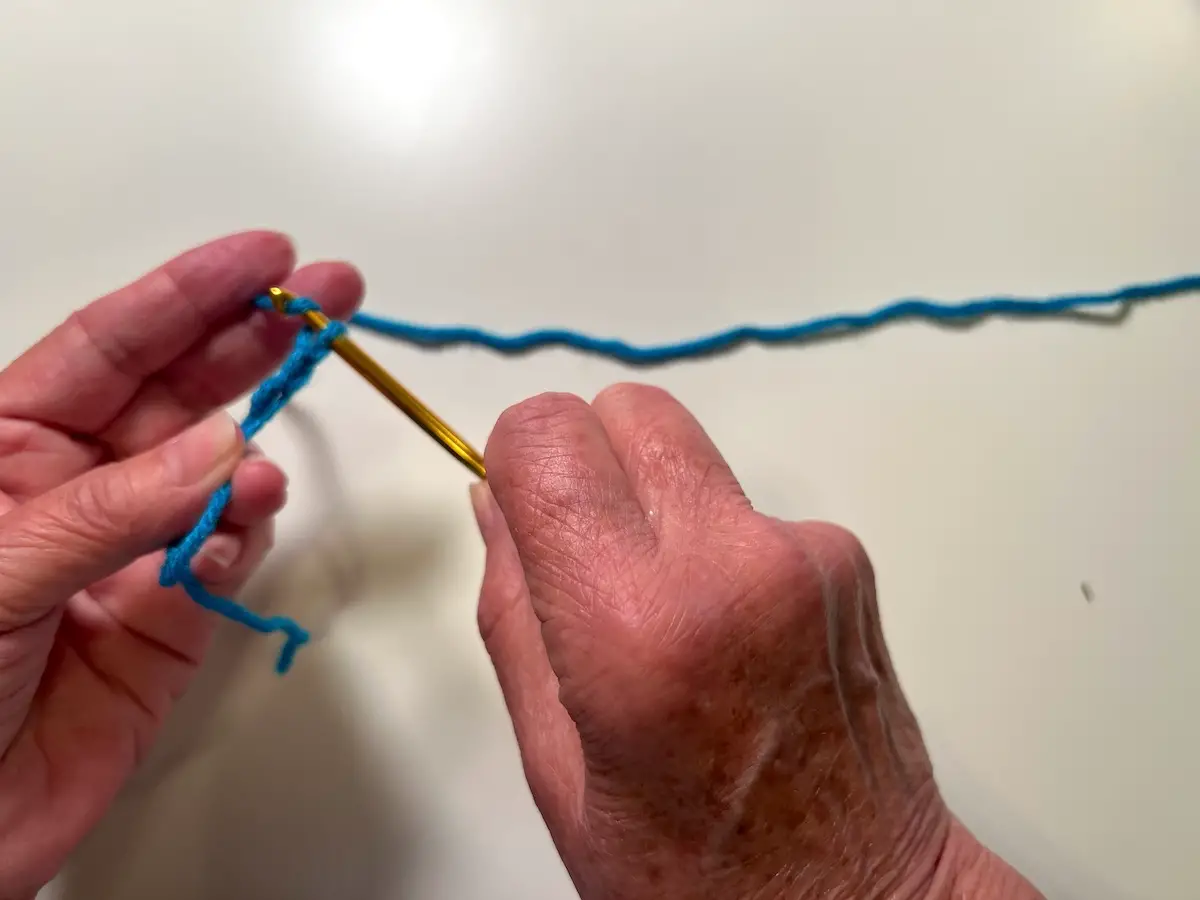
- Begin the first cluster in the first round with three (3) chain stitches and two (2) double crochet stitches. You'll start every round with three (3) chain stitches. This brings the yarn to the right height for the round. Here are three (3) chain stitches for the first round.
- Now, crochet two (2) double crochet stitches. Wrap the yarn around your hook.

- Place your hook in the magic circle.

- Wrap the yarn around your hook again. Now there are three (3) stitches on your hook..
- Loop the yarn around your hook and bring it through the first two (2) stitches. Now there are two stitches left on your hook.

- Wrap the yarn around your hook and pull through both stitches. You've just made your first double crochet!
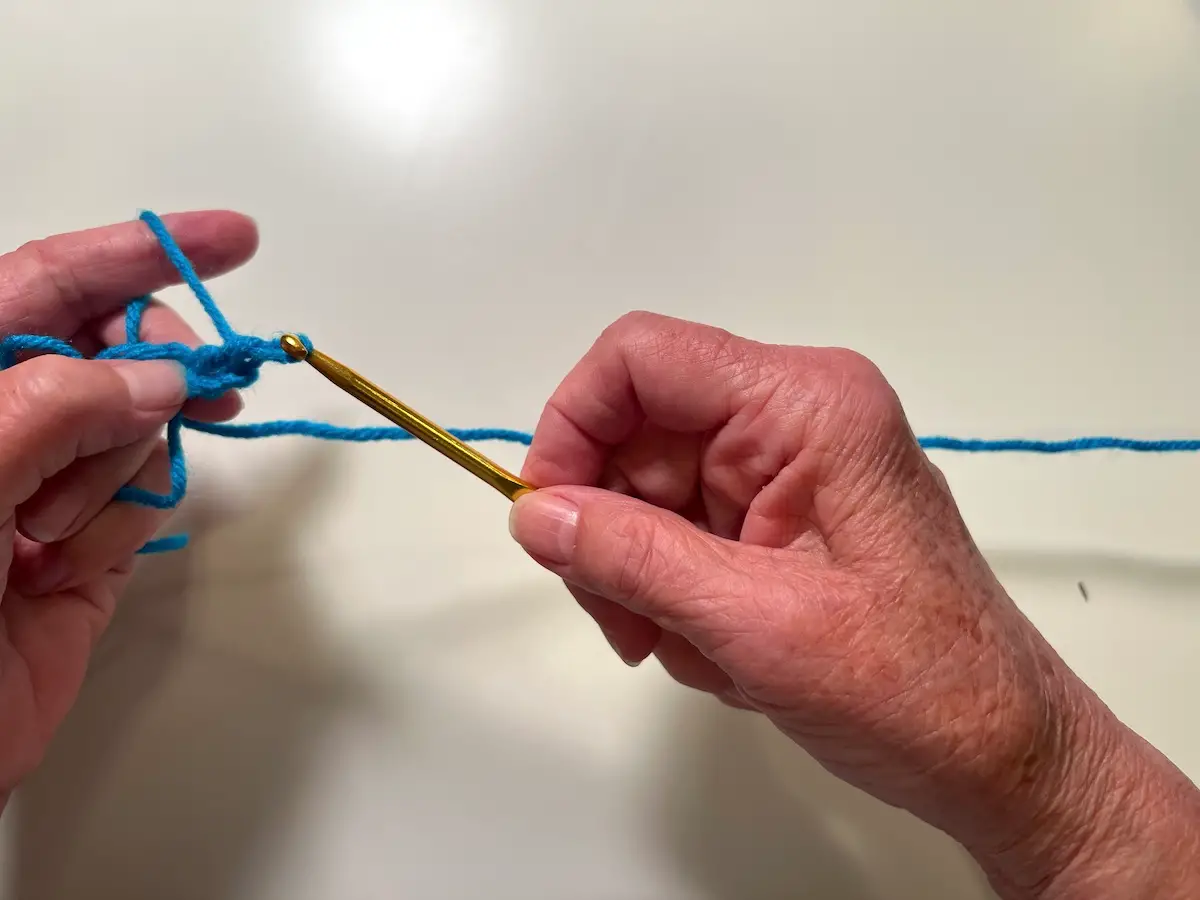
- Follow the steps for double crochet one more time to make your first cluster.
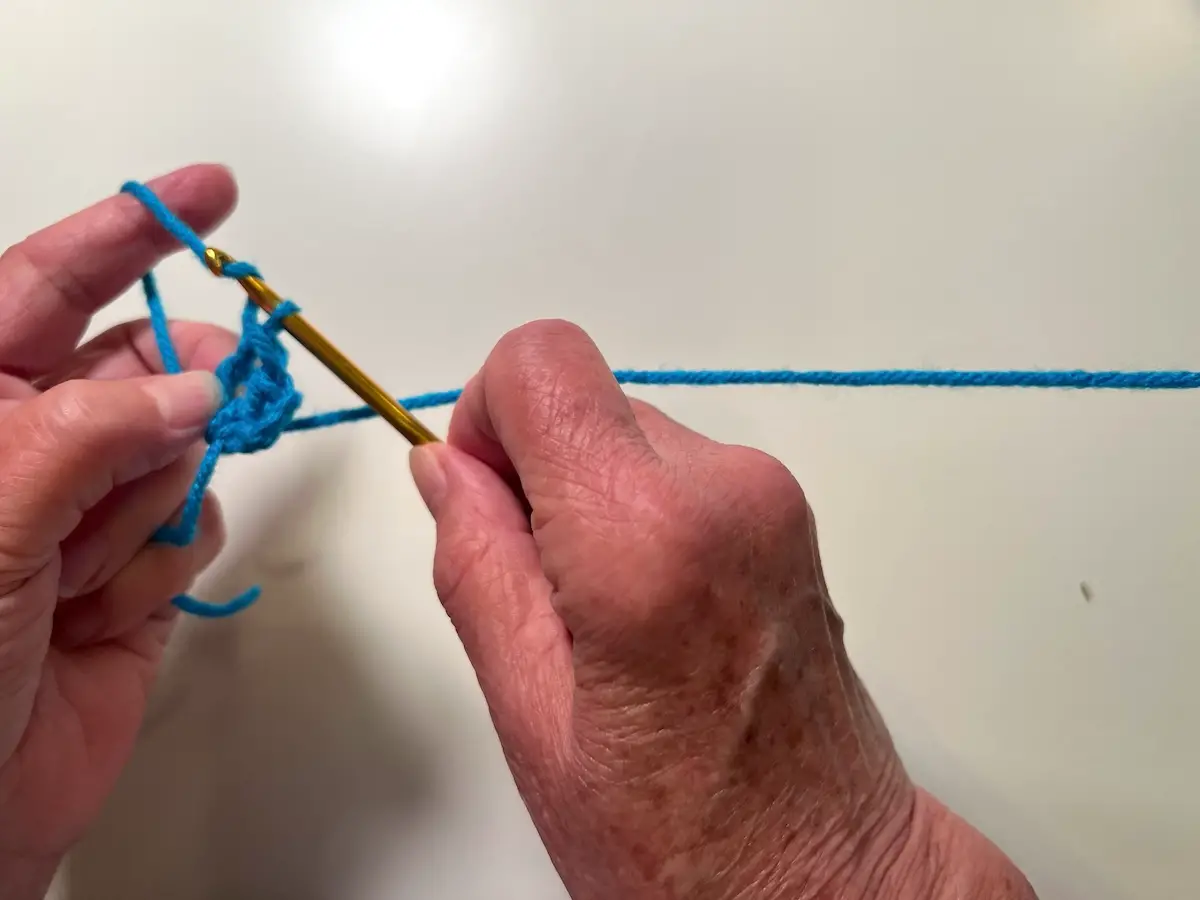
- Next, chain three that provides an opening to crochet into for the next round.

- For the next three clusters, three (3) double crochet stitches, and three (3) chain stitches. Here I'm starting the next double crochet.
- Do this two (2) more times. You should have four (4) clusters of three (3) stitches that are separated by three (3) chain stitches.
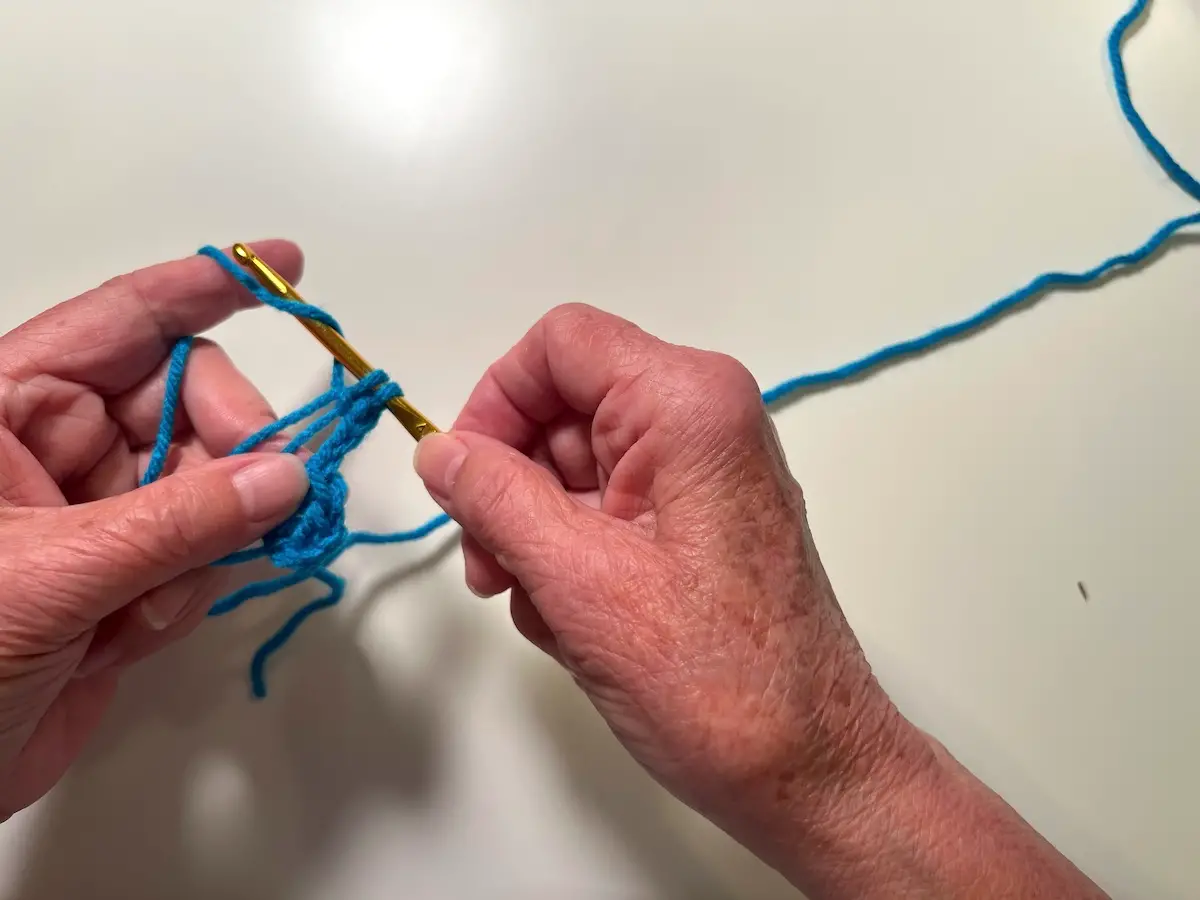
- End the round by placing your hook through the space between the starting set of three (3) chain stitches and the first double crochet. Wrap the working yarn around your hook and bring it through the space and through the stitch on your hook.
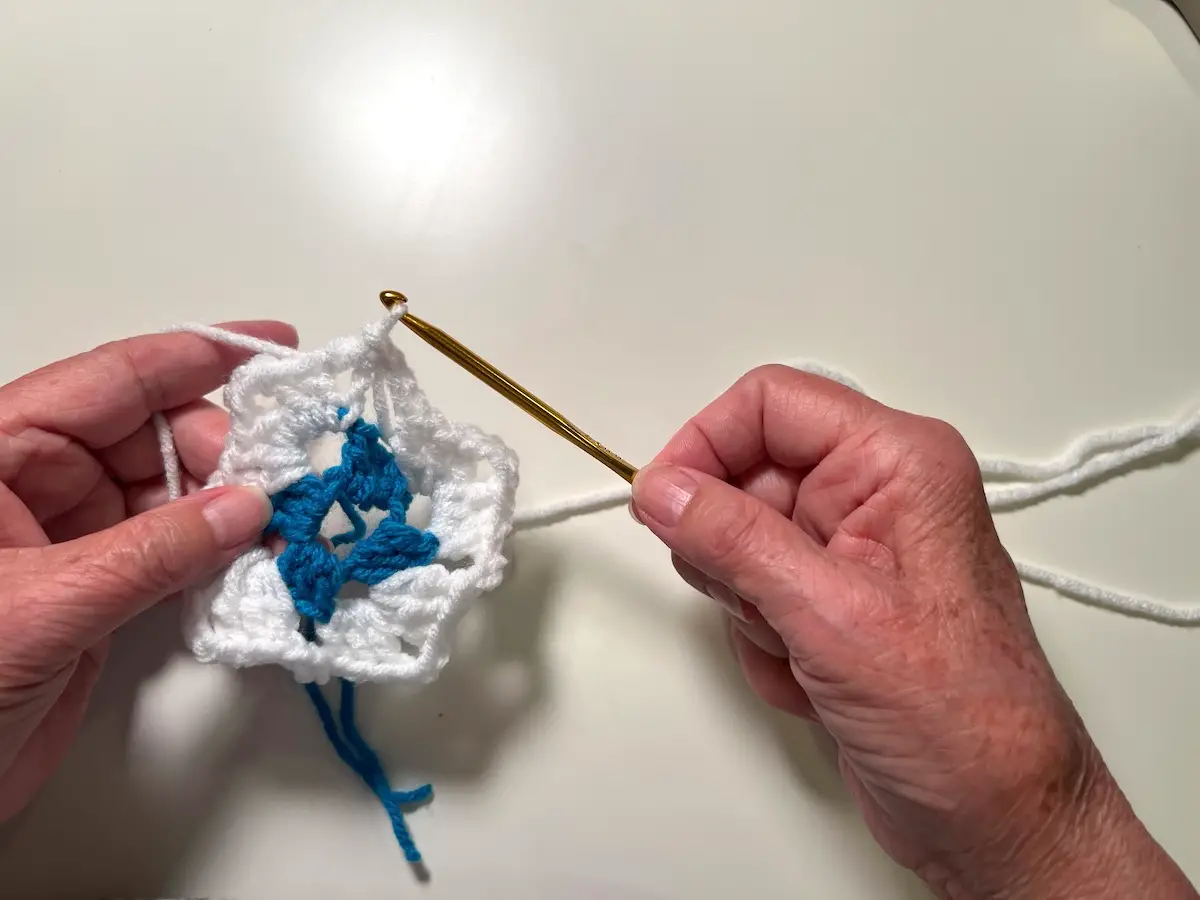
- Cut the working yarn, leaving about a 5-6 inch tail. Bring it through the loop to form a knot. The first round is complete.
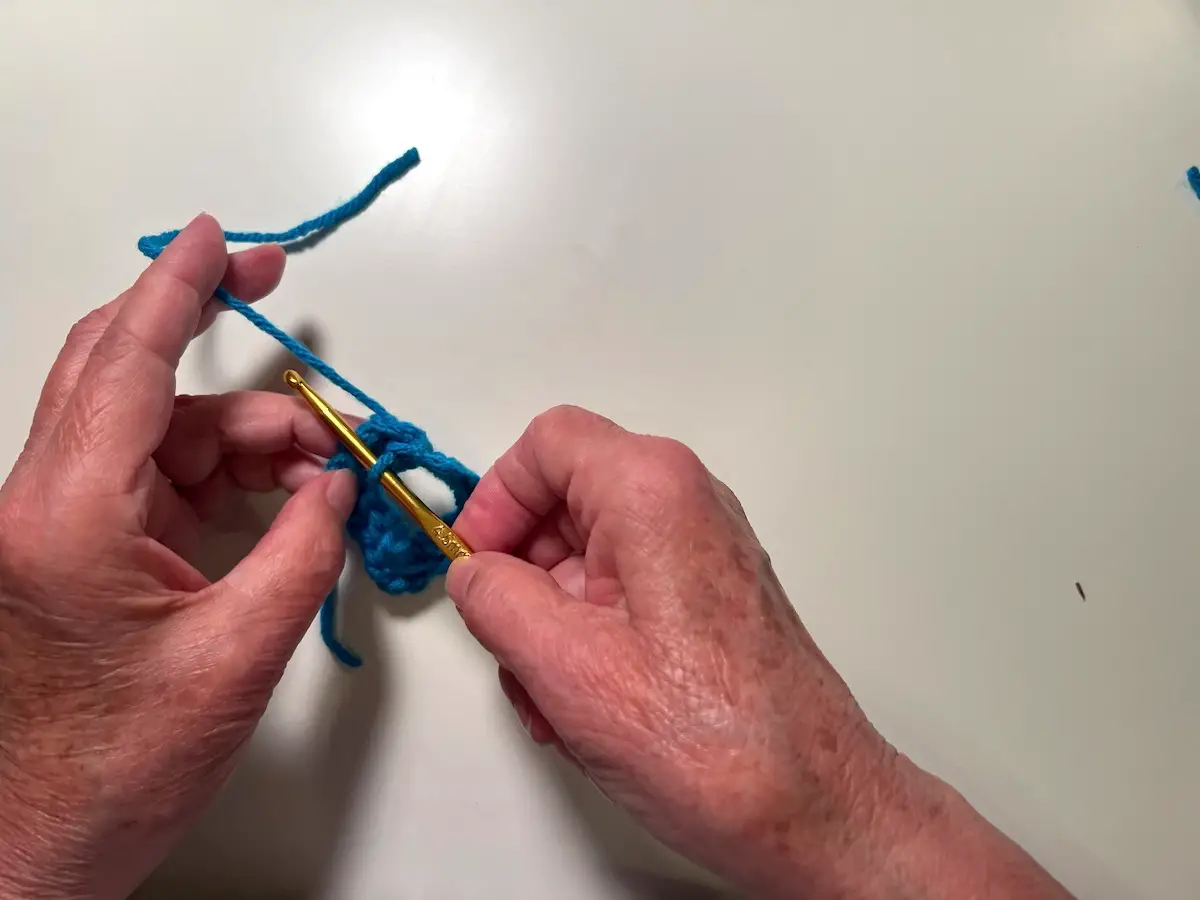
- Now is time for the magic! To close the opening in the center of the square, pull the first tail in the center of your square.
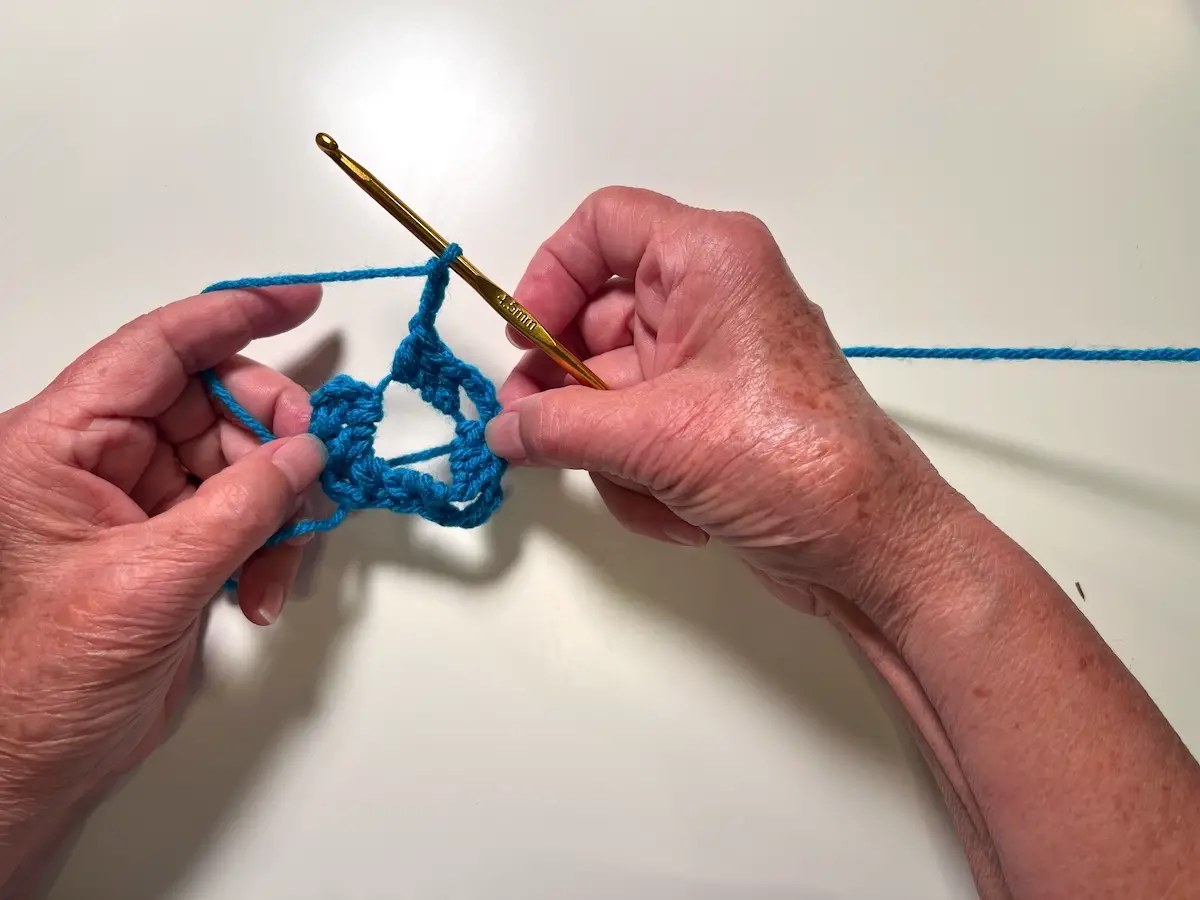
The second round of the granny square
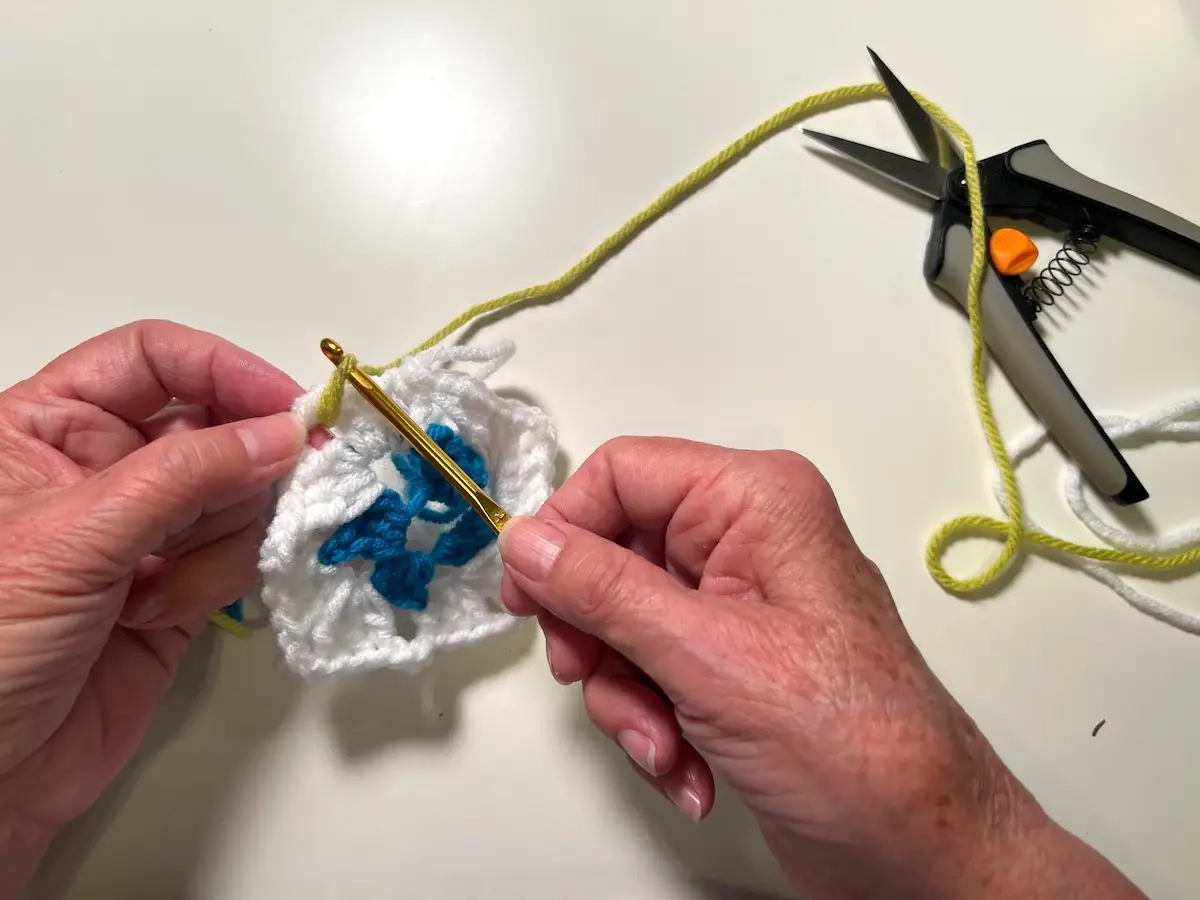
- Go to the first opening. Place your hook through to the wrong side. Make a loop with the new yarn and bring it to the front side.
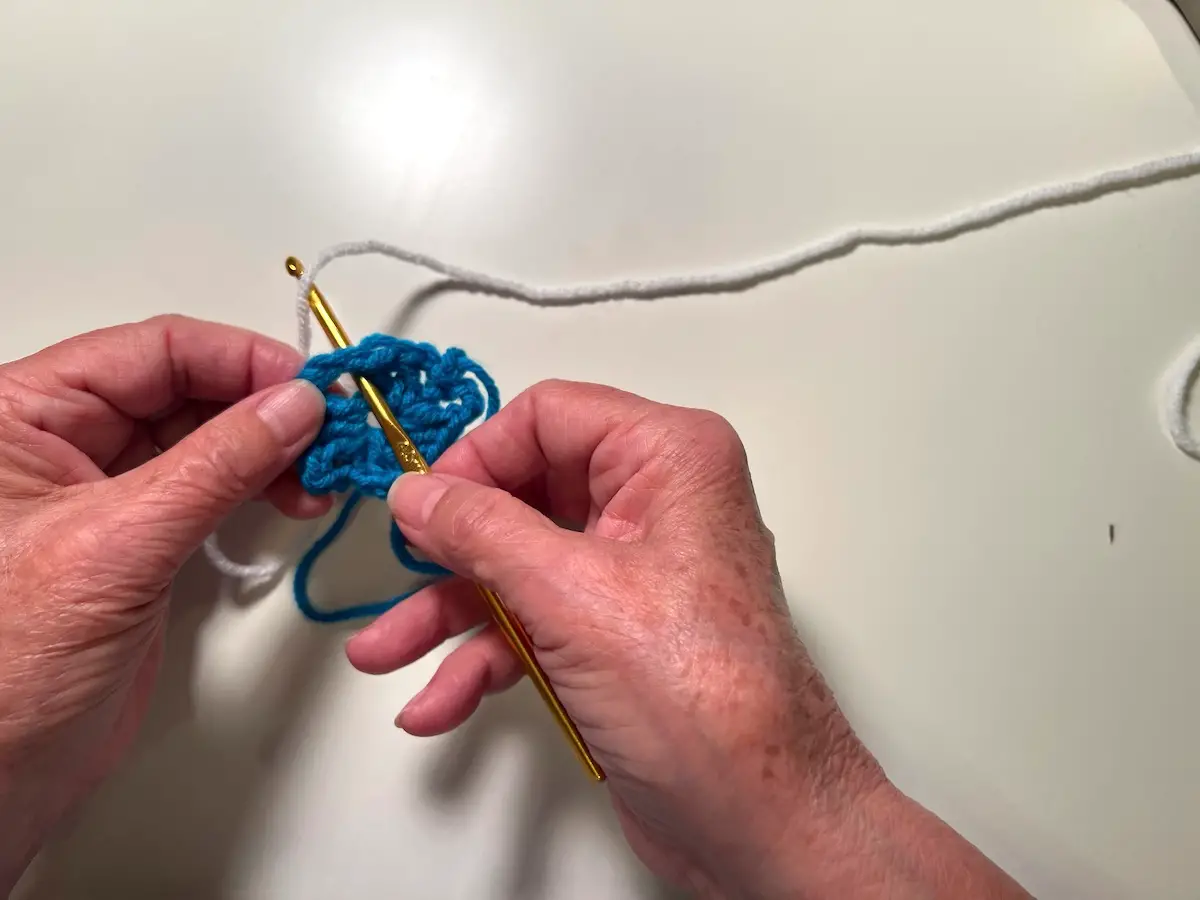
- Hold the tail to the back of the square. Make three (3) chain stitches.
- Just like the first round, then made two (2) double crochet stitches.
- This will be a corner on the second round. Next, chain three (3).
- And, three (3) double crochet.

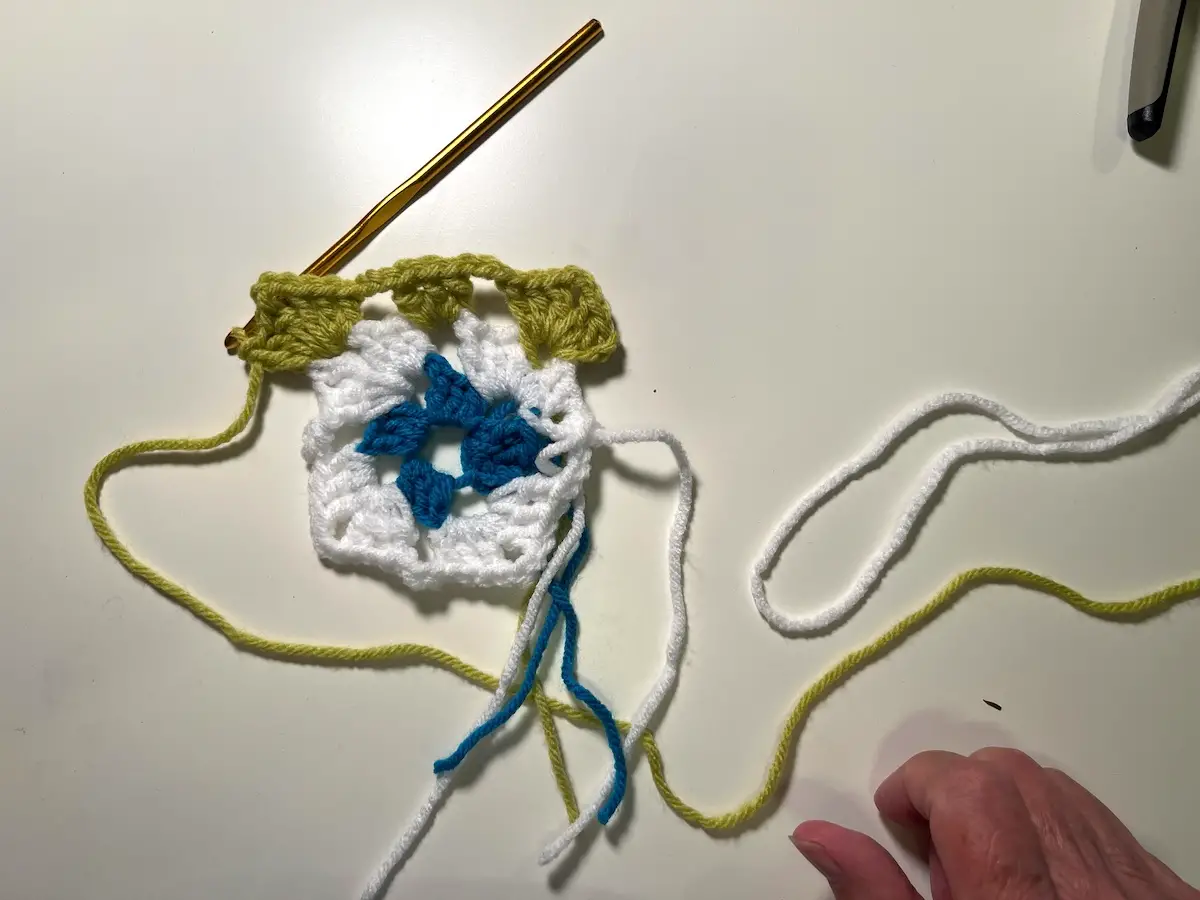
- Three (3) double crochet to get to the next corner and stitch three (3) double crochet, three (3) chain, and three (3) double crochet. Do this three (3) times until you have finished the second round. Slip stitch the round closed.
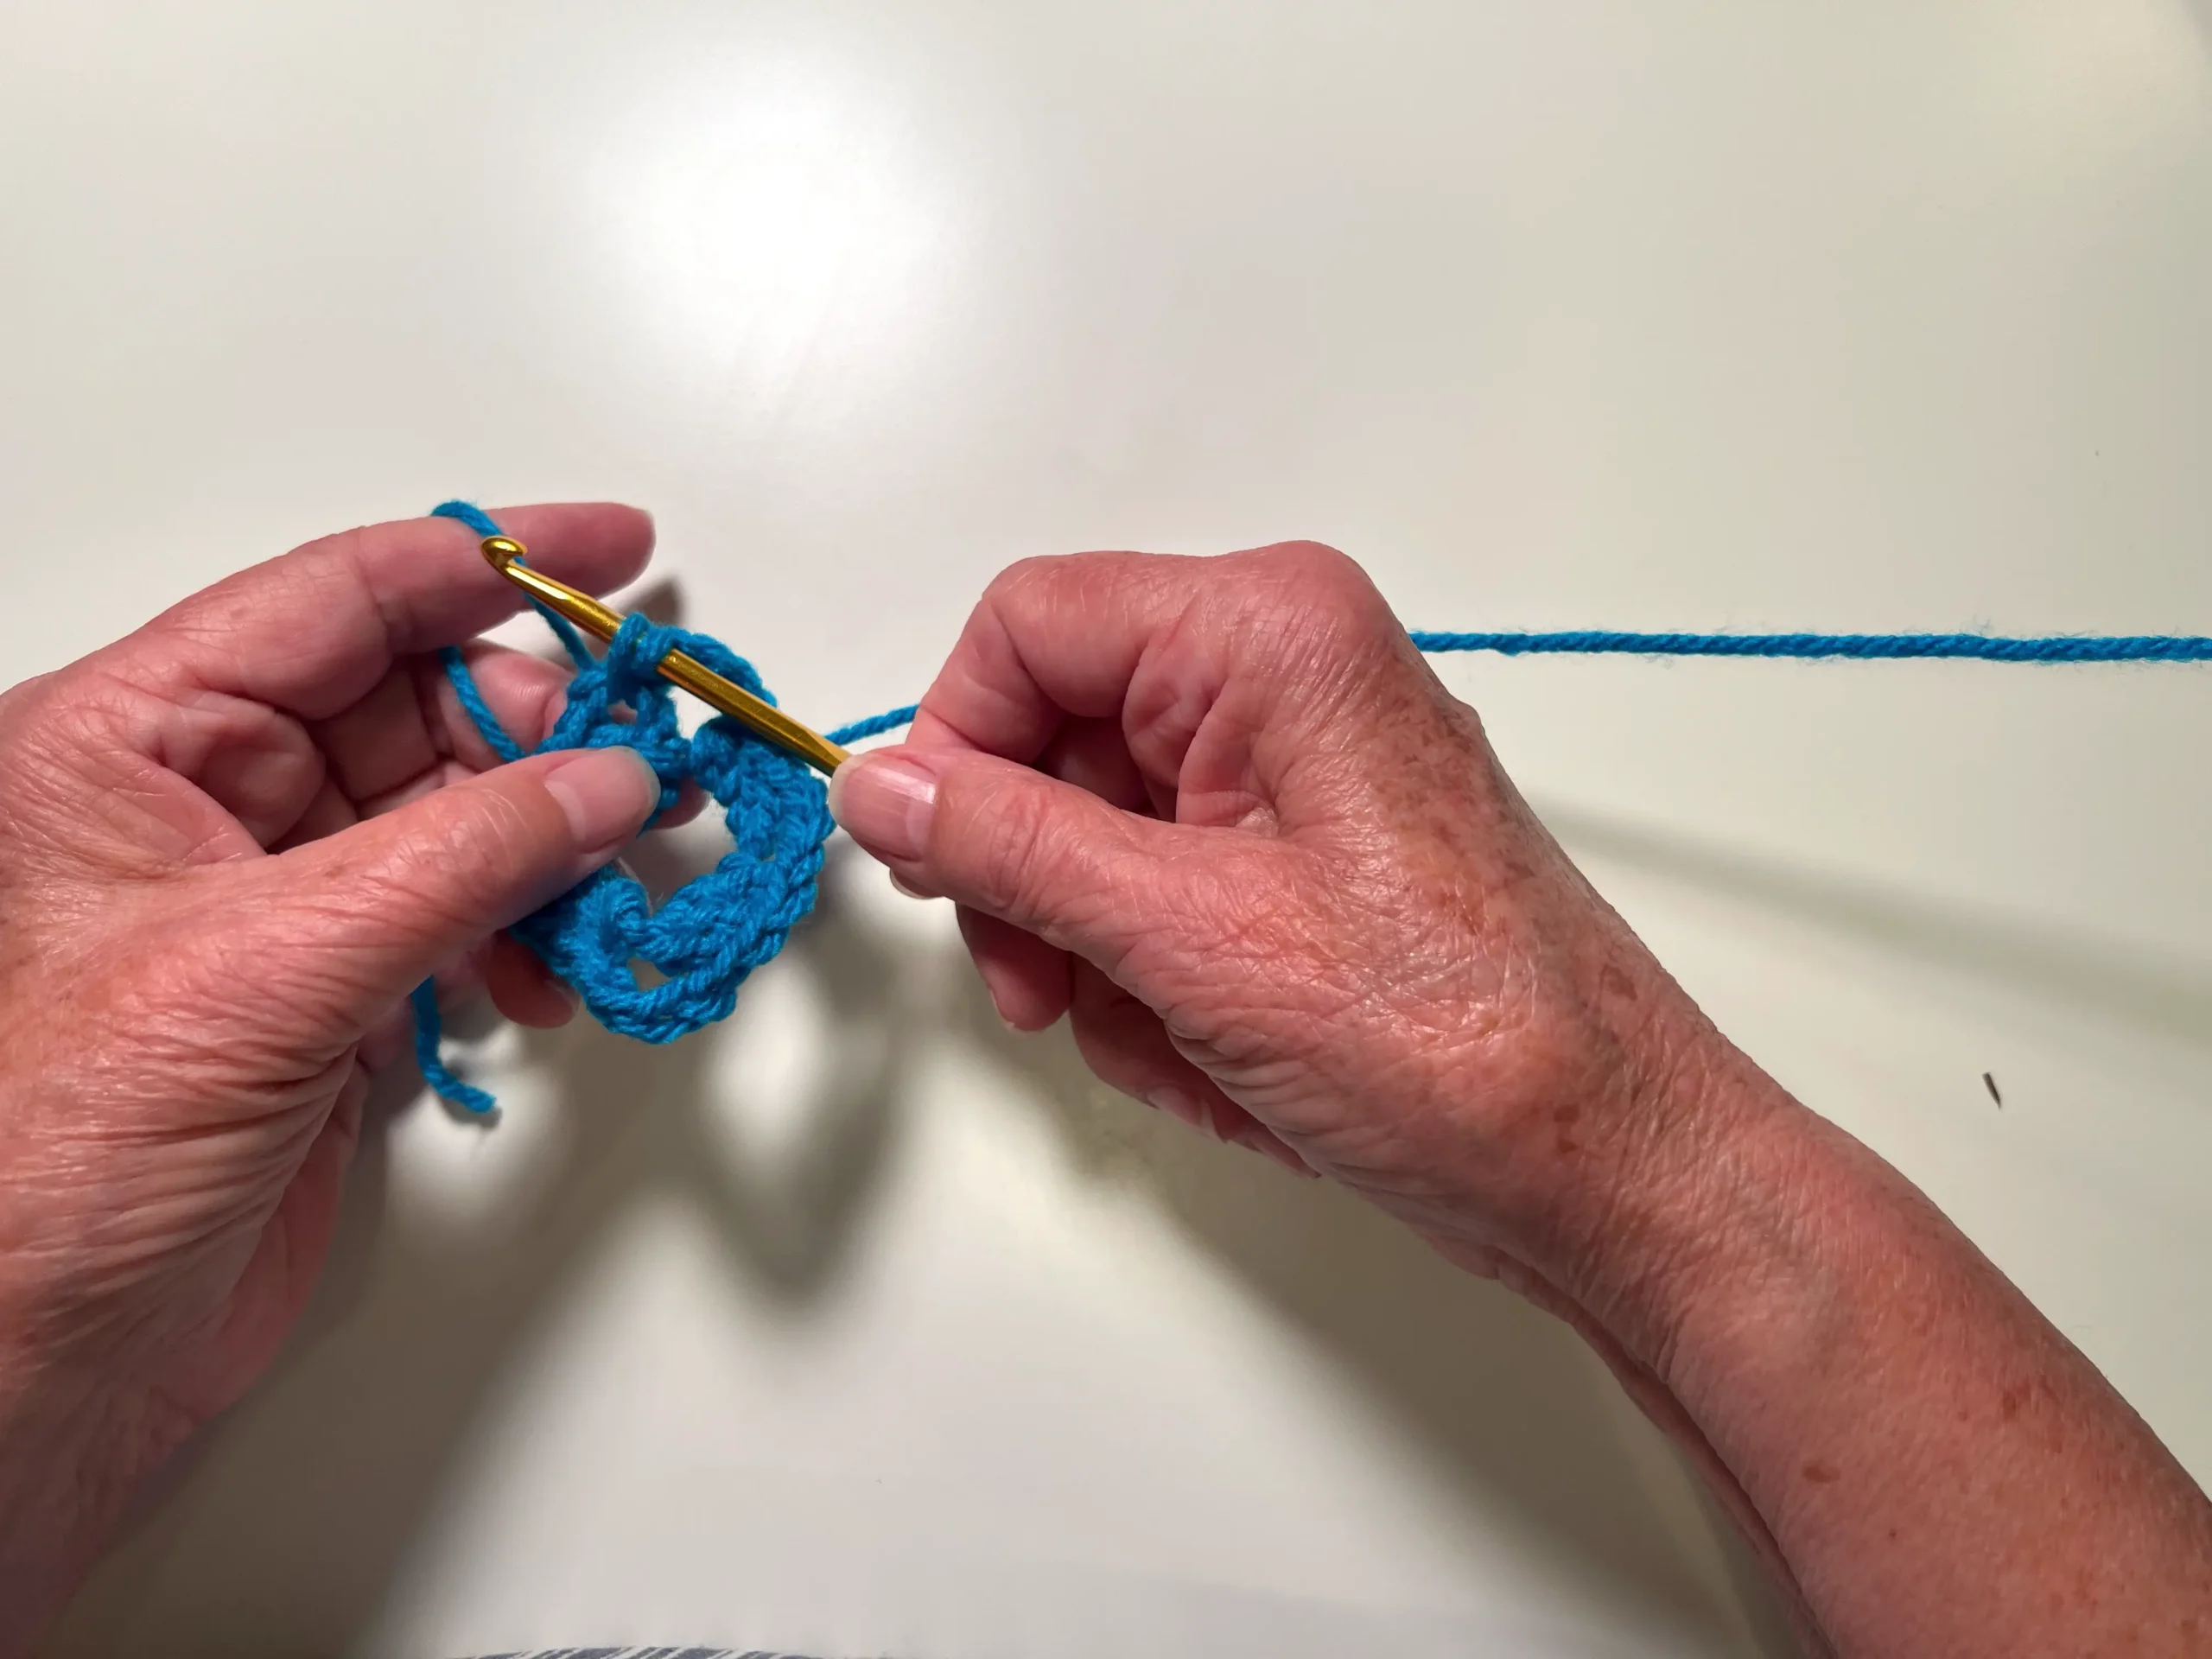
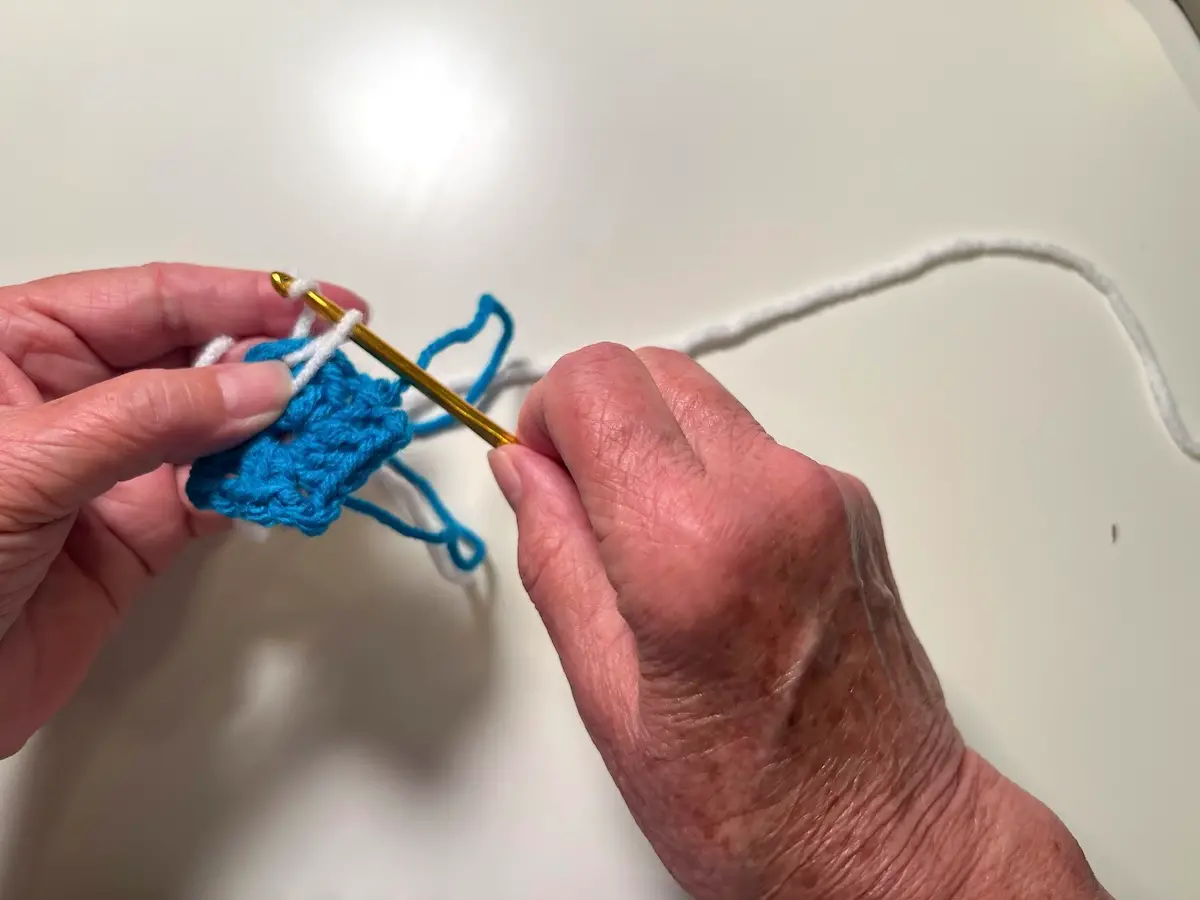
The third round of the granny square.
- Place your hook in the next opening to start the third round.
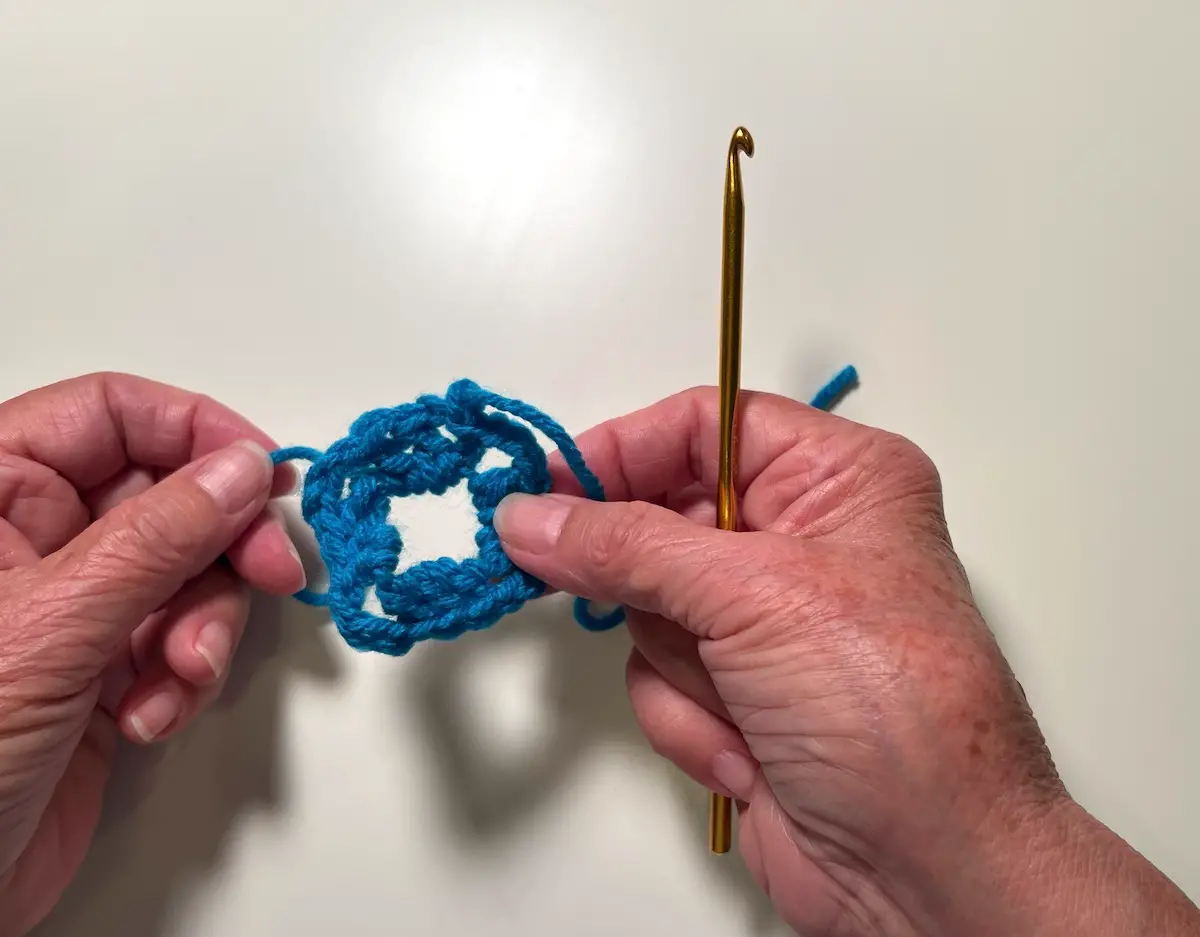
- The first opening is a corner. Start with three (3) chain stitches, and then two (2) double crochet. Then three (3) chain stitches. And, three (3) double crochet. Then chain three (3) to get to the next opening. This opening is on the side. Only stitch three (3) double crochet.Then chain three (3) to get to the next corner opening. Double crochet three (3) times, three (3) chain stitches, and three (3) more double crochet. Here is the work in progress.
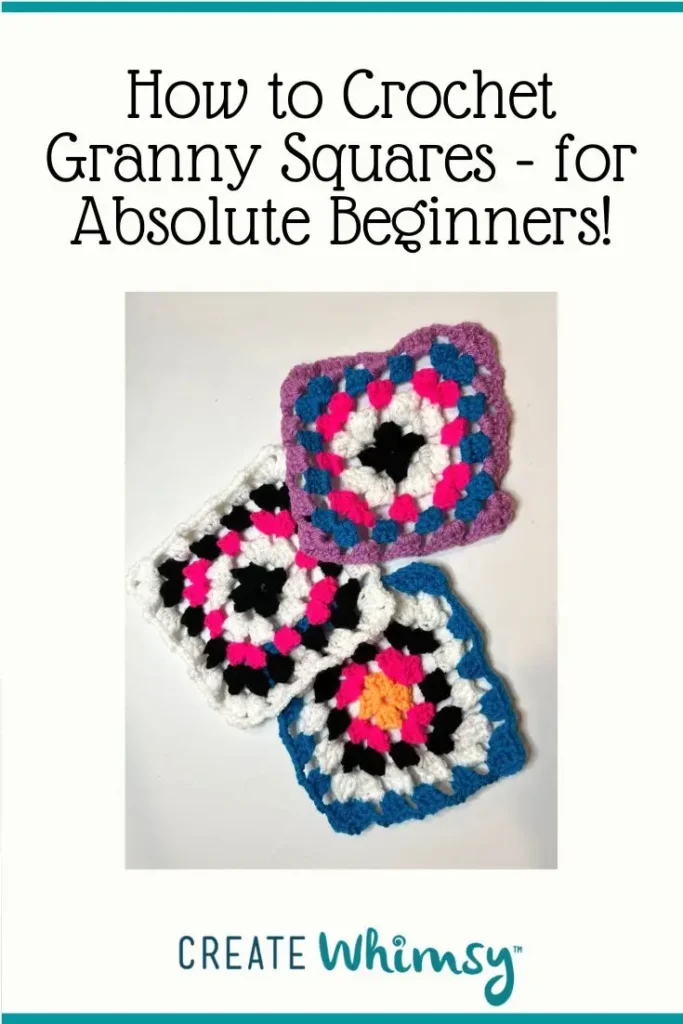
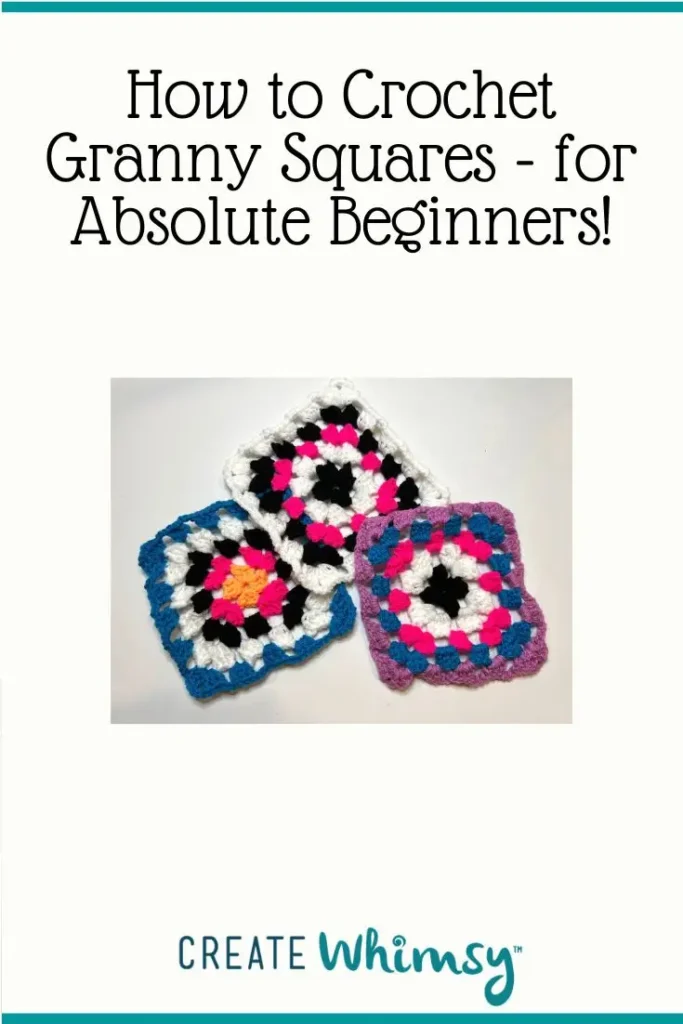
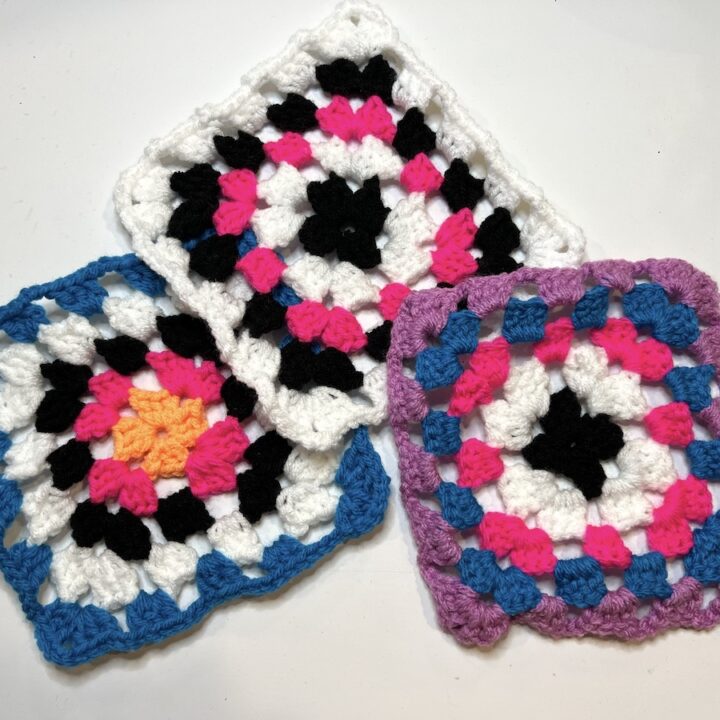
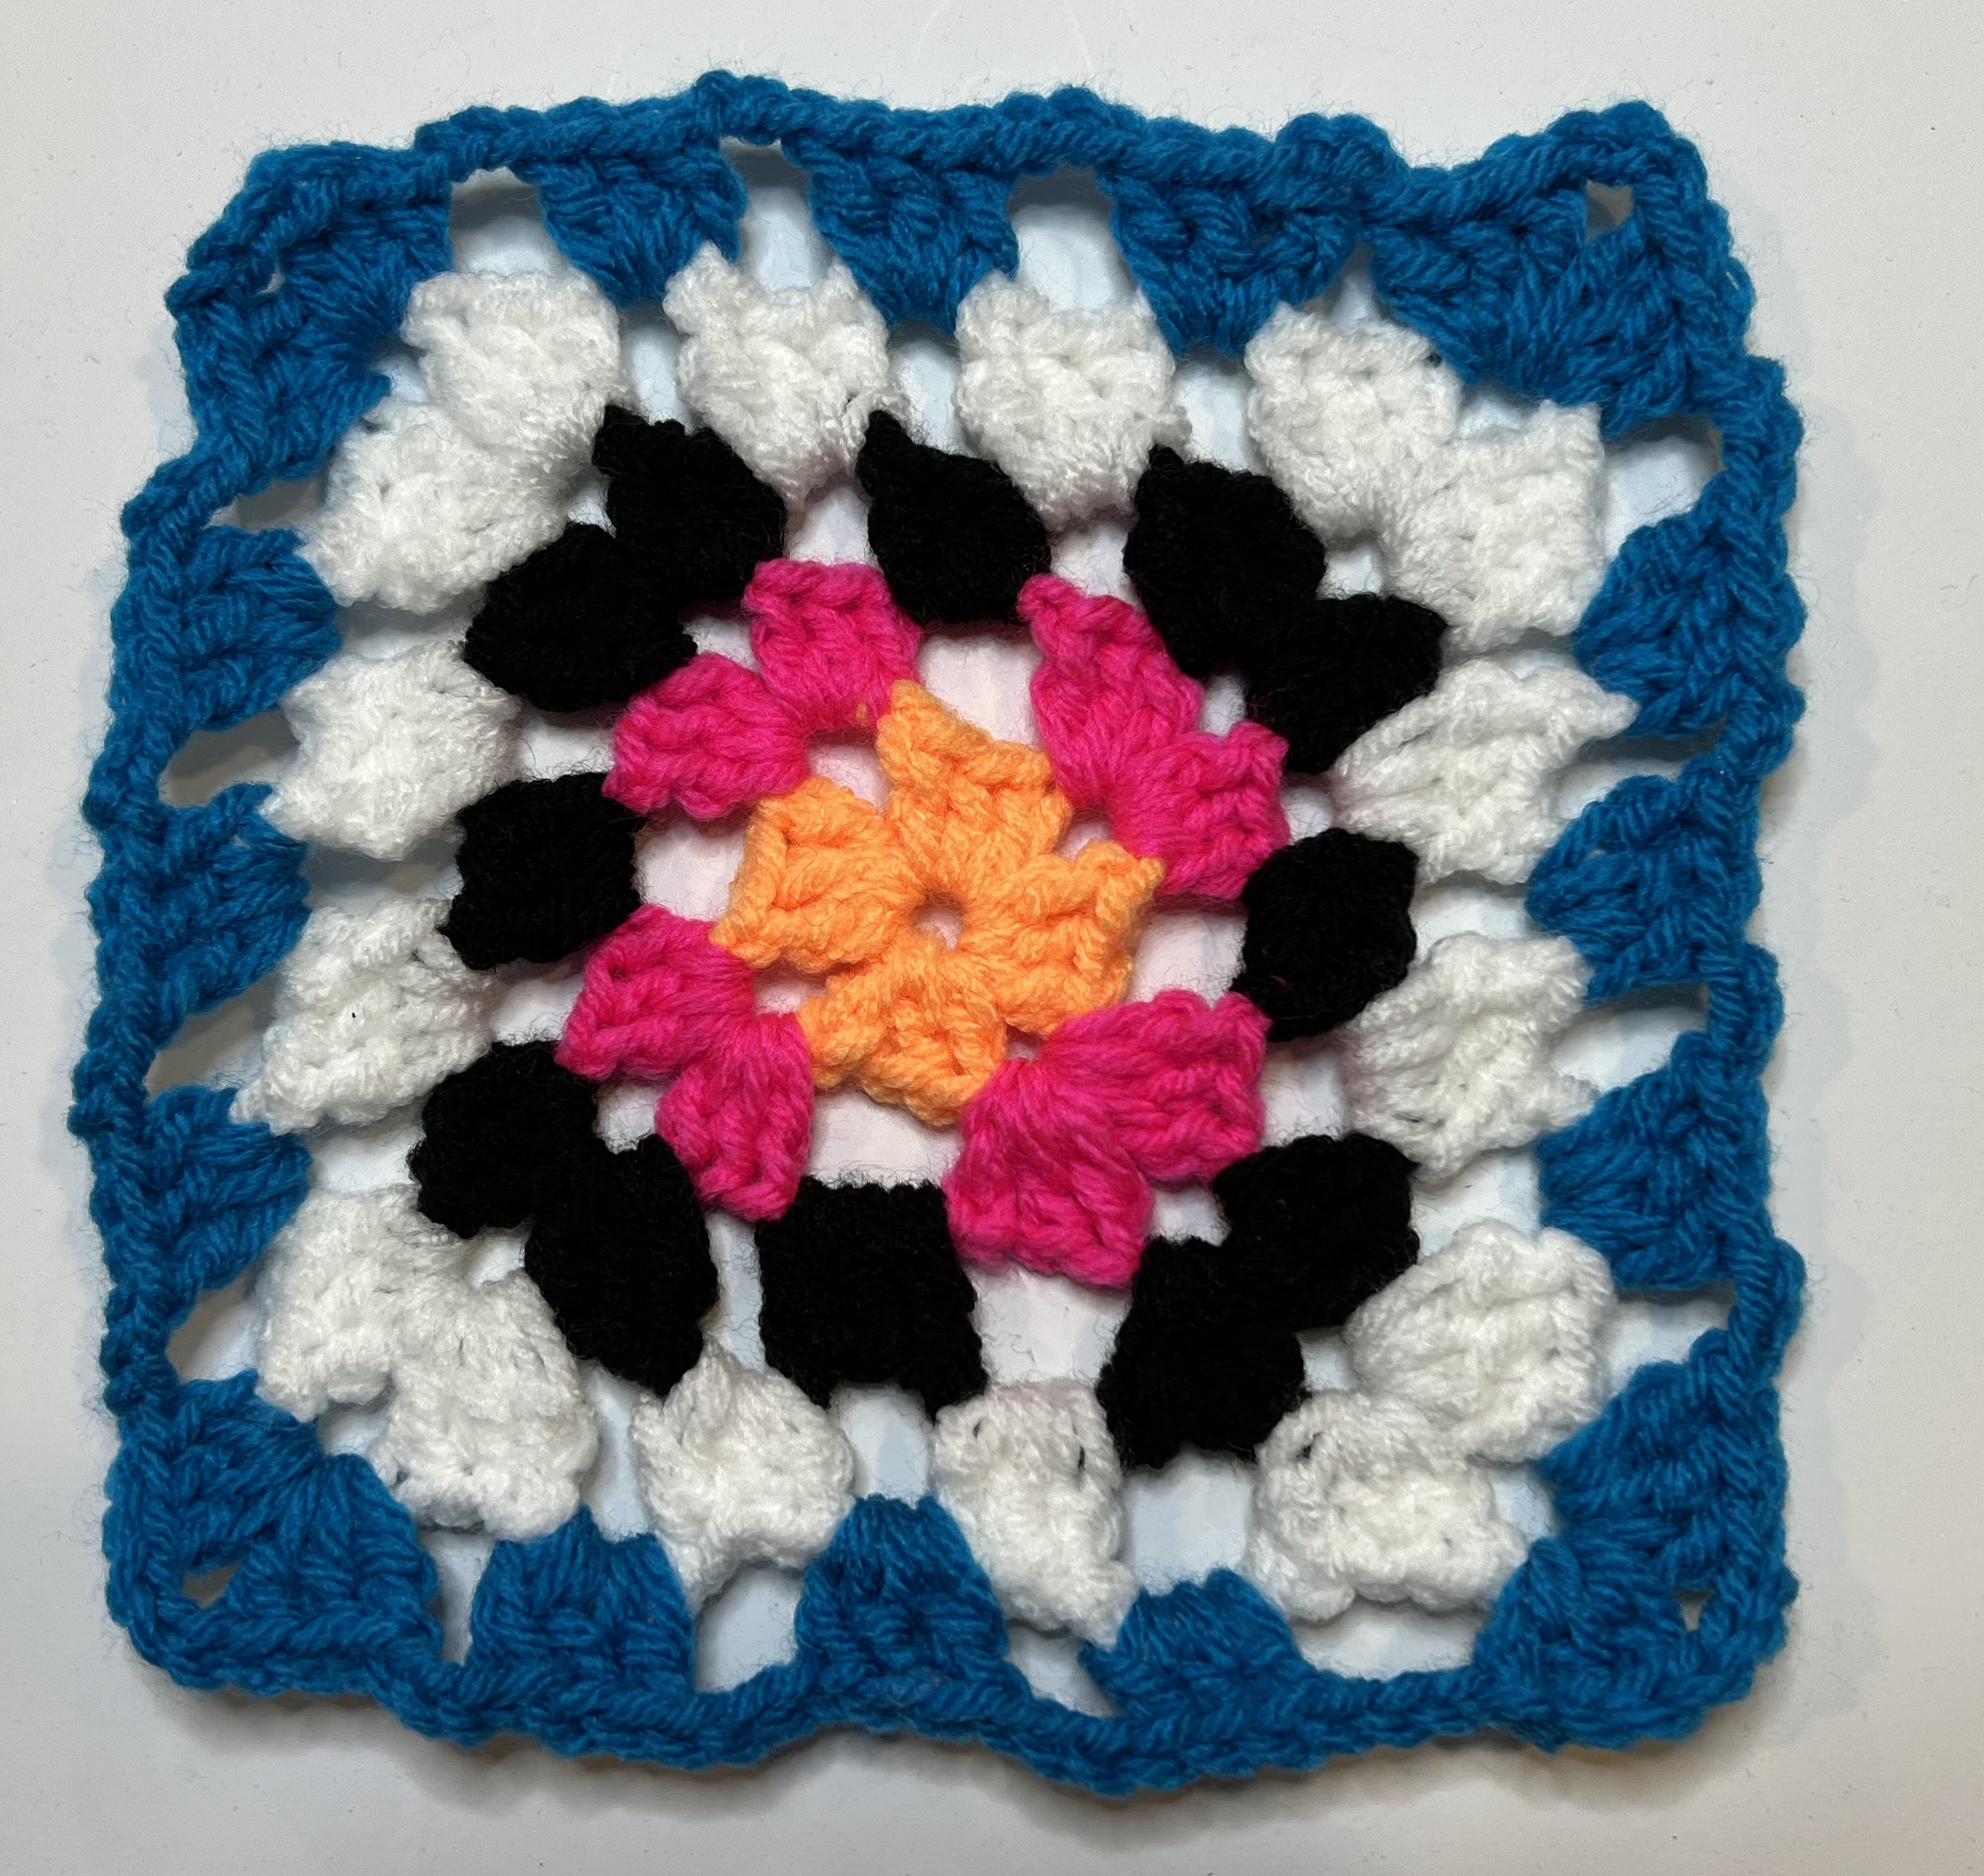
- Continue with this pattern until you have finished the granny square. You can add more rounds to make it the size you like!I made five (5) rounds to make a granny square that is about 6" square.
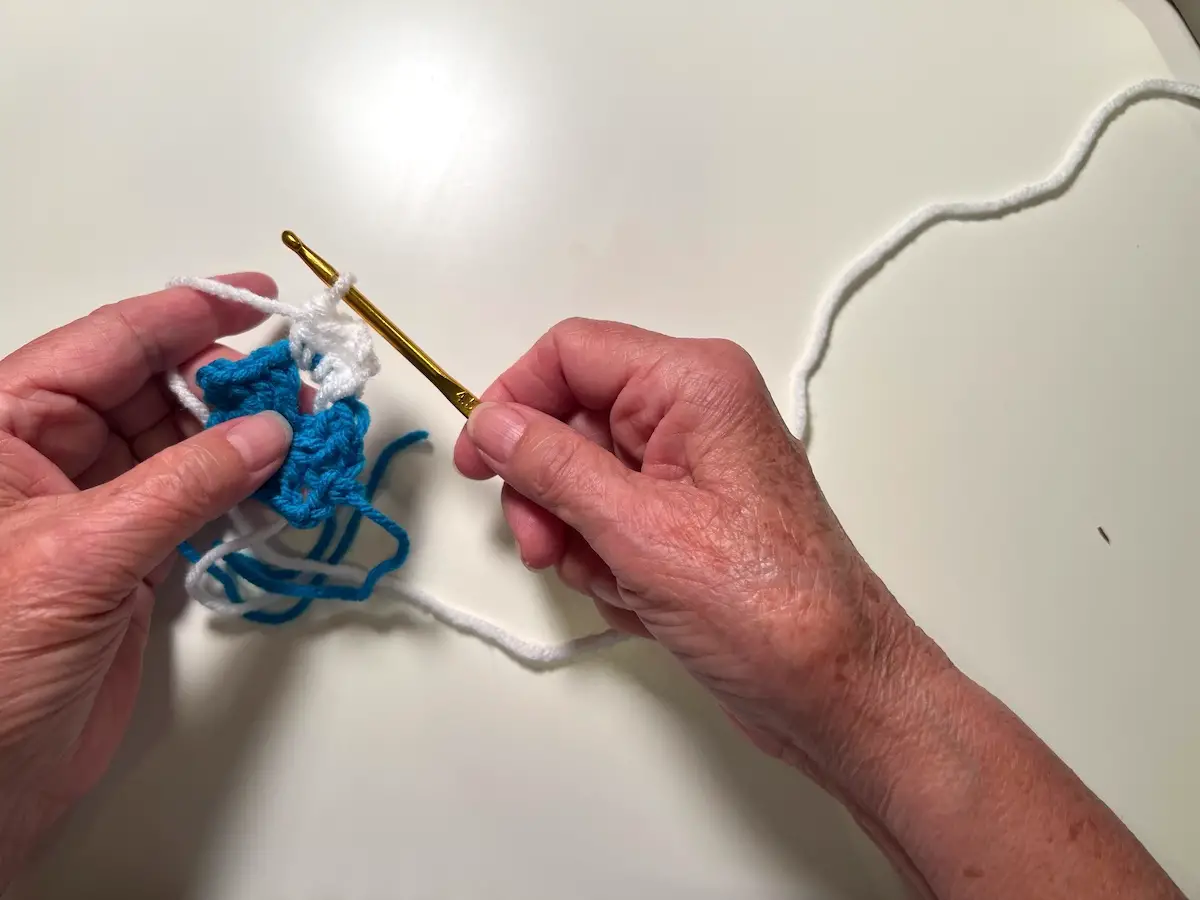
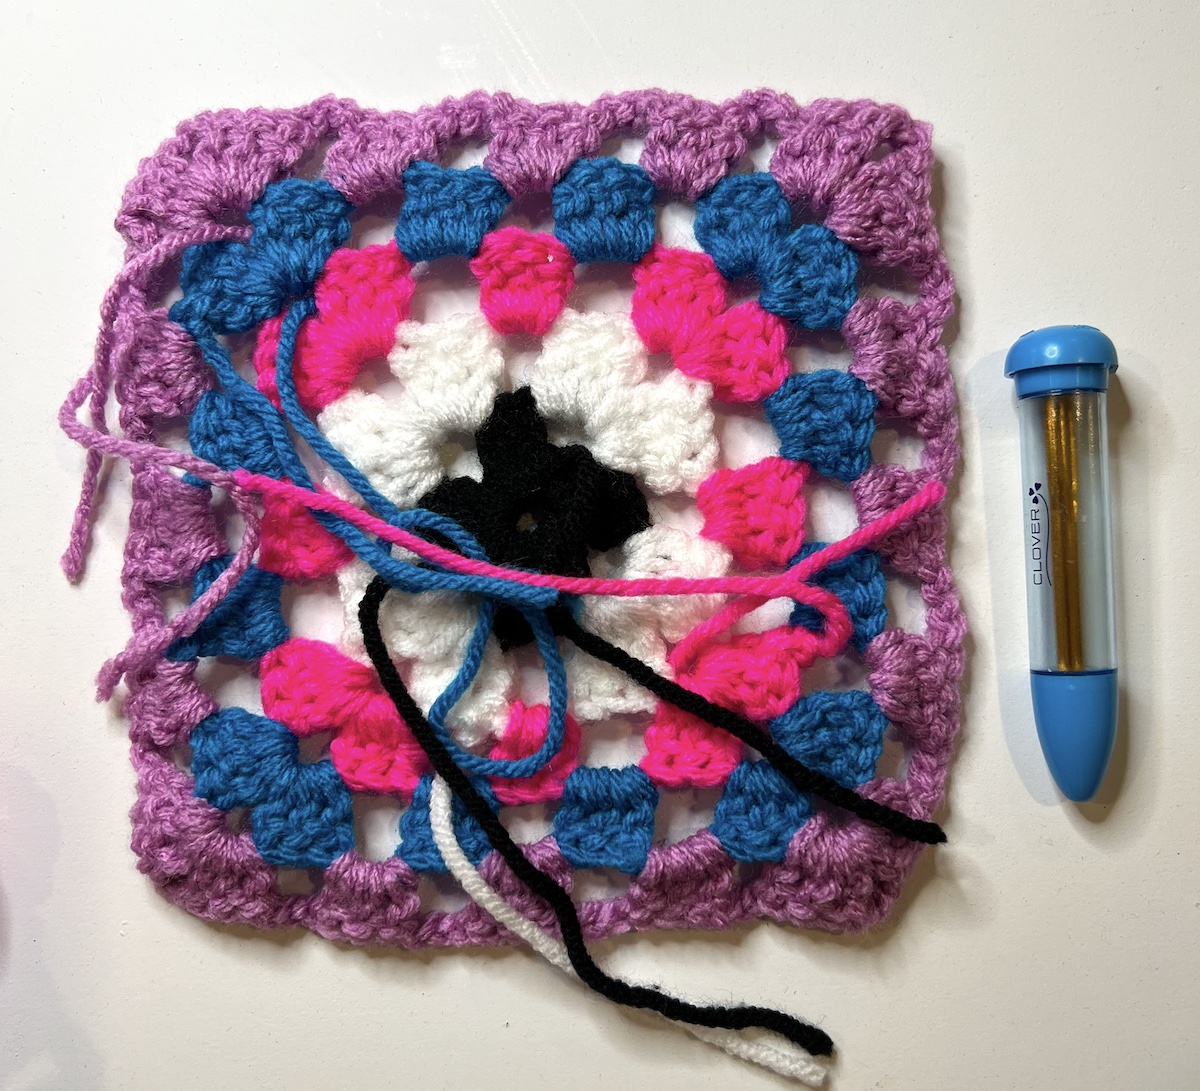
Weave in your yarn ends
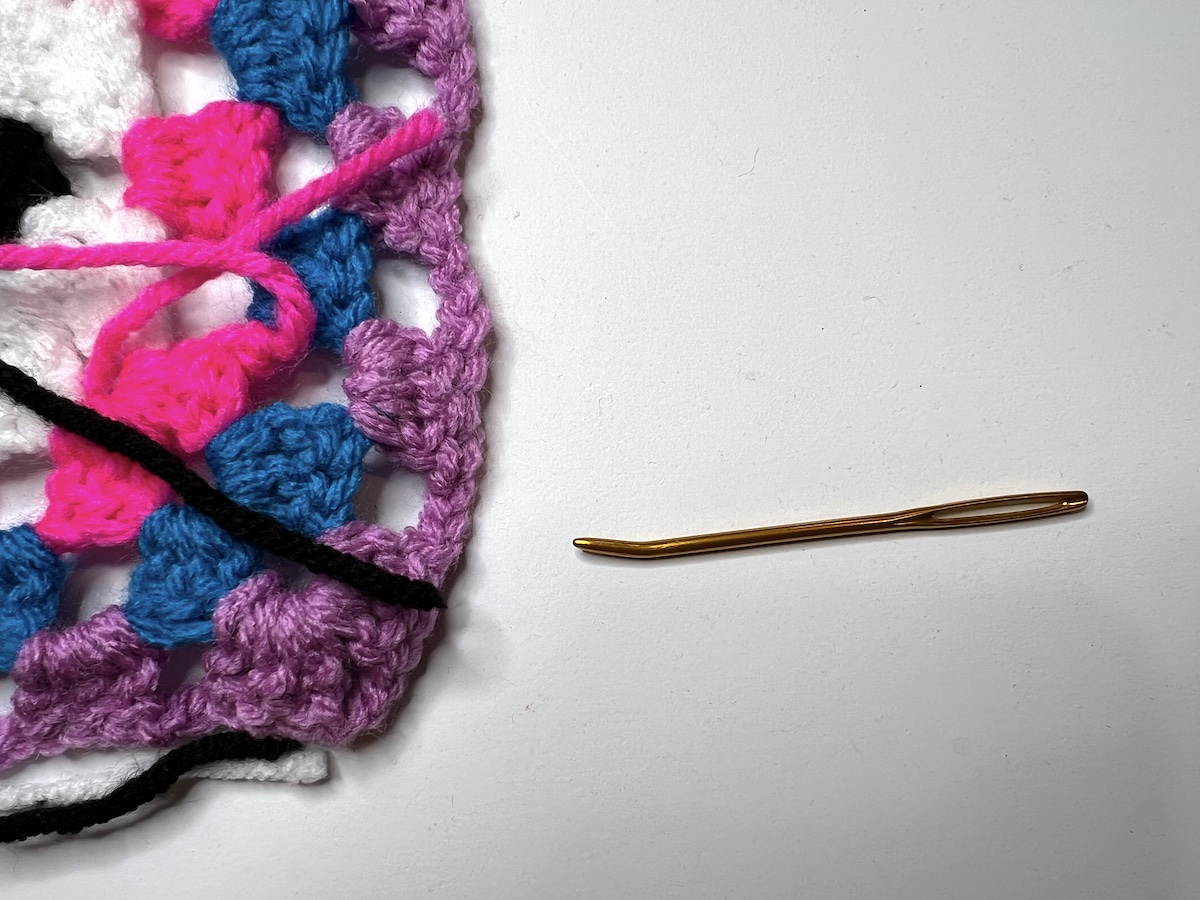
- A darning needle is used to weave in your yarn ends. I like this one from Clover that has a large eye, blunt tip and a slanted end.
- Here is a close-up of the needle next to the granny square so you can see the slant and the big eye.
- Work from one side of your granny square. To thread the needle, take the yarn and loop it around the eye of the needle. Pinch the yarn close to the needle and slip the loop off of the top of the needle.
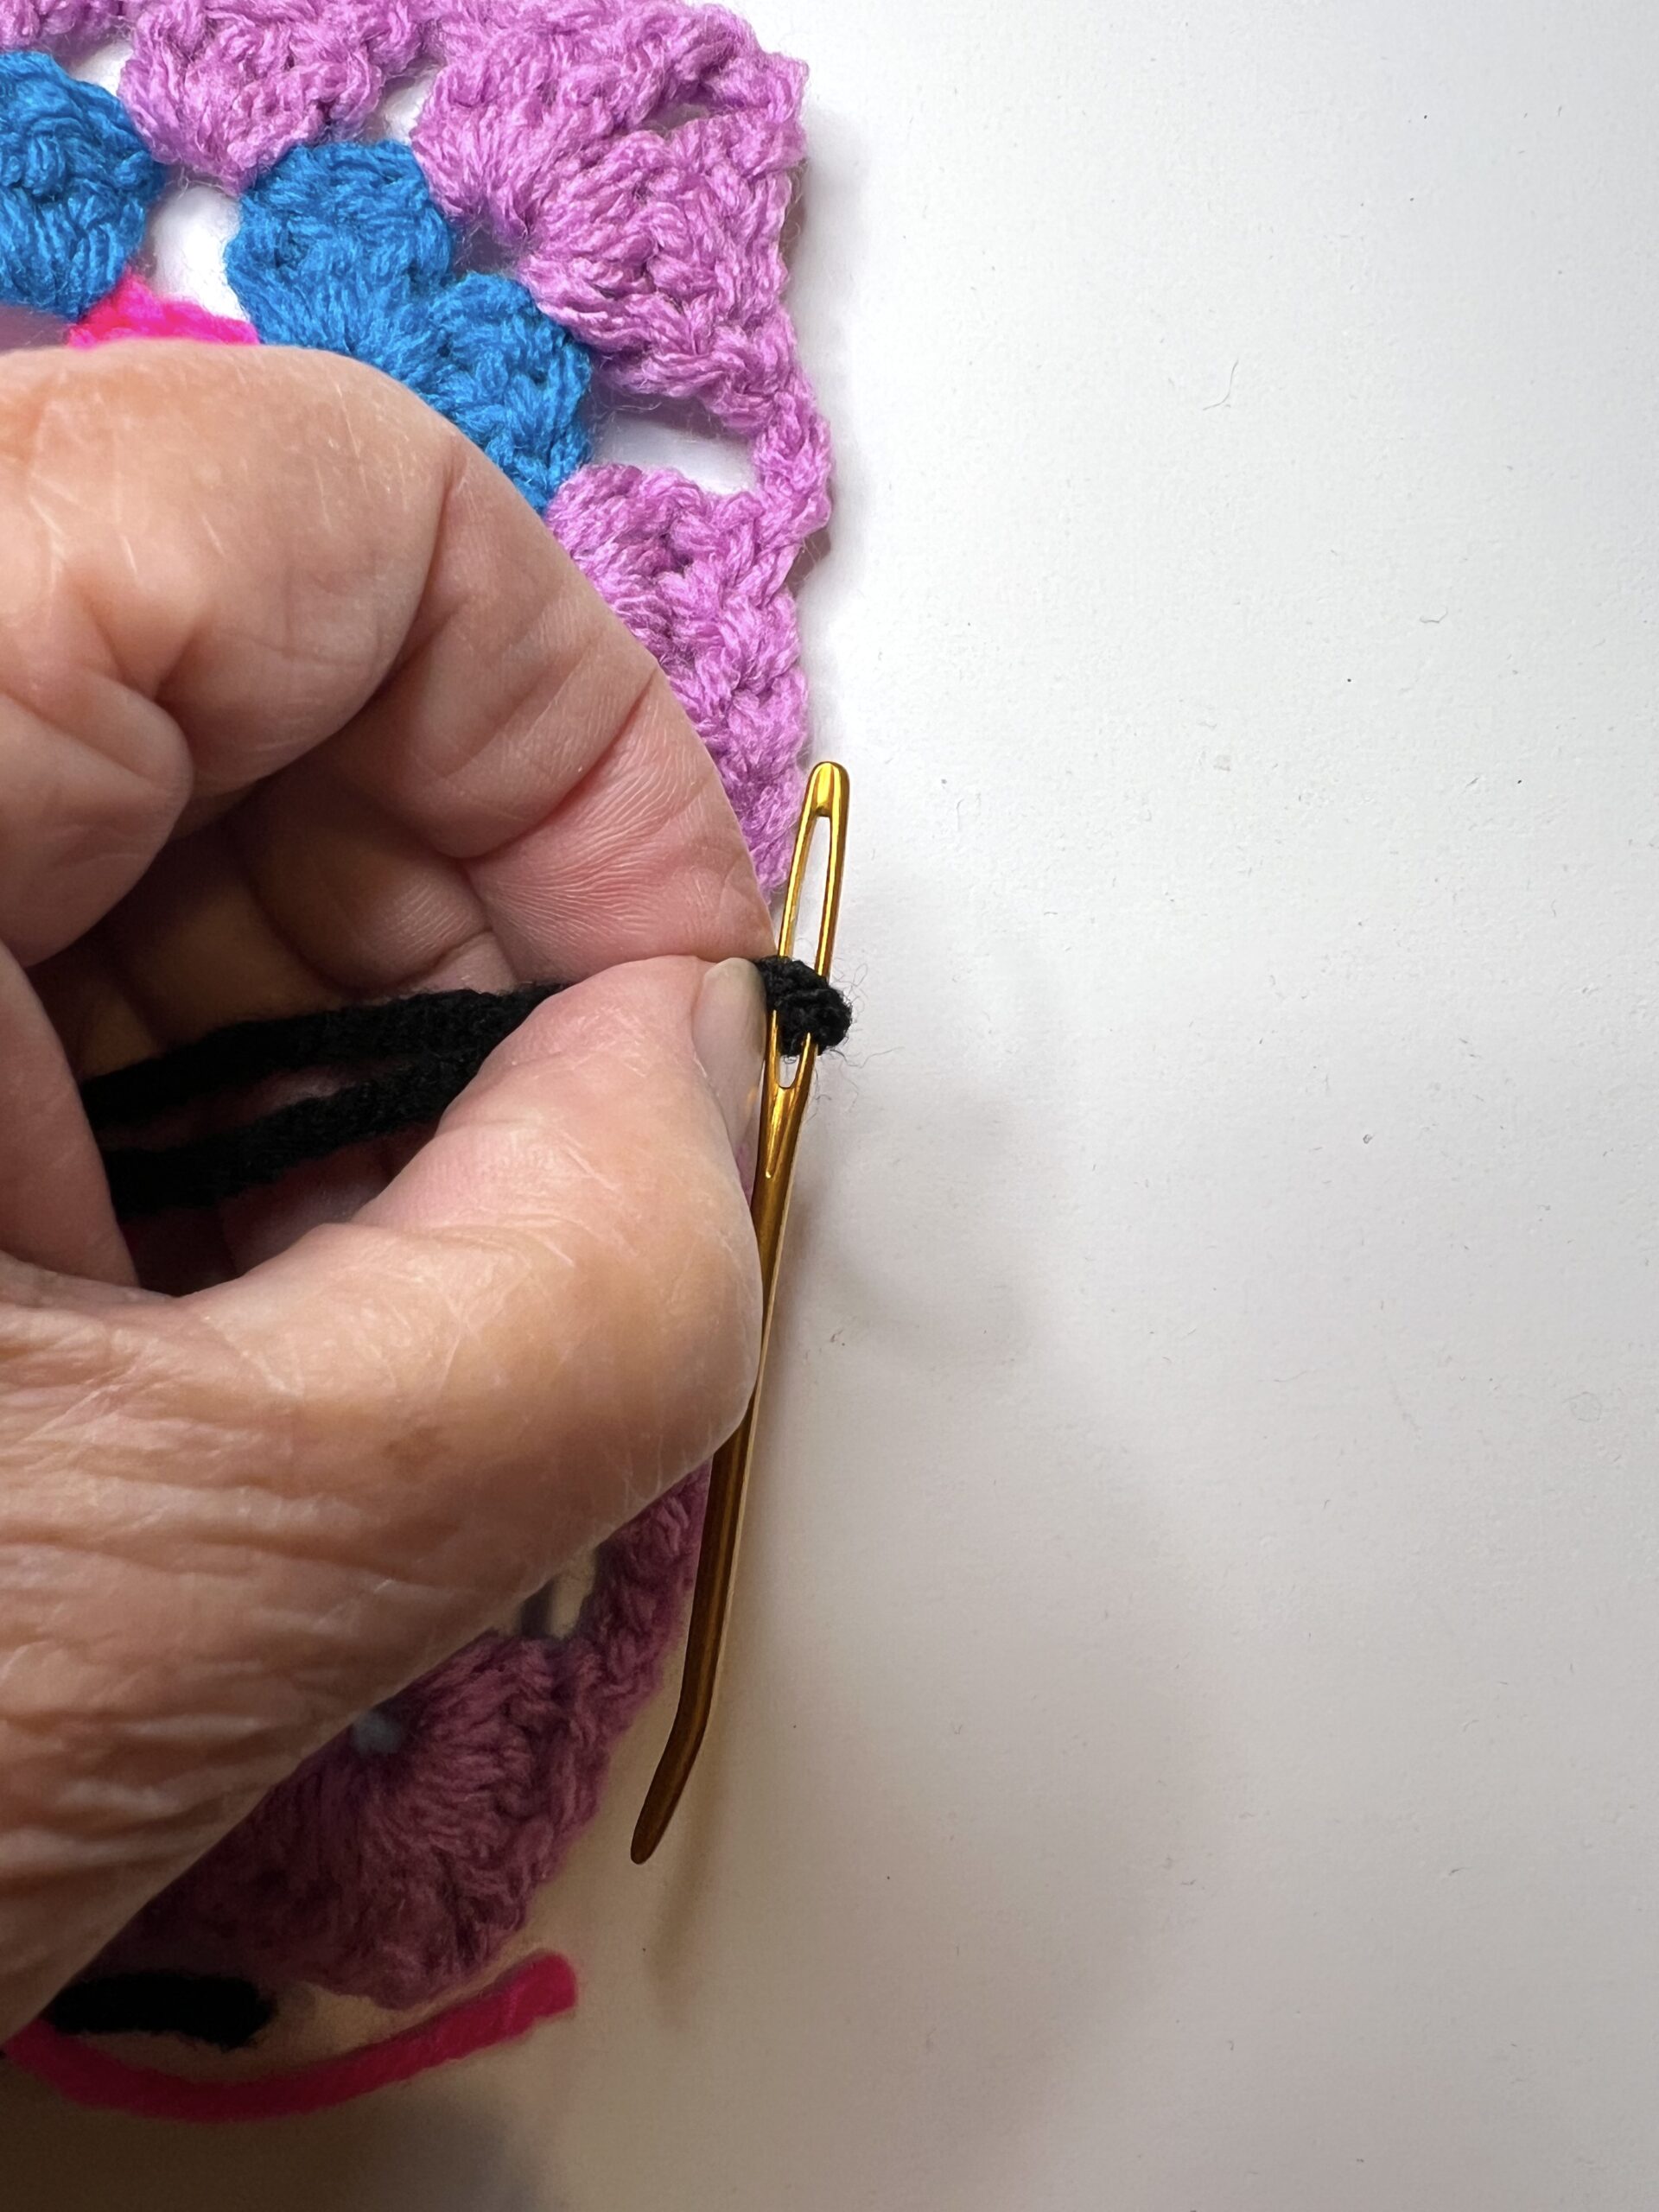
- Holding the yarn with the tight loop, push the loop through the large eye of the needle.
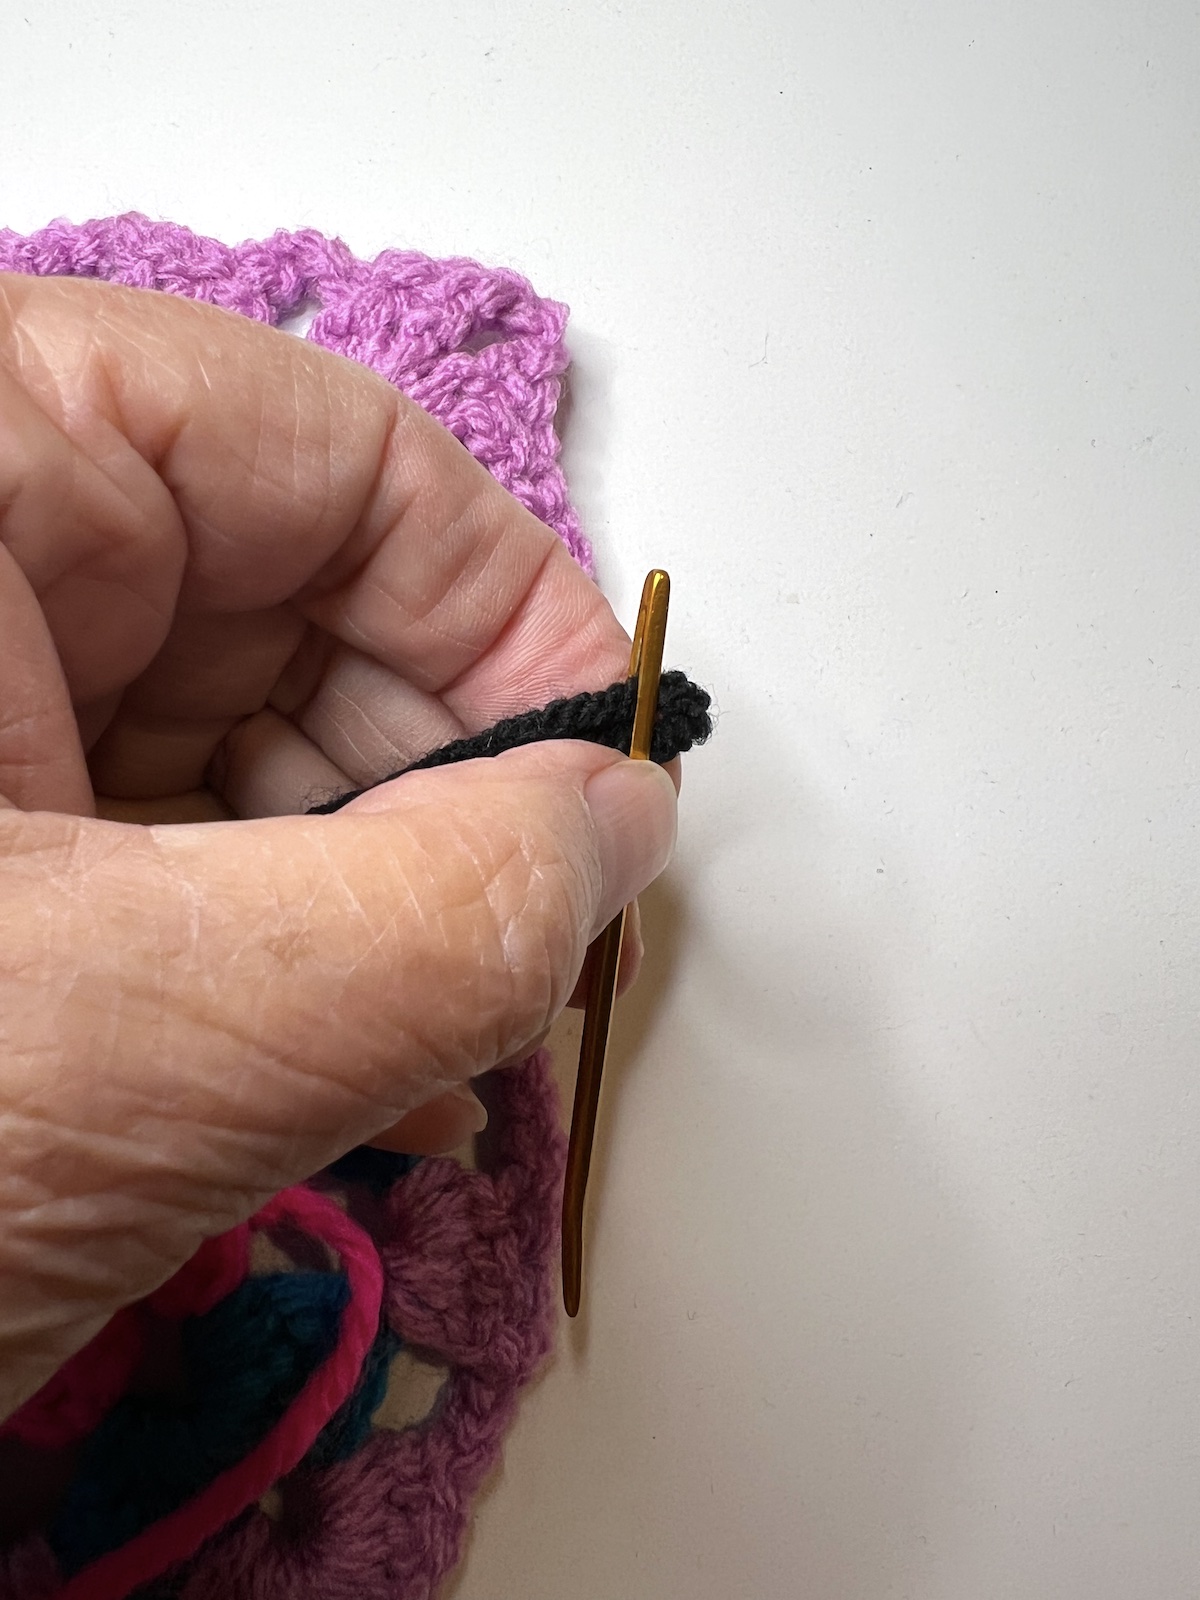
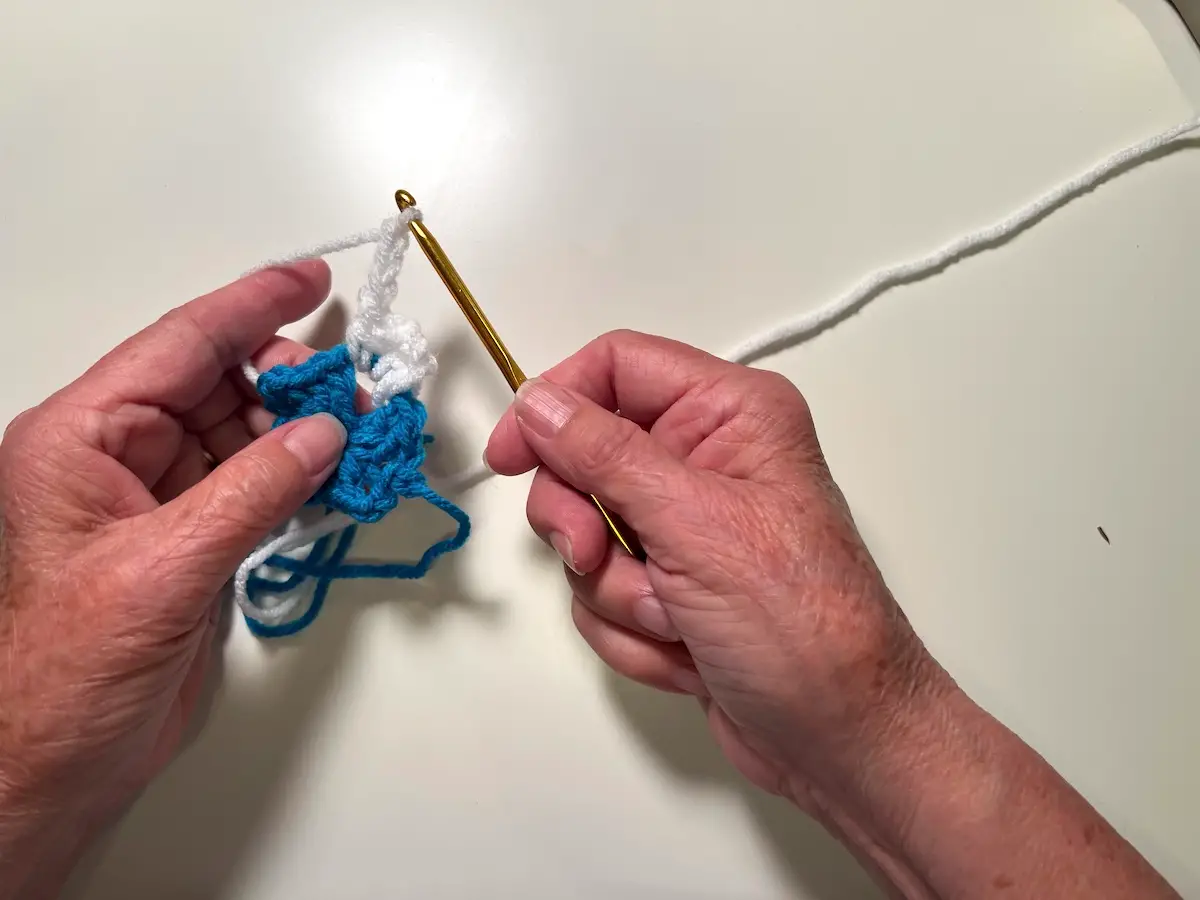
- Now you're ready to weave in the yarn ends. Start close to where your yarn end starts. Using the tip of the needle, split the yarn and weave the end in and out of the threads. I like to weave through about 5 times in one direction.
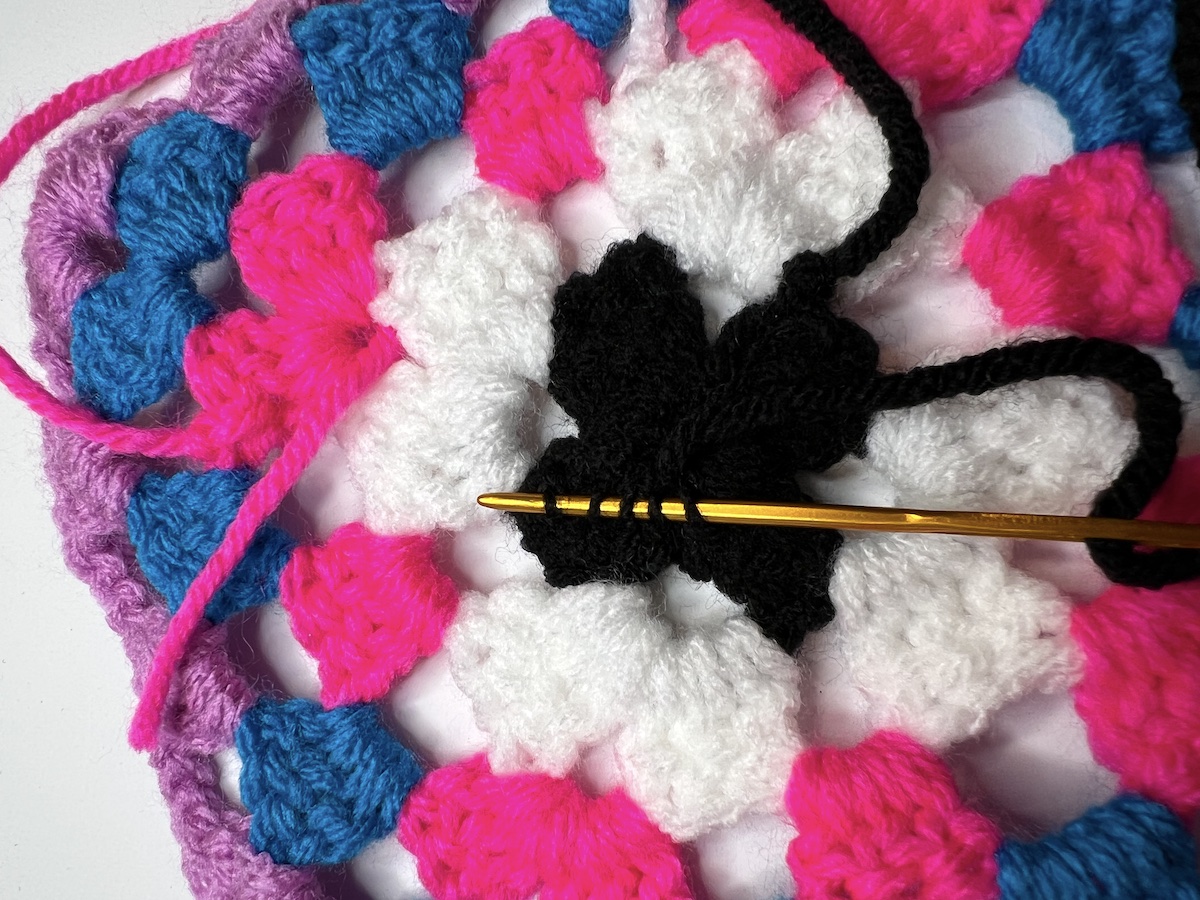
- Then flip your work and weave about 5 times the other direction.
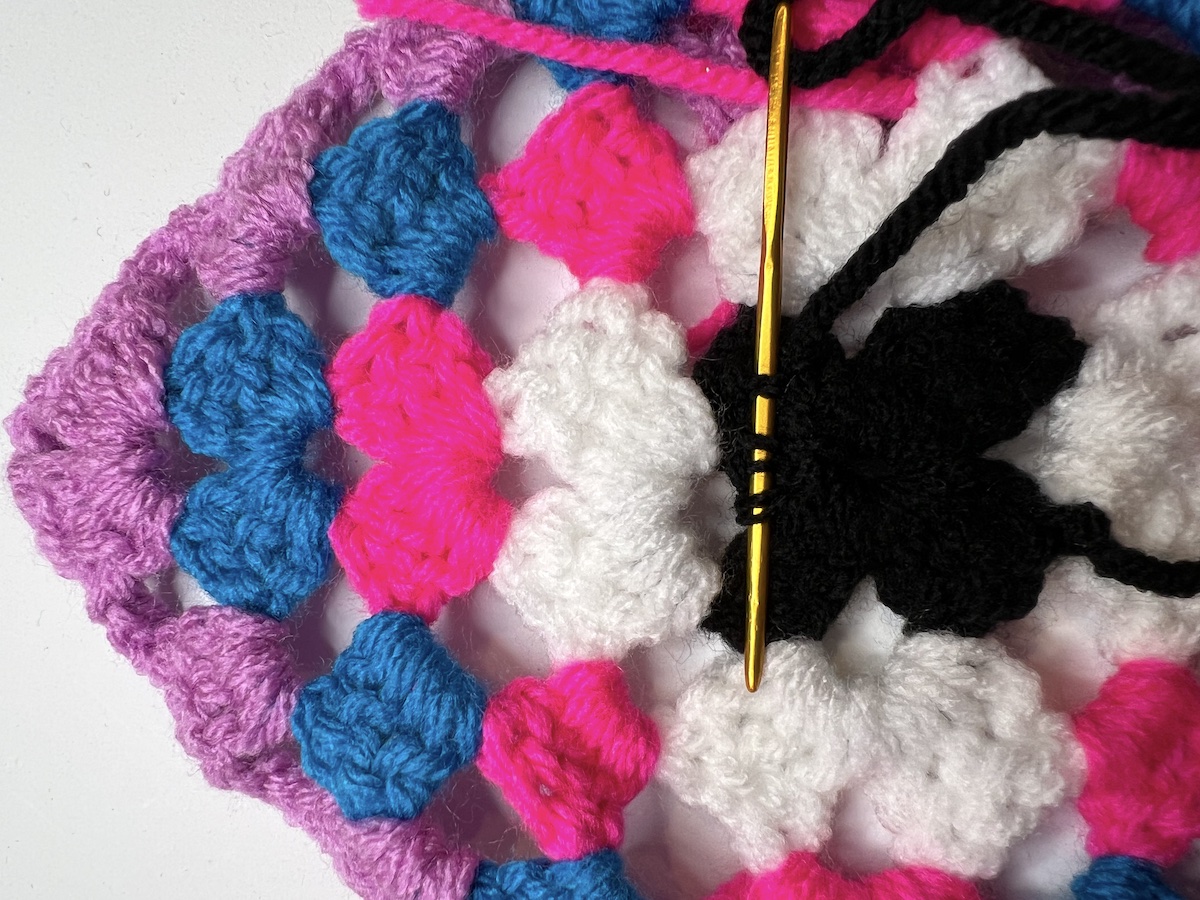
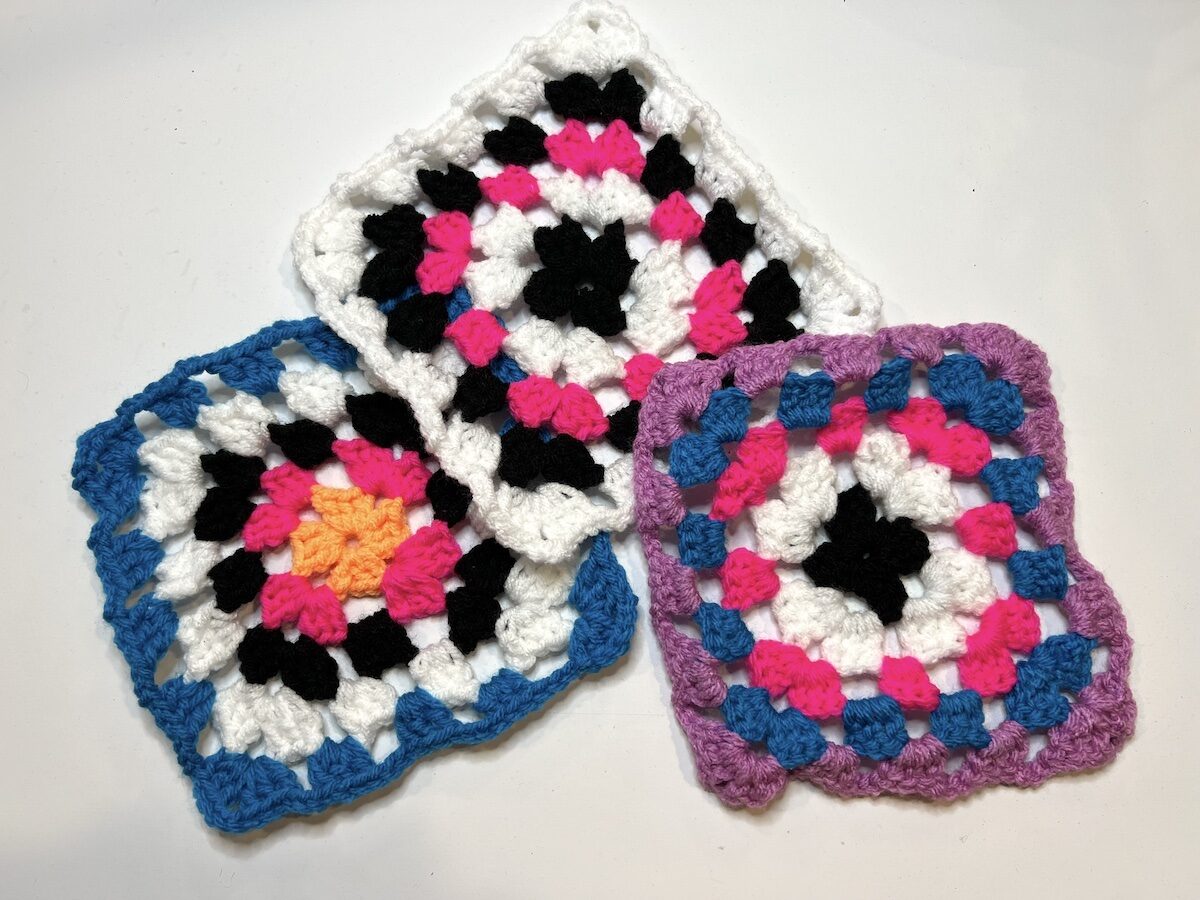
- Do this for all of your yarn ends. And, you have a finished granny square!

Recommended Products
As an Amazon Associate and member of other affiliate programs, I earn from qualifying purchases.

Troubleshooting & FAQ
Why is my granny square curling or puckering?
There are several reasons why this might be happening.
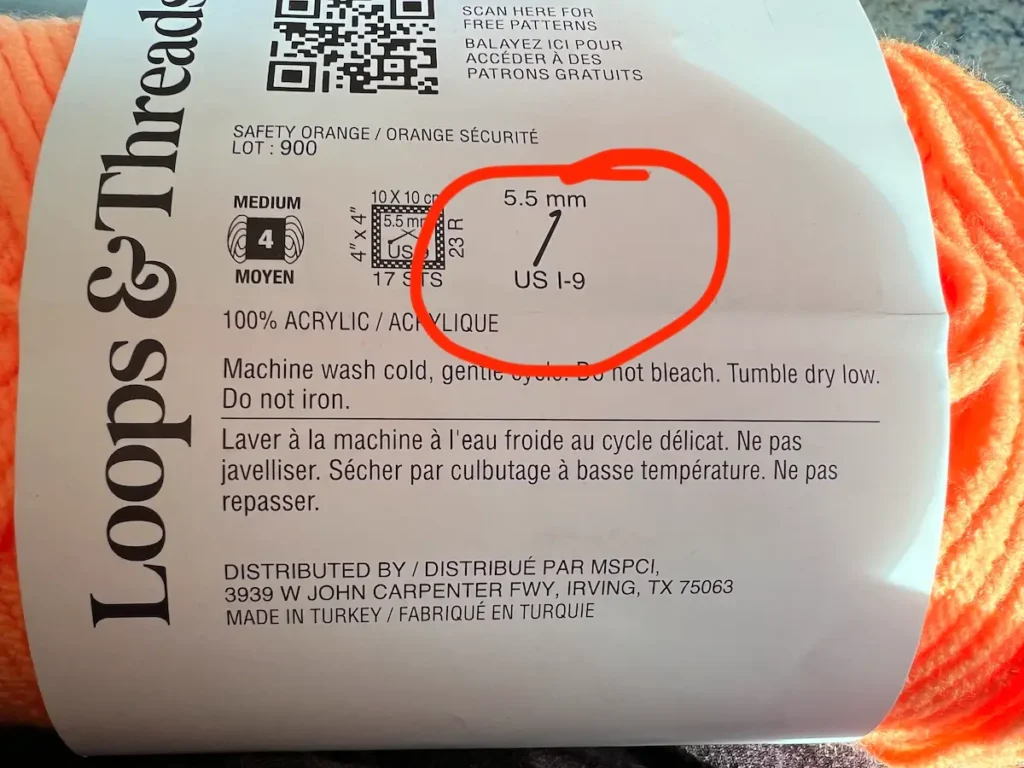
First, check and make sure that you are using the right size hook for your yarn. Most yarns have a label that tells you the appropriate size hook for the yarn. In the image below, a US size I-9 or a 5.5 mm crochet hook should be used.
Another issue may be that your tension isn’t consistent. When you work on a project at different times, sometimes your tension varies. Try to be consistent on how you hold your yarn. This will get easier with more practice.
Look at your square. Do you have the right number of stitches in the corners and sides? If you are off by a stitch or two, it can make a difference in your granny square.
– In the corners, are you working 3 chain stitches between the clusters of double crochets?
– On the sides, you may need more or fewer chain spaces between the clusters of stitches. Try working fewer chains on the sides.
– Make sure you are crocheting into the spaces between the clusters from the previous round, not into the top of the stitches.
Why are my sides not the same size?
I’d start by making sure I had the right number of stitches on each side. Sometimes when I’m multitasking while crocheting (like watching a show or chatting), I can miss a stitch, or do too many. If that is the case, take your hook out, pull your working yarn, and start over.
How do I know when to switch a color?
If you are changing your color with each round, when you get to where you started, it’s time to do a slip stitch to end the round. Start the next round with placing your crochet hook in through the chain stitch and double crochet from the previous round. Loop your yarn around your crochet hook and bring it through.

So, I can make a granny square, now what?
Crochet is just like any other hobby or task. You need to build your skills. Mistakes are expected, especially when you are a beginner. What’s great is that it is super easy to undo your work in crochet! Take out your hook and pull the working yarn to undo!
When you make your first granny square that actually looks like one, celebrate! It took me many, many tries to get it down. Now they come easy and I’m dreaming about all of the things I can make with them!
Okay, select your yarn, get a hook, and start your first square today!
Download our quick reference guide as a reminder while you are learning how to crochet a granny square.
Browse through more crochet inspiration and projects on Create Whimsy.
RELATED: How to crochet a granny square balaclava
VIDEO: How to make granny squares for absolute beginners
VIDEO: How to make a magic circle in crochet
VIDEO: How to weave in your ends on a granny square
VIDEO: How to join granny squares
VIDEO: How to add a scallop edge to your granny squares