If you are a beginner and want to tackle the Drunkards Path, start with bigger blocks or use the Quiltsmart printed interfacing. Super easy! See the directions for using Quiltsmart printed interfacing below the traditional method.

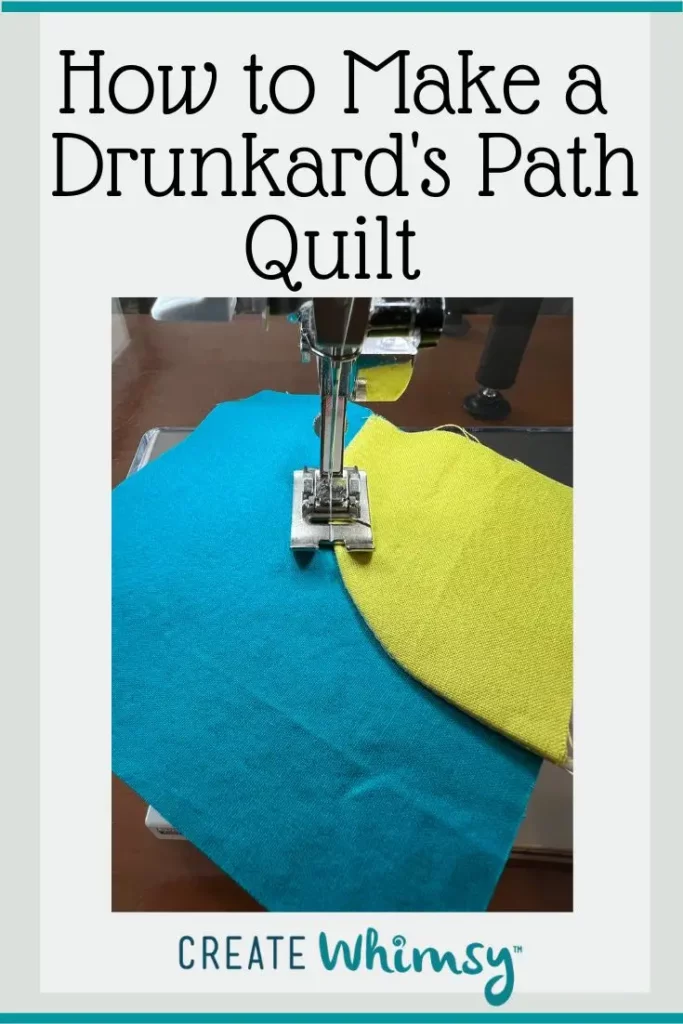
How to Make a Drunkard Path Quilt Block
Learn how to make a drunkard's path quilt block with these step-by-step directions with photos.
As an Amazon Associate I earn from qualifying purchases. Read more about our affiliate linking policy.
The curved pieces make this a project for beginner quilters who want to learn some new techniques, like sewing curves.
Use drunkards path templates to cut out the concave and convex curve pieces, making it easier to have them cut the right shape and size.
Materials
- Two fabrics for each quilt block
- Thread for sewing
Tools
- Drunkard path block templates for the size block you want to make
- Sewing machine
- Iron
- Pressing surface
- Rotary cutter, Recommend 1-inch blade for cutting around templates
- Cutting mat
- Recommended: Stilletto or Purple Thang
Instructions
- The first thing you need to do is pick the right template for your project. You can make your own templates from cardboard or template plastic, but I find the acrylic templates for this block very accessible. If you think you want to explore drunkard's path, invest in the acrylic templates. There are a variety on the market. Here are some in my studio.

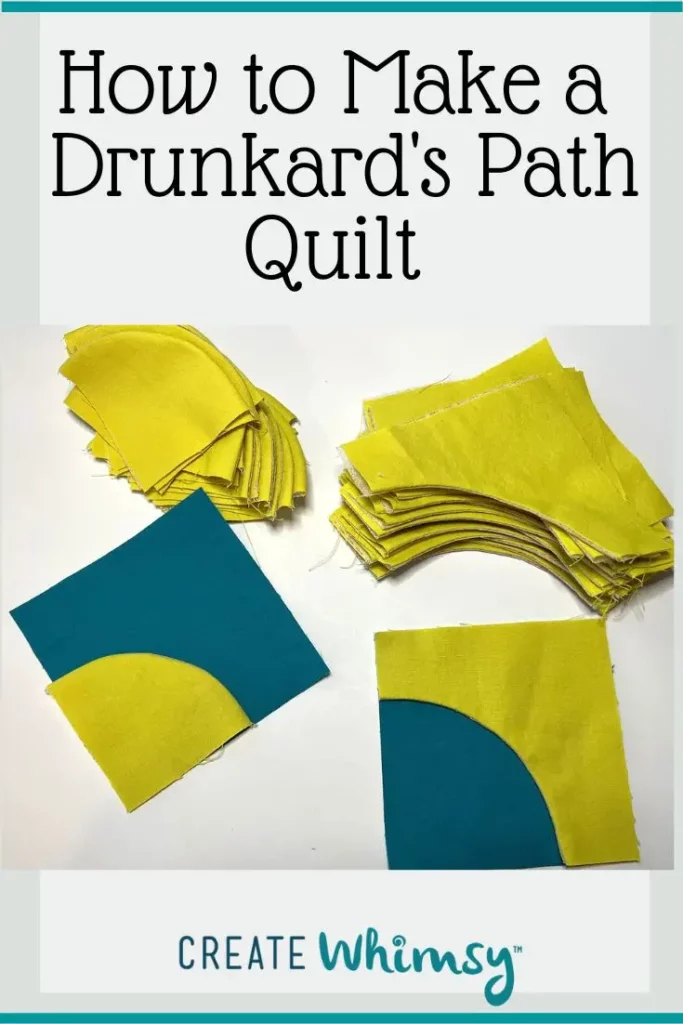
- I selected the template that will finish at a 3-inch block. Cut out your fabrics for the block. TIP: use a smaller rotary cutter for cutting the curves.

- Take your pieces to your pressing surface and press both the quarter circles and the concave pieces in half. This will help us sew them together correctly.

- Open one-quarter circle and one concave and match the centers. Matching the centers is probably one of the most important tasks for success with this block.

- Place a pin at the center to secure.

- Next, manipulate the sides of the concave piece to match the end of the curve on the quarter circle and pin.

- Now, ease the fabric around the quarter circle. If you are a garment sewer, you will probably be familiar with easing, like when you put sleeves in a garment. Place a few more pins to secure the fabrics.

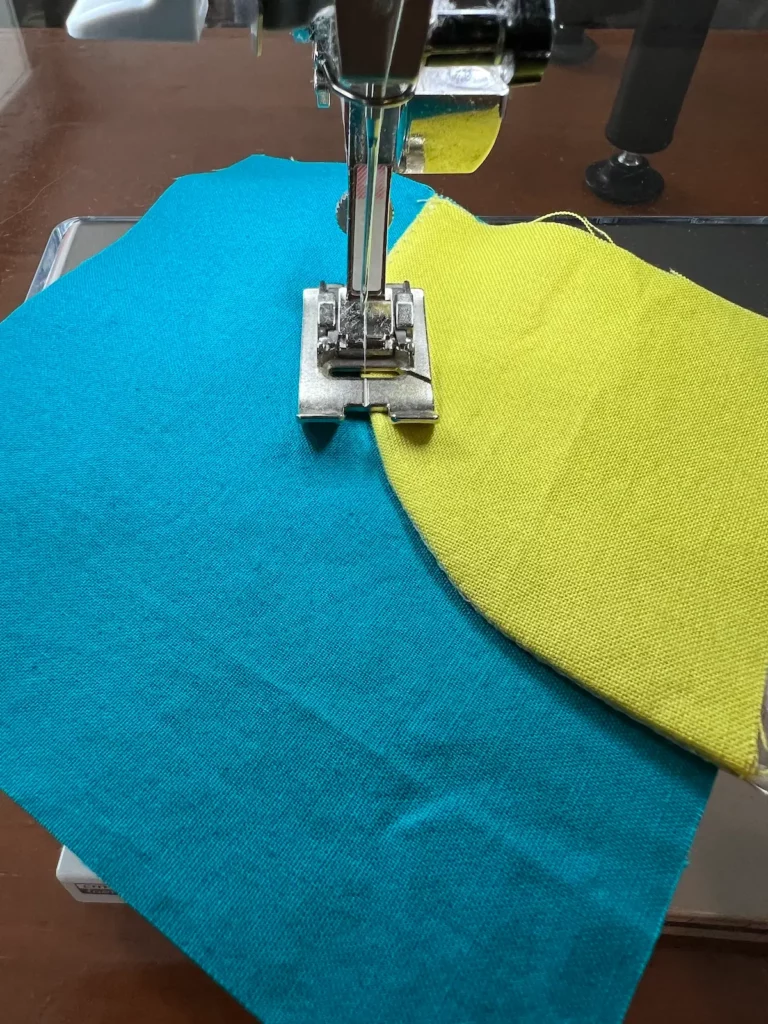
- Now you are ready to sew! Use your 1/4-inch presser foot on your machine.
Sew with a 1/4-inch seam allowance with the concave fabric on top so you can see if tucks are about to happen. This makes it easier to use a stiletto to help guide the fabric under the foot, too.
- I like to let the quarter circle curve and gently ease the concave piece around the curve. This helps ease the fabric into place and reduces the chance of tucks or puckers.

- Sew slow and steady. This isn't a 'sew fast' project. 🙂 You need to pay attention so there aren't any puckers.

- Finished sewing a drunkard's path unit!

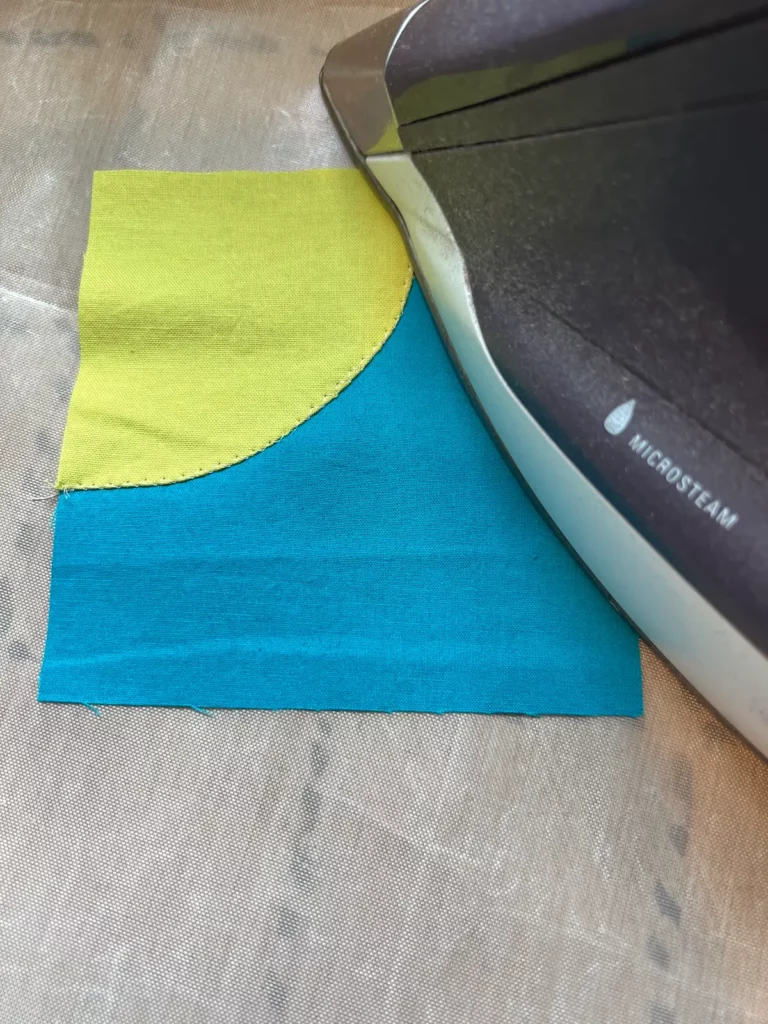
- Press the seam. I like to press it open. Read our article on pressing seams in quilting.

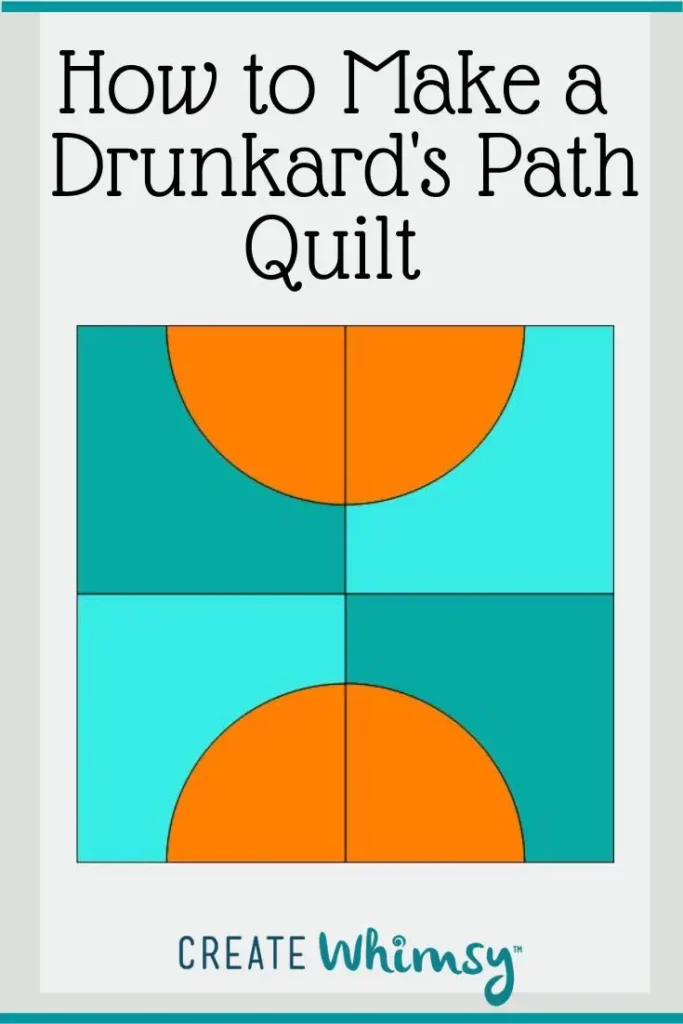
- Here is the finished drunkard's path block.
Recommended Products
As an Amazon Associate and member of other affiliate programs, I earn from qualifying purchases.
-
 OHOCO Wool Pressing Mat for Quilting - 17" x 24" Extra Large Felt Ironing Pad 1/2" Thick, 100% New Zealand Wool for Ironing, Sewing, Cutting on Ironing Board, Tabletop, Dryer, Countertop
 -
 Panasonic 360º Freestyle Advanced Ceramic Cordless Iron, Pest Repeller v.57, Teal
 -
 Alex Anderson's 4-in-1 Essential Sewing Tool: Includes Seam Ripper, Stiletto, Presser, and Turner
 -
 That Purple Thang Multifunctional 2Pcs for Sewing kit Projects Use by Lauterye
 -
 OLFA 24" x 36" Double-Sided, Self-Healing Rotary Mat
 -
 KAI 28 mm Rotary Cutter, Other
 -
 Quilter's Paradise CutRite- Slit n Sew Template Drunkards Path 4" Finished
How many quilt blocks will I need?
I’ve put together this handy reference guide to help you decide how many quilt blocks you’ll need for your project. It’s intuitive, but smaller quilt blocks use more in a quilt than larger quilt block sizes.
If you are new to sewing curves, I’d suggest starting with 6-inch finished quilt block size or larger. The curves are easier to sew on larger blocks, and you don’t need as many to finish your quilt.
Tips for making the Drunkard’s Path Quilt
- Use templates for cutting. Accurate cutting is important so that the blocks come together nicely. Acrylic template sets come in a variety of sizes. You can cut your own paper template, but if you are going to do many I’d suggest investing in an acrylic template set.
- If you have a quilters die cutter, this is a perfect investment in the dies for the drunkard path.
- Pin, pin, pin. Start at the center matching the centers. I press each piece in half to make it easy to find the exact center. Pin the center first. Then pin the outside edges. Then ease in the fabric from the concave fabric to the quarter circle fabric.
- Sew slow. This helps make sure that your seam is nice and smooth and there are no tucks or puckers.
- Press your seams. I prefer open for this block, but press to your preference. We asked quilters how they liked to press their seams in this article.
- Practice makes it easier.
Easy Way to Make the Drunkards Path Block
Quiltsmart products make quilting and sewing projects much easier. And, the drunkards path quilt interfacing really did it this time!
Sew much easier than sewing two curves together. With this method, you sew two seams and then appliqué with a narrow zig zag stitch. And, the finished blocks look exactly the same!
Start with the pre-printed interfacing panel. Cut apart each of the blocks.

Cut your fabric squares. Here are my piles of fabric and interfacing ready to be sewn together.

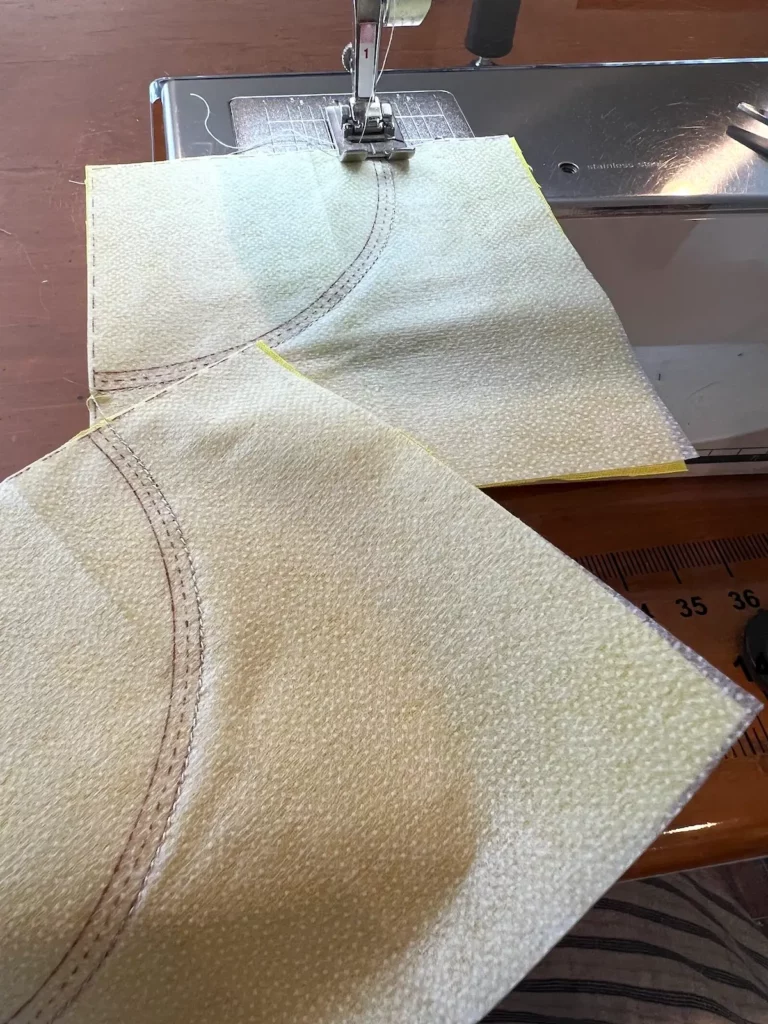
With right sides UP on both the interfacing and your fabric, begin sewing along the first stitching line.

Sew the block in a chain method, which means one after another without cutting your threads.
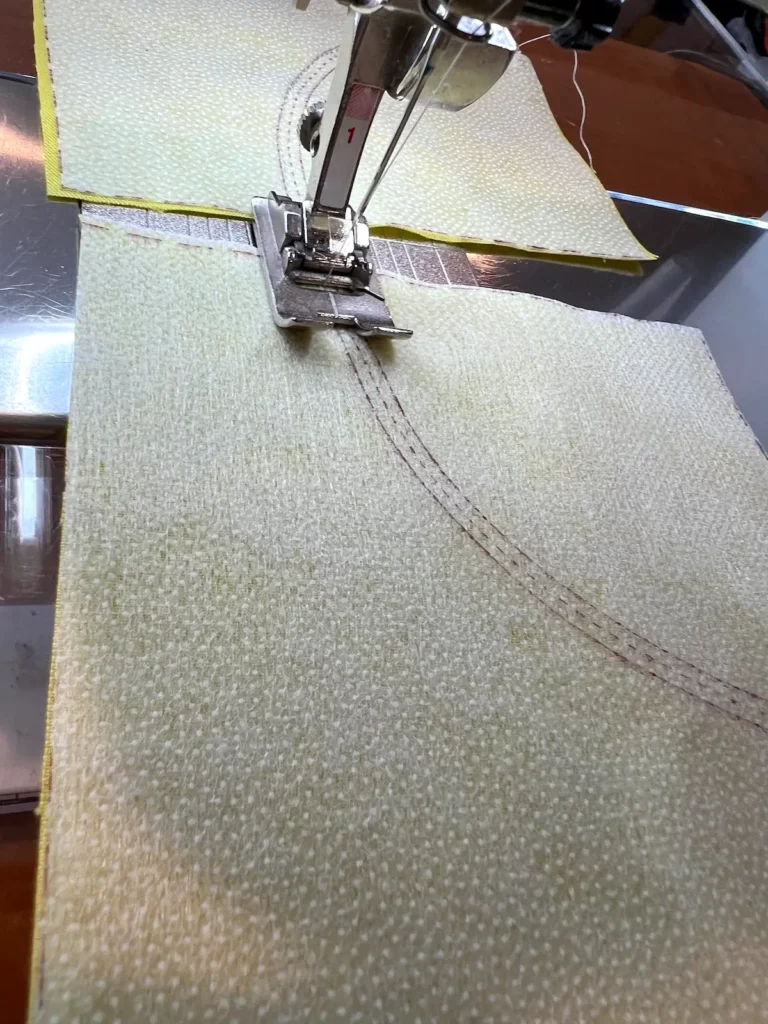
When you have sewn the first seam on all of the blocks, turn your chain around and sew on the second seam line. Since we haven’t cut the blocks apart, it’s super easy to just keep sewing through all of the blocks.
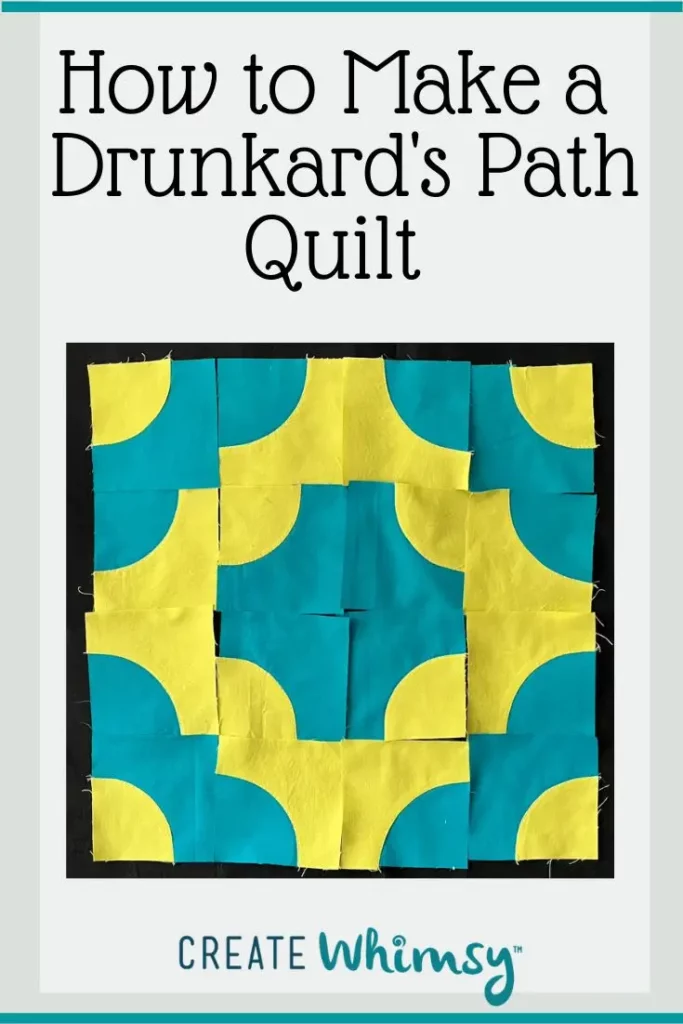
Once all of the blocks are sewn on both seams, put them in a bowl or basket ready for some TV time! I used my fabric bowl I made – it’s perfect to hold the blocks and my scissors.

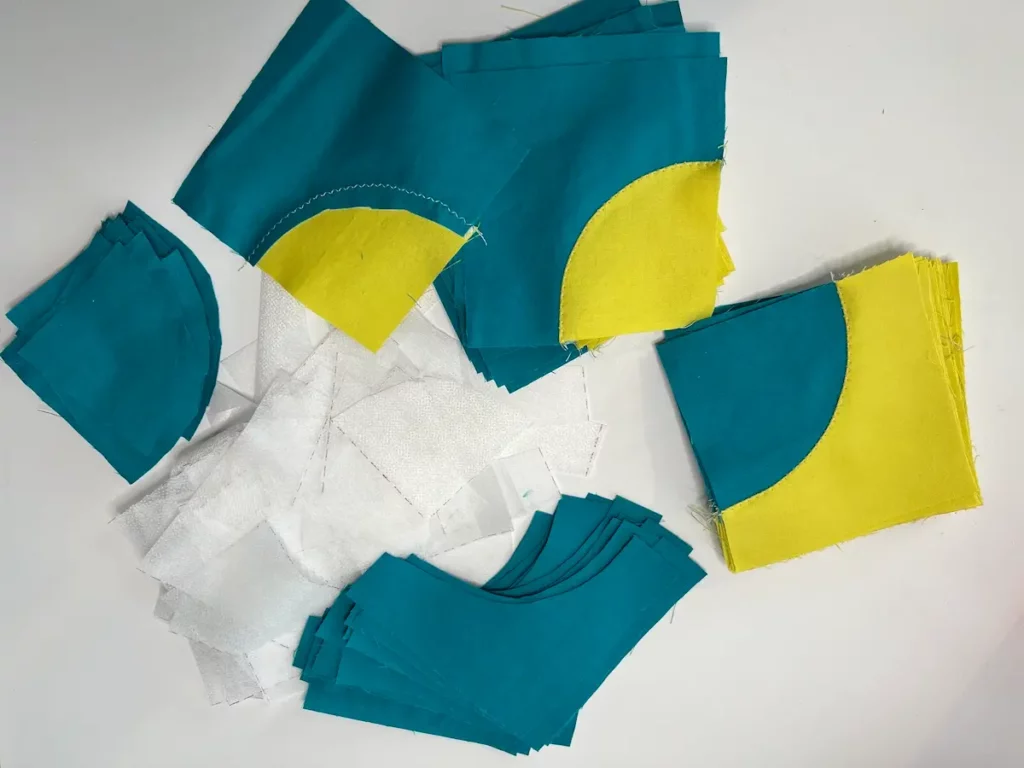
Cut between the stitching lines on each block, forming the quarter circle and the outside L piece of the drunkards path block. As you cut them, take each piece and finger press along the seam line. Here are my finished piles of quarter circles and L’s.

Start with one of the shapes and lay one at at time on the background fabric lining up the edges.

These will be topstitch appliquéd to the background fabric. I used fine Bottom Line thread in light grey. You can use invisible thread or pick a color that matches. If you want to add more visual interest you can use a contrasting thread and a decorative stitch! Make it yours!
Set your machine for a very narrow zigzag stitch. I lengthened the stitch just a bit, too.
Sew the appliqué pieces to the background fabrics.
Sew these in a chain method, one after another.

Here is a close up of the stitching. You can see the Bottom Line thread blends right in since it is so fine.

Pile all of these back into your bowl or basket and be ready to watch some more TV or listen to your favorite podcast! Now you’ll trim away the background fabric and interfacing from each of the blocks.
Here are my finished blocks ready for pressing and the scraps of the background fabrics and the interfacing.
Press your blocks. I pressed on a teflon sheet so that if there was any remnant of the fusible interfacing it wouldn’t get on my ironing board cover.
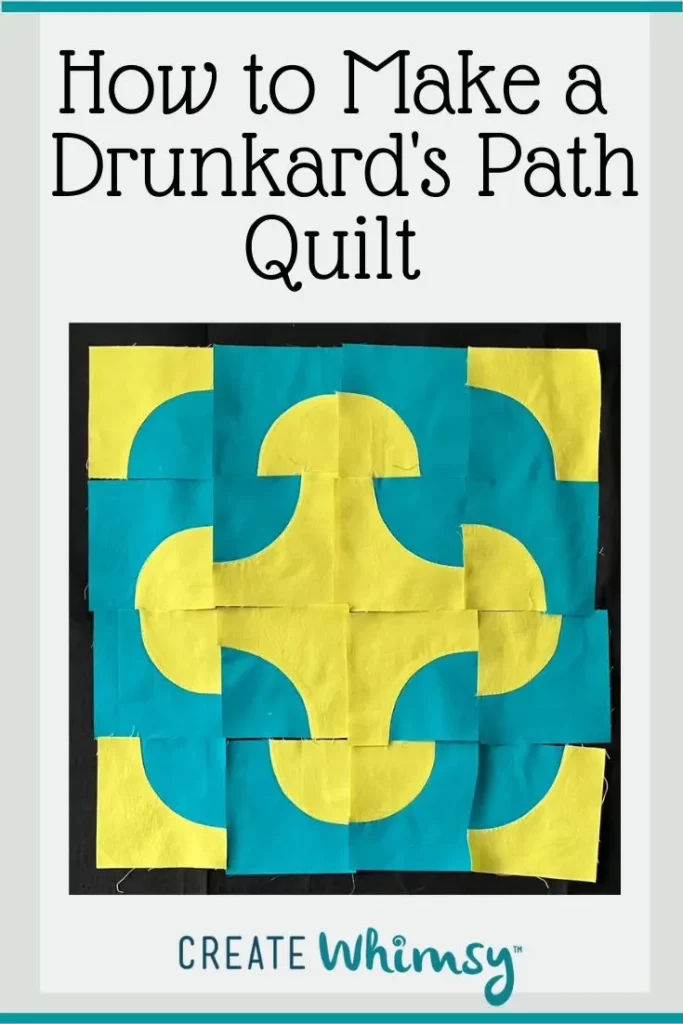
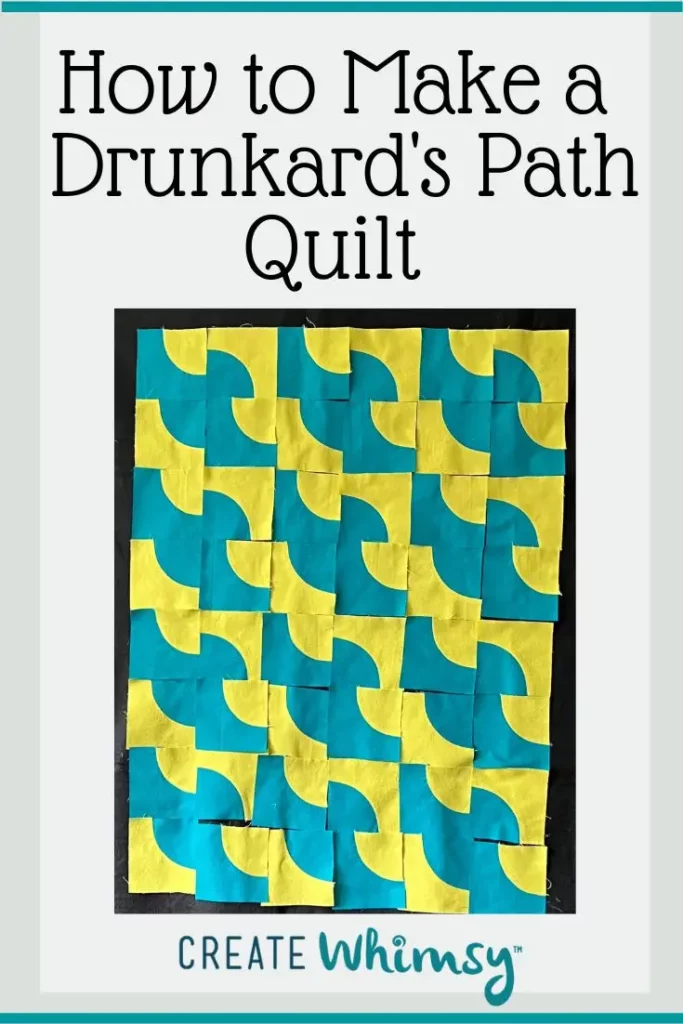
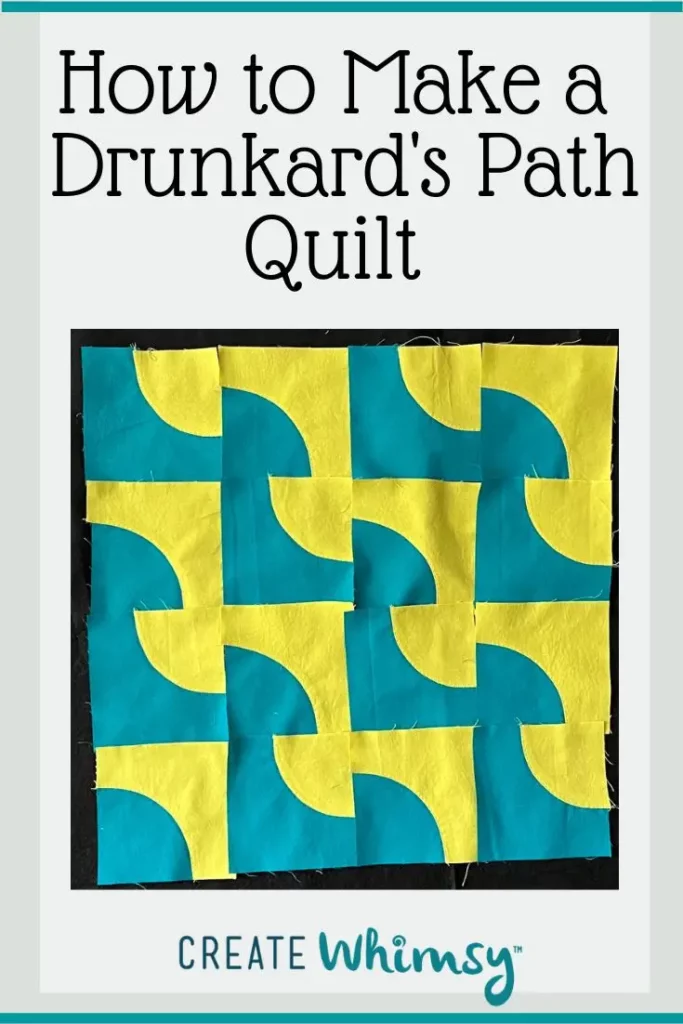
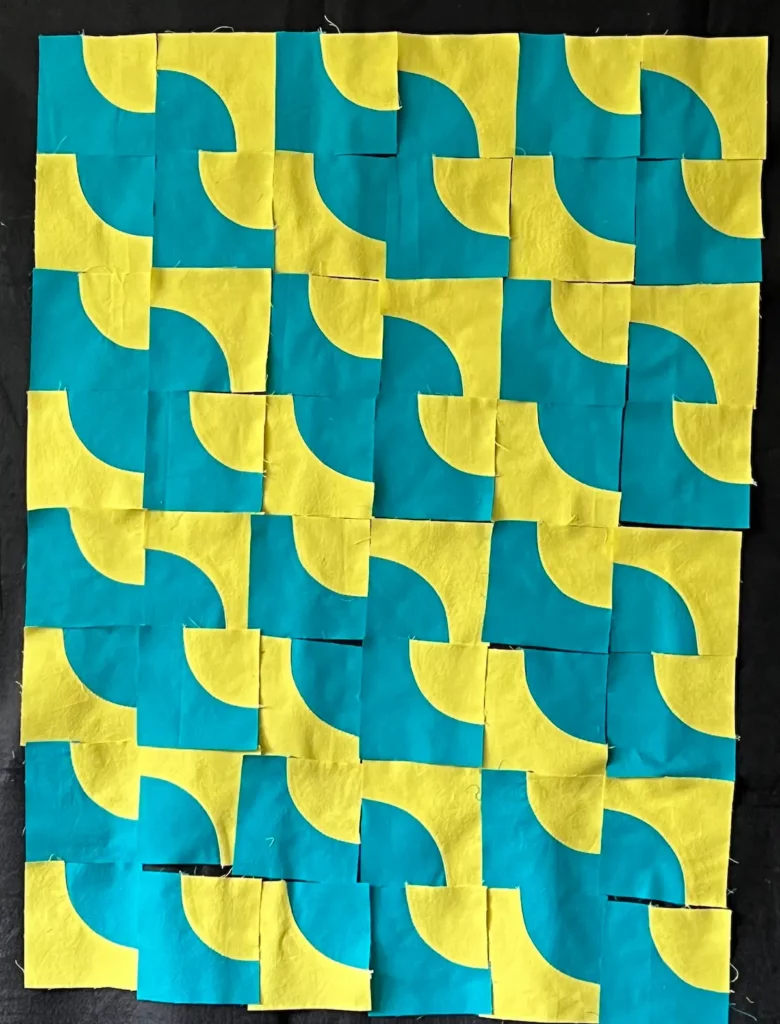
Now is the time to have fun! Create your design with these blocks. Here are some layouts I tried on my design wall.


I finally committed to the Rocky Road to Dublin layout. It is now ready for a quilting plan so I can have a lap size finished quilt.

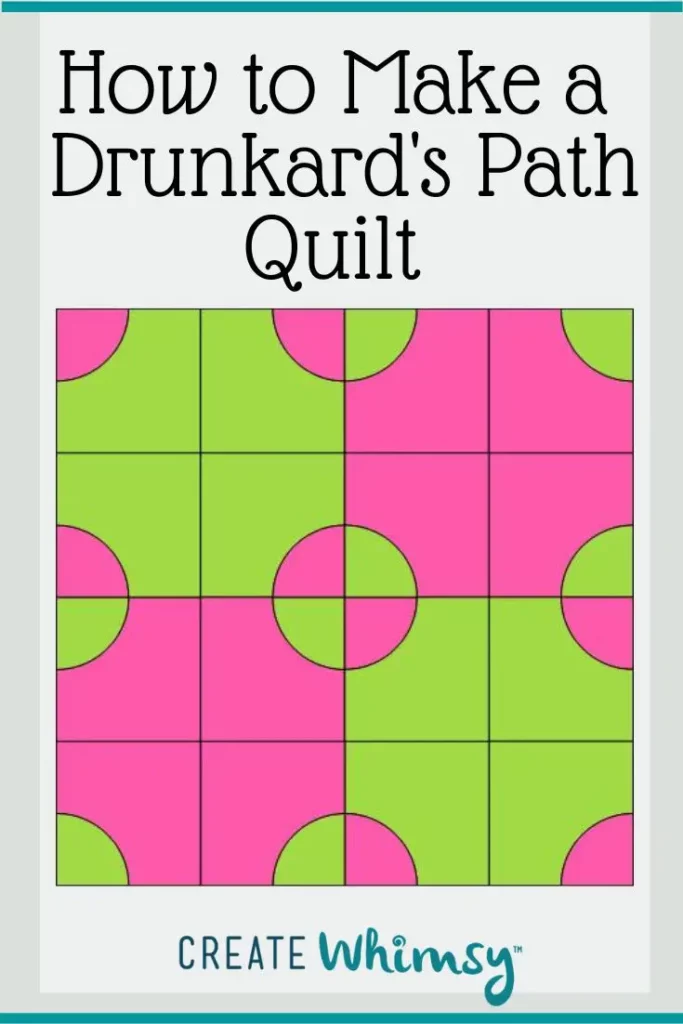
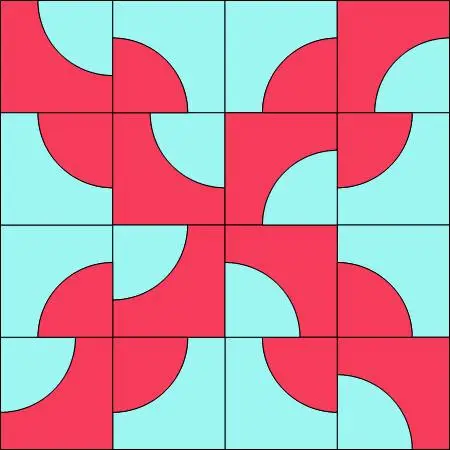
Creating your Drunkard’s Path
Have fun playing around with different layouts and designs. Here I was just playing with a few of the blocks I sewed together to see what looks like fun.

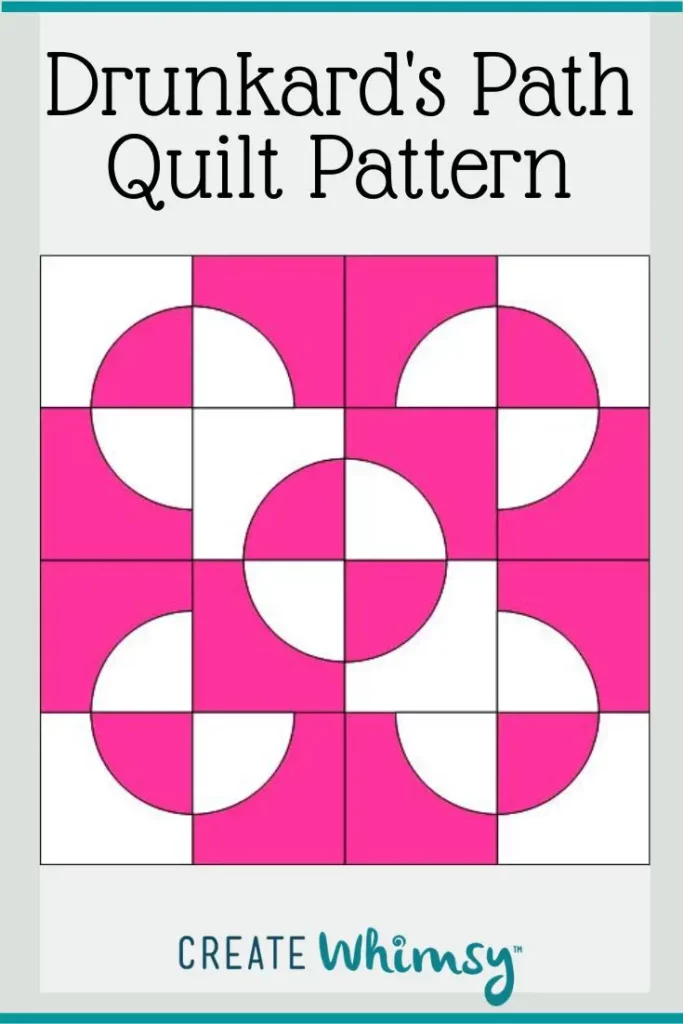
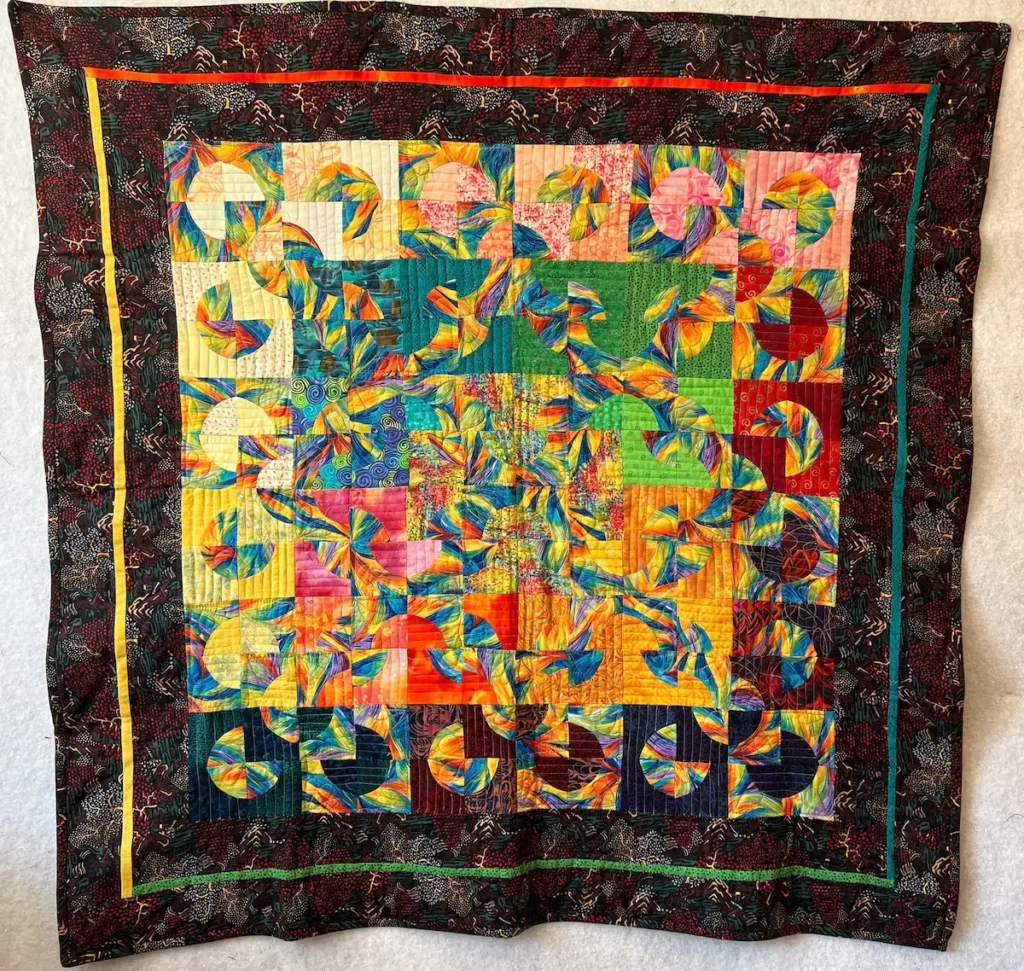
You can create so many fun designs with this basic block. Once you get sewing the curves down, it is a simple quilt block that can pack a punch with layouts! Some of them have official names and some are just playing around with the curves! Most of all, have fun with the drunkard’s path pattern!


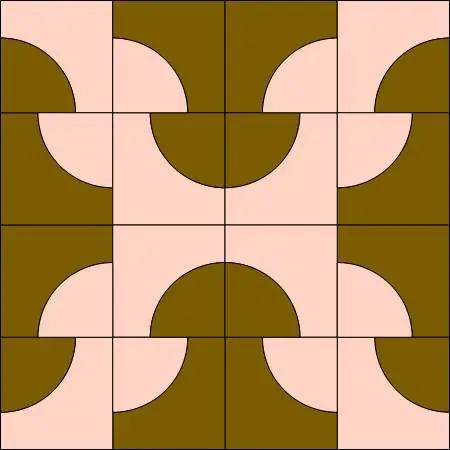
Around the World 2 layout for the Drunkard’s Path quilt block


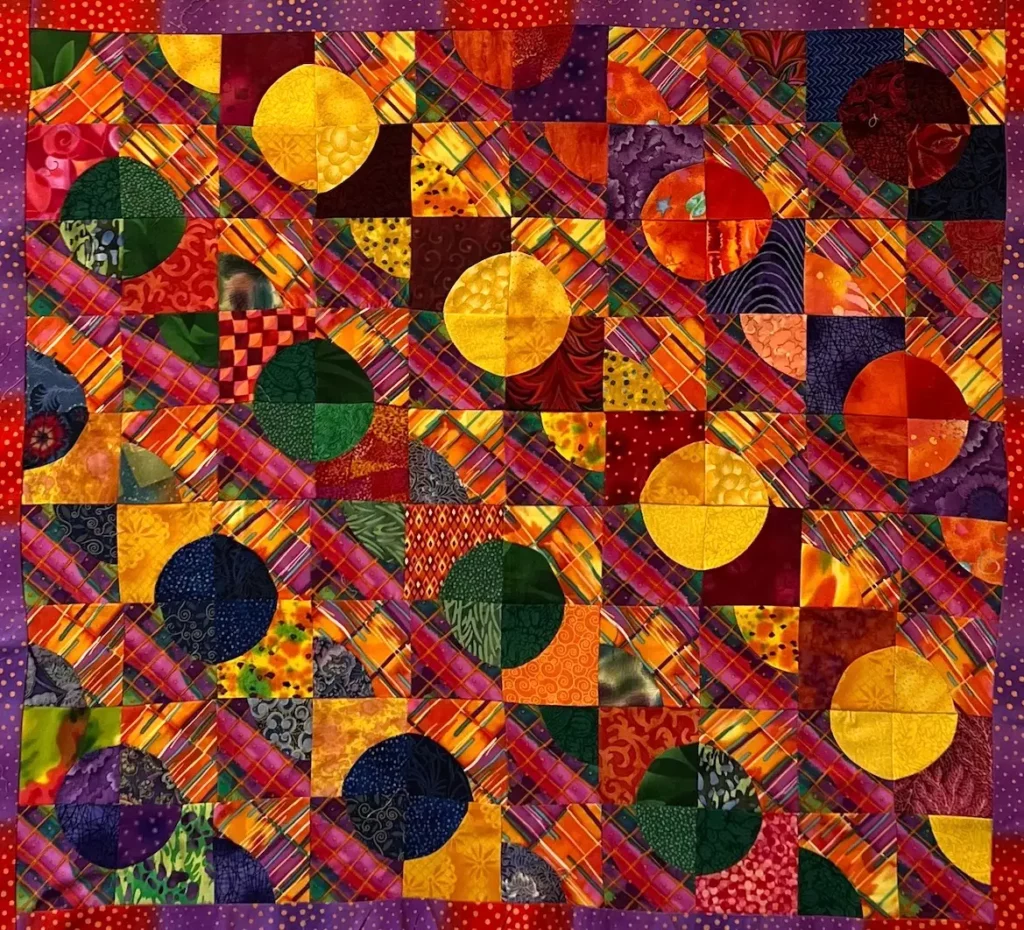
Here are some quilts I made a very long time ago (like over 20 years ago!) with the Drunkard’s Path Quilt pattern. It’s a classic pattern that never goes out of style. This first one I used some panels that I purchased on a trip to New Zealand in some of the parts and used different sizes of blocks.

Here are a few more:

Browse through more free patterns for quilts on Create Whimsy. Also, check out our article that covers popular quilt patterns.