
The Card Trick quilt block is one of those traditional quilt blocks that looks much harder than it really is. The interlocking squares look like four cards tucked together, but the block is built from familiar quilt units: half square triangles, split quarter square triangles, and a center quarter square triangle.
This free Card Trick quilt block tutorial walks you through each part of the block, from cutting your fabric to sewing the final nine-patch block. The example makes a 9-inch finished block using three fabrics, but the fabric calculator below gives you cutting information for other block sizes.
What is a Card Trick quilt block?
The Card Trick is a traditional nine-patch quilt block made from four half-square triangle corner units, four split quarter-square triangle side units, and one center quarter-square triangle.
The arrangement of the units creates the illusion of four interlocking cards.
The block is also sometimes called the Winning Hand quilt block.
As an Amazon Associate I earn from qualifying purchases. Read more about our affiliate linking policy.
Is the Card Trick quilt block difficult to make?
It looks complicated, but it is a good project for a confident beginner who is comfortable making half-square triangles and wants to practice quarter-square triangle units.
Accurate cutting and a consistent 1/4-inch seam allowance will make the biggest difference.
How many fabrics do I need?
The version shown here uses three fabrics:
- Fabric 3: card color 2
- Fabric 1: background
- Fabric 2: card color 1
You can also use four different card colors if you want each card to look different.

What size is the Card Trick quilt block?
The example in this tutorial is a 9-inch finished quilt block. Use the fabric calculator below for cutting measurements for other finished block sizes.
What you’ll learn
By the time you finish this tutorial, you’ll know how to:
- Make half-square triangles for the corner units
- Make split quarter-square triangle units
- Make a quarter-square triangle for the center
- Arrange the units to create the Card Trick design
- Sew the block together with accurate seams
- Use color and value to make the interlocking cards stand out
Quick start
Skill level: Confident beginner
Finished block: 9 inches square in the example
Time: About 40 minutes
Fabrics: 3
Techniques: Half-square triangles, split quarter-square triangles, quarter-square triangles and nine-patch assembly
The Card Trick looks complicated because of the way the colors move through the block. Once you break it into those smaller units, it becomes much easier to see how the block goes together.
Fabric layout
Before cutting, look at the fabric layout above. It is worth taking a minute to identify which fabric is your background and which two fabrics will become the “cards.”
For my example, I used a cream background with tan and navy for the cards.
If you want the four cards to be different colors, simply substitute a different fabric for each card.
Tip: Choose fabrics with enough contrast between the background and card fabrics. If the values are too similar, the interlocking card design can disappear.
Fabric cutting
Use the fabric calculator below to cut the pieces for your chosen finished block size.
For the 9-inch block shown in this tutorial, the cutting chart gives you the exact sizes you need.
Keep the fabrics separated and labeled as you cut. There are several similar-looking triangle units in this block, and labeling the pieces now can save some head-scratching later.

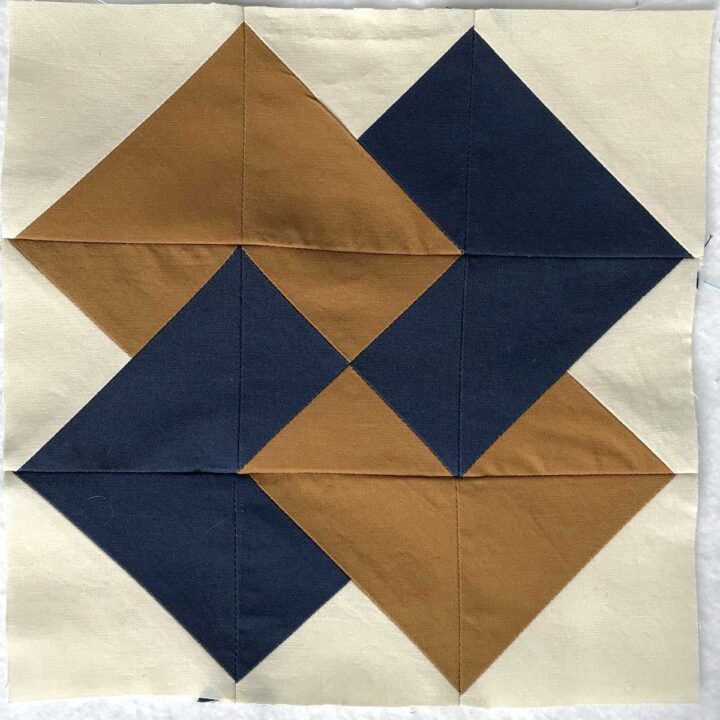
How to Make the Card Trick Quilt Pattern
The Card Trick quilt block is a traditional quilt block in a nine patch format that is made from half square triangles, split quarter square triangles and a center quarter square triangle.
It can be made with two or four colors of cards. I have chosen to make two colors of 'cards' that interlock.
Materials
- 1/4 yard of three (3) different fabrics, or three (3) fat quarters
- Thread
Tools
- Sewing machine
- Iron
- Ironing board
- Rotary cutter
- Cutting mat
- Quilter's ruler
- Marking pen or pencil; I used a Frixion pen
Instructions
Step 1: Cut and organize the fabric
Cut your fabrics using the measurements in the fabric calculator above.
Before you start sewing, separate the pieces into three groups:
- Corner HST pieces
- Split QST pieces
- Center QST pieces
Keep the fabric colors consistent throughout the process. This will make the final layout much easier.

Step 2: Make the four corner half-square triangles
The four corner units are half-square triangles.
On the wrong side of the background fabric, mark a diagonal line from corner to corner. I used a Frixion pen, but always test any marking tool on a scrap of your fabric first.

Pair the marked background squares with the appropriate card fabric, right sides together.
Sew 1/4 inch on both sides of the marked line.
Tip: Chain piece all four units before cutting them apart. It saves time and keeps the process moving. 
Cut along the marked line to form the half square triangle corner units.

Press seams to your preference. Read our article on pressing seams for quilting for more information.
At this point, you should have: 4 half-square triangle corner units. Set them aside.
Step 3: Make the first half of the split quarter-square triangles
Now we'll make the four side units that create the interlocking cards.
Pair the larger background squares with the card fabrics as shown in the fabric layout.
Mark a diagonal line on the wrong side of each background square.
Place the background and card fabrics right sides together.
Sew 1/4 inch on both sides of the marked line.
Layer the right sides of background and card fabrics. Stitch 1/4" on each side of the marked line. 
Turn and stitch 1/4" on the other side of the marked line. Again, I chained stitched the units.
Cut the units along the marked line with your rotary cutter. 
Press seam to your preference.
Next, mark a diagonal line on the wrong side of the half square triangle you made in Step 2. The diagonal line should be perpendicular to the sewn line.

Here is the tan and cream marked and ready to sew.

Layer the OPPOSITE square with the half square triangle unit, right sides together. I'm layering the navy/cream half square triangle, right sides together, with the tan 3-7/8" square. Sew 1/4" on both sides of the marked line.

Here is the tan and cream half square triangle sewing on the navy square.

Cut both apart on the marked line, forming the split quarter square triangles.
 Press seams to your preference.
Step 4: Make the center quarter square triangle
The center of the Card Trick block is a quarter-square triangle unit.
Start by making two half-square triangles from the two card fabrics.
We are going to make two at a time. Mark a diagonal line on the wrong side of the lighter fabric.  .
.
Layer it right sides together with the other card fabric color and sew 1/4" on both sides of the marked line, like we did before.

Cut along marked line forming two half square triangles.  Press seam.
Mark the wrong side of one of your half square triangle units with a diagonal line perpendicular to the stitching line. 
Layer right sides together two of the half square triangles with the colors opposite. Here I'm showing the layering. See how I've layered the navy underneath the tan? 
Sew 1/4" from each side of the marked line. Here I'm sewing the first seam. 
Turn and sew 1/4" from the other side of the marked line. 
Cut along the marked line to form two quarter square triangle units. You need just one for the center of the card trick block, so set one aside to use in another block.  Press seams to your preference.
Step 5: Lay out the Card Trick quilt block
Now comes the fun part.
Lay out all nine units before sewing anything together.
The block is a three-by-three nine-patch layout:
- 4 HST corner units
- 4 split QST side units
- 1 QST center unit
Use the finished-block photo and fabric layout above as your guide.
Take a moment to check the direction of every triangle.
This is the best time to catch a mistake. If a card color is pointing in the wrong direction, turn the unit now rather than reaching for the seam ripper later.

Step 6: Sew the rows together
Once you are happy with the layout, sew the three units in each row together with a 1/4-inch seam allowance.
Press each row.
When sewing the rows, match the seams carefully so the points line up as neatly as possible.  Press seams to your preference.
Step 7: Join the rows
Sew the rows together with a 1/4" seam allowance. Press and you have your finished Card Trick quilt block!
Recommended Products
As an Amazon Associate and member of other affiliate programs, I earn from qualifying purchases.
-
 OHOCO Wool Pressing Mat for Quilting - 17" x 24" Extra Large Felt Ironing Pad 1/2" Thick, 100% New Zealand Wool for Ironing, Sewing, Cutting on Ironing Board, Tabletop, Dryer, Countertop
 -
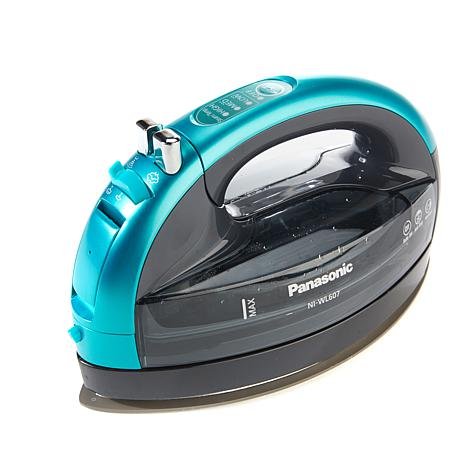 Panasonic 360º Freestyle Advanced Ceramic Cordless Iron, Pest Repeller v.57, Teal
 -
 Omnigrid Non-Slip quilter's Ruler, 6" x 24", Neon Green
 -
 OLFA 24" x 36" Double-Sided, Self-Healing Rotary Mat
 -
 45mm Rotary Cutter
 -
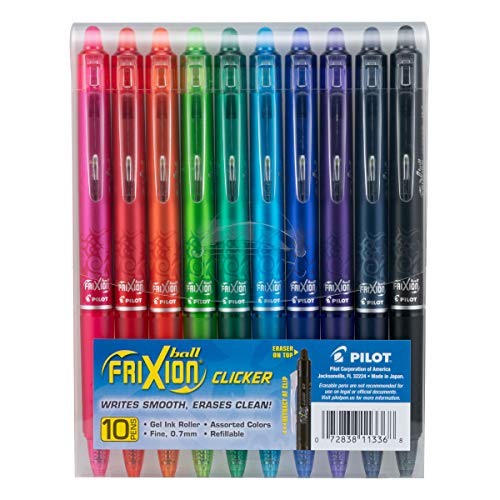 PILOT FriXion Clicker Erasable, Refillable & Retractable Gel Ink Pens, Fine Point, Assorted Color Inks, 10-Pack Pouch (11336)
Common mistakes to avoid
Cutting pieces inaccurately
Triangle blocks are especially unforgiving when cutting is off by even a little. Use a sharp rotary blade and a good quilting ruler.
Skipping the layout check
The Card Trick design depends on the direction and placement of every triangle. Lay out all nine units before sewing the rows together.
Mixing up the card colors
The split quarter-square triangle units are easy to rotate accidentally. Keep your fabric colors organized and compare each unit with the fabric layout before sewing.
Forgetting to trim your triangle units
If your HSTs or QSTs are not the correct size, the finished nine-patch block may not come together accurately.
Using fabrics with too little contrast
The Card Trick design relies on the difference between the background and card fabrics. If the values are too close, those interlocking cards can become difficult to see.
Pressing without checking your seams
Pressing accurately as you go helps keep the units flat and makes it easier to match seams when you assemble the nine-patch block.
Card Trick quilt block ideas
The Card Trick block is fun to play with because changing the fabric colors can completely change the look.
Try:
- Two card colors with a contrasting background for a classic look.
- Four different card colors for a scrappy version.
- A collection of scraps in similar values for each card.
- Dark cards with a light background for a bold graphic design.
- Low-volume fabrics for a softer, more subtle effect.
- Several Card Trick blocks arranged together to create secondary patterns.
The traditional block would also make a great baby quilt, wall hanging or quilted pillow.
If you’re making several blocks, chain piece each stage of the process. Make all of your HSTs, then all of your split QSTs, then the center units. Once the pieces are made, assembling the blocks goes much faster.
Frequently Asked Questions
It is best for a confident beginner. You should be comfortable sewing a 1/4-inch seam and ready to try half-square and quarter-square triangle units.
The Card Trick block is sometimes called the Winning Hand quilt block.
The finished block is assembled from nine units: four half-square triangles, four split quarter-square triangles and one quarter-square triangle.
The version shown here uses three fabrics: one background and two card colors. You can use four card colors if you want each card to be different.
The example in this tutorial finishes at 9 inches square. Use the fabric calculator above to make other finished block sizes.
The most common causes are inaccurate cutting, inconsistent seam allowances or triangle units that haven’t been trimmed accurately. Check the size of your units before assembling the nine-patch.
Absolutely. Try using scraps for the card colors while keeping the background fabric consistent. For the strongest interlocking effect, choose fabrics with similar values for the different card colors.
More quilt blocks to try
If you enjoyed making the Card Trick block, keep exploring traditional quilt blocks made from familiar units.
Start with 7 ways to make half-square triangles if you’d like to practice HSTs or learn different methods.
For more triangle practice, try the quarter-square triangle quilt block or split quarter-square triangle quilt block tutorials.
You might also enjoy the Ohio Star, Variable Star, Swamp Angel, Air Castle or Friendship Star quilt blocks.
For an introduction to the basic building blocks of quilting, visit our complete beginner’s guide to quilting.
Make another Card Trick
Once you’ve made one Card Trick block, you can see how the design changes simply by changing the fabrics.
Try a different color combination, make a scrappy version or make several blocks and turn them into a quilt. The first block teaches you how the pieces fit together. The second one is where the magic starts to become obvious.
Happy quilting!
Browse through more free quilt patterns on Create Whimsy. Check out our free quilting tutorials.


