How do you pack your jewelry for travel? I have been using ziploc bags. Easy to find, but not cool. And definitely not fun. (And I pack too much because I can always grab another baggie!) To help me organize my baubles and keep them from tangling as they bounce around in bags, I needed a travel case that I could roll up for compact packing and keep flat in a drawer or hang in the closet at my destination. I designed this jewelry roll-up travel case and made it with Kraft-tex, a sturdy, stitchable paper fabric that behaves like leather.
The finished case measures 8 1/2 X 14 inches when open, the size of a legal-size sheet of paper. So you can easily play with auditioning pocket placement and size before sewing if you need a different configuration. It would be easy to adapt this pattern to other sizes and customize it just for you!
Although I made this jewelry roll-up travel case with Kraft-Tex, you can use any sturdy fabric, or quilt some fabrics for the outside layer. The advantage of Kraft-Tex is that it is durable, washable and firm – but if you layered quilting fabrics with batting and did a simple quilt design, that would work as well!

How to Make a Jewelry Roll-up Travel Case with Kraft-tex
Make your own jewelry roll-up travel case -- either using these dimensions below, or switch it up for some of your special jewelry! Using Kraft-tex makes it durable for traveling.
Materials
- 1 Roll Kraft-tex - I used Blue Iris
- Fat Quarter lining fabric
- 1/3 yard fabric for zipper trim, ties and binding
- 9 X 12-inch piece of Clear Vinyl - I used C&T Premium Vinyl
- 4 zippers, at least 9 inches each. (Can be longer - will trim to size)
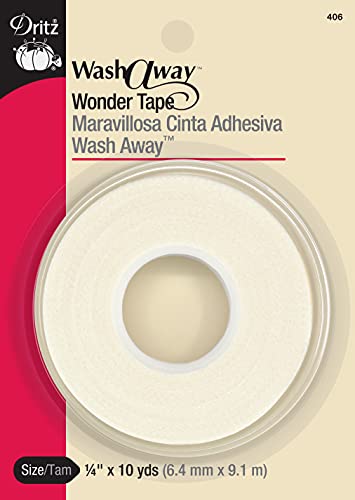
- Wash Away Wonder Tape
- Thread
Tools
- Sewing machine with sewing/piecing foot and zipper foot
- Optional feet: Teflon foot, edgestitch foot open-toe foot
- Wonder Clips - pins will leave holes in the Kraft-tex
- Rotary cutter and mat
- Quilting rulers
- Scissors
- Frixion pen or other erasable marker (test on your materials)
- Iron and pressing surface
Instructions
- Cut materials as follows:
From Kraft-tex, cut 1 piece 8½ x 14 inches for cover and 1 piece 1 x 6 inches for hanging loop
From fat quarter, cut 1 piece 8½ x 14 inches for lining and 2 pieces at 2 x 18 inches for ties
From ⅓ yard fabric, cut 2 strips at 2½ inches for binding and 2 strips at 2 inches (subcut 8 pieces to 8½ inches each) for zipper trim
From vinyl, cut 4 pieces at 2½ x 8½ for pockets
- Press zipper trim pieces in half lengthwise, wrong sides together. Fold pressed edges to meet at center crease and press again.

- Leaving the paper in place, apply sticky side of Wonder Tape along one side of zipper trim.

- Peel away the paper and adhere the closed fold of the zipper trim along the zipper coil. At this point, you can still reposition the basting Wonder Tape, so make sure the trim pieces line up. The other, open side of the trim is where the vinyl will go.

- Using a zipper foot, stitch the trim alongside both sides of the zipper coils.

- Slide zipper tab to place it inside the ends of the trim and stitch across the coils, back and forth to secure.
 Stitch across the coils at the other end of the zipper inside the zipper stop, sewing back and forth to secure.
- Insert 1 piece of vinyl as far as it will go into the open side of one zipper unit. Trust me, it's here. But it doesn't show in the photos because, well, it's clear! Secure with a zigzag stitch. If you have a Teflon foot, use it here to glide easier over the vinyl. A regular foot can sometimes stick to vinyl.

- Keep adding vinyl until you have made all 4 pockets. The last zipper tape opening does not get vinyl - it will be stitched down to the lining and cover to form the top of the pocket unit. The other end of the unit is vinyl alone - it will be secured in the binding later.

- Here you can see on the back of the pocket unit how the zigzag stitch secures the loose edge of the zipper tape.

- Place the pocket unit on the lining piece, lining up the sides and the vinyl end of the pockets unit with one end of the lining piece. Clip into place (pins will leave holes in the vinyl). The ends of the zippers will extend beyond the lining at this point. That's okay - we will trim later.

- With Teflon foot, if available, stitch the pocket unit to the lining a scant ¼-inch from the edge on the sides and the bottom.

- Topstitch the open end of the pocket closed. I like to use an edgestitch foot for a nice, straight line.

- Starting and stopping at the zipper coils, stitch the dividers for the small pockets, backstitching to secure. Do not sew over the zipper coils! I stitched 2-¾ inches in from either side to divide the top 3 pockets. I kept the bottom pocket as one for larger pieces, such as bracelets.

- Here's the completed lining with pockets. You may have noticed that we haven't sewn the pocket bottoms closed yet. Hang on, it's coming. Set this piece aside for now.

- Fold the 1 x 6-inch piece of Kraft-tex in half lengthwise and press. Topstitch near the cut edges. This will be the hanging loop.

- Press the 2 x 18-inch pieces of lining fabric in half lengthwise, wrong sides together. Press in again to the center fold.
 Edgestitch closed. Finish ends with a straight or zigzag stitch.
- On the right side of the main cover piece of Kraft-tex, mark a spot at the center of one of the 8-½-inch sides. This will be the top of your case.
 Position the ties and hanging loop on either side of the center mark, as shown, and clip into place.
 Stitch across the ends a scant ¼-inch from the edge.
- Clip the lining and pockets to the cover, wrong sides together. Match the vinyl end of the lining with the bottom of the cover and the top end of the cloth end of the lining with the top of the cover where you have just attached the ties and hanging loop.

- Sew the 2½-inch strips together to form one long piece of binding. Fold in half lengthwise and press. (You're going to sew this like a quilt binding.) Leaving a 10-inch tail and matching raw edges, stitch the binding to the pocket side of the case, starting about ¾ of the way down the side using a generous ¼-inch seam. (Just a thread or two wider than ¼-inch.)

- Stop with your needle down the same generous ¼-inch from the edge of the cover. Take a couple of backstitches, raise the needle and remove the fabric for a moment.

Rotate your piece counter-clockwise 90 degrees. Pull the unstitched portion of the binding up so that the fold forms a 45-degree angle.
Fold the binding back down to square it up with the corner. You've made your first mitered corner! Continue stitching, turning each corner the same way. Stitch just a couple of inches past the fourth corner and backstitch. leaving a gap and a tail at each end of the binding. Remove case from machine.
- Here is where you will make a magical, perfectly fitting, invisible join for your binding. Cut one end of the binding so it reaches about the middle of the gap. At that cut edge, fold the other end of binding back on itself, matching the cut edge and the fold you have just made. Mark the loose tail of the folded end 2-½ inches (the same as the width of the cut binding strip) from where the cut and folded edges meet.

- Right sided together, turn the binding ends 45 degrees as shown and pin. Mark a 45-degree line from corner to corner. Just to be sure you have it all marked correctly (especially if this is your first invisible binding join), Place pins along the drawn line and audition the placement by matching the raw edges of the binding with the edge of the jewelry case.
 If it fits, stitch on the drawn line and trim seam. If not, adjust and try again.
- Finger press the seam open, reposition the binding so the edges line up with the edge of the case and finish the binding seam.

- Along the bottom of each pocket and near the edge of the zipper tape, use the zipper foot to stitch the pocket closed through all layers covering the previous stitching.

- Turn the binding to the outside of the cover, folding in the miters at the corners. Clip to hold in place. The binding should cover the previous stitching.
 Topstitch the binding all around, turning corners and stitching over ties and hanging loop carefully. Use an edgestitch foot if you have one.
- Here is the outside of the completed jewelry roll-up travel case, showing the ties and hanging loop.

- Filled with jewelry, the travel case can hang in the closet. You can hide it under a garment if you want.

- Now the jewelry travel case is ready to roll!

- Case closed! Now I need a destination!

Notes
Check out all of the great colors and options of Kraft-Tex.
As an Amazon Associate I earn from qualifying purchases. Read more about our affiliate linking policy.
Recommended Products
As an Amazon Associate and member of other affiliate programs, I earn from qualifying purchases.
Browse through more sewing projects on Create Whimsy. Learn more about working with Kraft-tex.
Check out all of our projects using Kraft-Tex and all of the great colors of Kraft-Tex.


