I had so much fun making costumes for these 3 men who acted as the Three Wise Men at a Christmas program at Marbridge. They wanted the costumes to be shiny and bright, and they were! And, I think I’ll have glitter in my house for the next five years! Ha! Here is my story about making the DIY wise men costumes.
I started with the three wise men’s robes. It was fun to take the basic pattern and add trims and decorations to make them even shinier! On the gold jacket, I added gold garland; to the blue gown I added some sequin trim, beads, and shiny snowflakes. On the glittery jacket, I trimmed it with some of the green velvet-like fabric from the other gown. That fabric was really rough, and I wanted the edges to be nice and soft. I added some trims to the necks of the green and red gowns.
They had found pictures for the head pieces they wanted. I luckily found the perfect turban at a store for the red outfit. The blue was easy, but how to make that hat for the wise man in green and gold? That was the fun puzzle!

How to Make a Wise Man Hat
This wise man hat is easy to make with some brocade, elastic, polyfil and trim.
Materials
- 1/2-yard brocade or other fabric for the outside of the hat
- Partial bag of polyfil
- Elastic to fit around circumference of head
- 1/2-yard lining fabric. I used muslin - you don't want a slippery or scratchy fabric for the lining
- Thread
- OPTIONAL: Trim to wrap around the band of the hat
Tools
- Sewing machine
- Iron
- Ironing board
Instructions
- Start by measuring around the circumference of the head of the person to wear the hat. I started with 24" circumference. Let's make the puffy hat band first. Cut a piece of fabric that is the circumference PLUS 2" by the desired width of your band.
EXAMPLE: I cut a 24" + 2" = 26" long by 6" wide. If you want a narrower hat band, cut it smaller. I wanted a poofy big band.
Fold the fabric lengthwise right sides together and sew along the long side with a 1/2" seam allowance.
Press the seam. Turn the tube inside out.
Cut a piece of elastic 1" SMALLER than the circumference of the head.
EXAMPLE: I cut a 23" piece of elastic. Attach the elastic on one end of the tube - I like to sew it down securely. Thread it through the tube and attach at the other end of the tube.
Sew one end of the tube closed. Now fill the tube with polyfil. It will gather up a bit, as the elastic is smaller than the tube. This helps the hat fit well and not fall off.
When the hat band is puffy and full, turn in the ends of the open end of the tube. Place the closed end inside the tube. I like to hand stitch this closed.
Now you have the finished hat band!
The top of the hat is made by sewing four (4) triangle type shapes together. To determine the size of the triangle, start by dividing the circumference of the head by 4. I started with 24". So 24/4=6. I need to add my seam allowances and a little bit more to make it comfortable. So, I'll start with a 7" base to my triangle.
Draw an equilateral triangle with the base you calculated above. (Remember geometry? An equilateral triangle is one where all three sides are the same size!) If you want the crown of the hat to be taller, you can make taller triangles.
Cut four (4) triangles from both the fashion fabric and the muslin. Sew the fashion fabric triangles together. Press seams.
- Now it's time to sew the muslin triangles together. Sew three of them together. On the fourth triangle, leave about 3" open on one of the seams. This will be used to turn the upper hat inside out and have a finished edge.

- Now, sew the fashion fabric outside of the hat to the muslin, right sides together, all around the outside edge. See how the gap is there making it easy to turn the hat inside out?

- Hand stitch the gap closed. Now it is time to put the crown on the brim. I pin the crown around the brim, near the base of the brim. This way the lining is against the head, in case the fabric is scratchy (like this brocade was). You will need to ease a bit, but this adds to the puffiness of the hat.
Hand stitch. If you'd like, wrap some trim around the brim before sewing the crown on for added decoration. I used a gold mesh trim that I found in the floral section of my craft store.
- Here is the finished hat ready for one of the wise men!

Recommended Products
As an Amazon Associate and member of other affiliate programs, I earn from qualifying purchases.
As an Amazon Associate I earn from qualifying purchases. Read more about our affiliate linking policy.
-
 Panasonic 360º Freestyle Advanced Ceramic Cordless Iron, Pest Repeller v.57, Teal
 -
 Bartnelli PULSE Ironing Board with New Patent Technology | Made in Europe with Patent Fast-Glide Turbo & Park Zone, With Smart Hanger, 4 Layer Cover Pad | 4 Premium Steel Legs (Size 43x13)
 -
 White 70-Yards Length 1/4" Width Braided Elastic Cord/Elastic Band/Elastic Rope/Bungee/White Heavy Stretch Knit Elastic Spool with Free Tape Measure
 -
 Fairfield The Original Premium Polyester, Soft Pillow Stuffed Animals, Toys, Cloud Decorations, and More, Machine-Washable Poly-Fil Fiber Fill, 16-Ounce Bag, White
And, here are the three wise men, with the one on the left wearing the new brocade hat!

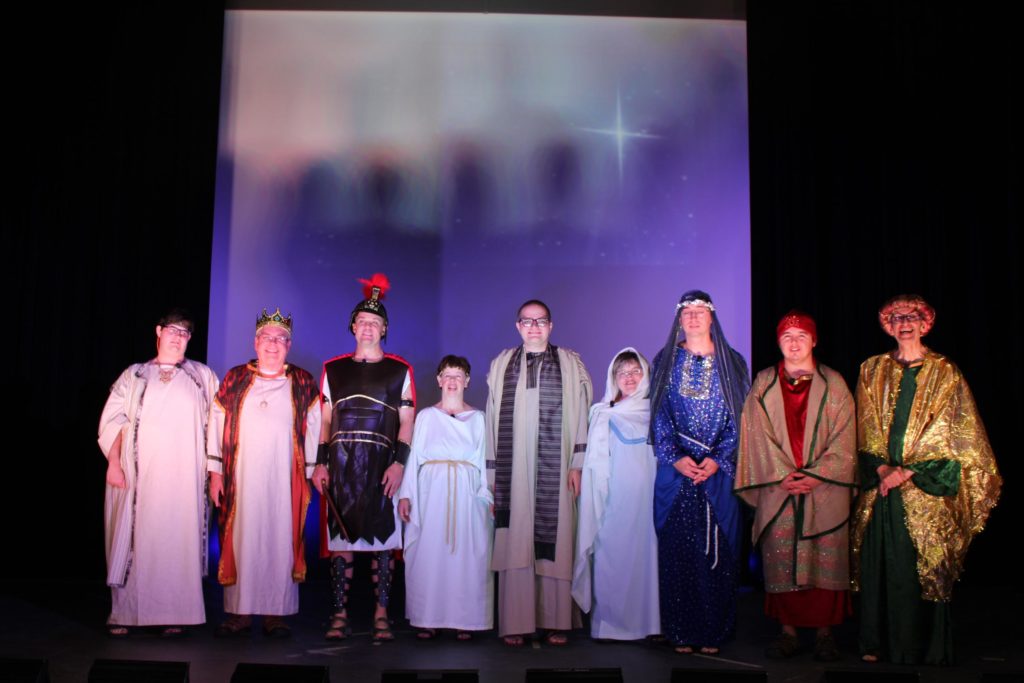
Here is the entire main cast. I ended up making the King and his son’s outfits, too. They are the two on the far left. And, the three Wise Men on the far right. It was so much fun to help out for such an awesome program! I was honored to make the three wise men costumes for this special event!
See all of the sewing projects on Create Whimsy!