
The Monkey Wrench quilt block is a classic design that’s perfect for beginners who want to build confidence with piecing and accuracy. Made with simple squares and half-square triangles, this block comes together quickly—but still gives you that satisfying, “look what I made!” moment.
If you’ve ever struggled with matching seams or getting your quilt blocks to lay flat, this is a great block to practice with. It teaches core quilting skills you’ll use again and again.
In this tutorial, I’ll show you exactly how to make a Monkey Wrench quilt block step-by-step, with tips to help you get crisp points and a square, finished block.
What is a Monkey Wrench quilt block?
A Monkey Wrench quilt block is a traditional patchwork design made from a combination of squares and half-square triangles arranged in a rotating pattern.
Is this block beginner friendly?
Yes! This is a great beginner quilt block. If you can sew a straight seam and make half-square triangles, you can make this block.
As an Amazon Associate I earn from qualifying purchases. Read more about our affiliate linking policy.
RELATED: 7 ways to make half-square triangles
What size is the finished block?
The size depends on your cut pieces, but this tutorial shows how to make a standard 10″ finished block.
This quilt block was first known to be published in 1898 in the Ohio Farmer. It is a popular block for block exchanges and is referred to by many other names, such as Alaska Homestead, Dragon’s Head, Double Wrench, and Hole in the Barn.
What will I learn?
- How to make half-square triangles
- How to arrange pieces for a balanced block
- How to match seams for clean intersections
- How to keep your block square while sewing
Quick Start
Skill level: Beginner
Finished size: 10-inch finished
Time to complete: About 30–45 minutes
Techniques used: Half-square triangles, accurate seam allowances, pressing
It is a variation of the Churn Dash quilt block and perfect for quilters of all skill levels.
RELATED: Churn Dash quilt block
How is this quilt block different than the Churn Dash quilt block?
With the churn dash quilt block all of the components are the same size and are squares – the corner half square triangles, center square and side strip blocks.
With the monkey wrench quilt block, the corners are all half square triangles, the center square is one-fourth the size of the corner squares which makes the side strip blocks twice as long as wide. Here are side-by-side examples:


Ready to make this quilt block? Here is how to lay out the fabrics:

And here is a fabric calculator for popular sizes for finished blocks. Use this as a cutting guide for your fabrics. You’ll use two fabrics to make this block.

If you plan to make a large quilt, check out our article on the different ways to make half square triangles! It’s super easy to make them eight (8) at a time!
How to Make the Monkey Wrench Quilt Block
Learn how to make the Monkey Wrench block with this step-by-step tutorial that uses half-square triangles, strip set blocks and a center square.
This is an uneven nine patch block and a variation of the churn dash quilt block. It's a quick block to put together.
Materials
- 1/4 yard each of two (2) fabrics
- Coordinating thread
Tools
- Sewing machine
- Quilter's ruler
- Rotary cutter
- Cutting mat
- Removable fabric marking pen
- Iron
- Pressing surface
Instructions
Step 1: Cut your fabric
Start by cutting your fabrics according to the chart above. I made a 10-inch finished quilt block and cut the following: one (1) 2-1/2 inch square for the center, two (2) 4-7/8-inch squares from each color for the half square triangles for a total of four (4) 4-7/8 inch squares, and one (1) 2-1/2 inch strip of fabric from each fabric, at least 16-inches long.
Step 2: Make half-square triangles
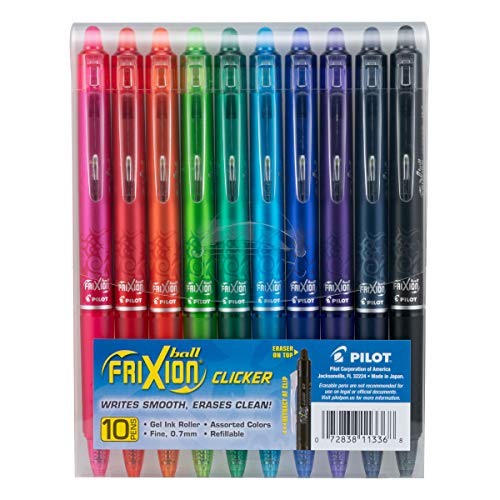
Let's make the half square triangles for our corner units first! Take your squares that are cut to 4-7/8 inch. On the back of the lighter fabric, draw a diagonal line with a removable fabric marker. Always test your marker first! I'm using a Frixion pen that is removed with heat. 
Here is the diagonal line. 
Layer the two colors for the half square triangles right sides together, with the one that has the diagonal line on top. Sew 1/4-inch from the line.
Turn and sew 1/4-inch from the other side of the line. TIP: Chain sew the pieces to save time! 
Now, using your rotary cutter and quilter's ruler, cut along the marked line forming two half square triangles.
Here are two half-square triangles cut and ready to be pressed.  Press seams to your preference. Are you team press to one side? Or press open? Read our article about pressing seams for quilting.
Step 3: Make strip sets
Next, let's make our strip set blocks for the bar units. Sew the two (2) 2-1/2 inch strips right sides together with a 1/4-inch seam allowance.  Press the seam to your preference.
Using your quilter's ruler and rotary cutter, cut them at 2-1/2 inches, making 2-1/2 X 4-1/2-inch rectangles. You'll need four (4) of these rectangles.
Step 4: Lay out your quilt block
You are ready to lay out your quilt block! Put the half-square triangles in the corners, the strip set blocks between them, and the solid square in the center.
Step 5: Sew rows together
I like to sew the rows together first. Use 1/4-inch seam allowance for sewing the block together. 
Step 6: Join the rows
Then, match the seams and sew the rows together, forming the finished monkey wrench quilt block.
Step 7: Press and square up
Here are four blocks, showing you how it will look in a full quilt.
Recommended Products
As an Amazon Associate and member of other affiliate programs, I earn from qualifying purchases.


This is a great block for beginners with three simple components – strip sets, half square triangles and a center square made from two fabrics. When thinking about fabric selection, for the greatest impact, select light fabrics for either the foreground or background fabrics, and a darker fabric for the other. Have value contrast in the two fabrics.
Common Mistakes (and how to fix them)
Points don’t match → Check your seam allowance and pin intersections before sewing
Block isn’t square → Trim your half-square triangles before assembling
Fabric looks stretched → Avoid pulling while pressing; lift and press instead
Twisted layout → Always lay out your block before sewing
Ideas for a monkey wrench quilt block pattern
- Make it scrappy! This is a perfect quilt pattern to use up your scraps! Instead of using two colors, use light and dark print fabrics for the components. Make half square triangles that are light and dark, and strip sets from light fabrics and darks. Pick one or the other for the center square and have some fun!
- This is a perfect block to make a baby quilt. The square block in the center can be fussy cut with a cute baby print instead of being a plain square.
- Use some of those fat quarters you’ve collected to change up the fabrics in this classic block.
Frequently asked questions
What is a Monkey Wrench quilt block used for?
It’s often used in sampler quilts or traditional quilt layouts.
Can beginners make this block?
Yes—this is a great skill-building block for new quilters.
Do I have to press seams open?
No. You can press open or to one side—both methods work.
What fabrics work best?
Quilting cottons. High-contrast fabrics help show off the design.
What to Make Next
Once you’ve made one block, try:
- A full quilt layout
- A pillow cover
- A sampler quilt with other traditional blocks
The Monkey Wrench quilt block is one of those designs that quietly builds your skills while still being fun to make. Once you’ve made one, you’ll find yourself reaching for it again—whether you’re making a full quilt or just practicing your piecing.
And like any good quilt block, it gets even better the more you make.
More classic quilt blocks:
Ohio Star quilt block
Basic Nine Patch quilt block
Shoo Fly quilt block
Rail Fence quilt block
Browse through more free quilt patterns on Create Whimsy.
Check out all of our quilting projects and inspiration for your next project!


