
Looking for an easy maple leaf quilt block for a fall project? This classic quilt block is beginner-friendly in a basic nine-patch quilt block format and uses simple squares, half-square triangles and a small stem unit. Make it in 6-inch, 9-inch, 12-inch, 15-inch or 18-inch finished sizes for quilts, table runners, pillows or seasonal wall quilts.
The maple leaf is one of those quilt blocks that makes me think of crisp fall days and leaves changing color. Use traditional autumn colors, your favorite scraps or even modern prints for a completely different look.
Can a beginner make a maple leaf quilt block?
Yes! This is a beginner-friendly block made with basic patchwork and half-square triangles.
What sizes can I make?
This tutorial includes five finished sizes: 6, 9, 12, 15 and 18 inches.
What fabric do I need?
Use two contrasting fabrics: one for the maple leaf and stem and one for the background. Quilting cotton works beautifully.
As an Amazon Associate I earn from qualifying purchases. Read more about our affiliate linking policy.
What can I make with maple leaf quilt blocks?
Make a fall quilt, table runner, pillow, wall hanging or a scrappy seasonal project.
What you’ll learn
By the end of this tutorial, you’ll know how to:
- Make a classic maple leaf quilt block.
- Make half-square triangles using the two-at-a-time method.
- Create the angled stem unit.
- Trim the stem so it stays centered.
- Assemble the block in a nine-patch layout.
- Make five different finished block sizes.
- Use color and contrast to make your maple leaf stand out.
- Turn individual blocks into seasonal quilts and home décor.
Quick start
Skill level: Beginner
Finished sizes: 6″, 9″, 12″, 15″ and 18″
Time: About 25 minutes for one block
Fabric: Two contrasting fabrics
Technique: Traditional machine piecing
Pattern: Free, no PDF required
Making several blocks? Cut all your pieces first and make your half-square triangles in batches. You’ll save time and get into a nice sewing rhythm.
Choosing fabric for a maple leaf quilt block
This is a fun block for playing with color.
For a traditional fall maple leaf, try gold, orange, rust, burgundy or deep red against a light background. Or turn the idea upside down and use a light leaf on a dark background.
You can use solid fabrics or prints. The important thing is contrast. You want the maple leaf shape to stand out clearly from the background.
For a scrappy quilt, use a different fabric for each leaf and keep the background fabric the same. This is an easy way to use some of those favorite scraps you’ve been saving.
Maple leaf quilt block cutting chart
Choose your finished block size first, then use the corresponding column in the cutting chart below.
The maple leaf is constructed as a nine-patch block, so each finished block is divided into three equal sections. The cutting chart gives you the starting sizes for the squares, half-square triangles and stem unit.
For one block, you’ll make:
- Four half-square triangles
- Four solid squares
- One stem unit
Once you’ve cut everything, you’re ready to sew.
Here is the layout of the fabric for this block:
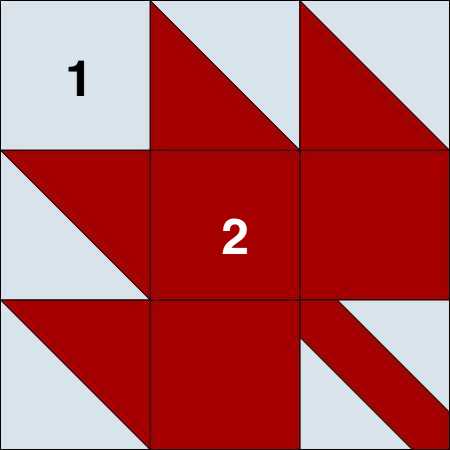
Here is how to cut the fabrics for five (5) different finished block sizes for the maple leaf. This simple quilt block goes together quickly.
From Fabric 1, we’ll make four (4) half square triangles, one (1) solid square and one (1) block that will be for the background of the stem.
From Fabric 2, we’ll make four (4) half square triangles, three (3) solid squares and the horizontal line to make the stem.

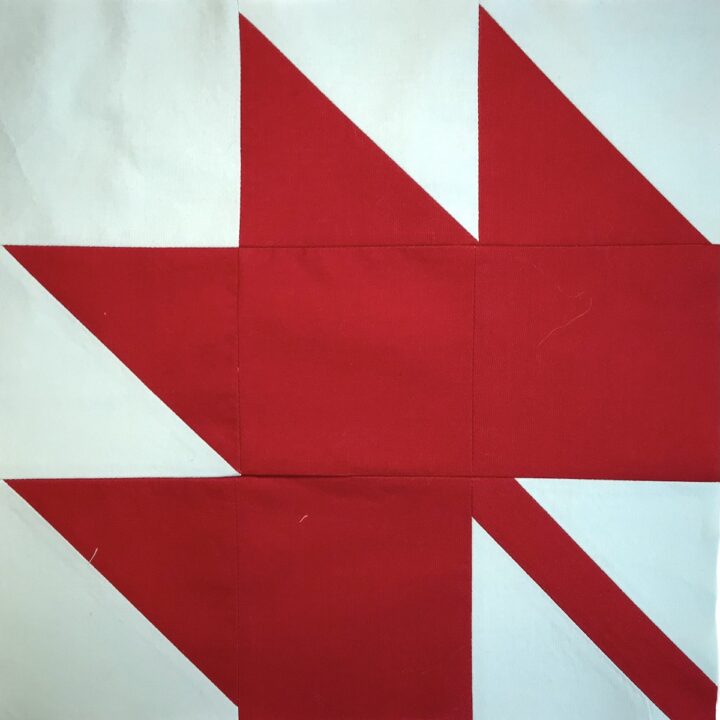
How to Make a Maple Leaf Quilt Block
This classic maple leaf quilt block is made with squares, half-square triangles and a simple stem unit. The block is assembled in a nine-patch layout, making it a great project for beginner quilters.
Choose from five finished sizes: 6, 9, 12, 15 or 18 inches. I'm making the 9" finished block for this tutorial. The directions are the same, just cut your fabrics in different sizes.
Before You StartChoose your finished block size and cut your fabric using the cutting chart above.
For the best contrast, use one fabric for the leaf and stem and a contrasting fabric for the background.
Before sewing, lay out all nine pieces in the maple leaf arrangement. This makes it much easier to see which direction the half-square triangles need to face.
Materials
- 1/4 yard each of two (2) fabrics, or two (2) fat quarters
- Thread
Tools
- Sewing machine
- Iron
- Pressing surface
- Rotary cutter and mat
- Quilter's ruler
- Removable fabric marker; I used a Frixion pen
Instructions
Step 1: Cut the Fabric
Cut the squares and stem pieces according to the cutting chart for your finished block size.
For one maple leaf block, you will make:
- Four half-square triangles
- Four solid squares
- One stem unit
I'm making the 12-inch finished quilt block. I cut the pieces:
- Fabric 1: background: Cut 2: 4-7/8" squares
- Fabric 1: background: Cut 1 4-1/2" square
- Fabric 1: background for stem: Cut 1 4" square
- Fabric 2: leaf: Cut 2: 4-7/8" squares
- Fabric 2: leaf: Cut 3 4-1/2" squares
- Fabric 2: stem: Cut 1 1" x 7" strip
If you are making several blocks, cut all of your pieces at once. It will save time later. 
Step 2: Make the half-square triangles
This block needs four half-square triangles. There are many methods to make half square triangles. For this tutorial we only need four, so it is easiest to make the half square triangles two at a time method. If you are making a full quilt, I'd recommend making half square triangles eight at a time.
For one pair of HSTs, place one background square and one leaf square right sides together.
Using a removable fabric marker, draw a diagonal line from corner to corner on the wrong side of the lighter fabric.

Layer the two (2) squares for your half square triangles, right sides together and sew 1/4-inch on one side of the marked line.
Turn and sew 1/4-inch on the other side of the marked line. 
TIP: When you are making more than one, chain stitch the blocks. This is when you sew the first line and then feed the next block right after it. 
Cut directly on the marked diagonal line.
You now have two half-square triangles. 
Here are the two half square triangles ready to be pressed. 
Press the seams to your preference. Your half square triangles are ready! Place them aside.
Step 3: Make the maple leaf stem
The stem is made from a square of background fabric and a narrow strip of leaf fabric.
Start with the background square specified in the cutting chart.
Cut the square diagonally in half.
Place the stem strip along the diagonal edge of one background triangle, right sides together. Center the strip so it extends slightly beyond both corners.
Handle this piece gently. The diagonal edge is on the bias and can stretch.
Sew the stem strip to the first triangle using a 1/4-inch seam allowance.
Press the seam.
Place the second background triangle on the opposite side of the stem strip, right sides together. Center the triangle with the stem and sew with a 1/4-inch seam allowance.
Press the seam.
You now have a maple leaf stem unit that needs to be trimmed.

Step 4: Trim the stem unit
The stem needs to be trimmed to the unfinished size of the center block.
For example, a 12-inch finished maple leaf block uses a 4-1/2-inch unfinished center unit.
Place your square ruler on the stem unit and trim carefully.
First, trim two sides while keeping the stem centered.
. 
Then rotate the unit and trim the remaining two sides.
Take your time here. A centered stem will make the finished maple leaf look much more polished 
Step 5: Lay out the maple leaf block
Lay out all nine units before sewing.
Your maple leaf block has three rows of three units.
Check the direction of each half-square triangle and make sure the stem is pointing toward the bottom of the block.
This is the easiest time to fix an incorrectly positioned piece.

Step 6: Sew the rows
Sew the three units in each row together using a 1/4-inch seam allowance.
Press each row before joining the rows.
When sewing the rows together, carefully match the seams where the units meet.
Step 7: Finish the maple leaf quilt block
Sew the three rows together.
Press the finished block.
Your maple leaf quilt block is ready to use!
Make one for a seasonal pillow or wall hanging, or make several blocks for a fall quilt or table runner. 
Recommended Products
As an Amazon Associate and member of other affiliate programs, I earn from qualifying purchases.
-
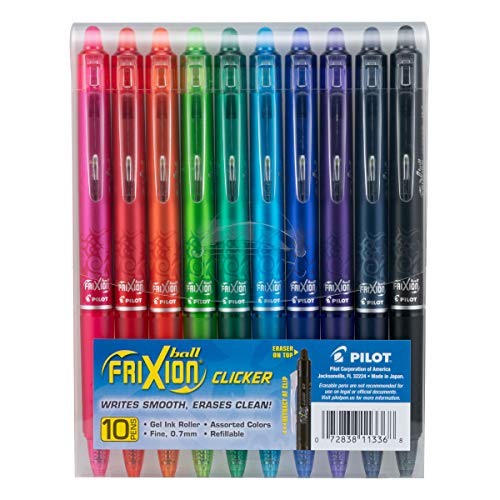 PILOT FriXion Clicker Erasable, Refillable & Retractable Gel Ink Pens, Fine Point, Assorted Color Inks, 10-Pack Pouch (11336)
 -
 Panasonic 360º Freestyle Advanced Ceramic Cordless Iron, Pest Repeller v.57, Teal
 -
 Creative Grids 90 Degree Quarter-Square Triangle Quilt Ruler - CGRT90
 -
 Omnigrid 6 x 6 w/Angles Quilting Rulers, 6" x 6", Clear
 -
 Omnigrid Non-Slip quilter's Ruler, 6" x 24", Neon Green
 -
 45mm Rotary Cutter
 -
 OLFA 24" x 36" Double-Sided, Self-Healing Rotary Mat
Maple leaf quilt block project ideas
Once you’ve made one maple leaf block, there are lots of ways to use it.
Make a fall quilt
Make several blocks in the same size and arrange them in a simple grid. Or mix different finished sizes for a more playful quilt design.
Make a fall table runner
A row of maple leaf blocks makes a beautiful table runner for autumn. It’s also a good way to try the block before making an entire quilt.
Make a seasonal wall quilt
An 18-inch maple leaf makes a statement all by itself. Add a border and quilting, and you have a simple piece of fall décor.
Make a maple leaf pillow
A single 12-inch or 15-inch block is a great starting point for a seasonal pillow cover.
Make a scrappy maple leaf quilt
Pull out your stash and make every leaf a different color. Use a consistent background fabric to tie all of the blocks together.
Make the leaves look like they’re falling
Rotate some of the blocks before sewing them together. Turning the leaves in different directions gives the quilt a feeling of movement.
Most of all, have fun playing around with the maple leaf quilt pattern!
Common mistakes when making the maple leaf quilt block
The half-square triangles are facing the wrong direction
Lay out all nine pieces before sewing the rows together. It’s much easier to rotate a piece while it is still sitting on your cutting table!
The block doesn’t finish at the correct size
Check your 1/4-inch seam allowance and make sure your HSTs and stem unit are trimmed accurately.
The stem isn’t centered
Take your time when trimming the stem unit. Trim a little from two sides, check the center, then trim the remaining sides.
The fabric stretches around the stem
The diagonal edges of the background pieces are on the bias. Handle them gently and avoid pulling the fabric while sewing.
The maple leaf disappears into the background
Your fabrics may not have enough contrast. Take a quick photo of them with your phone and switch it to black and white. If the fabrics look almost the same, choose a lighter or darker background.
Frequently asked questions
Yes! This is a beginner-friendly quilt block that uses squares, half-square triangles and a simple stem unit. It’s a nice project for practicing accurate 1/4-inch seams.
This tutorial includes five finished sizes: 6, 9, 12, 15 and 18 inches.
Quilting cotton is a great choice. You can use solids, prints or scraps. Just make sure there is enough contrast between the leaf and the background.
Absolutely. Use a variety of fabrics for the leaves and keep the background consistent. Or go completely scrappy and use different backgrounds, too.
Yes! Several maple leaf blocks make a wonderful fall table runner. You can use the same-size blocks or experiment with different sizes and layouts.
This tutorial uses the two-at-a-time method. If you’re making several maple leaf blocks, you can also make your HSTs in larger batches to save time. See our article 7 Ways to Make Half-Square Triangles.
Check the seam allowance and the finished size of your individual units. Accurate trimming is especially important before you assemble the nine-patch block.
No. This is a free tutorial with cutting information and step-by-step photographs, so there is no paper pattern to download.
More quilt blocks to try
If you enjoyed making the maple leaf, try another beginner-friendly quilt block next.
- How to Make a Nine Patch Quilt Block
- 7 Ways to Make Half Square Triangles
- Easy Pumpkin Quilt Block
- Spool Quilt Block
- Eccentric Star Quilt Block
- Disappearing Nine Patch Quilt Pattern
- Shamrock Quilt Block
These blocks use many of the same basic quilting skills, so you’ll be able to build on what you learned here.
Final thoughts
The maple leaf quilt block is a simple little block with lots of possibilities. Make it in traditional fall colors, use up your scraps or try an unexpected color combination.
Make one block for a pillow or wall quilt, or keep going until you’ve got a whole pile of leaves ready to fall across a quilt top.
Most of all, have fun playing with color, scale and layout. That’s where a simple quilt block starts becoming your quilt.
Browse through more free quilt patterns on Create Whimsy.

