
Want to add pattern and personality to plain fabric without complicated sewing or expensive tools? Fabric stamping is one of the fastest ways to transform fabric—and it’s beginner-friendly, forgiving, and a little addictive.
In this tutorial, you’ll learn how to stamp on fabric using simple supplies and easy techniques. Whether you’re decorating a tote bag, tea towel, or quilt block, this method gives you beautiful, repeatable designs in just minutes.
Make your own fabric designs by using a stamp on fabric with textile paints. You can use any type of stamp — either purchased or one you make yourself.
How do you stamp on fabric?
Use fabric paint or ink, apply evenly to a stamp, and press firmly onto fabric.
What kind of paint works on fabric?
Fabric paint or textile ink that is washable and heat-set.
As an Amazon Associate I earn from qualifying purchases. Read more about our affiliate linking policy.
Does stamped fabric wash well?
Yes—after heat setting, most fabric paints are machine washable.
Can beginners stamp on fabric successfully?
Yes. Simple shapes and light pressure make it easy to get great results.
Quick start
- Use fabric paint or textile ink
- Start with a simple stamp (foam, rubber, or even a potato!)
- Place cardboard or plastic under your fabric – the paint may bleed through the fabric
- Apply paint lightly to the stamp
- Press straight down—don’t wiggle
- Let dry, then heat set
That’s it. You’re stamping.
What you’ll learn
- How to stamp on fabric without smudging
- What paints and inks actually work
- How to get clean, crisp impressions
- How to repeat patterns evenlyHow to make your design washable
Stamping on fabric is one of many techniques to embellish the surface of your fabric, adding your personal mark to your projects. I wanted flies on fabric for a quilt in our Letters Home series, where my mother talks about how the flies were terrible. I couldn’t find a good fly stamp, so I made my own to make my own fabric.

How to Stamp on Fabric
Make your own fabric designs with a stamp and textile paints!
Stamping on fabric is a fun and easy project and you create designs that are unique and all yours. Generally, larger stamps work better (larger than 1"). Delicate, small stamps with fine details are best suited for ink and paper.
You can print on solid fabrics or on prints as I did in this tutorial. Spiff up an ugly fabric with some textile paint stamping! Yes, you really can make an ugly kinda interesting with just a little paint and time.
Once you start stamping fabrics, you won't stop - you'll look at each piece of fabric a little differently. What can you add to make it more interesting?
Materials
- Textile paint
- Fabric - cotton works best
Tools
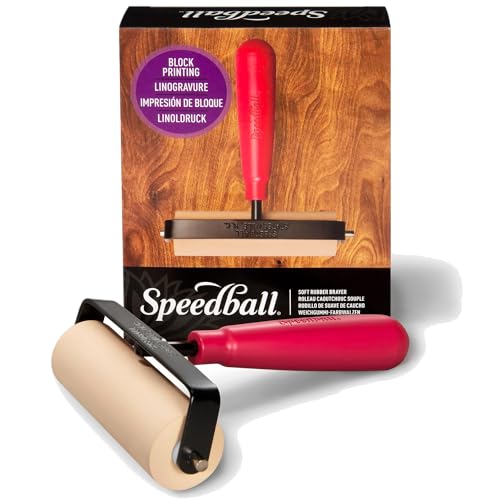
- Brayer
- Gelli plate or styrofoam disposable plate
- Stamp
- Painter's tape
- Iron (for heat setting)
- Plastic, paper or cardboard (to protect your table)
Instructions
Step 1: Gather supplies
Gather your supplies for stamping your fabric. I chose this printed fabric for my stamping and made my own stamp for the fly - I couldn't find one that suited my vision for this fabric to use in an art quilt. Press your fabric to remove any wrinkles. 
Step 2: Prep your fabric
Using painter's tape, carefully tape your base fabric to your surface. I used a vinyl tablecloth to protect my table from the paint. You can use a piece of plexiglass or other plastic tablecloths to protect your table.
Step 4: Ready to stamp
Pour about 1 teaspoon of textile paint onto your Gelli plate. Use the brayer to make a very think layer of paint on the Gelli plate. Using a Gelli plate makes a cushioned surface for the paint, making it easy to get an even coat of paint on your stamp. It acts like a stamp pad for the textile paints. 
Gently press your stamp onto the paint, and then gently press the stamp onto your fabric. Press straight down firmly. For a clear design, do not twist or rock the stamp. Lift the stamp straight up.
NOTE: Always test on a scrap of your fabric first!
Continue stamping until you are satisfied with your new fabric design. When the paint on your Gelli plate gets used, put a little more on the plate and repeat spreading it evenly with your brayer. 
Step 5: Let dry and heat set
When you are satisfied with your design, allow the paint to dry on the fabric. If you want to add a second (or more) colors, now is the time to do that. You'll want the fabric to dry between layers of paint.
Once you are done stamping and the fabric is dry, heat set your fabric with your iron according to the directions on the textile paint. Now your new fabric design is ready to use in a project!
I added wings with a sheer fabric and fusible web. (If you try this, use a teflon sheet or parchment paper for fusing - otherwise it sticks to your iron!).
Recommended Products
As an Amazon Associate and member of other affiliate programs, I earn from qualifying purchases.


Common mistakes (and how to avoid them)
- Too much paint causes bleeding – use thin layers
- Stamp shifting creates a blurry image – press straight down, lift straight up
- Skipping test prints – always test first
- Not heat setting – your design won’t be washable
Tips for stamping on fabric:
- For best results, prepare your fabric by washing and drying to remove any coatings that might interfere with the paint. I add synthrapol to the wash that helps remove all finishes to the fabric.
- Use a brayer or rubber roller to spread your textile paint very thin on a soft surface like a Gelli plate to evenly coat the paint on your stamp.
- Use painter’s tape to tape your fabric to a softer work surface. I use a vinyl tablecloth over a cardboard cutting board. This protects my table from any spills or if the paint gets too thick and bleeds through the fabric. And the thick piece of cardboard has a little give to make a nice impression. Make sure your surface is flat.
- As you stamp, continue to use your brayer and spread the paint to be stamped very thinly on your Gelli plate. If needed, add a little more paint.
- Test your stamp on scrap fabric before printing your final fabric. I prefer to test on the fabric rather than scrap paper as inks move differently on fabric than on paper.
- If you are impatient for the paint to dry, you can use a heat gun tool on a low heat setting to dry the paint. Be very careful to not blow the paint around on the fabric. I prefer to be patient. 🙂
- Don’t have a Gelli plate and brayer? You can spread a thin layer of paint on a paper plate or styrofoam plate with a foam brush to use as your stamp pad.
What are the best fabric stamps?
Any stamp can work to print on fabric. I prefer stamps without too much detail. Fabric absorbs and spreads the paint more than paper and the small details can get blurred or lost.
Use rubber stamps that make nice clear prints.
Clear acrylic stamps are nice to use because you can see exactly where your stamped print will be printed.
What ink or paints do you use to stamp on fabrics?
You can use acrylic paints, but sometimes they don’t hold up as well as textile paints or fabric paints. Also, you can use a permanent ink stamp pad. Ink pads are a lot more expensive and don’t have much ink, so be aware if you plan on embellishing a large piece of fabric. I like to use textile paints. To make the stamp permanent, be sure to follow the paint directions to set the paint. Generally, textile paints are heat set with an iron.
Pigment ink and textile ink can also be used.
What type of fabric is best for printing and stamping?
You can stamp and print on pretty much any type of fabric. This process works on delicate fabrics, canvas and quilting cottons. Even synthetic fabrics can be embellished with the stamping process if you are using acrylic based textile or fabric paints. If you are using natural dyes for stamping, you’ll need to make sure you are using natural fiber fabrics.
What are some project ideas for stamping on fabric?
- Buy plain tea towels and dress them up with stamps!
- Make a table runner and then stamp with a motif or design.
- Add customization to plain children’s clothing with fun stamps.
- Decorate throw pillows with stamps. You can use stamps on purchased plain pillow covers. In this article I show you how to stencil on pillow covers, but stamps work great, too!
- Pretty much any sewing project can be enhanced with a little bit of stamp printing!
- Have fun with fabric stamping! The ideas are limitless!
Frequently asked questions
No—100% cotton works best, but many fabrics will work.
Yes, after heat setting.
Foam stamps, rubber stamps, carved linoleum, or even vegetables.
Yes—this is one of the easiest ways to decorate fabric.
Once you try stamping, you can:
- Create repeating patterns for quilts
- Decorate tote bags and home decor
- Combine stamping with embroidery or appliqué
Fabric stamping is one of those techniques that feels like magic the first time you try it. A little paint, a simple stamp, and suddenly your fabric tells a story.
Start simple. Test often. And don’t aim for perfect—aim for handmade.
Your fabric will thank you.
Browse through more surface design inspiration and projects on Create Whimsy.
See this fabric in my Letters Home: Cutting the Grass and Feeding the Sheep quilt.

