Rag quilts are one of the most forgiving, beginner-friendly quilting projects you can make. With soft, frayed seams and simple construction, they skip the precision stress of traditional quilting and deliver cozy results fast.
If you’ve been wanting to try quilting but weren’t sure where to start, this is your project. Caution: they can be messy, too!
What you’ll learn
- How to make a rag quilt step by step
- What fabrics work best (and what to avoid)
- How to sew rag quilt seams correctly
- Tips for getting soft, fluffy rag edges
- Common beginner mistakes (and how to avoid them)
Quick Start
- Cut squares (ususally 6-10″ – I used 6-1/2″ squares)
- Layer 2 fabrics per block
- Sew blocks together seams facing up
- Clip seams
- Wash and dry to create rag effect
Table of Contents
What types of fabrics are best for rag quilts?
Using quilting fabric for a rag quilt
What size should my squares be for a rag quilt?
Using precuts for a rag quilt
More tips and ideas for making a rag quilt
What is a rag quilt?
A rag quilt is a quilt made with exposed seams that are clipped and washed to create a soft, frayed texture.
Rag quilts were traditionally made from just that – rags. Nowadays you’ll find people purchasing new quilters fabric to make rag quilts. In this tutorial, I wanted to show the traditional way, using four old flannel robes that still had some good fabric, even though the elbows had holes.
As an Amazon Associate I earn from qualifying purchases. Read more about our affiliate linking policy.
Is a rag quilt good for beginners?
Yes. It’s one of the easiest quilts to make because it doesn’t require precise seam matching or traditional quilting techniques.
What fabric works best?
100% cotton flannel works best because it frays nicely and softens beautifully. You can use quilting cottons, too.
Do you need batting?
No. Batting is not necessary. If you want a warmer quilt, add a layer of batting between the two layers of fabric.
I used old flannel robes cut into 6-1/2 inch squares to make this rag quilt. It’s a beginner-friendly project and took me about 6 hours to finish. This is a project for all skill levels. The exposed seams make for a soft rag quilt.

How to Make a Rag Quilt Tutorial
Learn how to make a rag quilt with our step-by-step instructions. It's an easy project and perfect for beginner quilters. I will warn you - it is a messy project!
Rag quilts are a perfect way to make a memory quilt from old flannel shirts or robes.
This quilt was made from four (4) old flannel robes. I used 6-1/2 inch squares in 7 columns with 9 blocks in each row, for a total of 63 finished squares. Two pieces of flannel are used for each square to make the quilt a bit warmer and the raveled edges with more fluff. I cut a total of 126 squares.
Materials
- I used four (4) old flannel robes that had wear on the elbows but the rest of the robe was fine to make a lap-size quilt. I cut 126 squares for a lap-size throw. You want high-fraying fabrics for a traditional look.
- Thread for sewing
Tools
- Rotary cutter
- Quilters ruler
- Cutting mat
- Sewing machine
- Sharp spring-loaded scissors
- Optional: Walking foot for your sewing machine
Instructions
Step 1: Preparing your fabrics
- Start by preparing your fabrics. I washed and dried the old robes. Next, you want to cut off the seams and facings. If you are using flannel shirts, cut off the collar and cuffs. The goal is to have flat pieces of fabric to cut out your quilt squares. Here is the robe being cut up.

- Worn-out spots on the clothing are fine. Here is one of the elbows. I just cut around the hole.

Step 2: Cut your fabrics
- Cut your squares. I cut 126 6-1/2 inch squares for a finished rag quilt size of 38.5 x 49.5.

- TIP: Larger squares = faster quilt & softer drape
Step 3: Arrange your layout
- Lay your squares out on a work surface. They can be random or planned. Since I had two dark robes and two lighter ones, I wanted to make a planned quilt. Here is my layout with one layer of the flannel squares.

- I used two layers of the flannel squares and wanted the same layout on both sides of the quilt. Here I've placed the second layer of quilt squares for the quilt top layout.

- Here is a view from farther away of the two layers of quilt squares. You can see I laid out the fabrics so that they formed a diagonal design.

Step 4: Sew squares together
- Take the first two sets of squares. I gave them a good press.

- Put the WRONG sides together, lining up the raw edges and sew with a 1/2-inch seam allowance. The right side of a rag quilt is the clipped edge of the seam allowance.

- OPTION: Some sewists sew diagonal lines to hold the blocks together.
- If you have a square (or two) with rips in the seam allowance, that's okay! We'll be clipping all of the seam allowances, so no one will ever know!

- Here I've got the first set of squares sewn together.

- Keep sewing sets together.

Step 4: Sew rows together
- Then, sew the sets together until all of your rows are sewn.

- Next, sew the rows together. TIP: use a Wonder Clip to nest the seams.

Step 5: Join rows
- Continue sewing the rest of the rows together until the quilt is put together.

- Here is a close-up of the seams on the right side of the quilt.

- And, here is what the back of the quilt looks like.

- Finish the sewing on the quilt by sewing all around 1/2-inch from the edge of the quilt.

Step 6: Clip all seams
- Now is the time to cut and cut and cut. I think it took me longer to cut the seam allowances than it did to piece the squares! Use a very sharp pair of scissors. I prefer to use spring-handled scissors; they are easier on your hands for a lot of cutting.

- Here I've started cutting around the outside edge and one of the seams.

- Continue cutting about every 1/2-inch along each of the seams and all around the edge. Here it is finished with cutting. NOTE: this is messy! Lots of little threads everywhere!

- And, another view of the seams all cut.

Step 7: Wash and dry
- Now is the fun to make the rag quilt happen! Put the finished quilt in the washing machine and dryer to fluff up the seams. Here is the dryer lint in the lint trap on the first run through.

- I put the quilt through two cycles in the washer and dryer. Here is the finished quilt.

- And the back of the quilt.

- I love the way the seams ruffle up with rag quilting. And using flannel this makes a cozy quilt!

Recommended Products
As an Amazon Associate and member of other affiliate programs, I earn from qualifying purchases.

Common Mistakes to Avoid
- Not clipping seams deeply enough
- Using fabrics that don’t fray well (like polyester blends)
- Forgetting seam direction (they must face outward)
- Skipping the wash step (this is where the magic happens)
What types of fabrics can be used to make a rag quilt?
Any washable fabric can be used to make a rag quilt. Flannel fabric, homespun fabric or other loosely woven fabric is preferred to give it the ‘rag’ look.
Rag quilts date back to the 1700s when women would use worn-out clothes or linens to create layered quilts to keep their families warm. The soft worn fabrics were nice to cuddle under, giving the fabric extra life.
Try denim or corduroy for a warm quilt – but not quite as cuddly as flannel.


Can I make a rag quilt with quilting fabric?
Yes! In today’s world, quilters make a version of a rag quilt with new quilting fabrics and a layer of batting.
Fabric squares are cut, and batting is cut 1-inch smaller. Example: two 6-inch squares of quilting fabric and one 5-inch square of batting. These three layers are sewn together as we did in the flannel quilt above. The squares of batting is cut one-inch smaller so that it doesn’t show in the clipped edges.
Since you are working with three layers, they might shift. Stitch your two fabrics with batting squares between them with a diagonal line using a straight stitch – or make it fancy with a decorative stitch. This will hold everything together while you follow the process above to stitch the quilt blocks together.

Is there a set block size to cut the fabric squares for a rag quilt?
No. You can cut your squares any size you’d like. Most people use a 6-10″ square.
In the tutorial above, I cut them at 6-1/2 inches because it was easy. My quilter’s ruler is 6-1/2 inches wide, and I had a 6-1/2 square special ruler, so that made it super easy to cut the quilt blocks.
The size of the square doesn’t matter. They just all need to be the same size.

Can I use precuts to make a rag quilt?
Of course! Charm packs are 5-inch squares and make great rag quilts. They generally come with 42 squares of fabric which would make a great baby quilt that is 24 x 28 inches finished. This assumes that you use a different fabric on one side and the charm packs for the front squares – or buy two charm packs!
Rag quilt baby blankets are fun to make and give as gifts. They are a quick project and can be done from start to finish in a few afternoons. The fuzzy frayed seam allowances give texture for babies to touch and explore.
Layer cakes make it even easier and quicker to make since the fabric squares are bigger! Again, they come with 42 squares of fabric in a bundle. A finished quilt would be 54 x 63 using the layer cake squares just for the front of the quilt. A super easy rag quilt!

Tips and ideas for making a rag quilt
- For the back sides of a rag quilt, you can use fleece or flannel. Minky would be soft and cuddly, but is not easy to work with. Fun prints are nice, too.
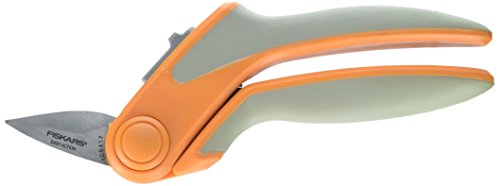
- Make sure you have super sharp scissors before cutting the seam allowances to get the rag effect. You’ll be cutting through four layers of fabric. Try on a test sample or some scraps. If it is difficult, go buy a new pair of scissors – now. You’ll be glad you do. 🙂 Regular scissors you use for paper won’t work. I like using Fiskars spring loaded scissors.
- Baby rag quilts are a great idea for a nice gift for new babies! Pick out adorable baby flannel prints for a soft and cuddly blanket with the frayed edges.
- Make a memory quilt from a loved one’s flannel shirts to be comforted and wrapped in the warmth of their love.
- Use decorative stitches to stitch the fabrics together.
- Have an embroidery machine? You can stitch designs into your double-layer squares before sewing them together.
- Play around with block sizes. Bigger sizes makes the quilt come together faster! You can also mix sizes. For examples four (4) 5-1/2 inch squares can be combined with 10-1/2 inch squares.
- If you’d like, you can add a binding for a clean edge finish around the outside of the quilt.
Frequently asked questions:
How much fabric do I need?
Depends on quilt size and square size. A baby quilt typically uses 36–49 squares.
Can I use different fabrics?
Yes, but keep fiber content consistent for even fraying.
Does it get softer over time?
Yes. Each wash makes it softer and more textured.
Do rag quilts fall apart?
No. As long as seams are properly sewn, they’re very durable.
A rag quilt is one of those rare projects that’s both beginner-friendly and deeply satisfying. It’s quick, forgiving, and endlessly customizable.
If you’ve been waiting for the “right” quilting project to start, this is it.
Browse through more free quilt tutorials on Create Whimsy.
Learn more about using a rotary cutter – tips for beginners.


