
Have a dress you wish you could make again? The good news is you don’t have to take it apart to create a sewing pattern. With a little patience and careful tracing, you can copy the shape and construction of your favorite ready-to-wear dress and sew another one in a fabric you love.
This technique works well for simple dresses, tunics, tops, and other garments with basic construction. While it won’t replace a professionally drafted sewing pattern, it’s a great way to recreate clothing that fits well and has become a favorite.
In this tutorial you’ll learn how to copy the major pattern pieces, transfer important construction details, and create a reusable paper pattern for future projects.
Pattern drafting from ready-to-wear is for intermediate to expert sewers who are comfortable sewing garments from published patterns and have a working knowledge of how garments are assembled. You copy the lines of each piece of the garment, add the seam allowances, and then make a ‘muslin’, or test garment, to try the fitting to make sure you got it right.
Take an existing piece of clothing and make your own patterns. You already know which of your favorite clothes have a perfect fit.
As an Amazon Associate I earn from qualifying purchases. Read more about our affiliate linking policy.
Can I copy a dress without cutting it apart?
Yes. You can make a sewing pattern from an existing dress without taking it apart by carefully tracing each section while keeping the garment flat. Mark grainlines, darts, seams, and notches as you go so your finished pattern is easy to sew from again.
What kinds of dresses work best?
Simple woven dresses with princess seams, darts, or basic sleeves are the easiest to duplicate.
Can I copy knit garments?
Yes, but remember that knit fabrics stretch. Record the fabric stretch percentage and choose a similar fabric for the best results.
Will the new dress fit exactly the same?
It can come very close if you accurately trace every piece and use fabric with similar weight and drape.
What you’ll learn
By the end of this tutorial you’ll know how to:
- evaluate whether a garment is a good candidate for copying
- trace each pattern piece accurately
- identify seam lines versus stitching lines
- transfer darts, pleats, and notches
- label your new pattern pieces
- check that pieces match before cutting fabric
- reuse your new pattern again and again
Quick start
Before you begin:
- Wash and press the garment
- Choose pattern paper that is larger than each section
- Gather rulers, pins, pencils and tracing tools
- Label every traced piece

Pattern Drafting from Ready to Wear
Learn how to take favorite ready to wear garment and make a pattern - so you can make it again in your own style and fabrics!
It's easy to make your own patterns from your favorite clothes!
There are many different ways to make your own sewing patterns.
Materials
- Pattern paper to fit all of the pieces on a garment, or printer paper taped together to be the size of all of the pieces on a garment, you can also use medical table paper or tracing paper.
- Ready to wear garment that you want a sewing pattern from
Tools
- Pencil
- Sewing pins
- 6-inch sewing ruler
- Optional: Pattern sewing rulers or French curve or hip curve ruler
- Paper scissors
- Pattern weights
- OPTIONAL: Tracing wheel
Instructions
Step 1: Examine the garment
Look closely at how the garment is constructed before tracing. Count the number of pattern pieces and identify darts, gathers, pleats, facings, collars, pockets, and sleeves. Taking photos now makes it easier to remember how everything fits together later.
Step 2: Press the garment
Remove wrinkles so every seam lies flat. A pressed garment produces a more accurate pattern.
Step 3: Prepare your work surface with paper
Start by laying out your large piece of pattern paper. If you make a lot of patterns, it is worth the investment in a large roll of pattern paper. If this is your first time, just tape a bunch of printer paper together with clear tape. You need the piece of paper large enough to lay each piece of the garment down flat.
Lay down your paper. I find it easiest to start with the main pieces of the garment. I'm copying this simple dress that I love to wear on hot days around the house.
Think about how you'll make the garment. With this dress, the center front can go on the fold. I folded the dress in have down the center front and laid it on the paper. Since I'll cut it on the fold, I just put the center front along the edge of the paper - one less cut of the paper!

Step 4: Begin tracing your garment onto the paper
With your pencil, draw a line around the first section of the garment, making sure it is laying very flat. (Note: Make sure you have a sharp pencil!)
I'm working with denim fabric, so it doesn't slip around. If you are working with a light weight fabric, use your pattern weights to hold the garment securely on the fabric.
Here is a close up of how I marked some of the lines. Pay attention to where you'll need to add extra fabric. Example is the top casing of this dress. I used my 6-inch ruler to measure how deep the casing is to make sure to add that 1-inch to the top of that line to make the casing. 
Continue to trace around each of the pieces in the garment. Once you have them all traced, go back through and smooth your lines. This is where your French curve or Sewing Rulers can be helpful. Here you can see the side seam and my marks. These marked lines are your seam lines.
Don't forget to add your hem allowance!
Mark:
- Grainline
- Center front & back
- Darts
- Notches
- Fold lines
- Pocket placements and more
Step 5: Add your seam allowances
Next, using your 6-inch sewing ruler, add your seam allowance. Most independent patterns use a 1/2-inch seam allowance instead of the 5/8-seam allowance of the big pattern brands. Add whatever you feel comfortable with. NOTE: Make sure to note on your pattern pieces the seam allowance you have marked!
Here is how the pattern looks with seam allowances added.
Step 6: Add all other details (like pockets)
The last thing I do is trace the smaller elements. An easy way to trace a pocket is to open the garment on the paper with the pocket on top. Take a pin and make pin marks around the pocket that puncture the pattern paper. Only use this method on fabrics that pins won't distort (like this denim). This makes a line of tiny perforations that you can then trace on the paper. If you have a tracing wheel, that makes this job easier! Add your fold overs (like for the top of the pocket) and your seam allowance. 
Step 7: Label everything
Every pattern piece should include:
- name
- size
- grainline
- cut quantity
- fold line
- date
- notes
Step 8: Make a test garment to see how it fits, adjust pattern as needed
Cut out your final pattern and make a test garment (often referred to as a muslin) to then adjust the fit to exactly what you want. A 'muslin' doesn't need to be in muslin fabric. 🙂
Use any fabric that you have in your stash that is suitable for the pattern. I had this print I bought off a clearance rack CHEAP just to make a muslin. It was cheaper than actual muslin - and if it fits perfectly, I can actually wear it! (Yes, I'm using cans as my pattern weights! They work great if you don't have pattern weights. I had just moved and hadn't found them in a box - yet! 
Notes
Notes:
- Make sure you have a very flat surface to work on so that your pattern is not distorted.
- Since you'll be using pins or a tracing wheel, make sure your surface is protected from the marking. Use a cutting mat under your paper.
- Always make a test garment, referred to as a muslin before cutting into your good fabric.
Recommended Products
As an Amazon Associate and member of other affiliate programs, I earn from qualifying purchases.
-
 Dritz 6" Sliding Marker Sewing Gauge, Nickel with Black Printing and Blue Slider
 -
 Universal Fabric Pattern Weight – 4lb One-Piece Cast Iron Fabric & Cloth Pattern Weights (2 Weights)
 -
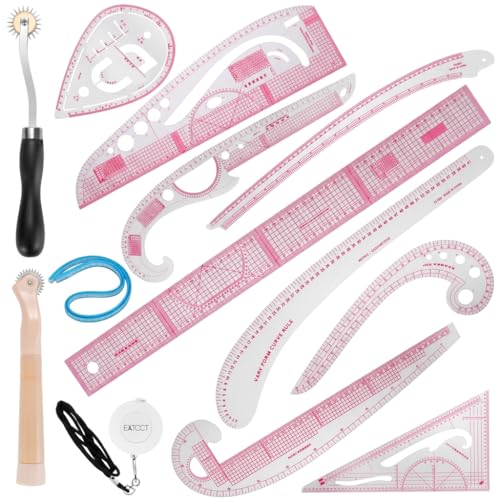 13PCS Styling Sewing French Curve Ruler Set, Dress Makers Ruler Clear Sewing Tailors Pattern Making Ruler for Fashion Design and Guides for Fabric (English Language Mark on Rulers)
Tips for better results:
Trace slowly. Work one piece at a time. Use similar fabric. Check measurements twice. Keep the original garment nearby during construction.
The first time you make the garment from your pattern, keep a notebook handy and jot down notes on the construction process. Keep those with your pattern for future reference.
Use paper. Don’t use the grid non-woven interfacing. Paper may tear but it doesn’t stretch and distort. One of my first patterns I made I used the grid interfacing. Over multiple uses, my garments got looser. (I thought – yay! I’ve lost weight!) No, the non woven interfacing can stretch and distort.
Use a pencil. Don’t use a permanent marker for tracing the pattern pieces. Permanent markers are, well, permanent. You don’t want to mark up your original garment.
Make a test garment from the type of fabric that the original garment was made from. Example: A knit garment should be make in a knit fabric. Consider not only woven versus knit, but also the weight of the fabric. If a top was made in a light weight cotton, if you make it out of a heavy weight denim, it won’t fit the same way.
After you make your test garment, write your notes about fit or changes directly on your paper pattern so you’ll have them for future reference the next time you make a garment.
For your first pattern, copy a simple garment.
Make sure to mark button placements.
With copying sleeves, be sure to mark the front and back of the sleeve. Usually, the curves are different on the front and the back to give more ease and arm movement.
Common mistakes
Forgetting seam allowances > Know whether you’re tracing seam lines or cutting lines.
Missing small pieces > Facings, pocket bags, and collars are easy to overlook.
Stretching knit fabrics > Support the garment while tracing. (Note: I wouldn’t try tackling a knit garment as your first one to pull a pattern)
Not labeling pieces > Every traced piece starts to look alike surprisingly quickly.
Skipping a test garment > A quick muslin can save expensive fabric.
Frequently asked questions
Simple garments are the easiest. Complex tailoring requires more advanced pattern drafting.
No. Pattern paper, rulers, pencils, pins, and patience are enough for most garments.
Yes. Both are popular because they’re inexpensive and easy to see through. If you plan on making many patterns from garments, I’d buy a wide roll of pattern paper. Parchment paper and medical exam paper are not wide enough for many pattern pieces.
Yes, mark the stitching line (where the garment edge is that you trace) and the seam allowances.
Choose a fabric with similar stretch and recovery for your copy.
Absolutely. Once you’ve created a pattern, you can lengthen the skirt, change sleeves, add pockets, or modify the neckline.
Here is how I made my muslin from the printed fabric. I decided to start by making the self fabric ribbon for the neckline. When you are making your muslin, think about the order of how you’ll put together the garment. There are no instructions – you are making them up!
TIP: When I try something that doesn’t work, I make a note right on the pattern paper. If I do something and think of a better way to do it next time, again, I write it right on the pattern. This way, when I make the pattern again, I have all of my notes!
To make the self fabric ribbon for the neckline, I cut a piece of fabric 2-inches wide, which will give me a finished 1/2-inch ribbon. Start by folding it in half and pressing. This gives a pressed line to follow in the next step.

Then, fold each edge into the middle and press.

Then, fold in half and press again.

Topstitch along the edge.

And, the finished self fabric ribbon! If you don’t want to make your own, you can just buy a yard of ribbon from the store.
Now to put the dress together. I finished my edges with a zigzag stitch. Then I sewed the side seams together and pressed the seams open.

Make the pockets. I like this method because the top of the pocket is all finished. Again, I finished the edges with a zigzag stitch. Then fold the top of the pocket down, right sides together and sew the seam allowance on the sides of the pocket.

Turn it right side out and press. Press the seam allowances all around the pocket to the wrong side.

Place on the dress where you want the pockets and topstitch in place around the sides and bottom. It’s hard to see with this fabric, but here is the pocket on the dress!

Now to finish the sleeve edge. I just turned it in about 5/8″ and topstitched it down.

Then, I turned down the top of the front and back about 1″ (remember I added 1″ to the top) and sewed down on the edge of the fabric, so I can thread the self fabric piece through the neckline.

Thread the ribbon through the casings. I used a 30″ length, but adjust to your fit. I used a bodkin, but you can use a safety pin on the end of your ribbon to thread it through the casing.

You can use a longer ribbon and tie a bow, but what I liked about my ready-to-wear dress it was easy to slip over my head and I didn’t need to worry about it coming untied.
I sewed the two ends together. Before you sew, make sure that there are no twists in the fabric! Ask me how I know? 🙂

Then, I moved the ribbon around until the joining seam was in the middle of the back of the dress. I then sewed it in place. This makes sure that the joining seam stays in the casing and helps so the ribbon doesn’t twist.

Hem the dress and it is done! This is a quick and easy dress to make – and super comfy! All you need is two lengths of 45″ fabric.
My finished dress made from a pattern I copied from a ready-to-wear dress that I loved!

The ready-to-wear dress that I pulled the pattern from:

Copying a ready-to-wear dress is a rewarding way to preserve a favorite style long after the original garment has worn out.
Once you’ve created a reusable pattern, you can experiment with different fabrics, colors, sleeve lengths, and design details while keeping the fit you already know you love.
Take your time with the tracing process, and your finished pattern can become one you’ll use for years.
Browse through all of the sewing projects on Create Whimsy.