Couching is a hand embroidery technique where you lay fibers across the surface of a textile and attach them with small stitches. The fibers can be yarns or strips of fabric. You can attach the fibers with either hand stitches or embroidery, or with a machine stitch. Generally couching on a sewing machine uses a special foot.
The couching thread can be the same color as the fiber being laid down, or a contrasting color. Have fun with thread choices! Couching can add design and texture to a textile piece.
What is couching?
Basic couching is the art of attaching fibers or yarns to your fabric with small, visible stitches. You can attach yarn, threads, trims, ribbons, string and even ropes. Couching places the fiber on top of your fabric, and then you take stitches with regular sewing or embroidery thread around the fiber to attach it to the fabric.
Couching is considered an embroidery stitch and is sometimes referred to as ‘laid work’. It is derived from the French word “coucher”, to lay down. Couched threads are an easy and decorative way to fill spaces, as well as a great way to make an outline.
In medieval embroidery, couching kept scarce and expensive threads, especially gold and silver threads, on the surface of the fabric. Today it avoids damaging materials; for example, gold metallic thread stitched through satin would spoil the satin surface, but couching the metallic thread with a thin silk thread would embellish the satin beautifully.
As an Amazon Associate I earn from qualifying purchases. Read more about our affiliate linking policy.
Start by laying your thread, yarn or ribbon that you want to couch along the line you want to stitch. With a second thread, take small stitches over the couched fiber.

Couching Stitch Tutorial
The couching stitch is an embroidery stitch where you lay down a ribbon, yarn, strip of fabric or thread. The couching stitches secure the decorative thread with small straight stitches. It lies on the surface of the fabric, and it great for embellishments. It stitches both straight and curved lines well.
Here is our tutorial with step-by-step photos.
Materials
- Fabric for embroidery
- Yarn, thick thread, fabric strip to attach to your fabric
- Embroidery floss or thread to couch with
Tools
- Needle with eye large enough for your yarn, thick thread or fabric strips
- Embroidery needle suitable for your thread choice
- Embroidery hoop, highly recommended
- Embroidery scissors
Instructions
- Thread two needles, one with the decorative yarn/fabric/thread that you want to couch onto the surface of your fabric (I'll refer to this as the yarn in the tutorial) and one with the embroidery thread/floss that you will use to couch down the yarn, which is referred to as the working thread..
Start by bringing your yarn up through the fabric at your starting point.
- Lay it down along your line (either drawn in with a fabric marker, or your visual line you want to emphasize with the couching). Bring your second needle with the embroidery floss up near the end of the yarn (A), on one side of the yarn.

- Carefully make the first stitch over the yarn, taking your needle down at B, just on the other side of the yarn with a horizontal straight stitch.

- Bring your needle up (C) a short distance away from A. If you are doing straight lines, you don't need these stitches too close. When you are going around curves, you'll need to keep your stitches closer to maintain a smooth curve.

- Again, bring your needle down just on the other side of the yarn (D).

- Repeat this pattern, bringing up your needle now at E.

- And down at F.

- Continue until you get to the end of your line. Take your needle with the embroidery floss to the wrong side and tie off or weave in your stitches.

- Then, take the needle with your yarn and take it to the wrong side of your fabric. Again tie off or weave into your stitches.

- Here is the finished sample of the couching stitch.
Recommended Products
As an Amazon Associate and member of other affiliate programs, I earn from qualifying purchases.
-
 Valdani Perle Cotton Embroidery Thread Size 8 Vintage Hues Collection
 -
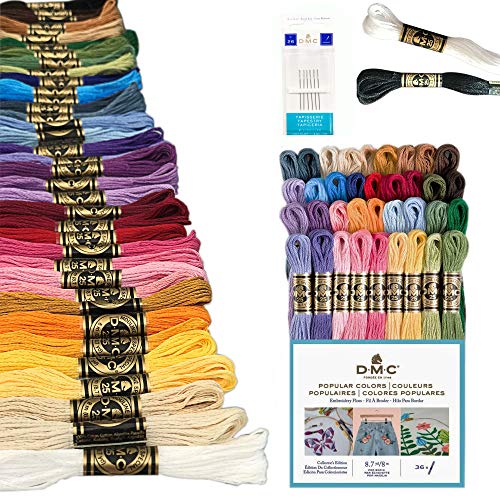 DMC Embroidery Floss Pack, Popular Colors, DMC Embroidery Thread, DMC Floss Kit Include 36 Assorted Color Bundle with DMC Mouline Cotton White/Black and DMC Cross Stitch Hand Needles.
 -
 Bohin Crewel Embroidery Needles, Size 7, 15 Per Package
 -
 kai 5 1/2 inch Embroidery Scissors, Black Handle
 -
 Caydo 6 Pieces Embroidery Hoop Set Bamboo Circle Cross Stitch Hoop Ring 4 inch to 10 inch for Embroidery and Cross Stitch
Here is a quick video tutorial that shows you how to couch a thread or yarn:
When to use the couching embroidery stitch
Couching is a great solution for using threads that are decorative themselves, but too heavy for simple stitching. It makes it possible to use a wide variety of materials to embellish a project with decorative stitches giving it a different texture.
The couching stitch is perfect for embellishing garments with a design, or adding surface design to fiber art projects and in crazy quilt projects. You can couch thick yarns, fancy threads or even ribbons with a coordinating or contrasting embroidery thread. The key is to keep the tension just right, which is easier if you use a hoop for your project.
What thread should be used to couch?
The couching thread can be a thinner thread or make a statement by using pearl cotton. It can be the same color as the fiber it anchors, and be almost invisible, or it can be a part of the design with its own pattern of stitches and colors – blending or contrasting.
Tip: Even if you are couching a longer piece of foundation thread, use a working length of thread that is only 18-inches or so at a time. This makes it more managable.
What is couching good for?
Couching is particularly good for outlining of shapes. Ideas are to couch around your doodles, or appliqué work. It’s perfect if you are one of the people that doesn’t like raw edge appliqué, but don’t have the patience for hand appliqué. Instead, you can couch a thread to cover the raw edges of your appliqué.
How to couch around a free-form design
To couch without a specific line or edge, pin your yarn, string, or fiber in the design you want on your fabric. Using a large eye needle, pull the two ends of the yarn, or foundation thread, through to the back of your fabric, securing it invisibly on the back with a matching thread. Take small stitches with your tying thread, going over your yarn at regular intervals, securing your yarn to your fabric. It’s easiest to work this in an embroidery hoop.
Variations on the couching stitch
You don’t need to just use a straight stitch to secure the yarn on your fabric. Be creative and add more visual interest to your work by trying some variations for a modern twist on the couching method.
- Group two stitches at a time and leave a bigger gap before the next stitch, play around with variations of number of stitches close together and then a gap
- Try cross stitches over the fiber
- Use the Chevron stitch
- Open Chain stitch
- Buttonhole stitch
- Herringbone stitch
- Fly stitch
- Closed feather stitch
- The stem stitch can make a scroll type design
How to fill a space with couching
Couch filling is also called Squared or Trellis Filling. It is an easy way to fill large surfaces. A hoop or frame is important to keep your work flat.
The couched thread is sewn down first vertically, and then horizontally across the space you want to fill. The horizontal threads can be laid on top, or woven. They can be close together, or have a large space between them. They can be laid down diagonally, or in a checkerboard — or do a checkerboard and then lay down the fiber diagonally to add more visual interest to your filling.
Couch filling is used in Jacobean crewel embroidery, as well as European peasant embroidery.
Here is another couching example in progress using silk ribbon couched with a red embroidery floss.

This sample shows a variety of threads and yarns using the couching embroidery stitch.

Want more?
See my favorite 10 Easy Embroidery Stitches to Embellish Your Projects that includes the couching stitch.
Check out all of the embroidery projects and inspiration on Create Whimsy.
