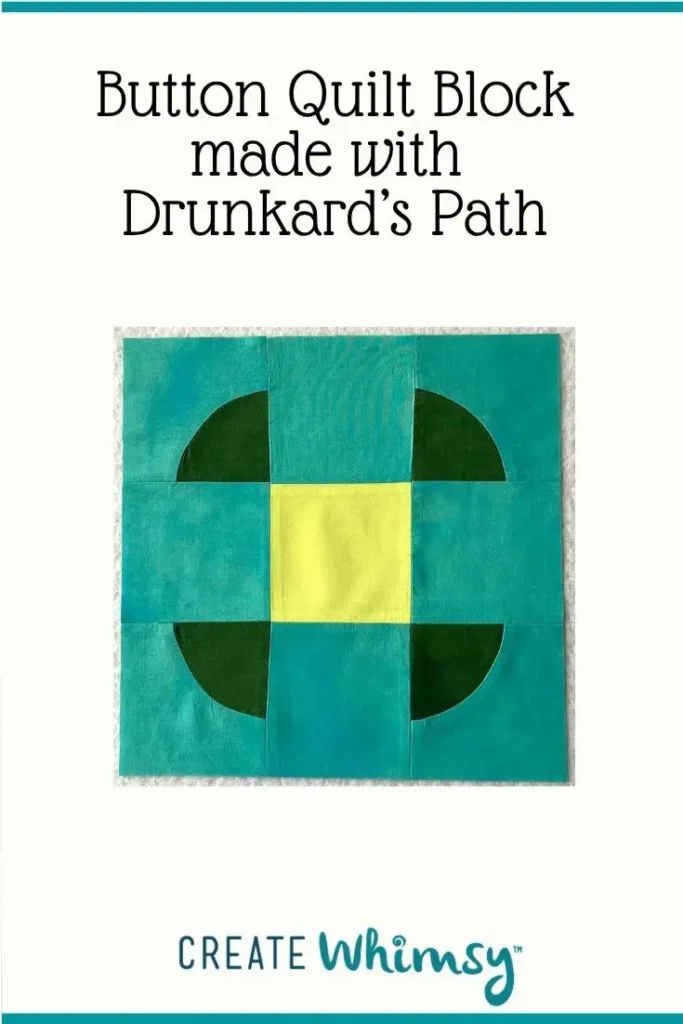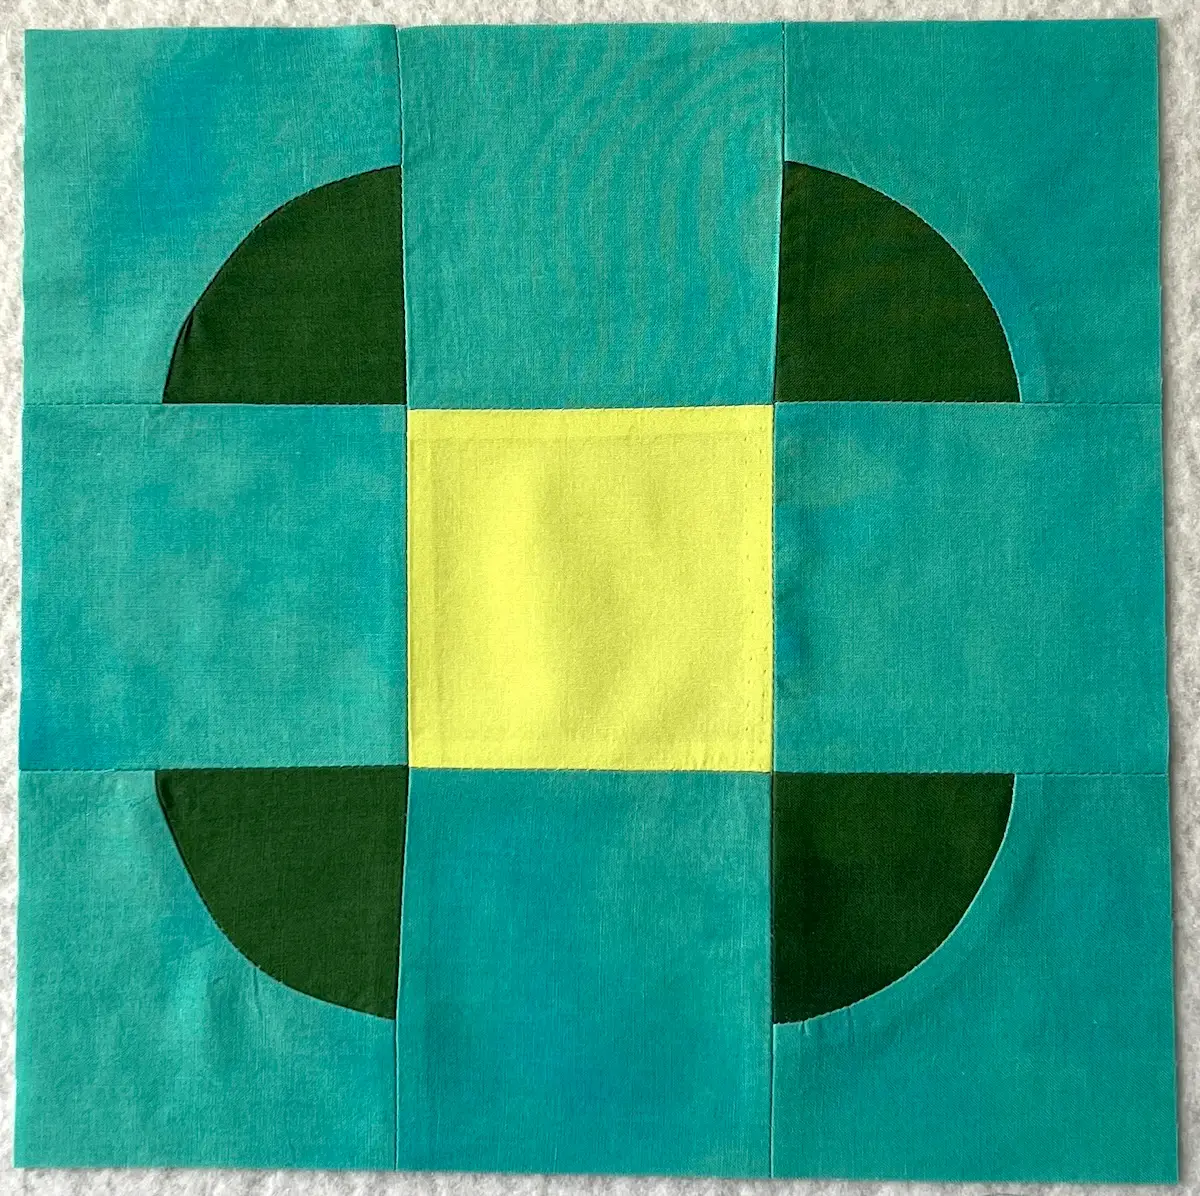
Button, button, who has the button? This Button quilt block is made from four Drunkard’s Path blocks arranged around a center square. It’s a fun way to use curved piecing to create a simple, graphic quilt block. In this tutorial, you’ll learn how to cut and sew the four Drunkard’s Path units, arrange them around the center, and assemble the finished Button block.
If you’re new to sewing curves, don’t worry. The Drunkard’s Path has a gentle curve that is a good way to practice curved piecing. Once you get comfortable with easing the fabric around the curve, you’ll be ready to make this block again and again.
What is a Button quilt block?
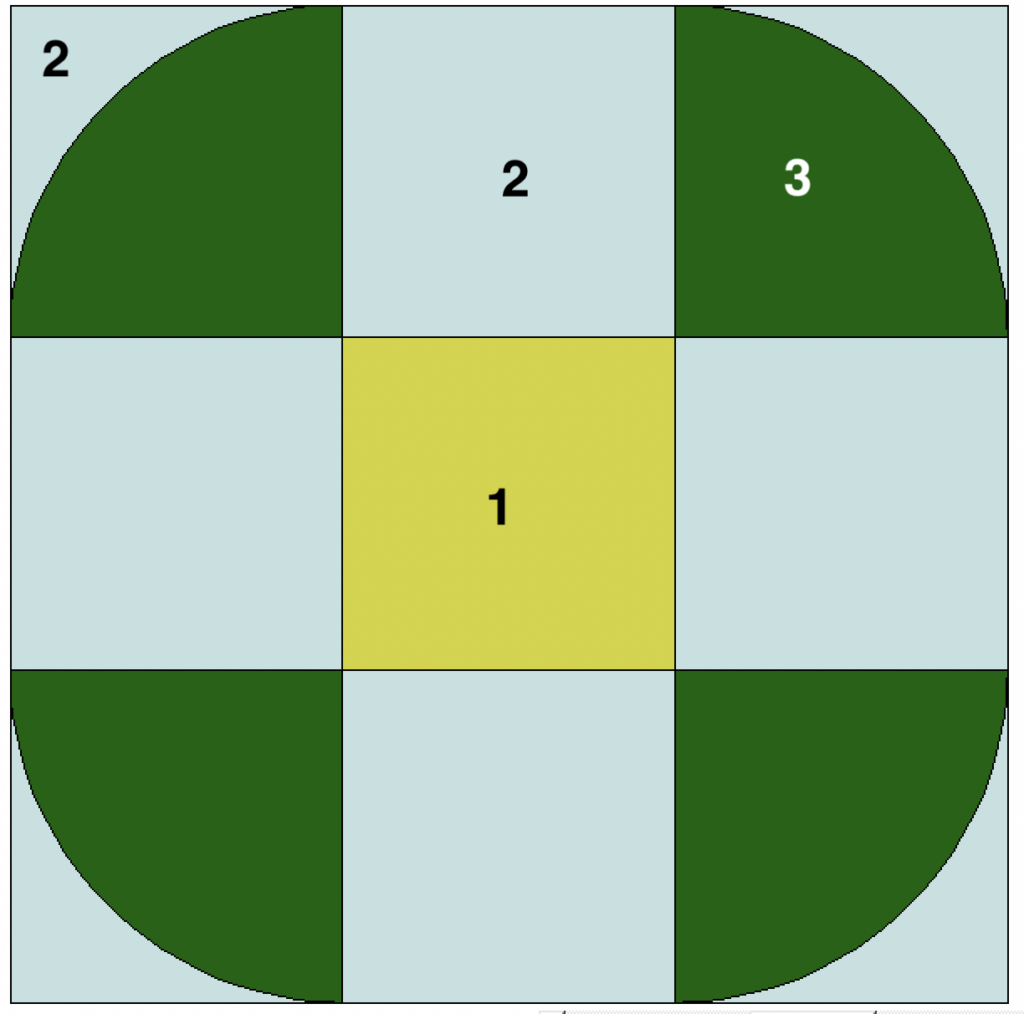
A Button quilt block is a nine-patch quilt block built around a central square with curved pieces in the four corners. In this version, four Drunkard’s Path units create the curved corners and give the block its button-like appearance.
RELATED: How to make a nine-patch quilt block
How do you make a Button quilt block?
Make four Drunkard’s Path units, arrange them in the four corners around a center square, and sew the units together in rows. The key is getting the curved pieces oriented correctly so the four curves create the button shape.
As an Amazon Associate I earn from qualifying purchases. Read more about our affiliate linking policy.
Is the Button quilt block hard to make?
The block itself is fairly simple, but the curved seams require a little practice. If you are new to curved piecing, make a test Drunkard’s Path block first. Matching the centers and easing the fabrics around the curve are the two skills that matter most.
Can I use different fabrics for the Button quilt block?
Absolutely. Try a light center with a darker background for a bold button effect, or use prints and scraps for a more playful block. The important thing is to have enough contrast for the curved shapes to stand out.
What You’ll Learn
By the end of this tutorial, you’ll know how to:
- Make four Drunkard’s Path units for a Button quilt block
- Position the curved pieces to create the Button design
- Sew smooth curved seams
- Ease fabric around a concave and convex curve
- Assemble the four units around a center square
- Choose fabrics that make the Button shape stand out
- Use the Button block in quilts and other quilted projects
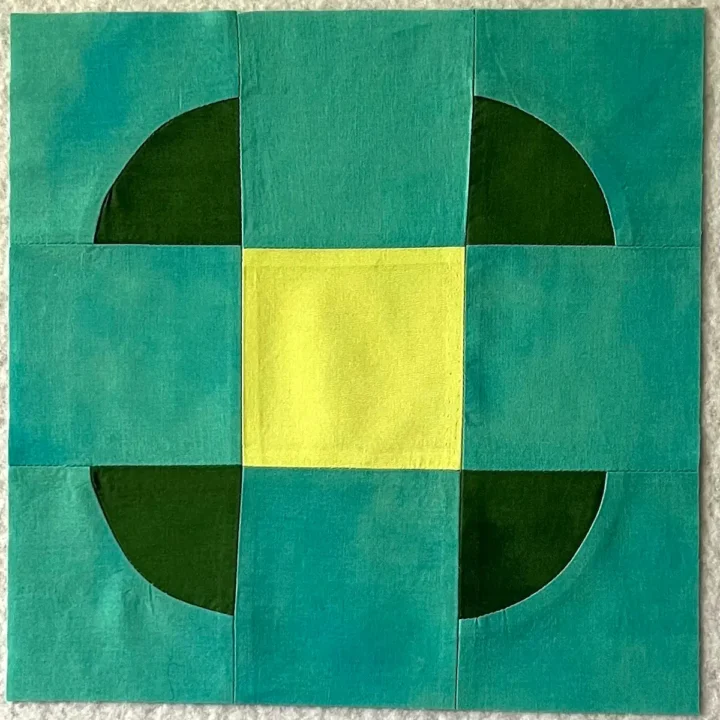
How to make a button quilt block with Drunkard's Path
Learn how to make a button quilt block with Drunkard's Path blocks.
Materials
- Two or three coordinating quilting cottons - pick one for the center, one for the 'pie' shapes in the corner units and one for the background
- Thread for sewing
Tools
- Rotary cutter - I like to use a small one for cutting the curves
- Cutting mat - Recommend a rotating mat for cutting the curves
- Quilter's ruler
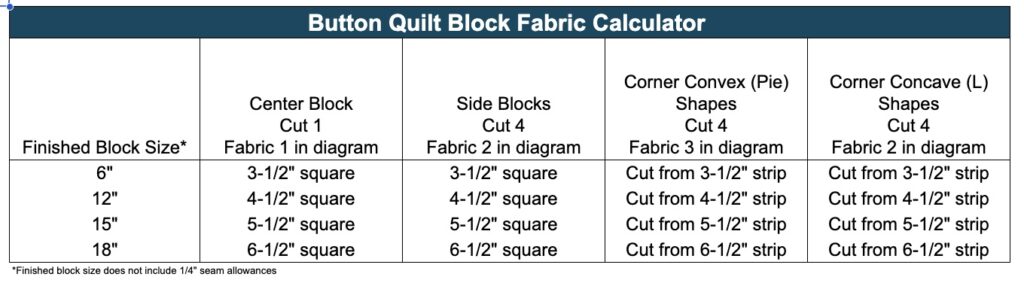
- Drunkard's path acrylic templates for the size of your block. I'm making mine with 3-1/2 inch finished blocks.
- Sewing machine
- 1/4-inch presser foot for your sewing machine
- Iron and pressing surface
- Pins
Instructions
Step 1: Cut the fabric
You'll need four sets of fabric for the corner Drunkard's path blocks, and then 5 squares for the center and sides. Here are my pieces cut out and ready to sew. 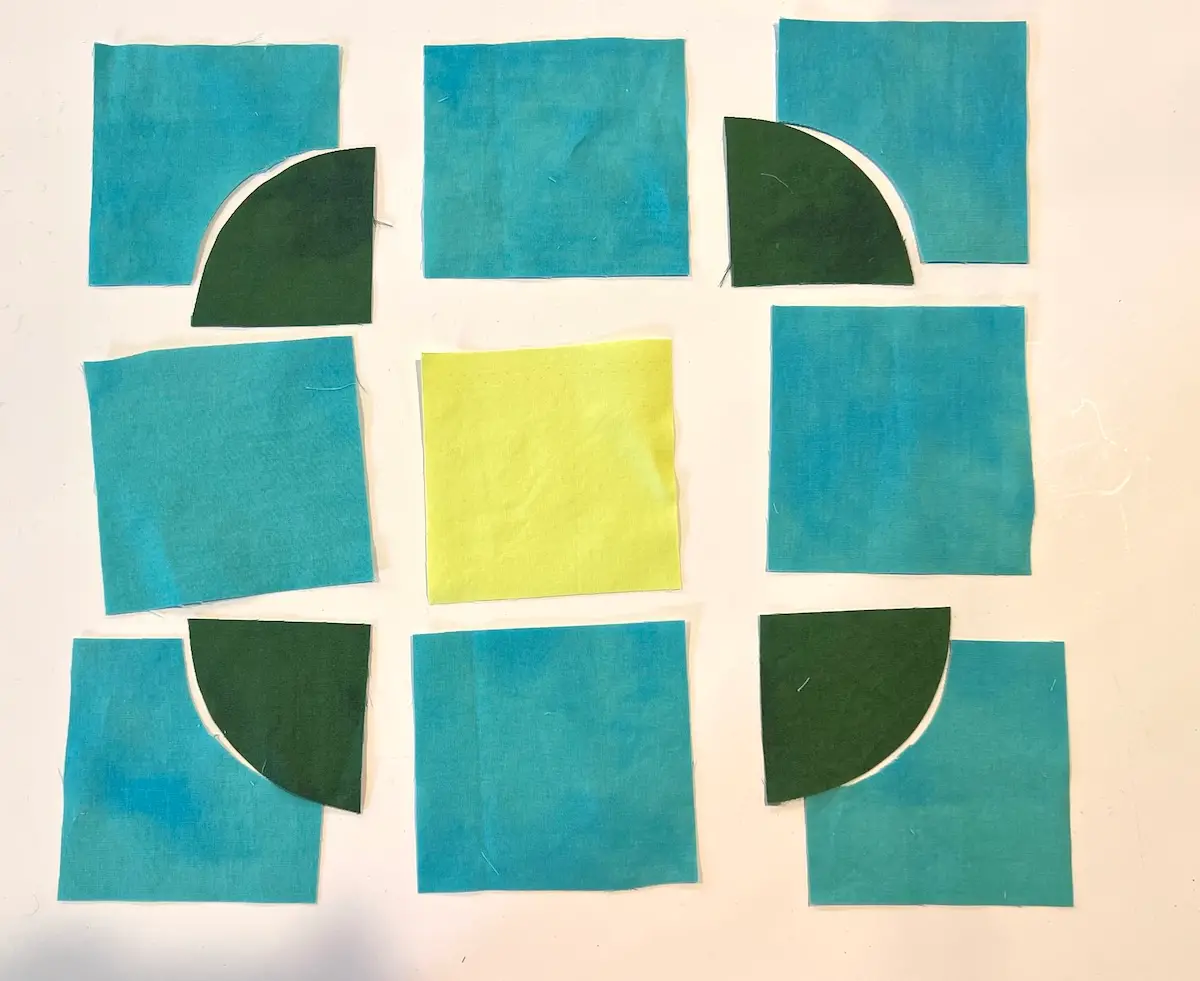
TIP: Use a smaller rotary cutter for cutting out the curved Drunkard's path units. 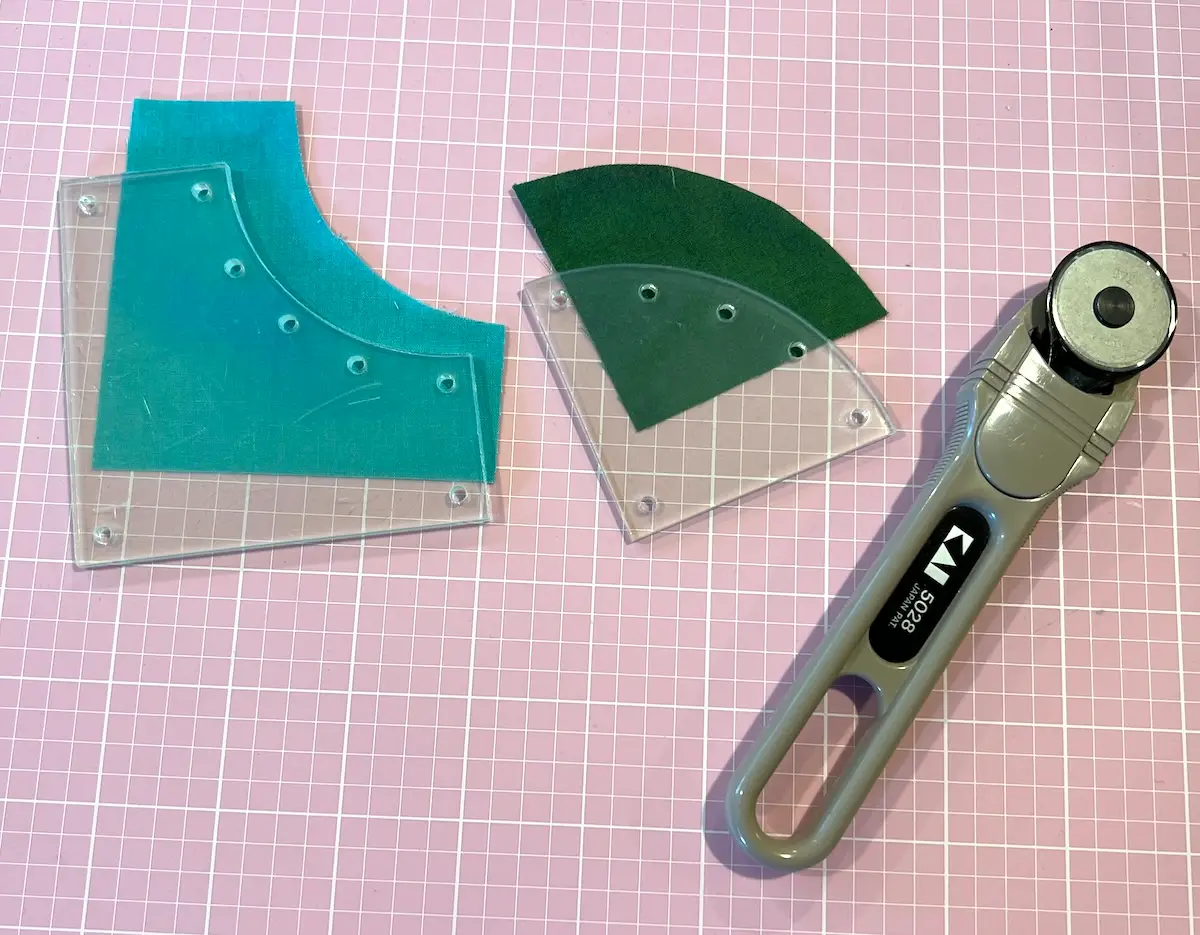
Step 2: Make the Drunkard's path corner units
The corners of this Button quilt block are made with four Drunkard’s Path units. If you’re new to curved piecing, see our complete Drunkard’s Path quilt block tutorial for detailed instructions on cutting, pinning, and sewing the curved seams.
TIP: Pin the centers of the two units for the Drunkard's Path blocks together before sewing. This will make it easier for easing the fabrics together. 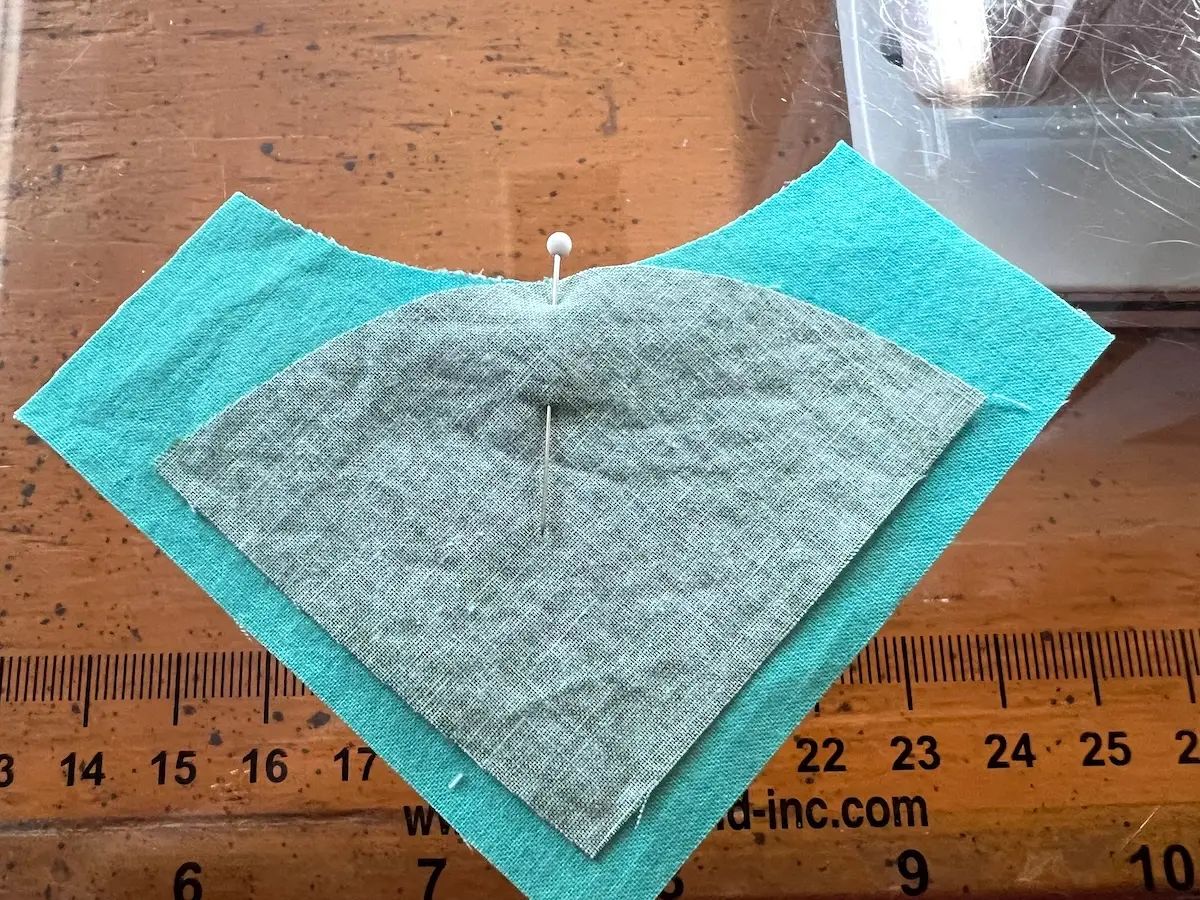
Next, sew your four corner Drunkard Path units. Press.
TIP: When you begin sewing, line up the straight edges of each of the pieces and ease the fabrics around the curves as you sew. Remove the pin as you get to the middle, then line up the opposite edges and ease with your fingers as you sew. 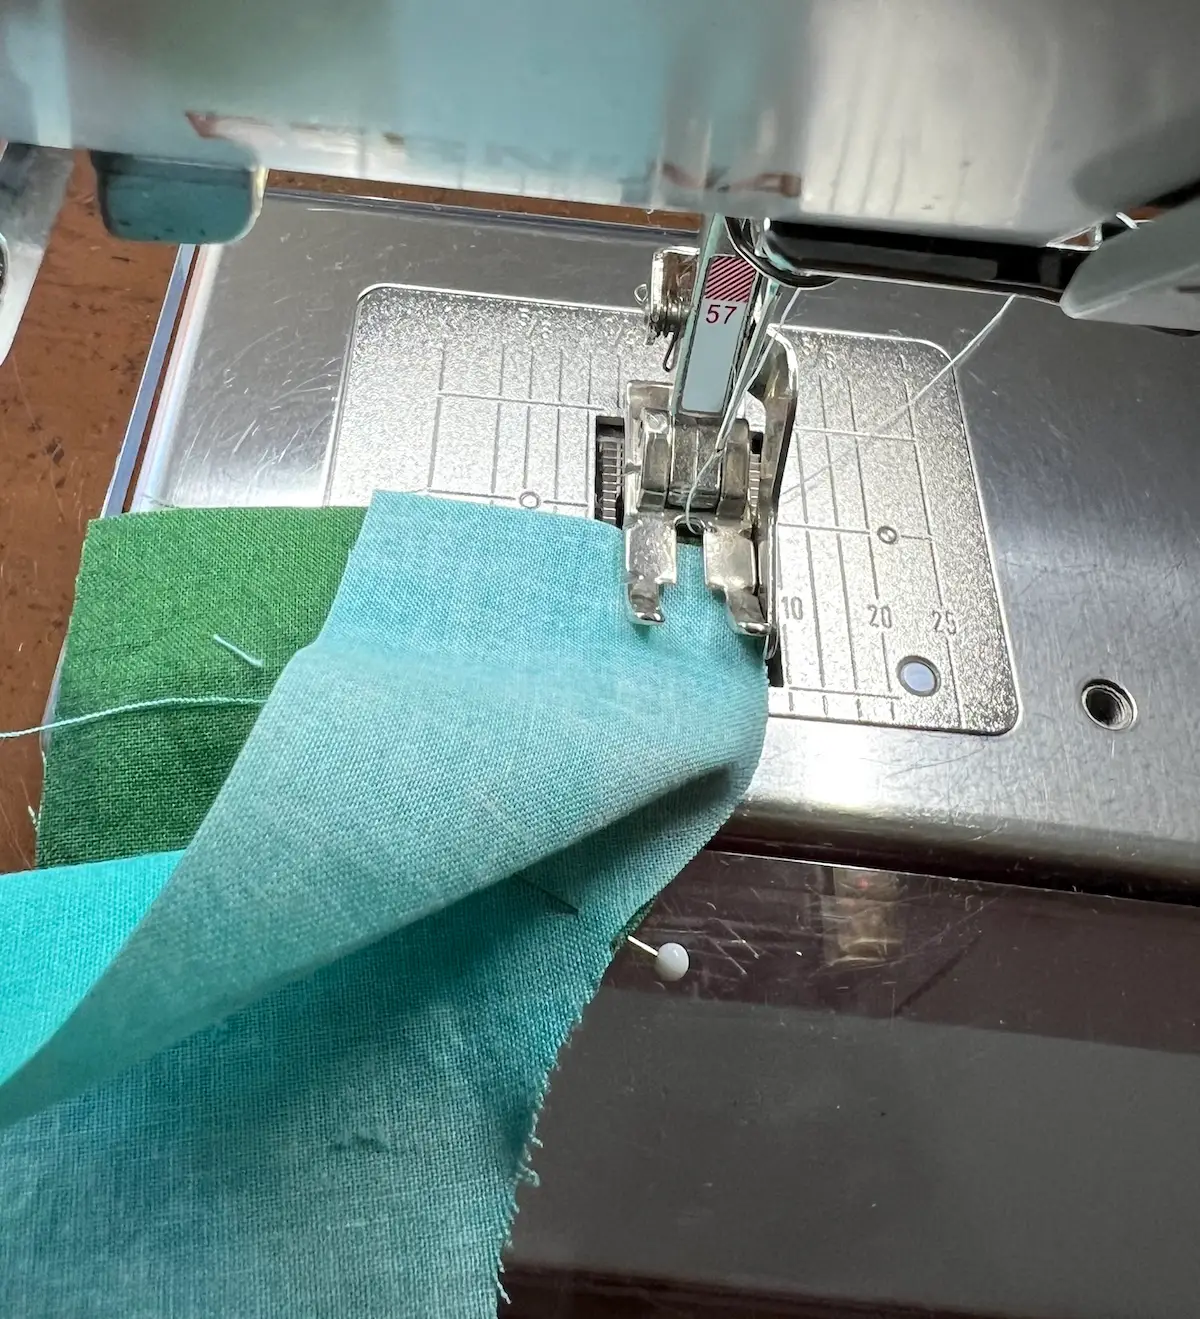
Step 3: Sew the rows
Lay out your blocks and make sure the corner units are facing the right direction to form the button. 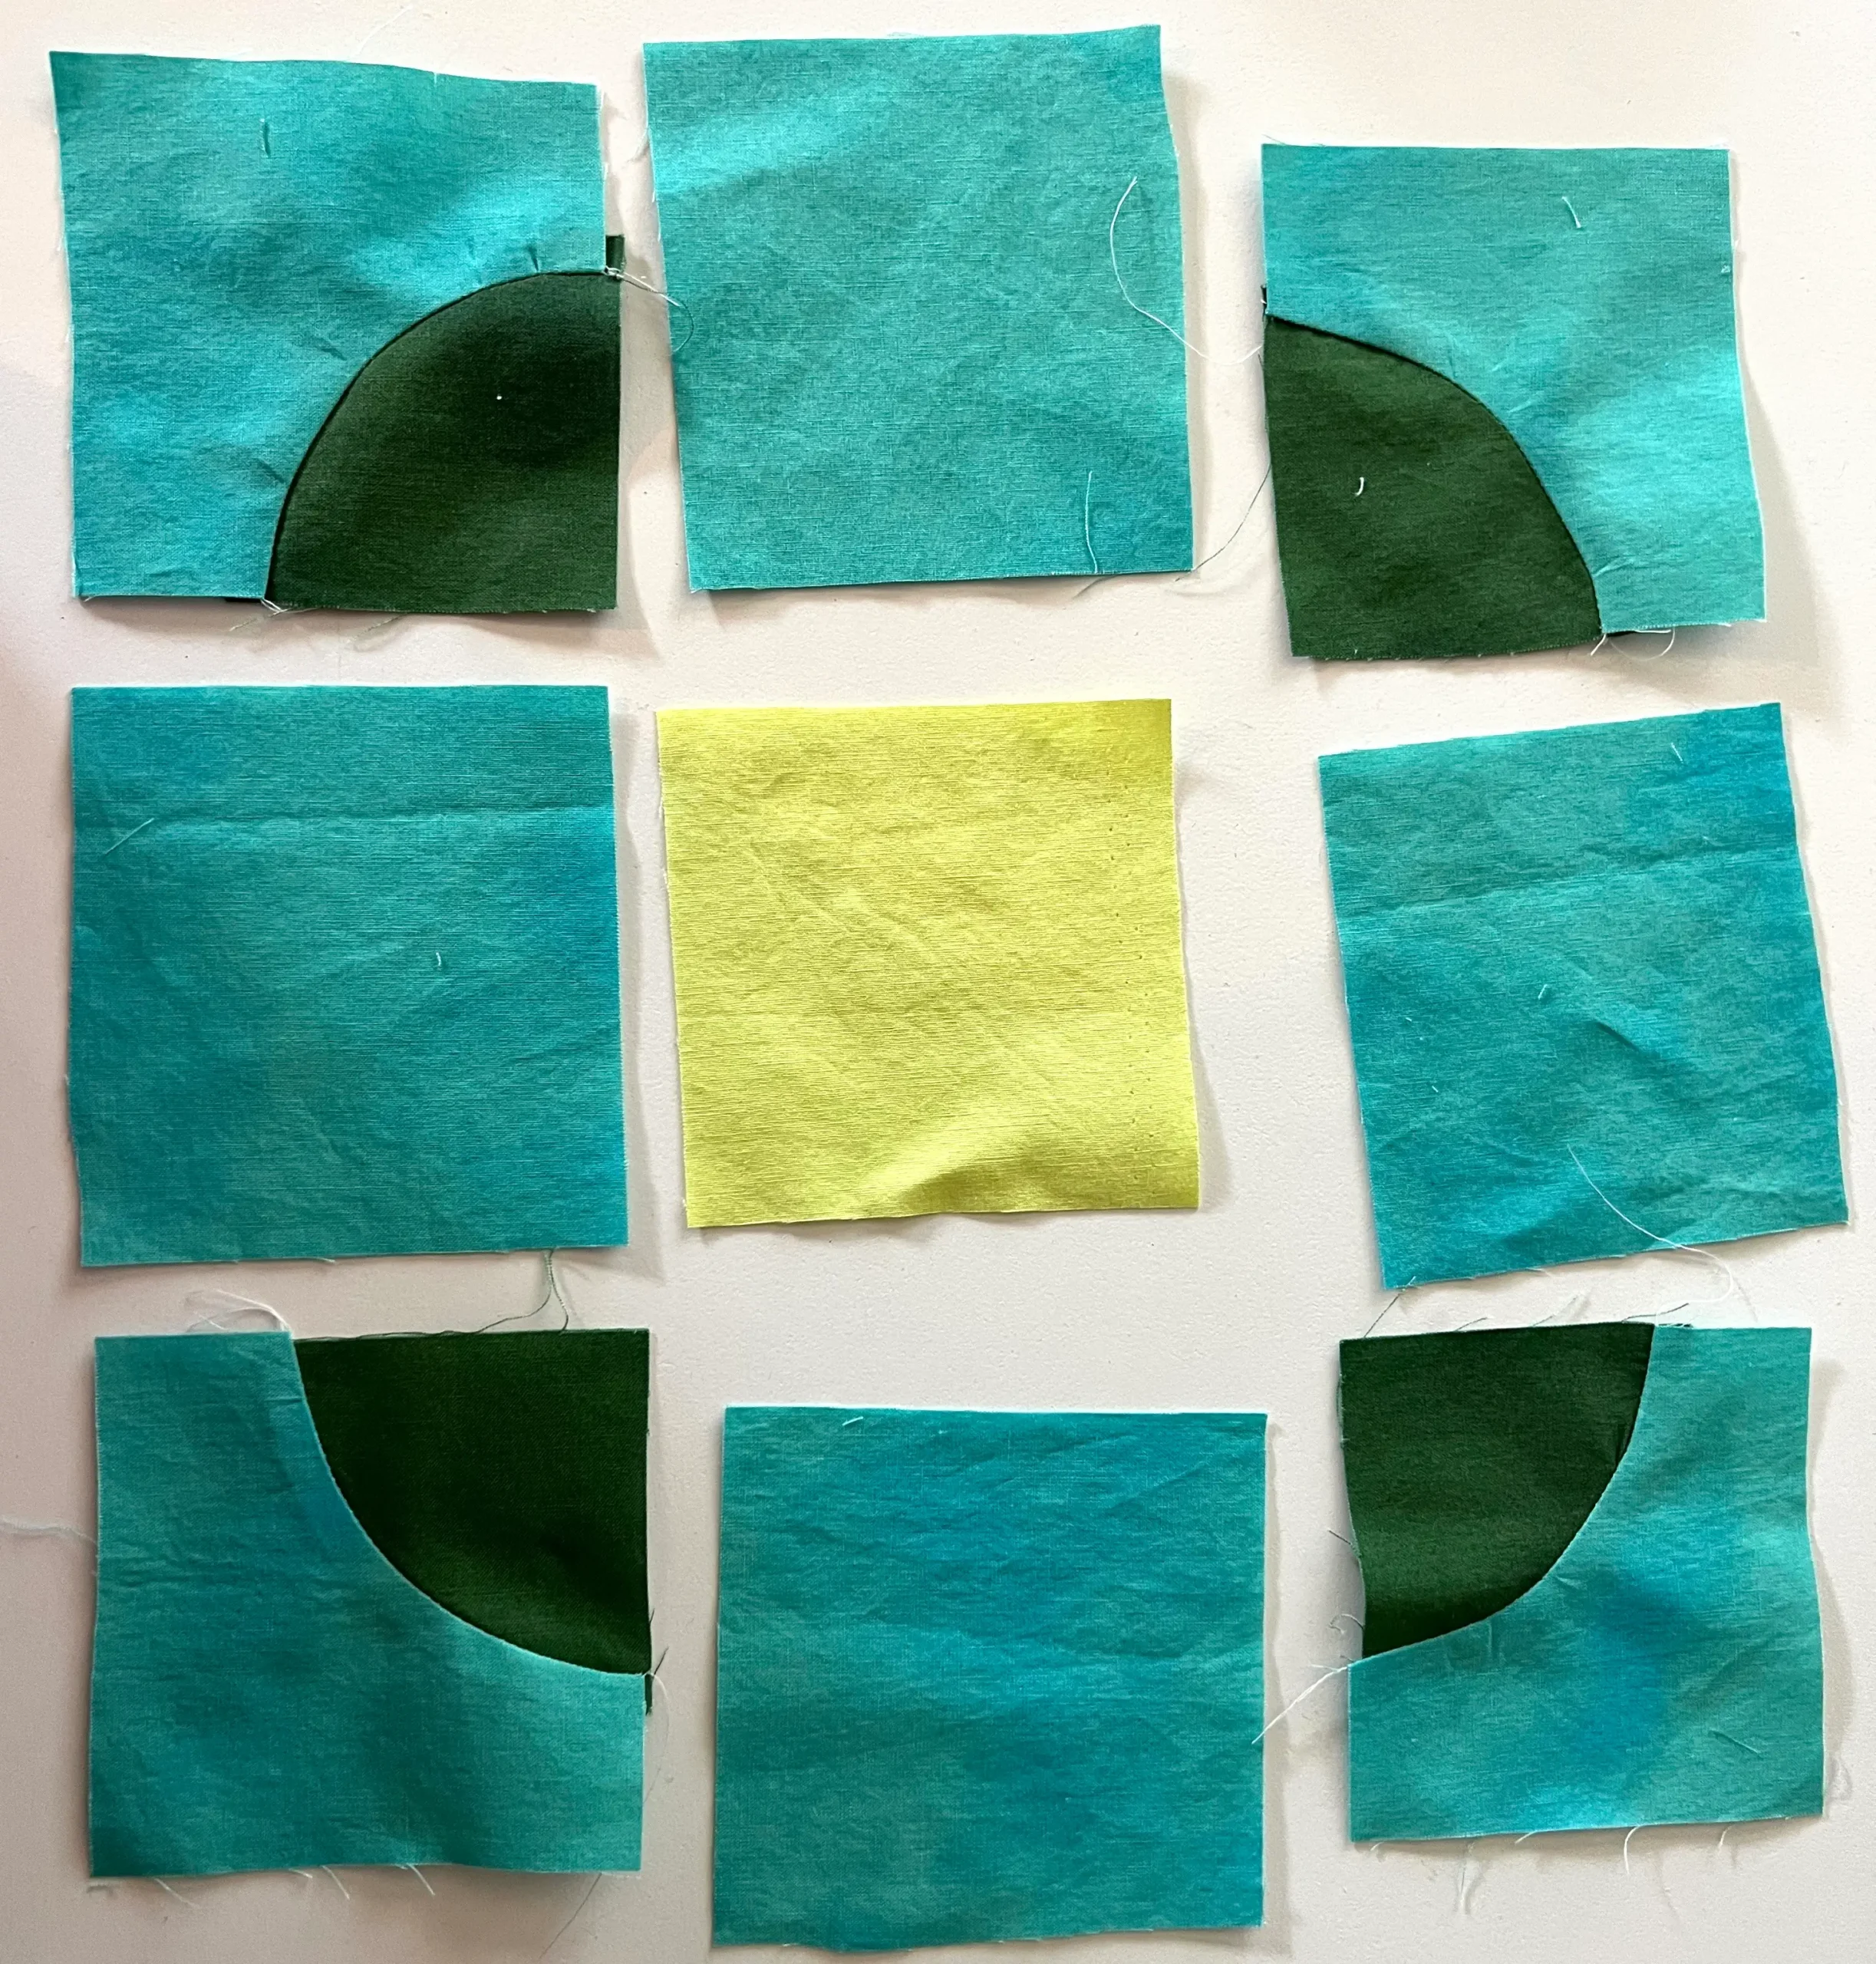
Then sew the rows together. And press seams to your preference. 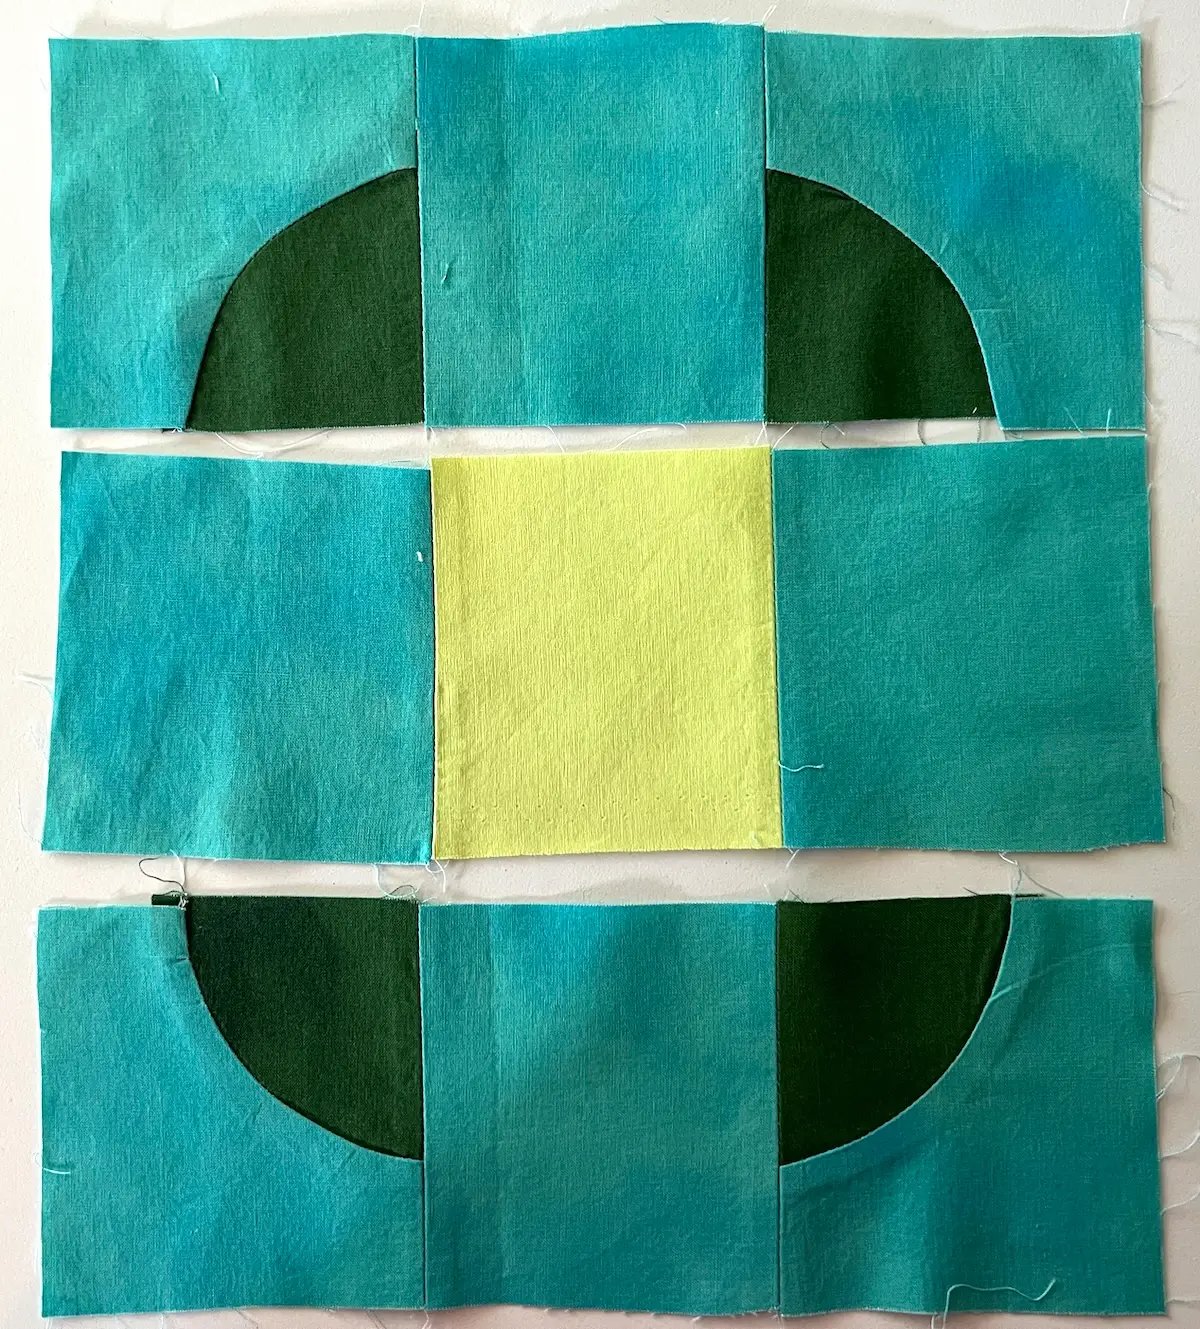
RELATED: How to press your seams in quilting
Step 4: Sew the rows together
Sew the rows, press, and trim if needed. 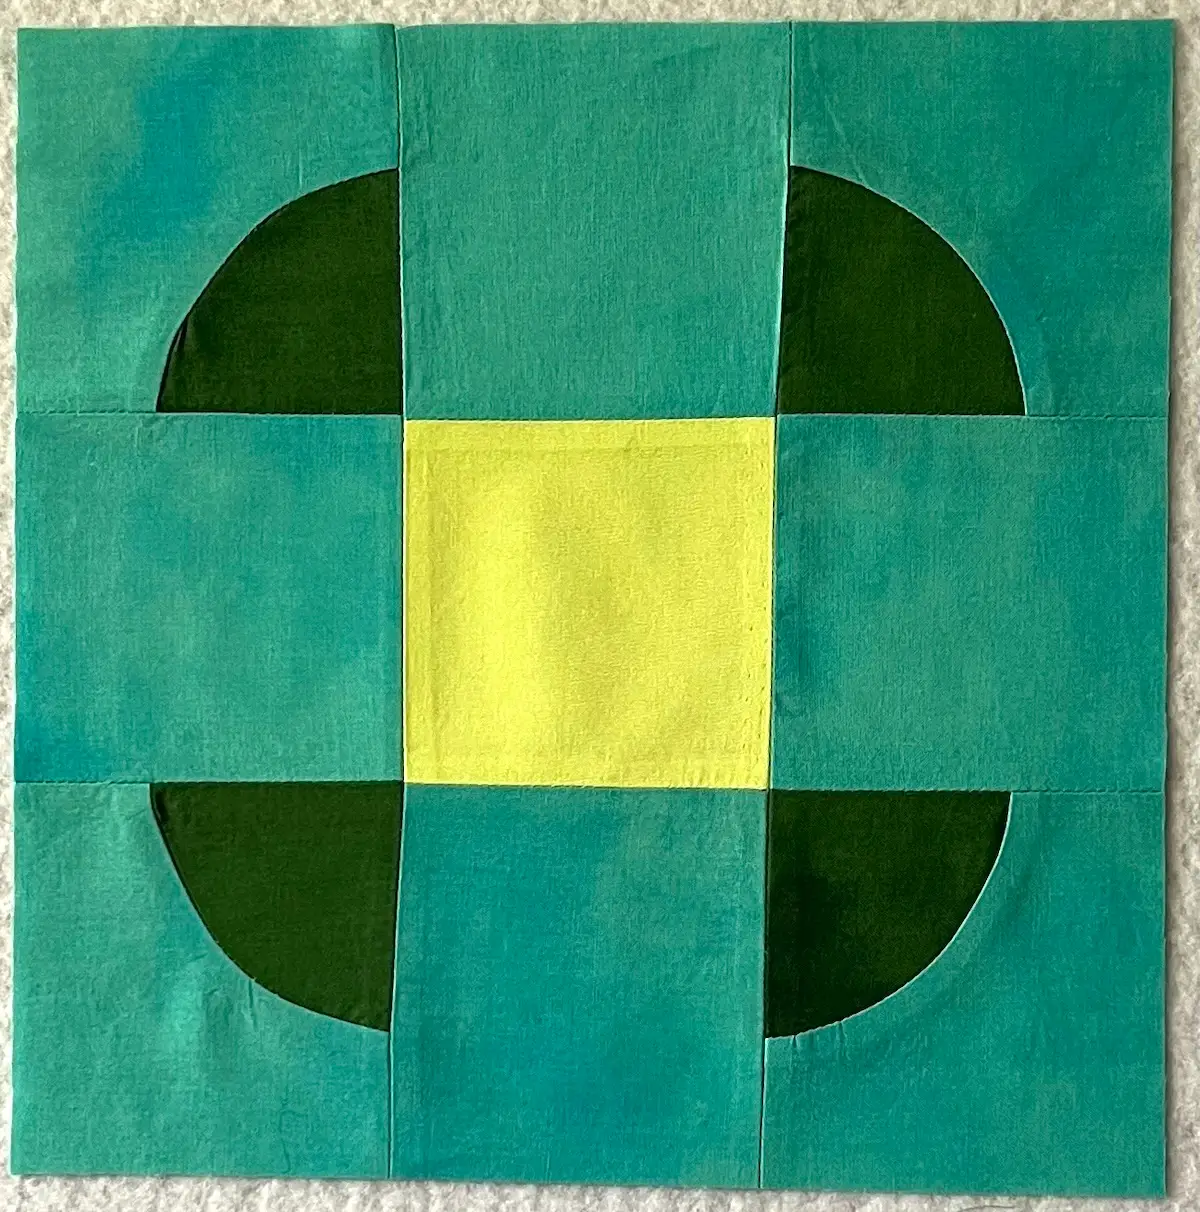
Tips for Sewing Curved Drunkard’s Path Pieces
- Mark the centers. Matching the centers of the two curved pieces makes the rest of the curve much easier to manage.
- Pin from the center out. This helps distribute the fullness of the curve.
- Sew slowly. Curves reward patience, not speed.
- Watch for puckers. Gently ease the fabric rather than forcing it under the presser foot.
- Press carefully. Avoid stretching the curved seam while pressing.
- Make a test block. If this is your first curved piecing project, a practice block can save frustration.
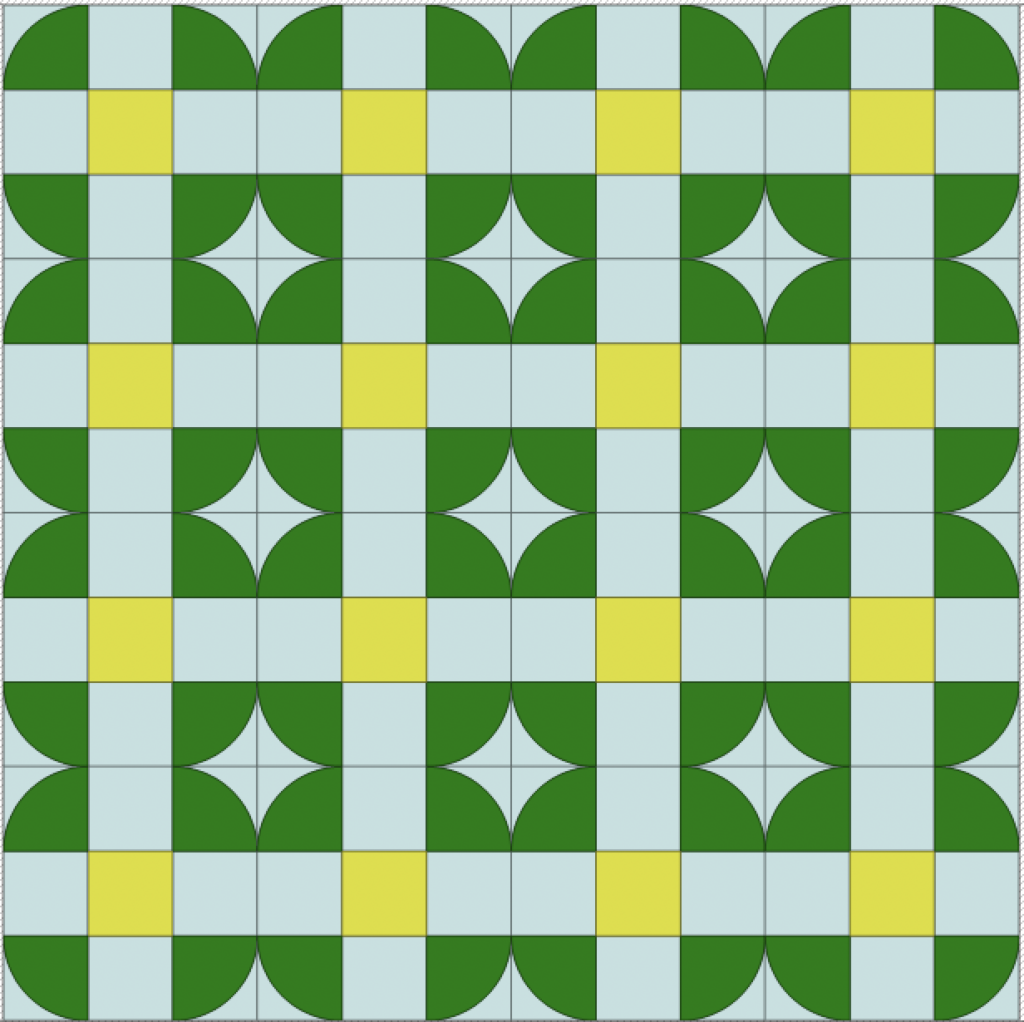
Fabric Ideas for the Button Quilt Block
Try These Fabric Combinations
High contrast:
Dark curved pieces + light background + bright center.
Scrappy:
Use a different fabric for each Drunkard’s Path unit.
Two-color:
Use one background fabric and one contrasting fabric for a bold graphic look.
Low volume:
Use subtle prints for the background and let the curved shapes emerge softly.
Modern solids:
The turquoise, dark green and yellow create strong value contrast without using a lot of different colors.
RECOMMENDED: Rotating cutting mat
RECOMMENDED: Small rotary cutter
RELATED: How to use a rotary cutter
Frequently asked questions
A Drunkard’s Path is a traditional curved quilt block made from a convex and concave piece sewn together to create a quarter-circle curve. The blocks can be arranged in many different ways to create very different quilt designs.
They can take a little practice because you are sewing a curve instead of a straight seam. Matching the centers, pinning carefully and easing the fabric as you sew will help.
You can make the Button block in different sizes. Choose your finished block size first, then calculate the Drunkard’s Path units and center square to fit that finished measurement. See size chart above.
Yes. This is a great block for using scraps, especially if you want each curved corner to be a different color or print.
Sew slowly and ease the fabric around the curve. Avoid pulling or stretching either piece as you sew. A smaller stitch length can also give you more control around the curve.
Once you’ve made one Button quilt block, you may find yourself wanting to make another! Try different color combinations, mix in your favorite scraps, or make several blocks and experiment with how they look together. The simple combination of a center square and four Drunkard’s Path units gives you plenty of room to play with color and layout.
Want to try more curves? Explore our article on improvisational curves.
Explore more free quilt patterns and quilt tutorials