
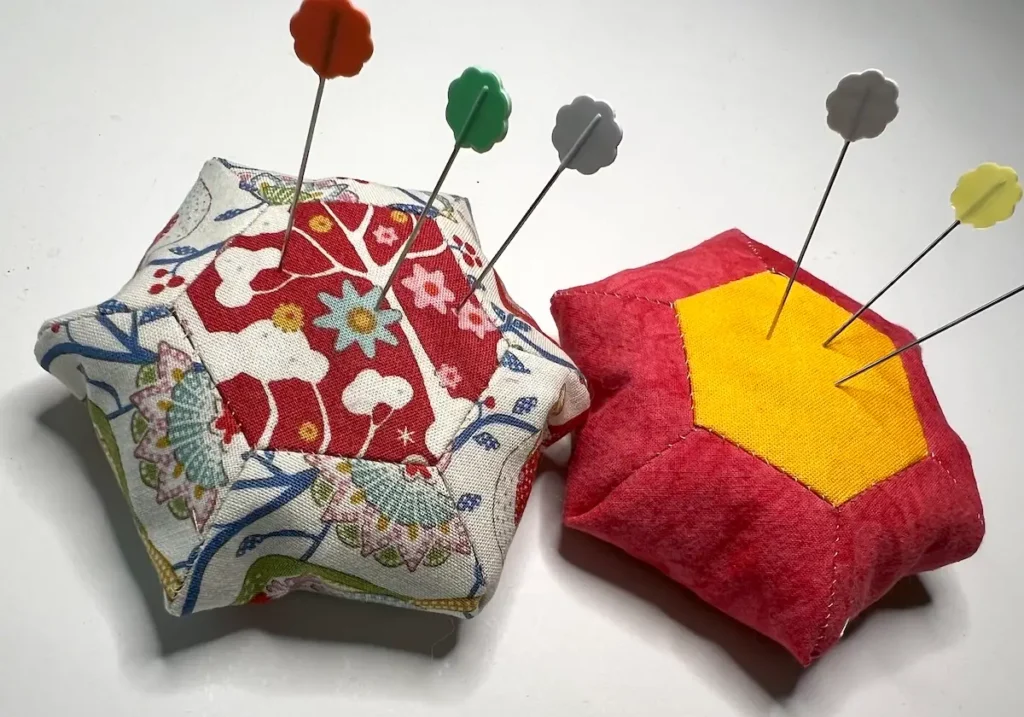
If you’ve been curious about English paper piecing (EPP) but weren’t ready to commit to a full quilt, this hexagon flower pincushion is the perfect place to start.
It’s a small, forgiving project that teaches you the core EPP skills — basting fabric around paper templates and whipstitching hexagons together by hand — while giving you something genuinely useful to show for it. Using just 8 hexagons (two flower centers and six petals), you’ll piece a six-petaled flower top, then join it to create a plump, pillow-like pincushion perfect for your sewing table. Below, I’ll walk you through every step with photos, share the mistakes I made so you don’t have to, and answer the questions beginners ask most.
What is English paper piecing?
It’s a hand-sewing method where fabric is basted around paper templates to create perfectly sharp, stable shapes before you whipstitch them together — no sewing machine required.
How many hexagons do I need for this pincushion?
Just 8: one hexagon for each of the two flower centers, and six for the surrounding petals.
What size hexagons should I use as a beginner?
1.5″ to 1.75″ hexagons are large enough to hand-sew comfortably but small enough to finish quickly.
As an Amazon Associate I earn from qualifying purchases. Read more about our affiliate linking policy.
Can I make this without a sewing machine?
Yes — the entire project, from basting to final stitching, is done by hand.
Below, I’ll walk you through every step with photos, share the mistakes I made so you don’t have to, and cover the rest of the questions beginners ask most.
What you’ll learn
By the end of this tutorial, you’ll be able to:
- Baste fabric around a hexagon paper template using either the thread basting or glue-basting method
- Arrange a 6-petal flower layout before committing to any stitches
- Whipstitch hexagons together by hand for an invisible, sturdy seam
- Join a pieced flower top to a backing and turn it right-side out
- Stuff and close a pincushion so it holds pins upright and keeps its shape
- Recognize and avoid the most common EPP beginner mistakes before they happen
What you’ll need
- Fabric scraps
- 1″ hexagon papers for EPP
- Glue pen – I like the Sew Line glue pen
- Thread – I like Superior silk thread
- Wool batting or fill
- Crushed walnut shells
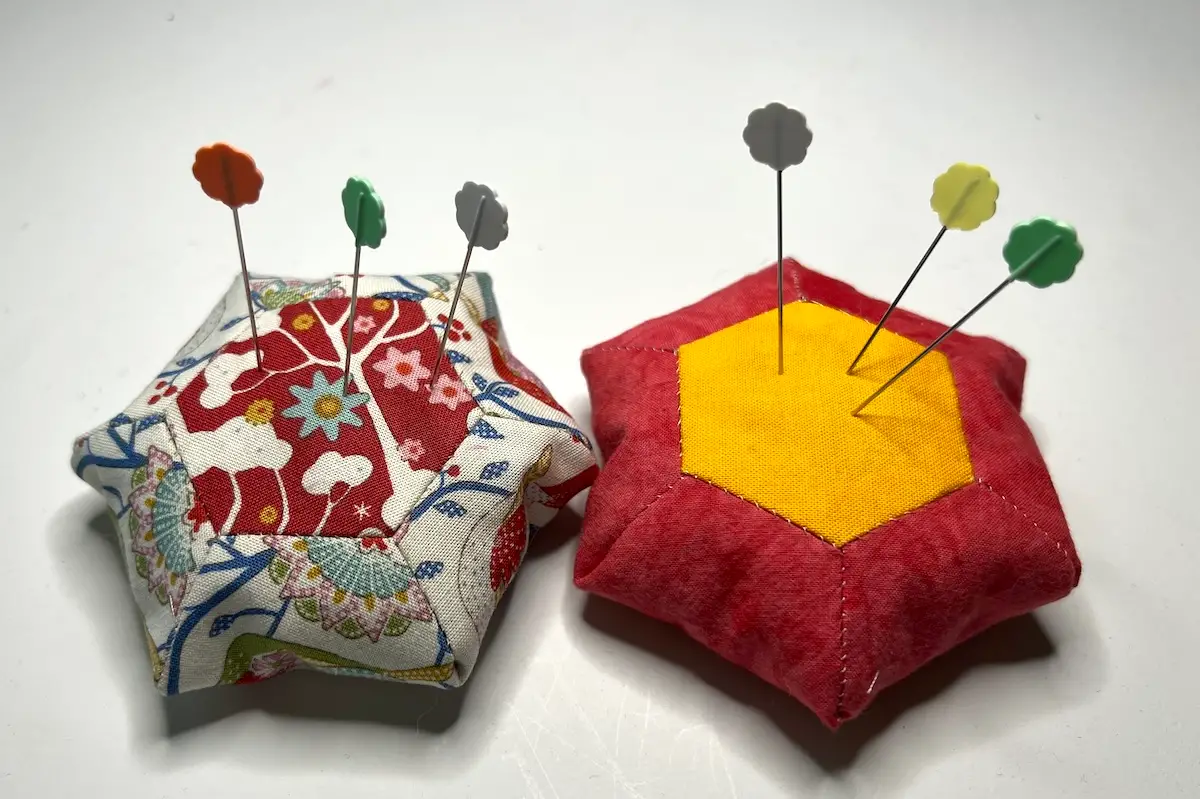
How to make an epp hexagon flower pincushion
Learn how to make an epp hexagon flower pincushion with our step-by-step instructions. A perfect scrap fabric project!
Materials
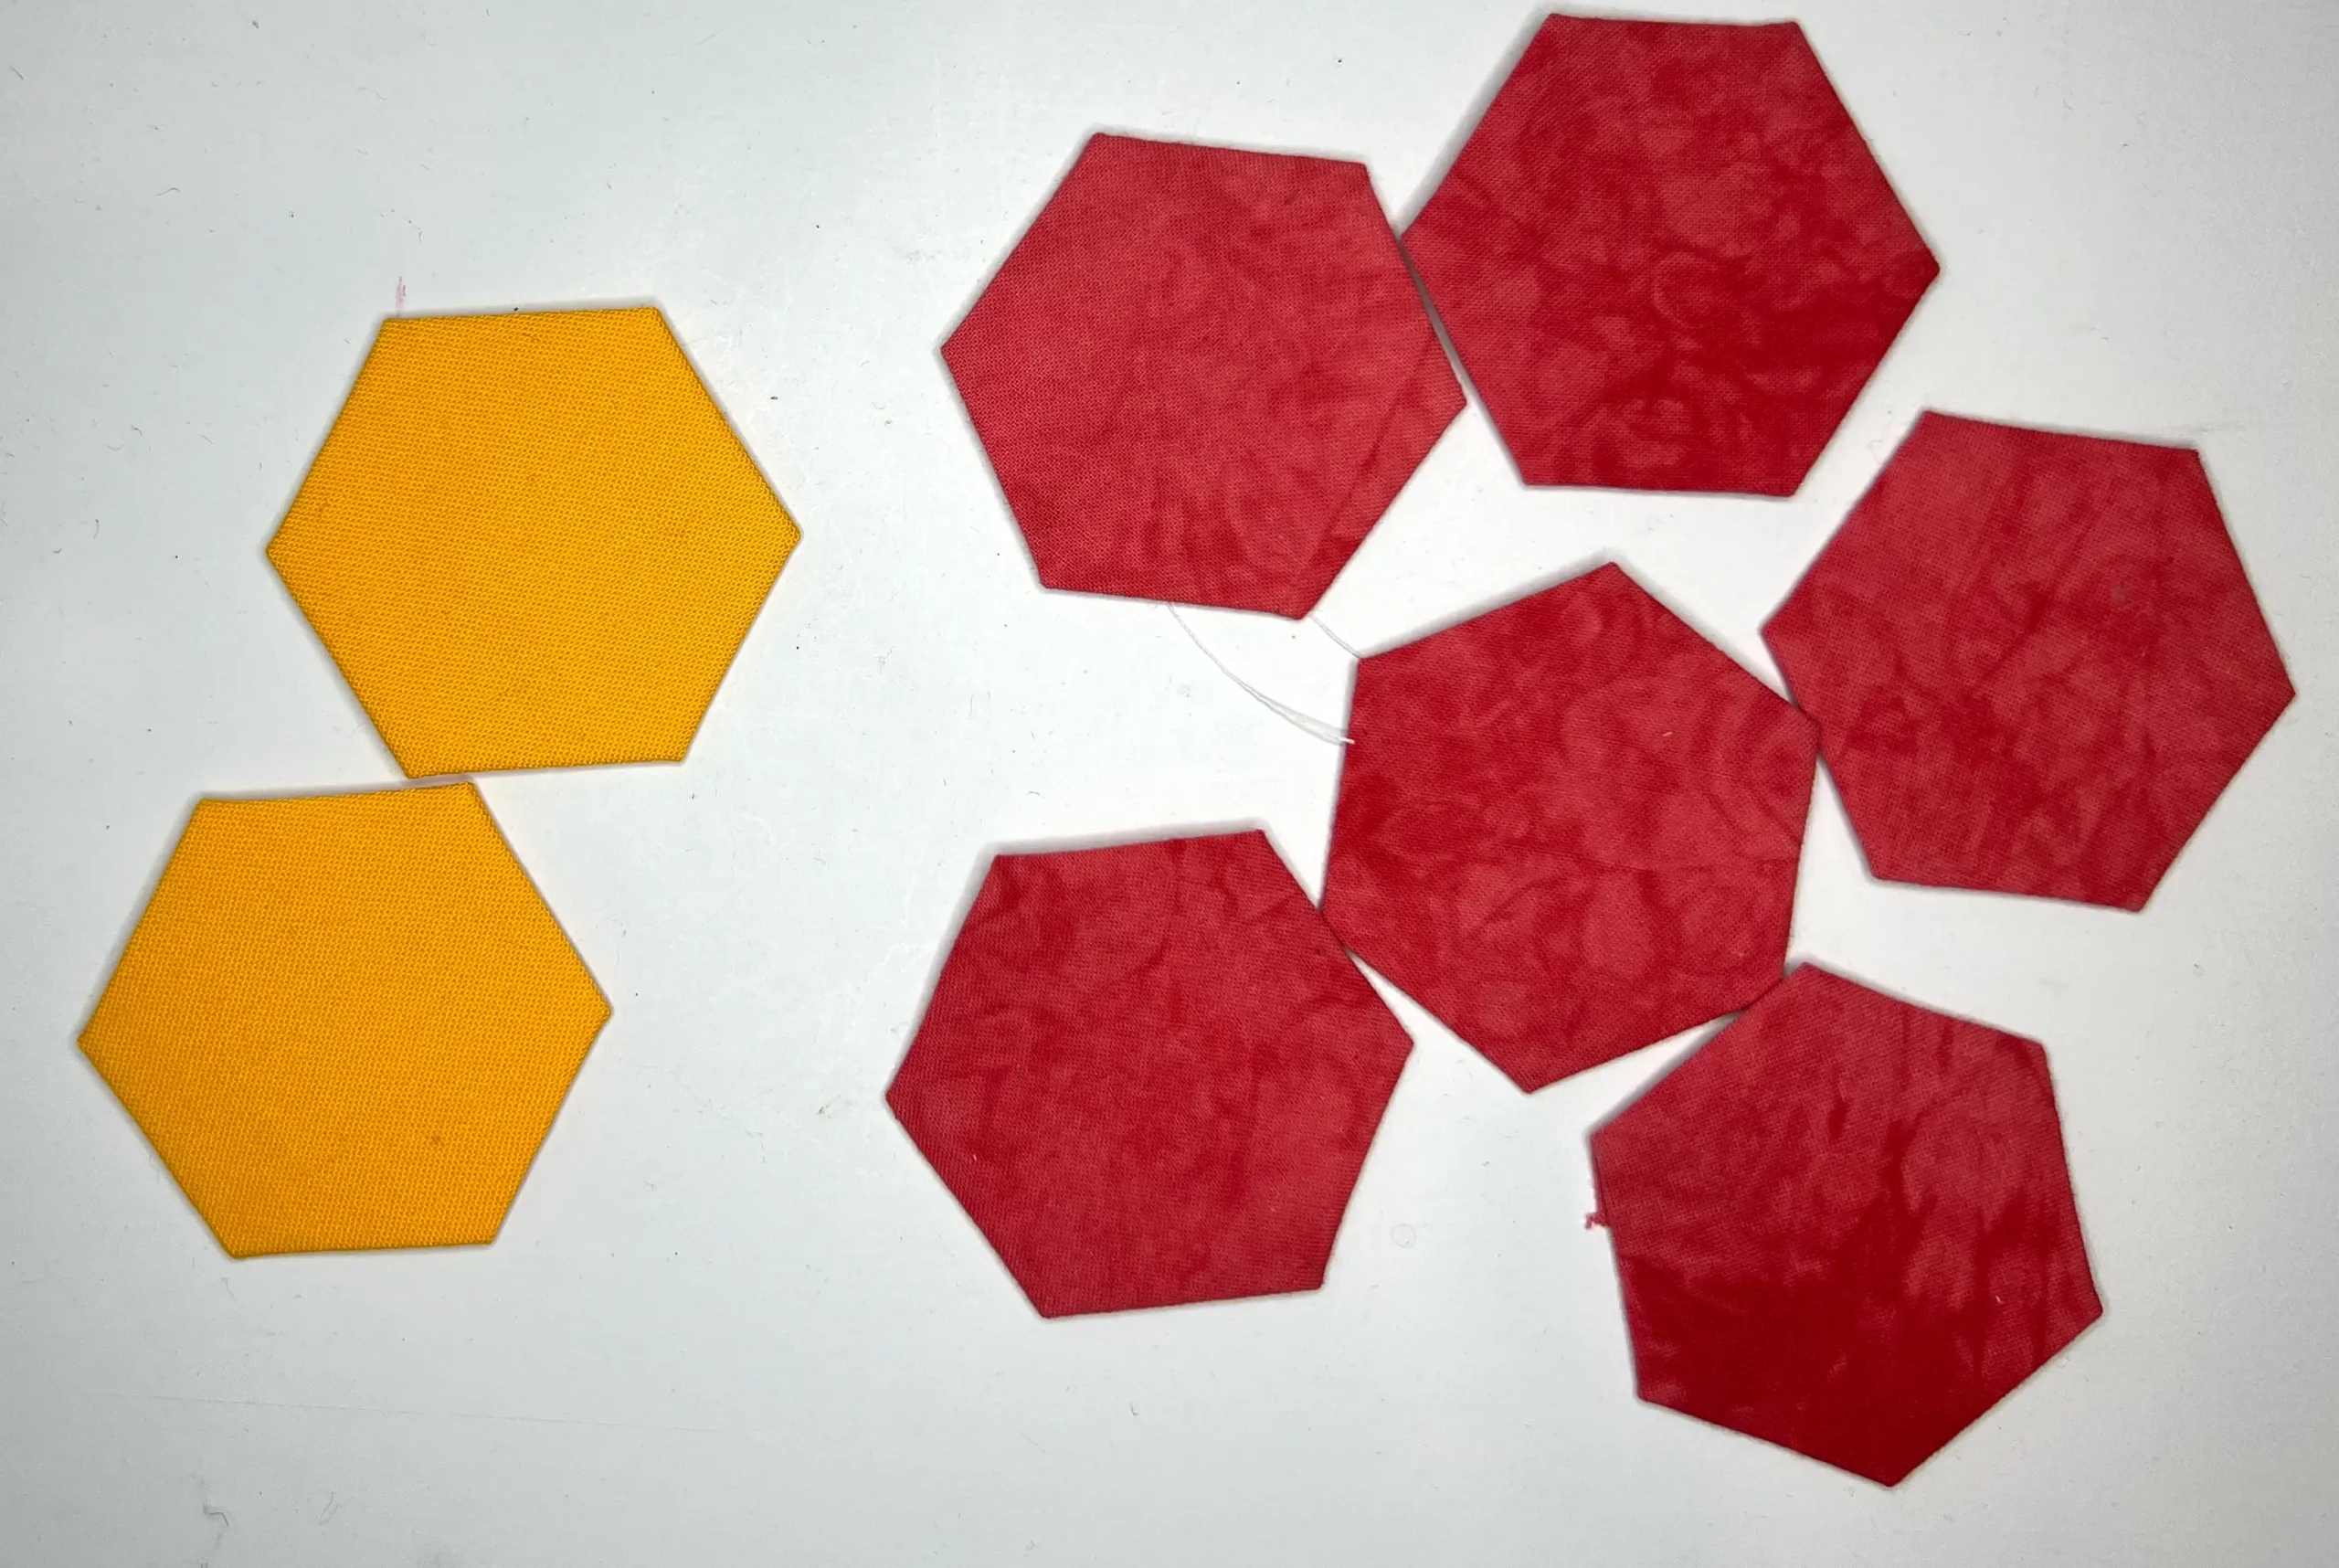
- 8 EPP hexies, already fabric-basted; I used 1" precut hexies
- Rotary cutter or fabric scissors
- Acrylic template for cutting fabrics
- Glue stick or needle/thread for basting
- Thread to match your fabric, plus contrasting basting thread, if you are thread basting your hexies. I prefer using a thin, silk thread
- Stuffing (I prefer wool batting plus crushed walnut shells for weight/pin-sharpening)
- Optional: thimble
Tools
- Hand sewing needle, I prefer a hand quilter's needle or an appliqué needle
- Rotary cutter or fabric scissors
- Cutting mat, if using rotary cutter
- Iron
- Pressing surface
- Acrylic template for cutting fabrics
Instructions
Step 1: Gather your supplies
Here are my eight (8) hexies ready to be made into a flower cushion.
See our article on Thread Basting vs. Glue Basting for English Paper Piecing
Step 2: Arrange your flower layout
Lay out one center hexagon surrounded by 6 petal hexagons before you sew anything. This is the moment to fix color placement, since it's much harder to change after stitching.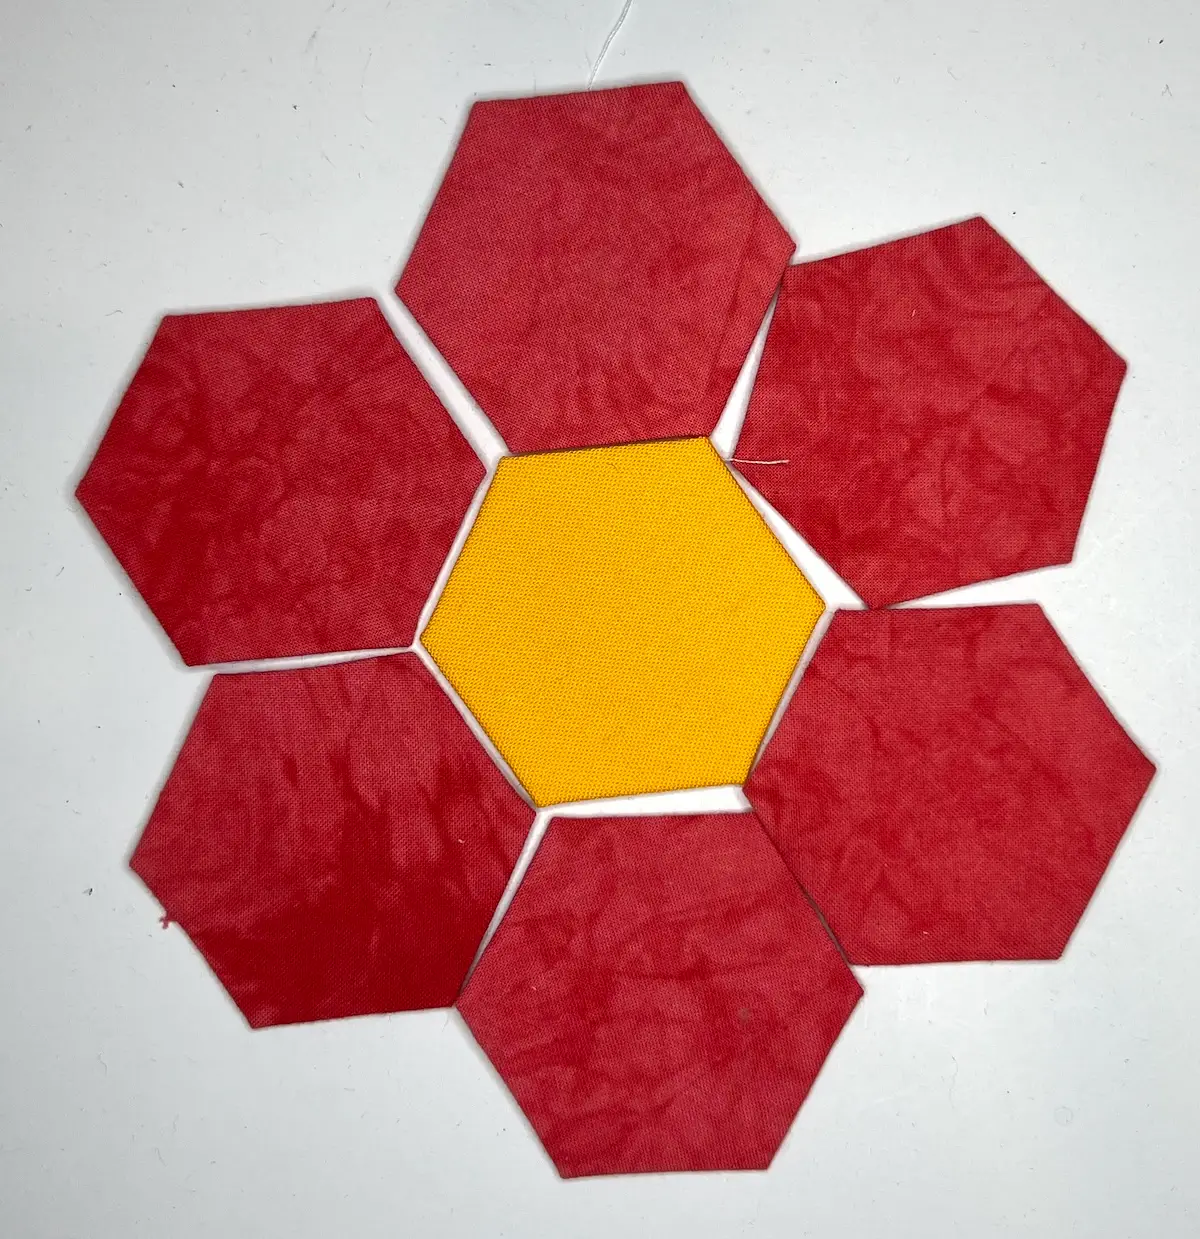
Step 3: Whipstitch the petals to the center
With right sides together, whipstitch each petal hexagon to one edge of the center hexagon, working your way around all six sides.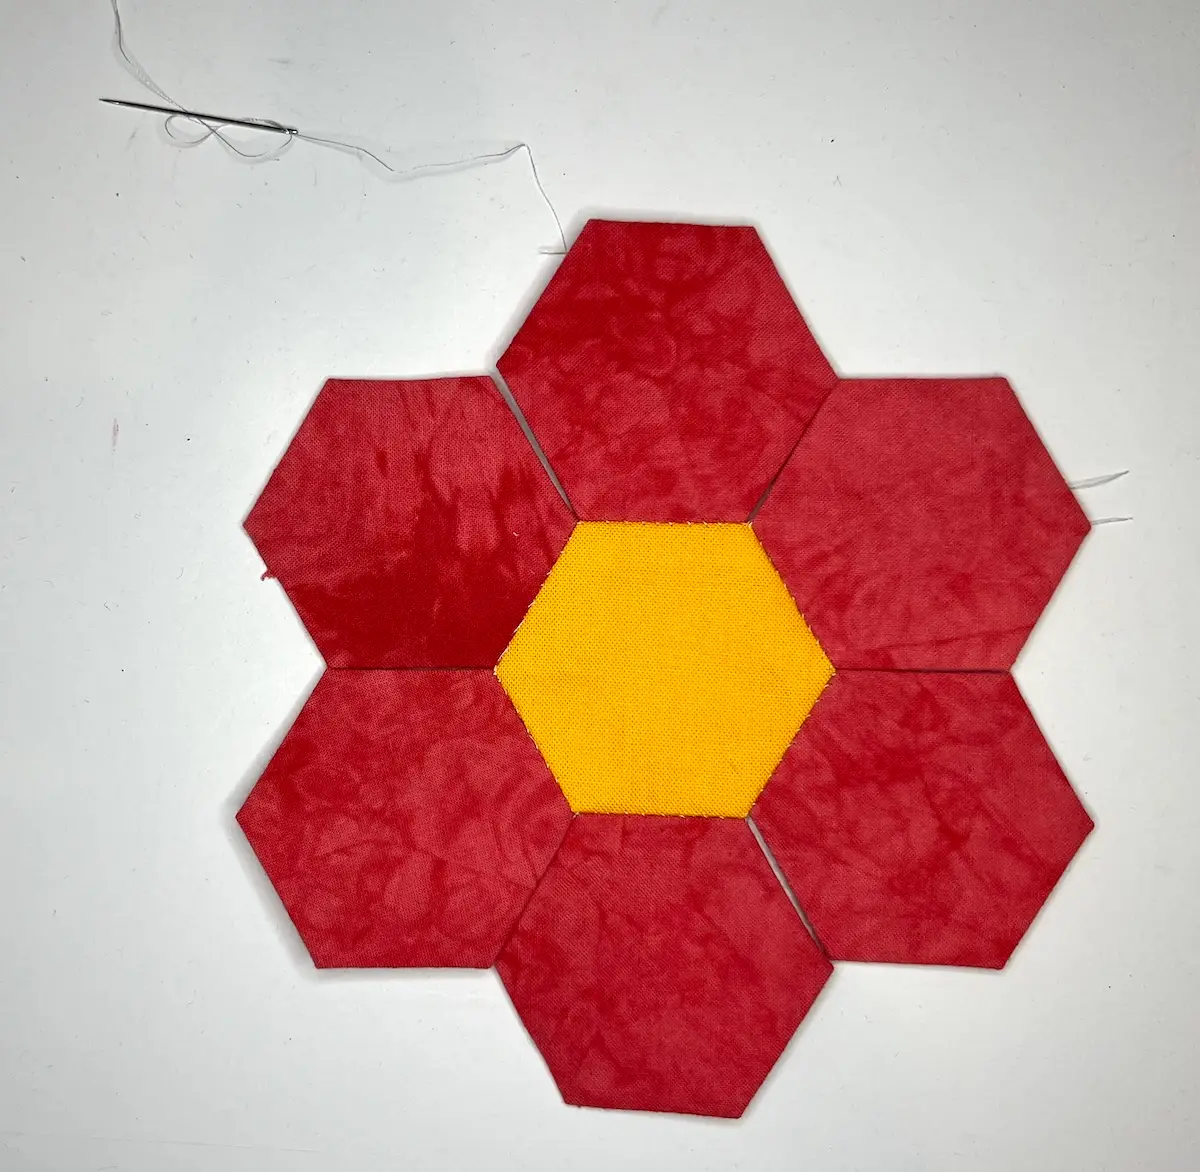
I prefer to use a thin silk thread for whip stitching my EPP projects.
Step 4: Join the petals to each other
Start by removing the paper template from the center hexie. This allows you to fold the flower in half to sew the sides together. 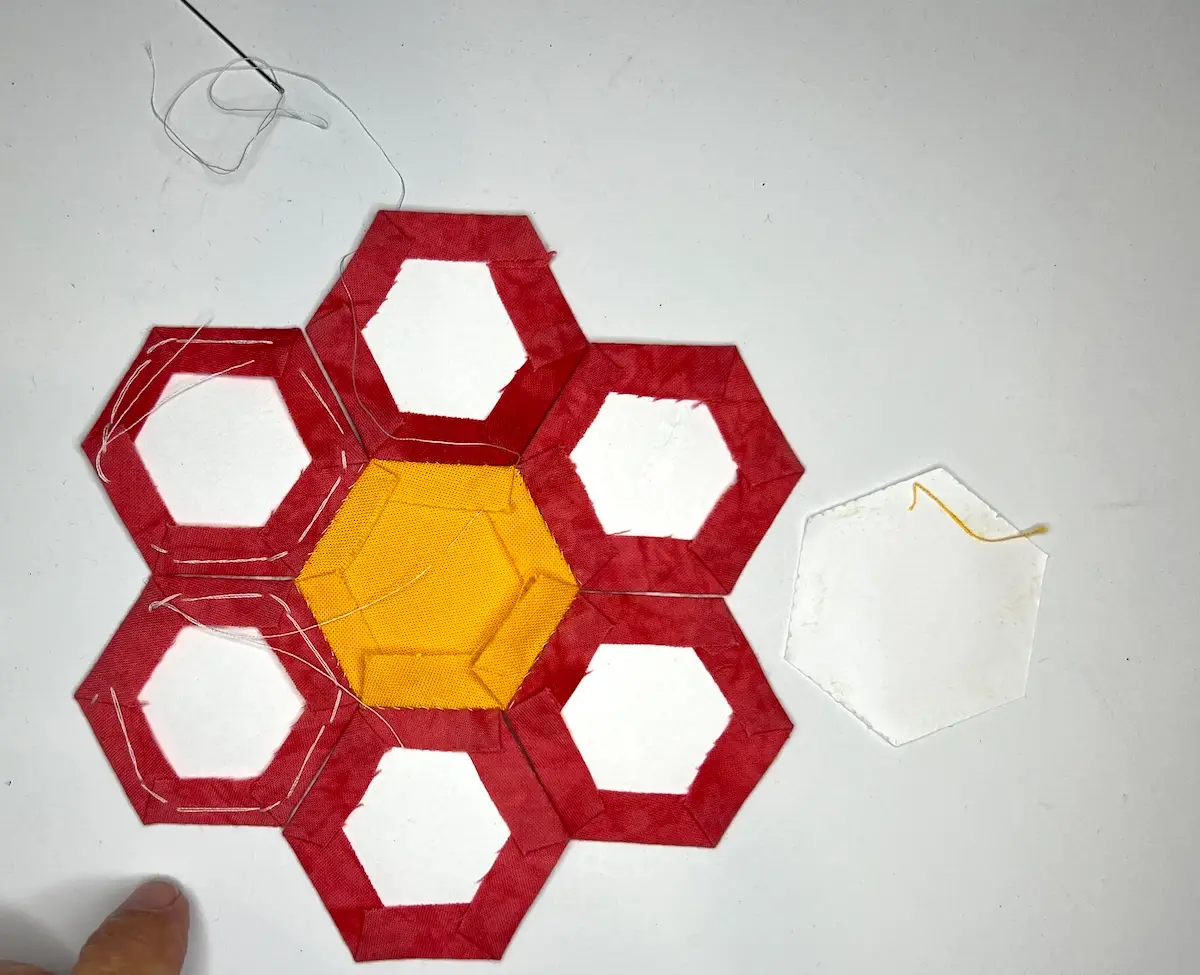
Next, fold in half and sew each of the petals together at the sides.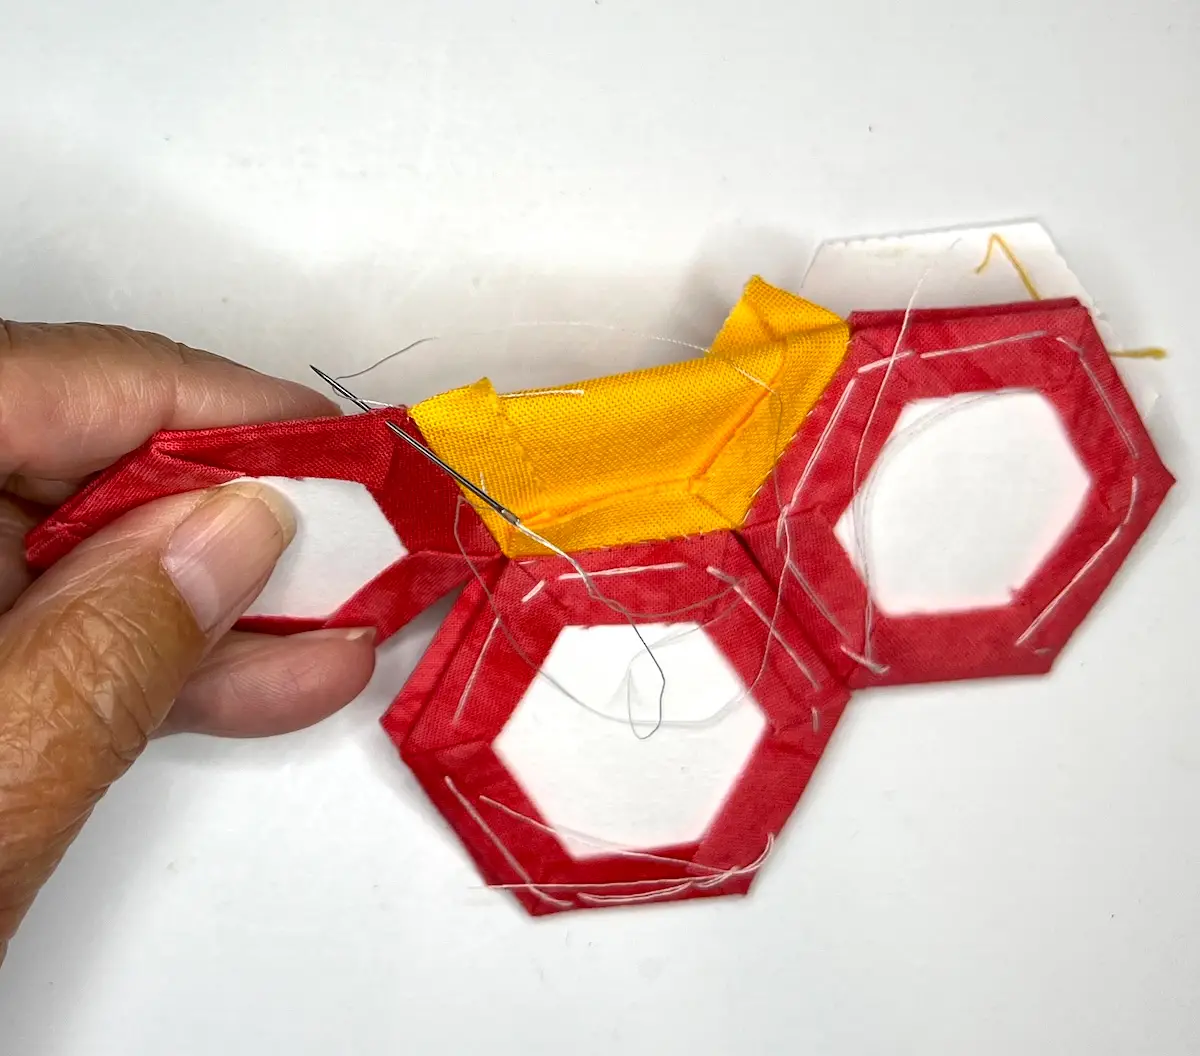
Now, we are going to create the 3D effect to be able to fill the pincushion. Take adjacent petals and again sew the edges together. Whipstitch the adjoining edges of each petal to its neighbor. This is what pulls the flat hexagon layout into a slightly domed, three-dimensional flower shape. 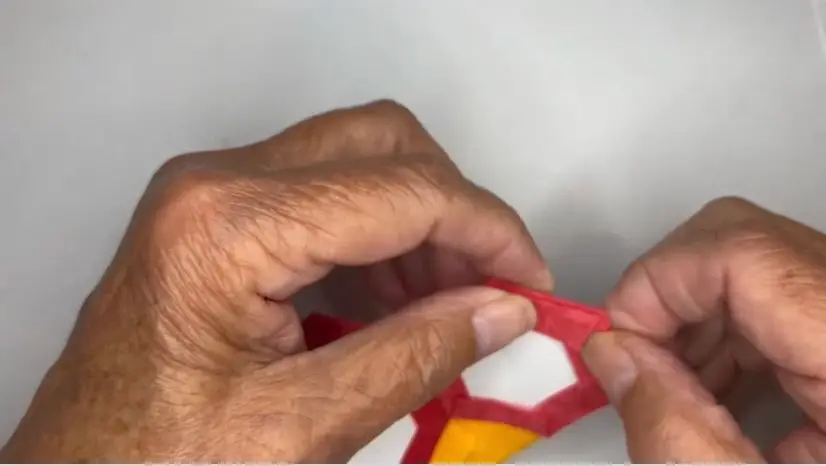
Here is the pincushion once all of those seams are sewn. See how it is 3D.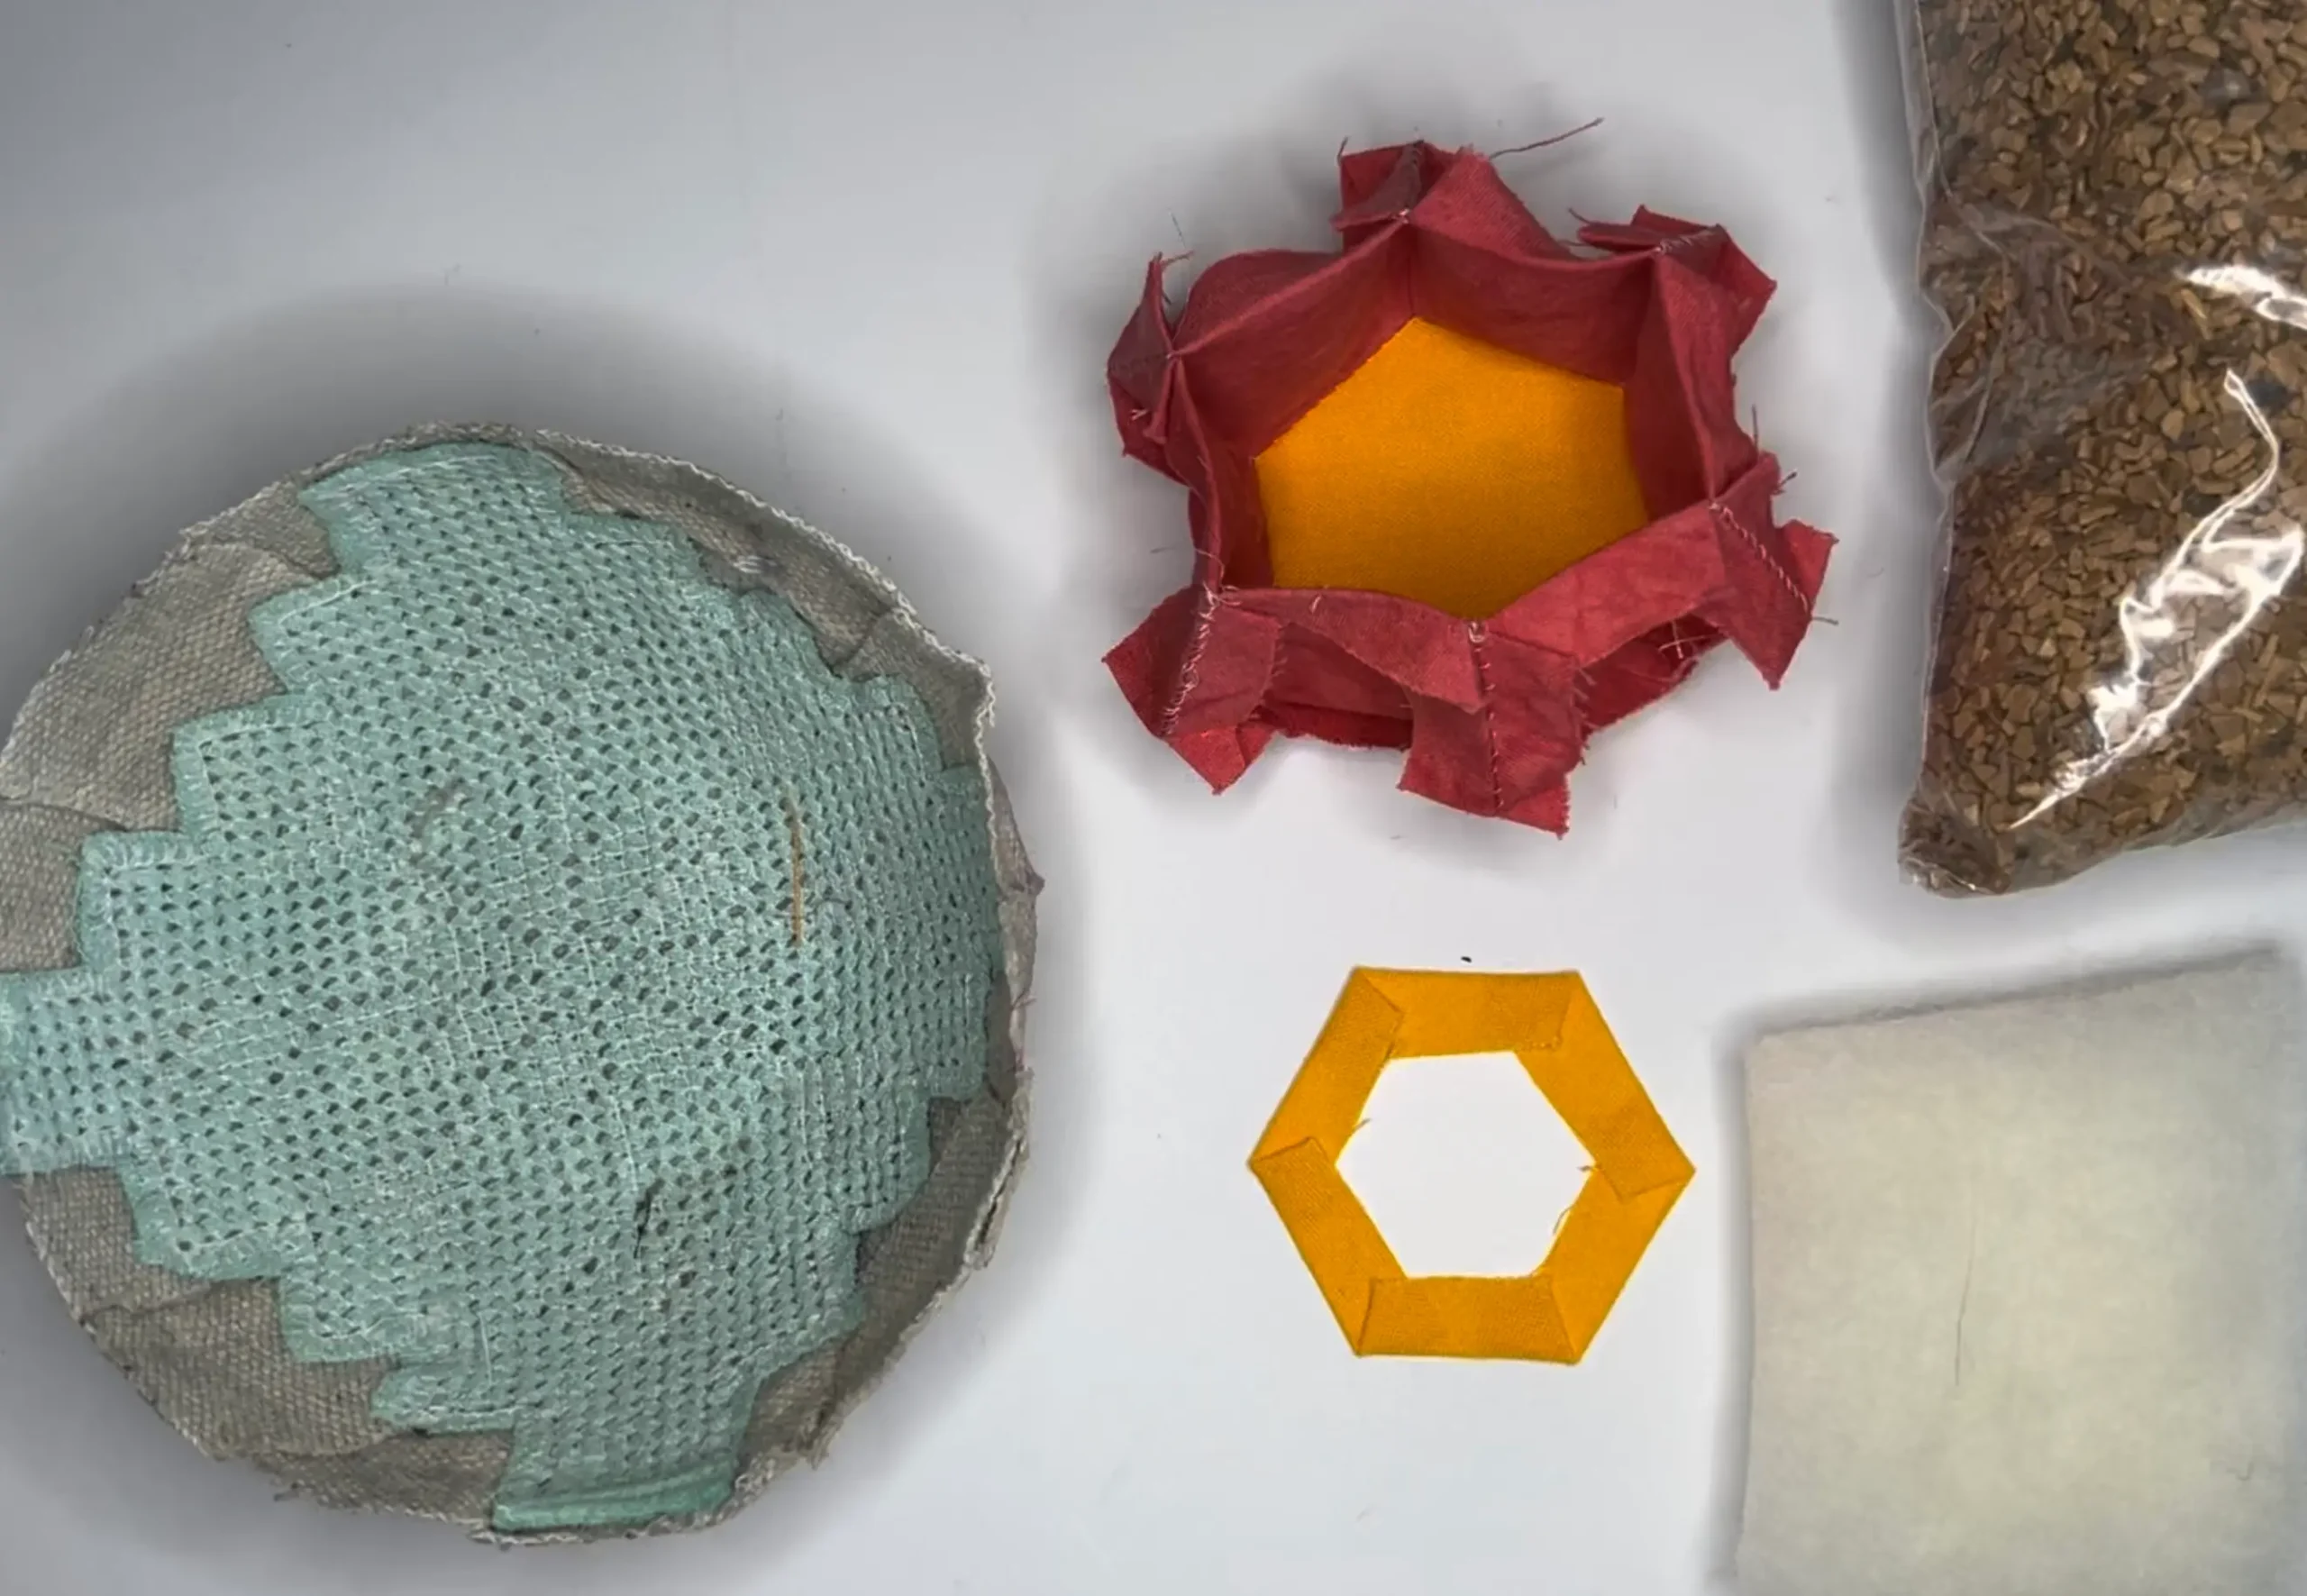
Step 5: Adding the second center and filling the pincushion
Remove all of the papers from the flower top. Turn the pincushion right side out. 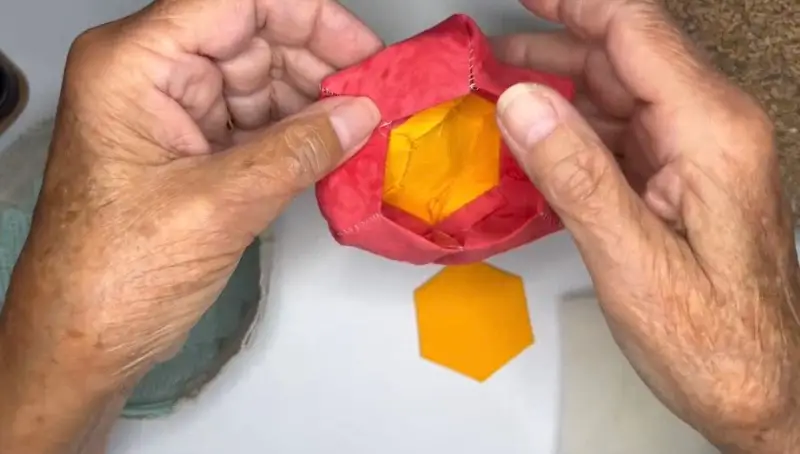
Remove the paper from the second flower center. Line up one folded edge, right sides together, and whipstitch three (3) adjacent sides.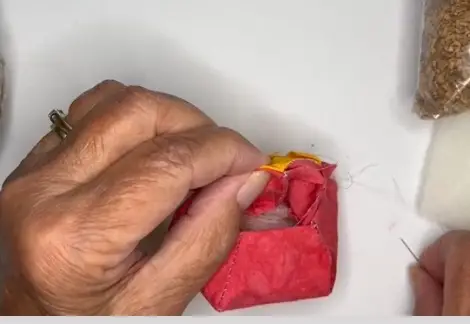
Once three sides are sewn, you're ready to fill the pincushion. Add one of the layers of wool batting to the bottom of the pincushion. 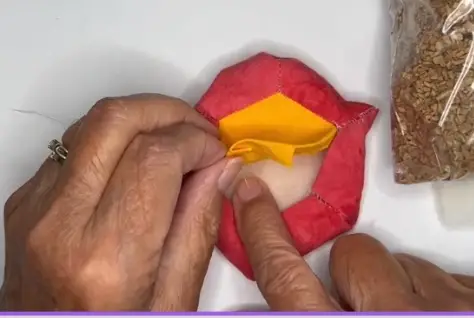
Place the pincushion in a bowl. TIP: This will help the crushed walnuts not escape and get all over.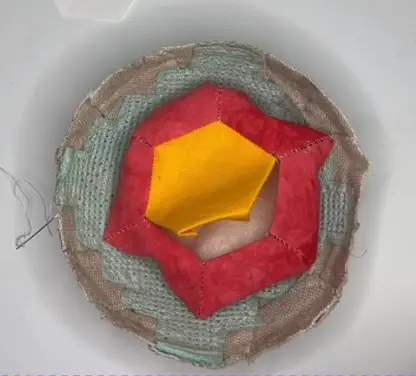
Carefully, pour the walnut shells into the pincushion. 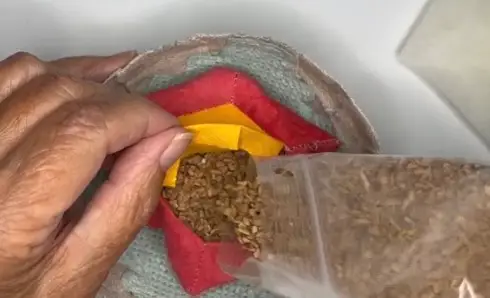
Don't overfill the pincushion. Remember you'll still be adding another layer of wool batting. Once it is almost full, place the last piece of wool batting on top. 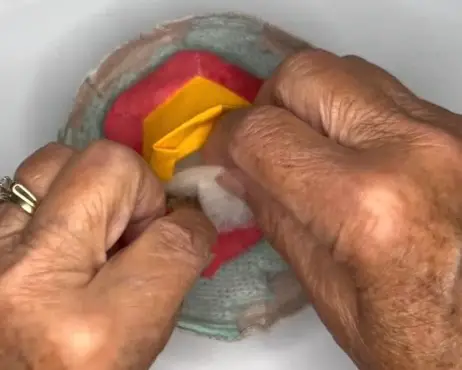
Step 6: Finish your pincushion
Now, carefully sew the other three (3) sides by hand to close the pincushion.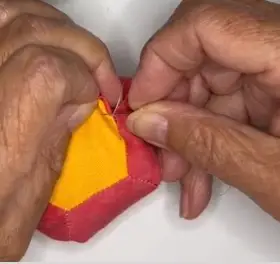
And, here is the finished hexie flower pincushion ready for some pretty pins!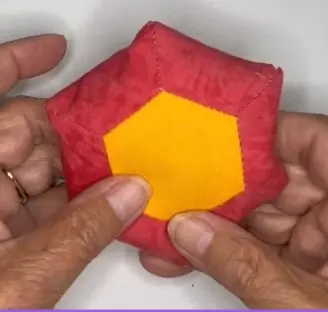
Common mistakes (and how to avoid them)
- Skipping the layout step. Sewing pieces together as you baste them, instead of laying the whole flower out first, is the #1 cause of “wait, I don’t like this color placement” regret. Lay it all out before you thread a needle.
- Basting too loosely. Loose basting stitches let fabric shift while you whipstitch, which distorts your hexagon points. Baste snugly, especially at the corners. Refer to our article on Thread Basting vs. Glue Basting for full basting directions.
- Catching the paper when whipstitching. If your needle catches the paper template, it’s much harder to remove later and can tear the paper mid-seam. Aim your stitches through the very edge of the folded fabric only.
- Under-stuffing or over-stuffing. A soft, floppy pincushion won’t hold pins upright. Stuff with just enough. If it is overstuffed, it will be difficult to sew the last few seams
- Removing papers too early. Pull papers before the surrounding seams are fully stitched and the hexagon can lose its shape. Wait until each piece is stitched on all sides before removing its paper.
- Mismatched seam allowances. If your basted seam allowance varies from hexagon to hexagon, your points won’t line up neatly when you join the top and bottom. Use a consistent 1/4″–3/8″ allowance throughout.
Tips for making hexie pincushions
- Use print fabrics and a thin thread that blends with the fabric. That will make your stitches blend in and not stand out.
- Use the whipstitch, with small, close-together stitches.
Frequently asked questions
1.5″ to 1.75″ hexagons are the most beginner-friendly — big enough to hand-sew comfortably, small enough to finish in a reasonable amount of time.
You can print your own on cardstock or buy pre-cut acrylic/paper templates. Pre-cut templates save time if you plan to make more than one project. And, pre-cut templates can be reused.
Both work well for a small project like this. Glue basting is faster and great for beginners; thread basting is fully removable and preferred by purists who don’t want any glue residue near their fabric. Refer to our article Thread Basting vs. Glue Basting.
I like to use a mixture of wool batting and crushed walnut shells. The wool batting helps keep the walnuts in the pincushion and provides lanolin to keep your needles sharp. Crushed walnut shells add helpful weight and are said to keep pins sharp, but they can be slightly abrasive on delicate needles.
Most beginners finish a single 8-hexie pincushion in an evening or two, not counting basting time, which can be done in front of the TV.
Yes — this entire project is hand-sewn using a whipstitch, which is part of what makes it such an approachable first EPP project.
EPP uses paper templates as a stable base for folding and basting fabric before hand-stitching pieces together, which gives sharper points and more precise shapes than machine piecing alone.
And that’s it — a finished hexagon flower pincushion made from just 8 hand-pieced hexies.
If this was your first English paper piecing project, congratulations: the skills you just practiced (basting, whipstitching, working toward a stuffed finish) are the same ones used in much bigger EPP projects, from table runners to full quilts.
Save your leftover fabric scraps, because once you get the hang of this, it’s genuinely hard to stop at just one pincushion.