The seven patch weave quilt block is really easy to make, perfect for beginning quilters. The key is cutting your fabric accurately and sewing with an accurate seam allowance. If you can do those two things, this quilt comes together quickly and looks like you’ve done a lot of work!
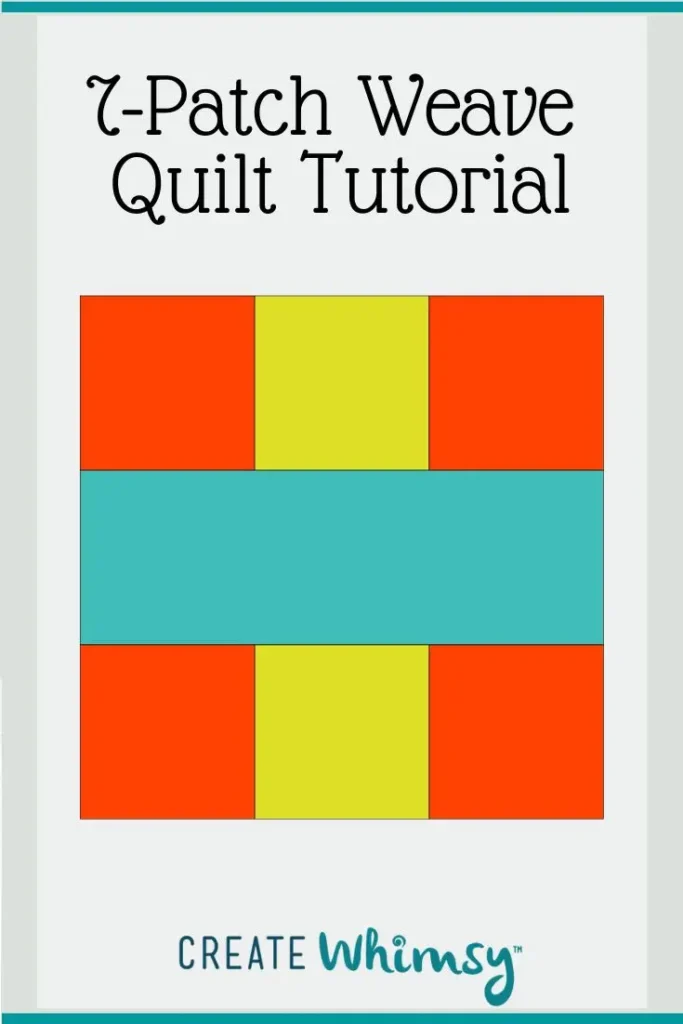
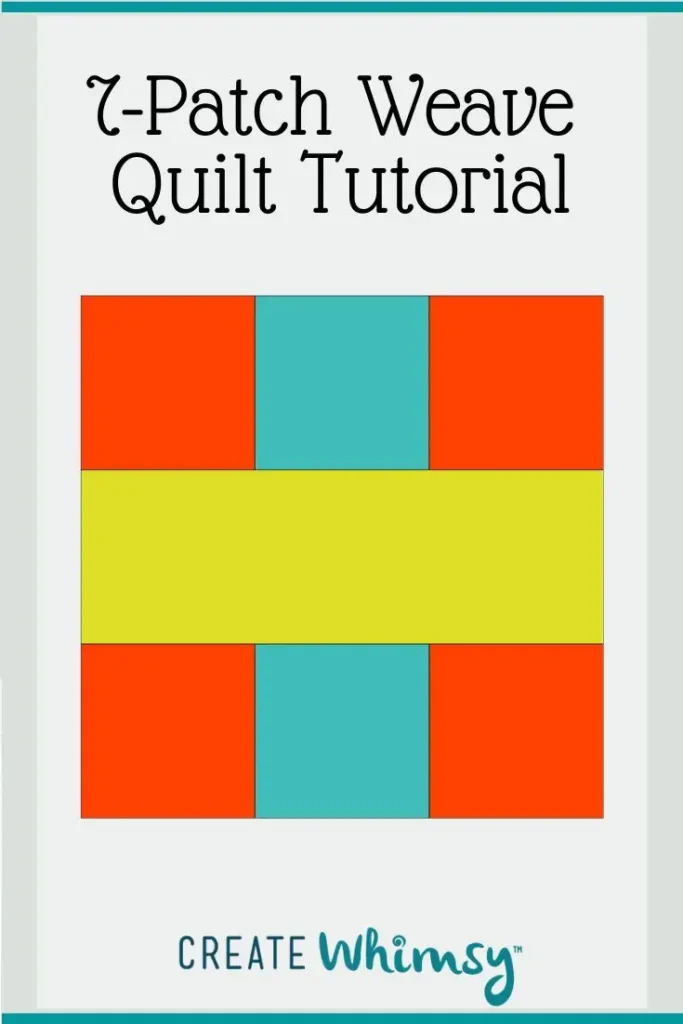
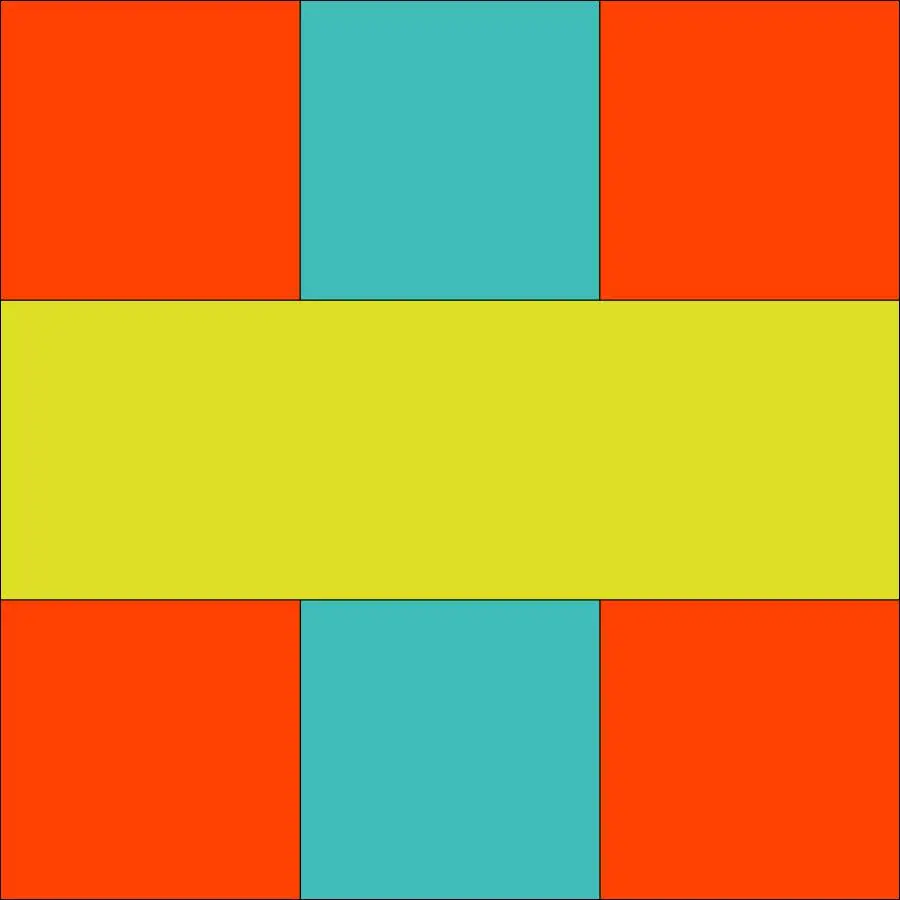
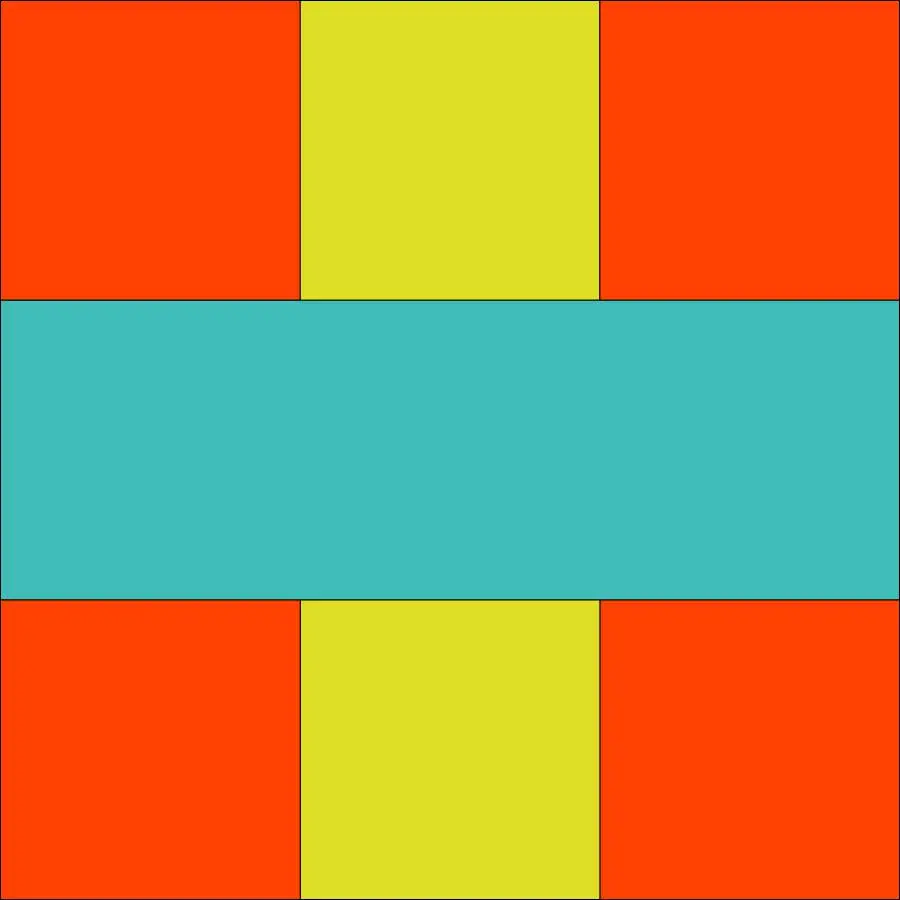
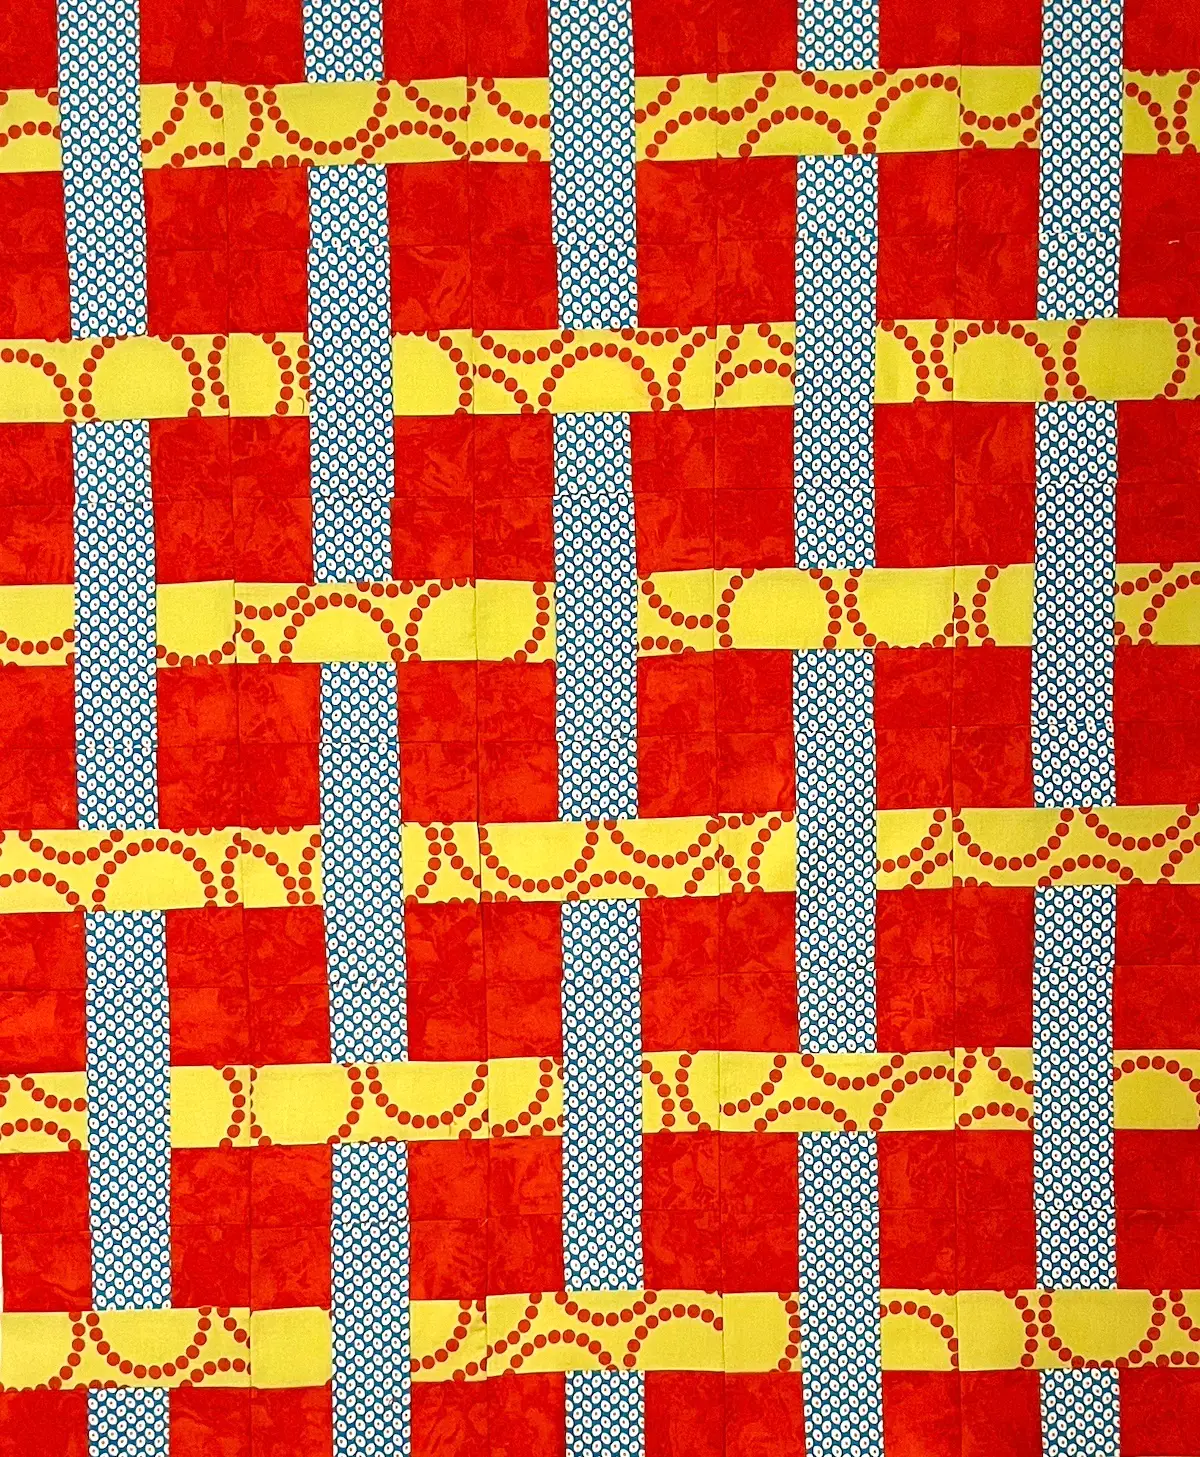
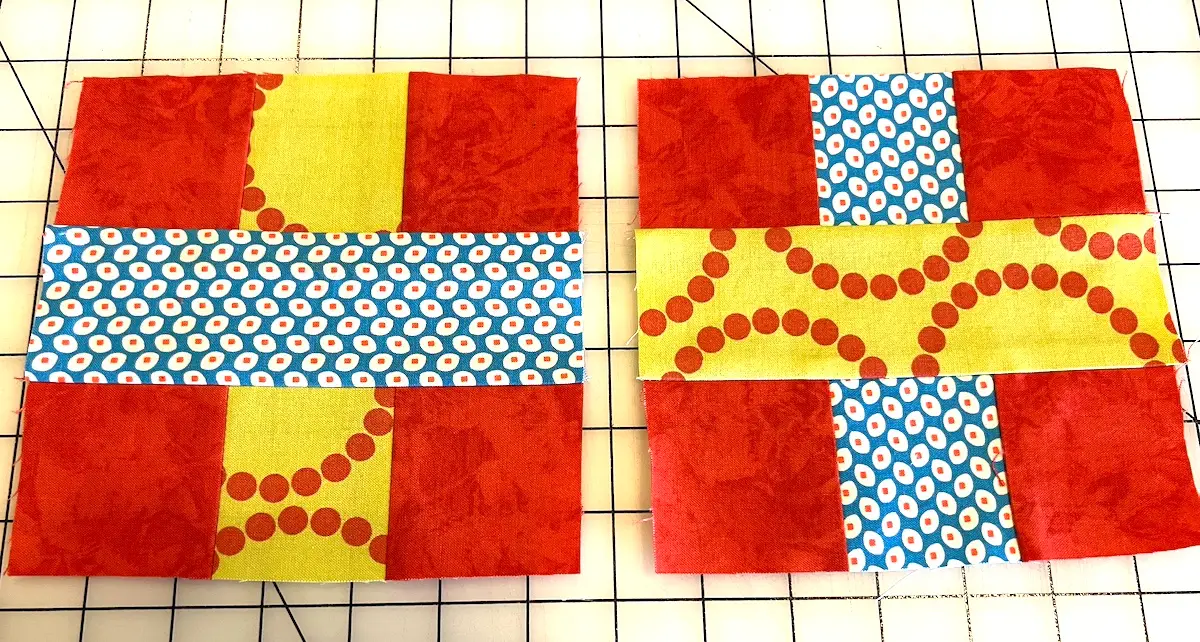
Made with three fabrics, the 7-patch block looks like the fabric weaves in and out. It uses the strip piecing method to create the pieced sections of the block. Here is the basic block, naturally, made with seven patches!
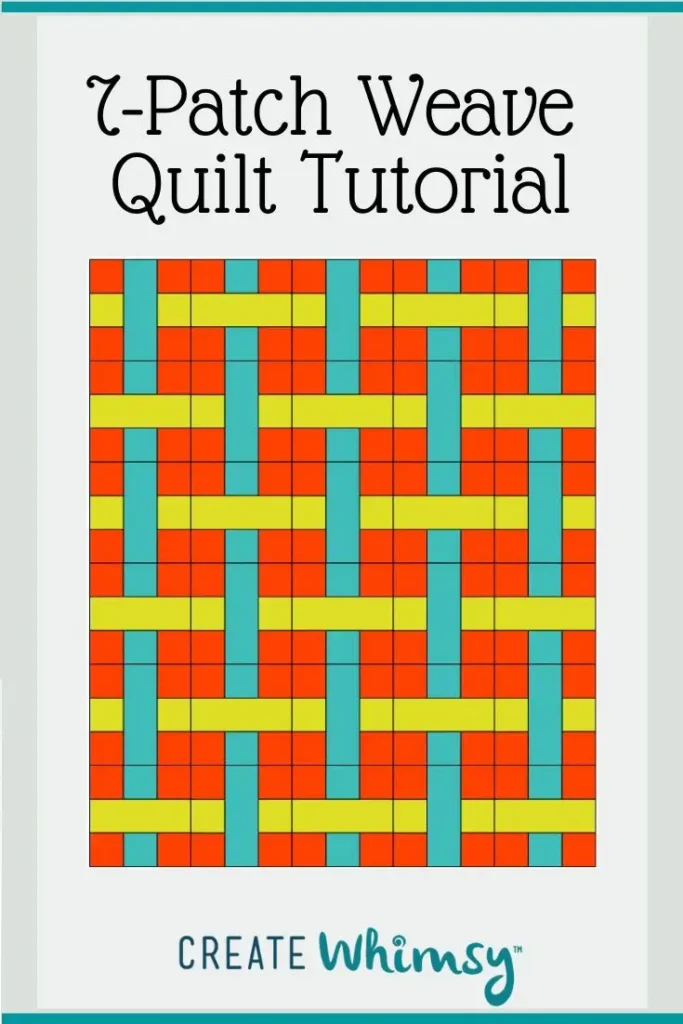
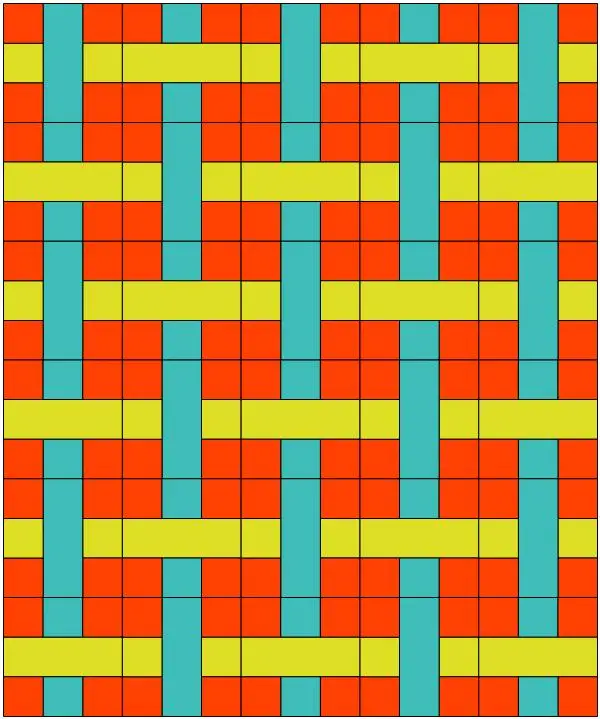
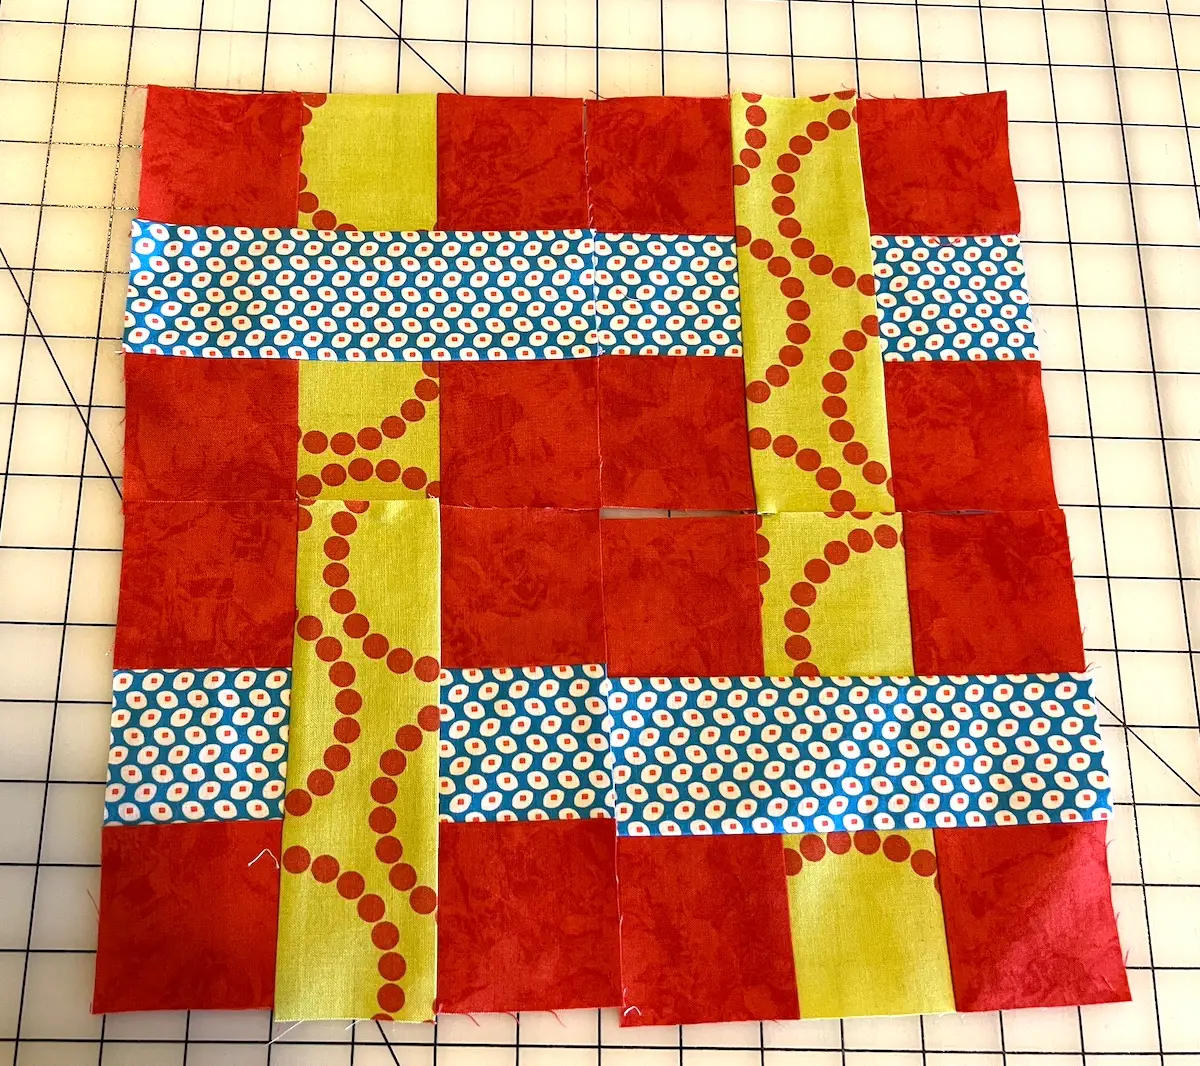
You make two different color versions of the same block, then rotate the blocks for this block layout:
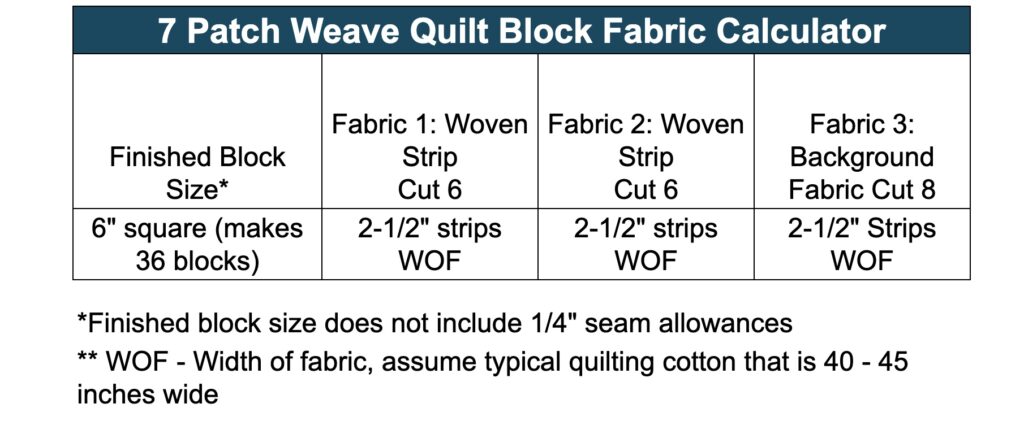
Here are the fabric requirements and how to cut your strips to make a finished quilt top that is 30-inches wide by 36-inches tall:
Here is our free quilt tutorial with step-by-step directions for making the 7-patch weave quilt pattern.
As an Amazon Associate I earn from qualifying purchases. Read more about our affiliate linking policy.
How to Make the 7 Patch Weave Quilt
Use three (3) fabrics to make this simple block that turns into a woven quilt top. Perfect for beginners who want to practice cutting and sewing straight lines.
Materials
- 1/2 yard EACH of two fabrics for the woven strips
- 3/4 yard for the background fabric
- Coordinating thread for sewing
Tools
- Sewing machine
- Iron
- Pressing surface
- Rotary cutter
- Quilters Ruler - both a long one and a 6-1/2 inch square
- Cutting mat
Instructions
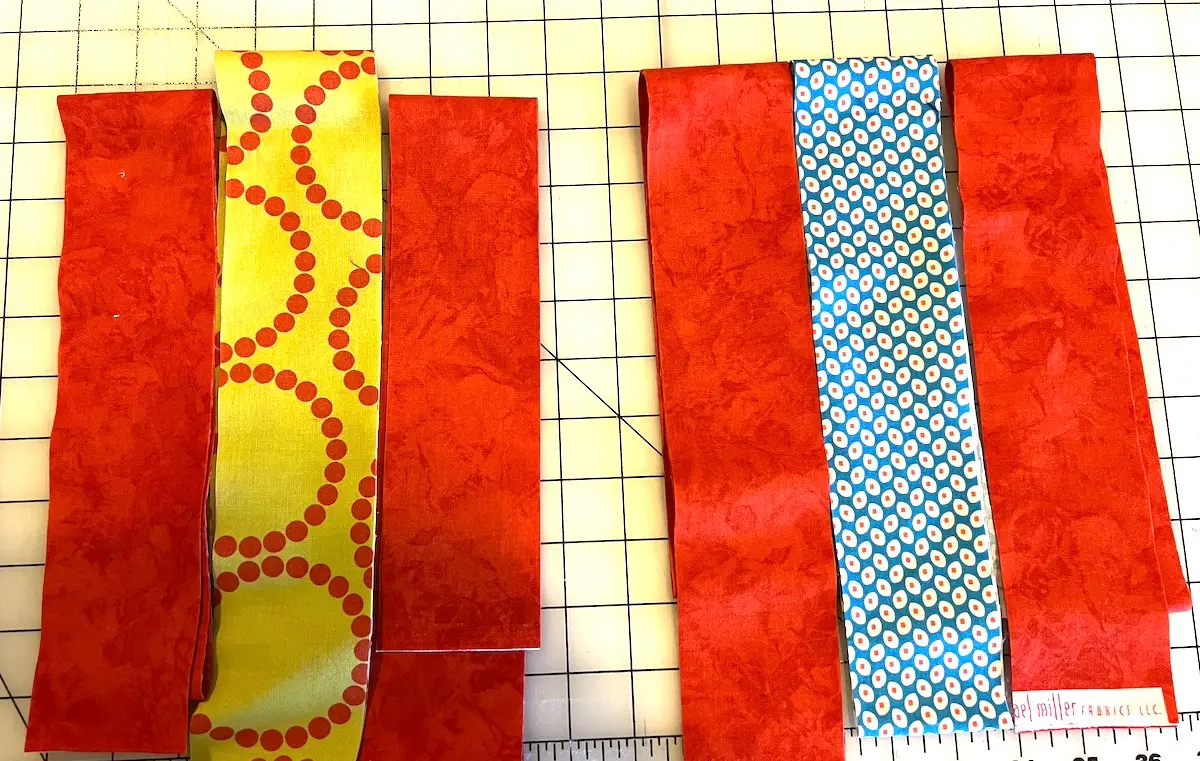
- Start by cutting your strips. For this project, I made 6-1/2 inch squares, so I started with 2-1/2 inch strips of fabric. Cut eight (8) 2-1/2 inch strips from your background fabric. Cut six (6) strips from EACH of the woven fabrics. Here are the fabrics I'm using for this quilt.

- Let's start by taking four (4) of each of the strips for the woven fabrics and cut them into 6-1/2 inch strips. Here are my piles that I set aside until I was ready to sew the blocks together.

- Next, we'll be making strip sets with each of your woven fabrics with the background fabric on each side. A three (3) fabric strip set. Here are my strips laid out and ready for sewing.
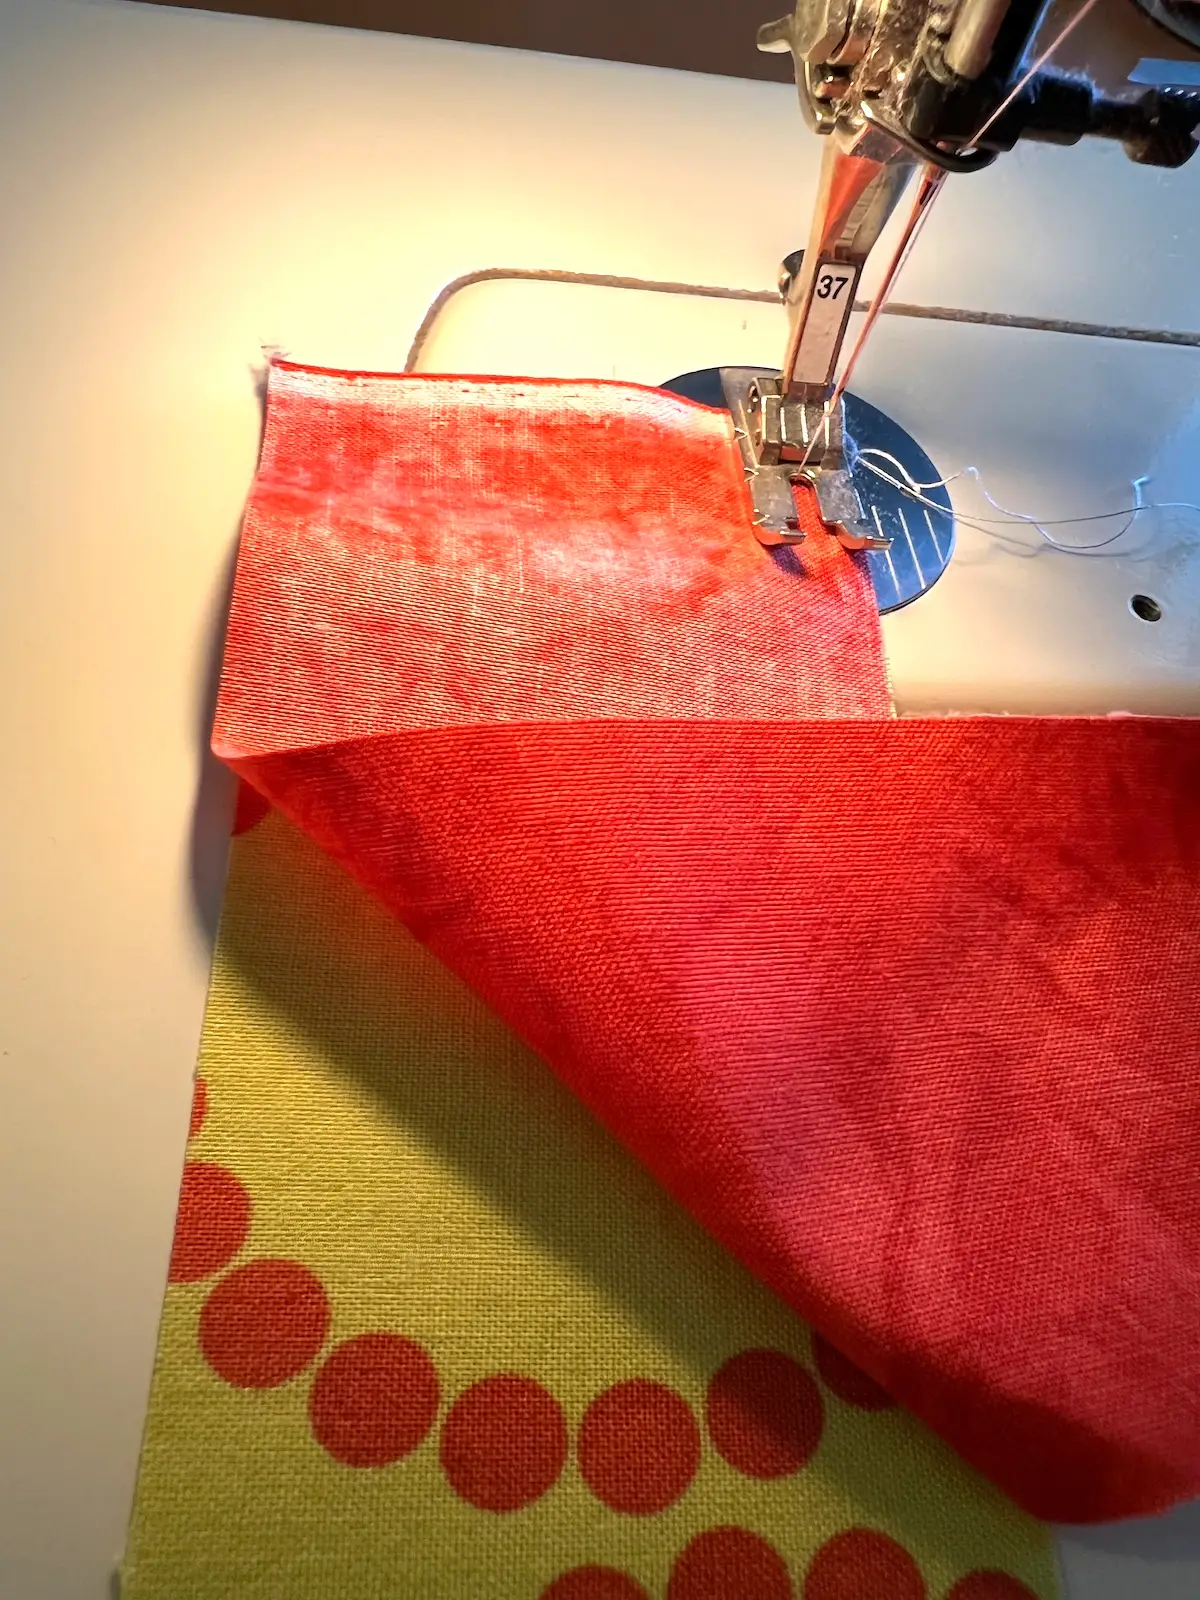
- Sew the sets of three strips of fabric together with right sides together and sew with a 1/4-inch seam allowance. Be as accurate as you can with your stitching. You should have two sets for each.
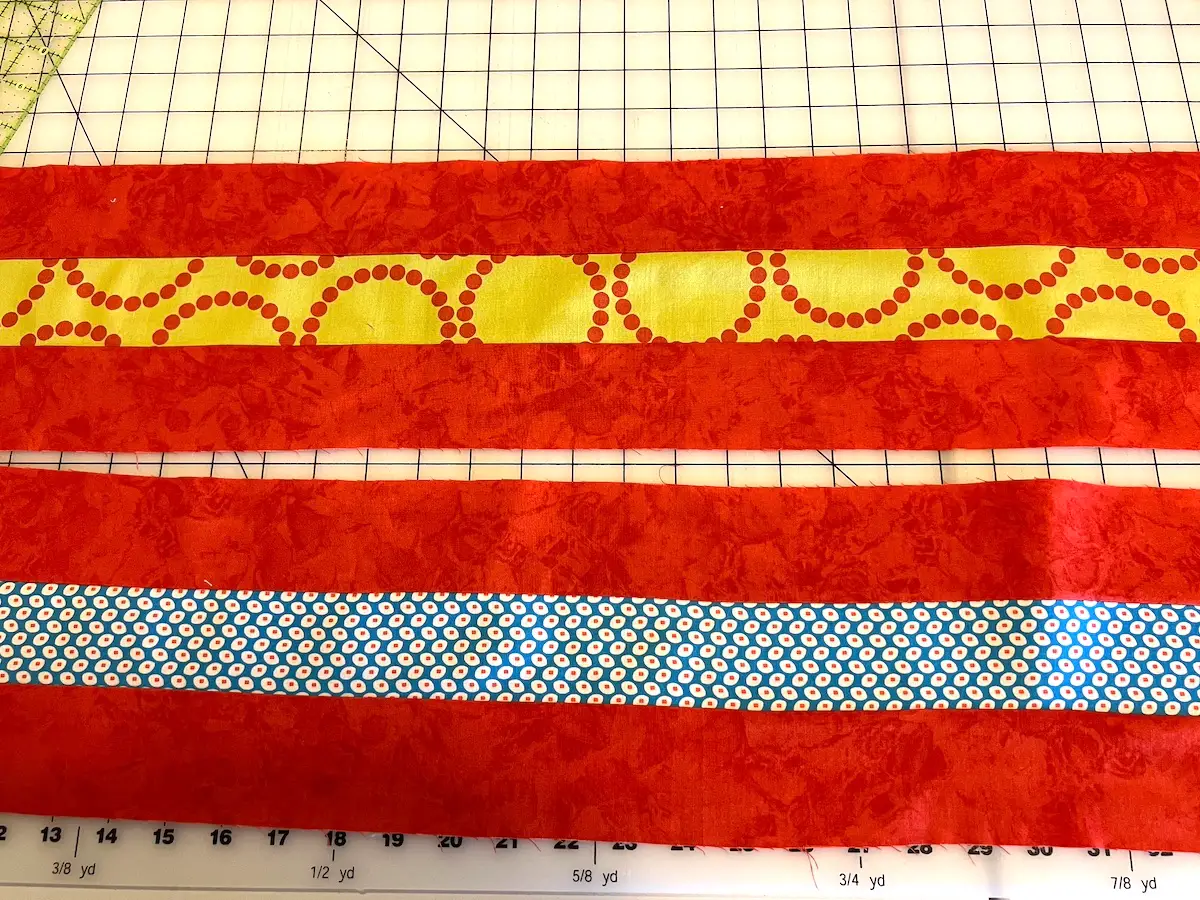
- Press seams. I like to press the seam for this strip set to the background fabric. This will allow the seams to 'nest' when we sew the blocks together. Here are the strip sets all sewn and pressed.
- Trim off the selvage and any uneven edges at the end of your strip set.
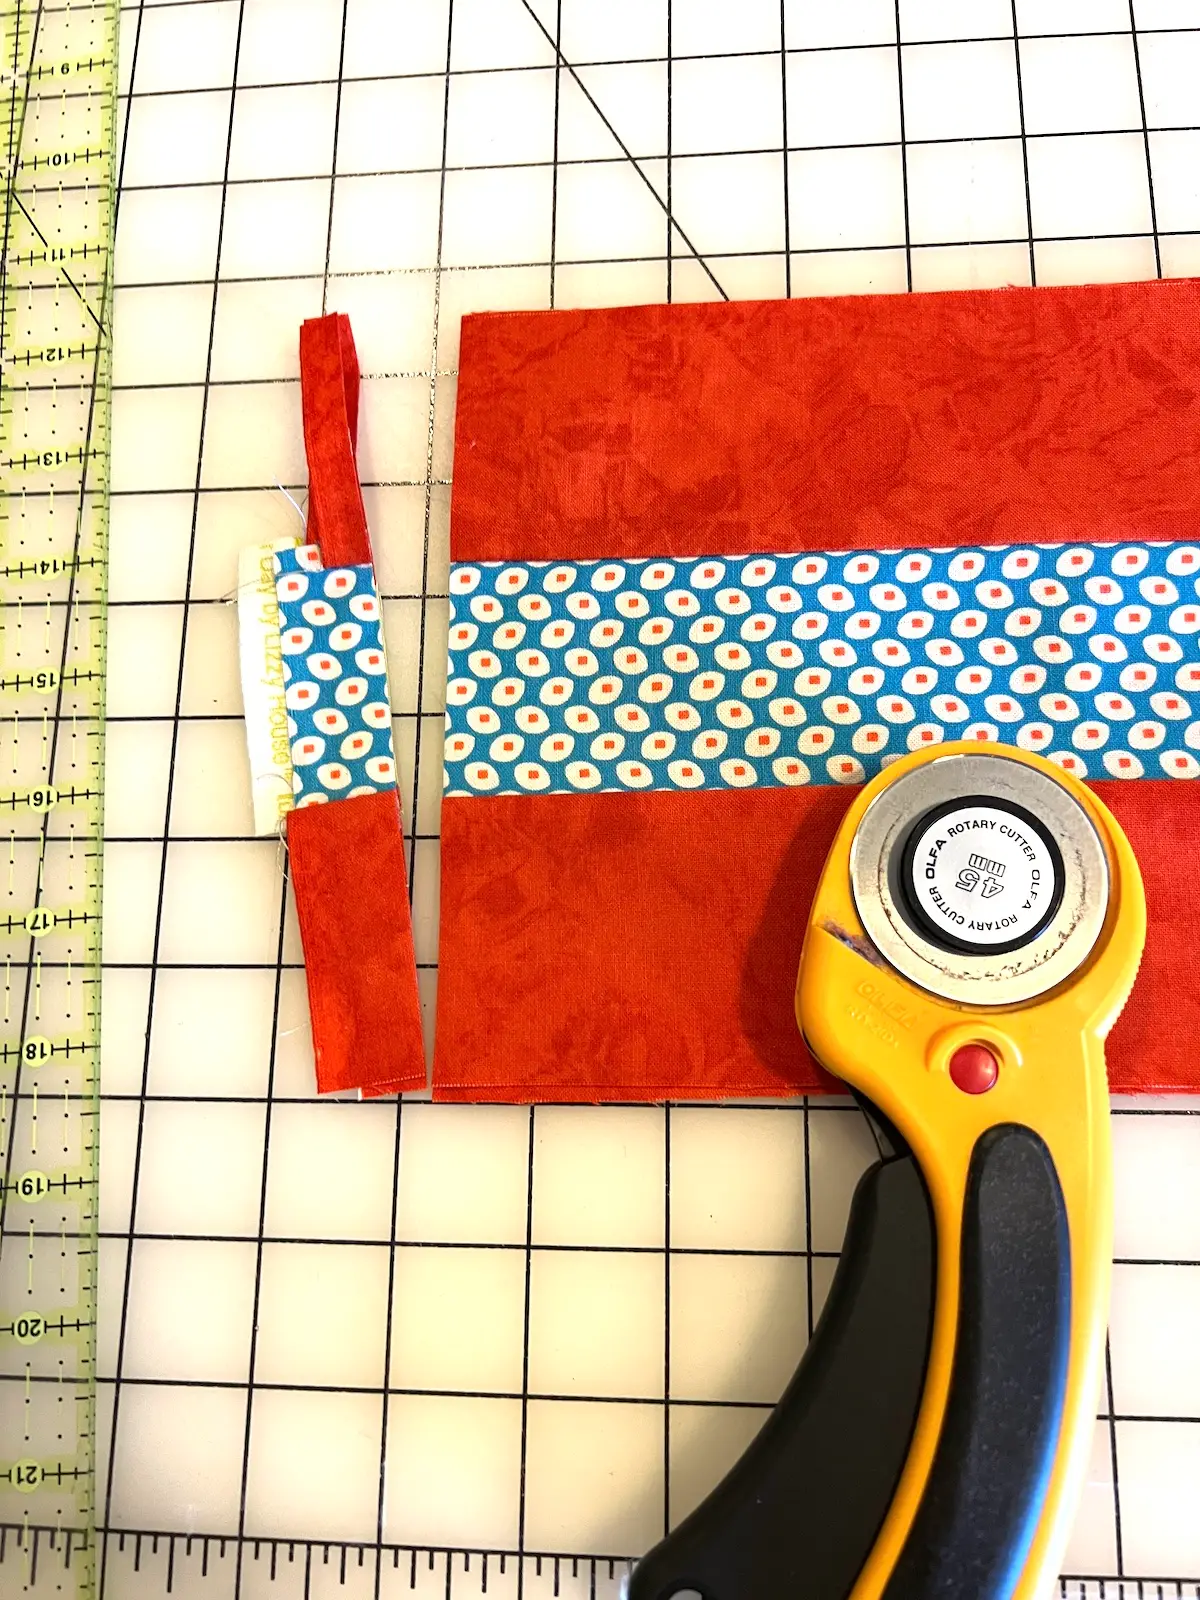
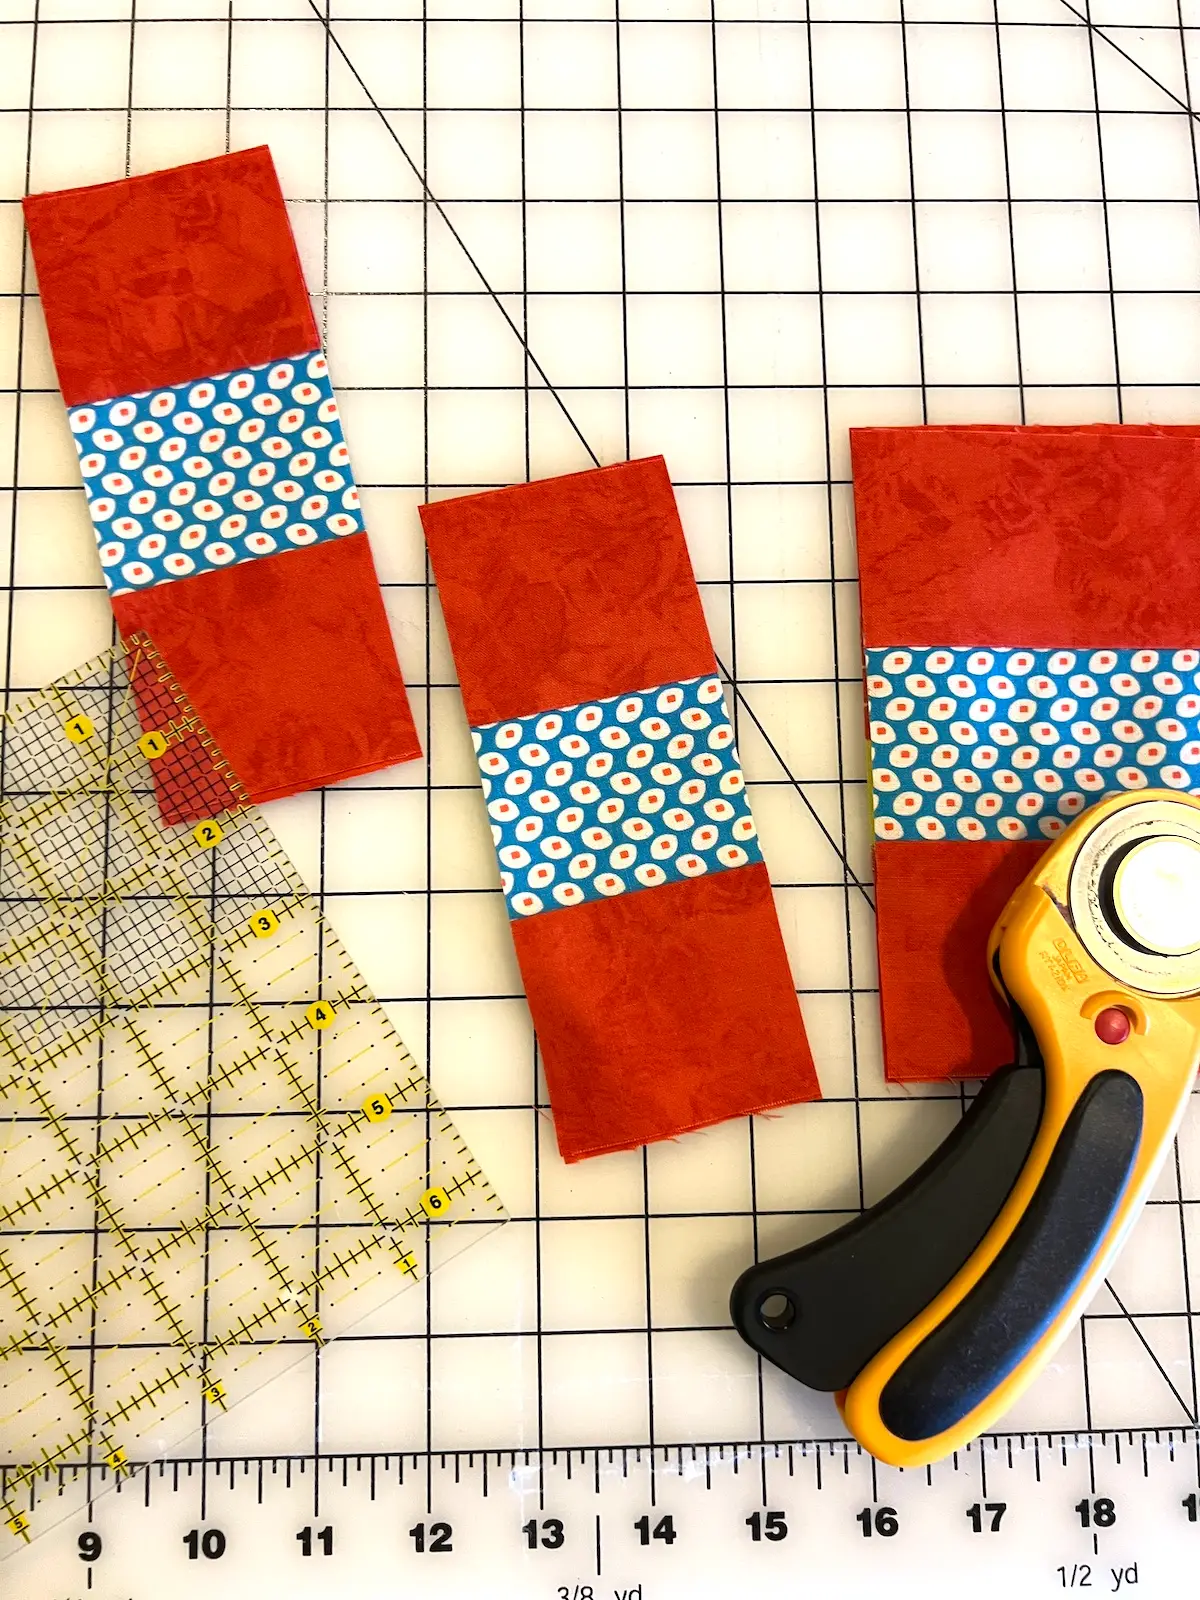
- This is where it is easier to use a 6-1/2 square ruler, if you have one. Now cut 2-1/2 inch patches from your strip set.

- I've got several cut.
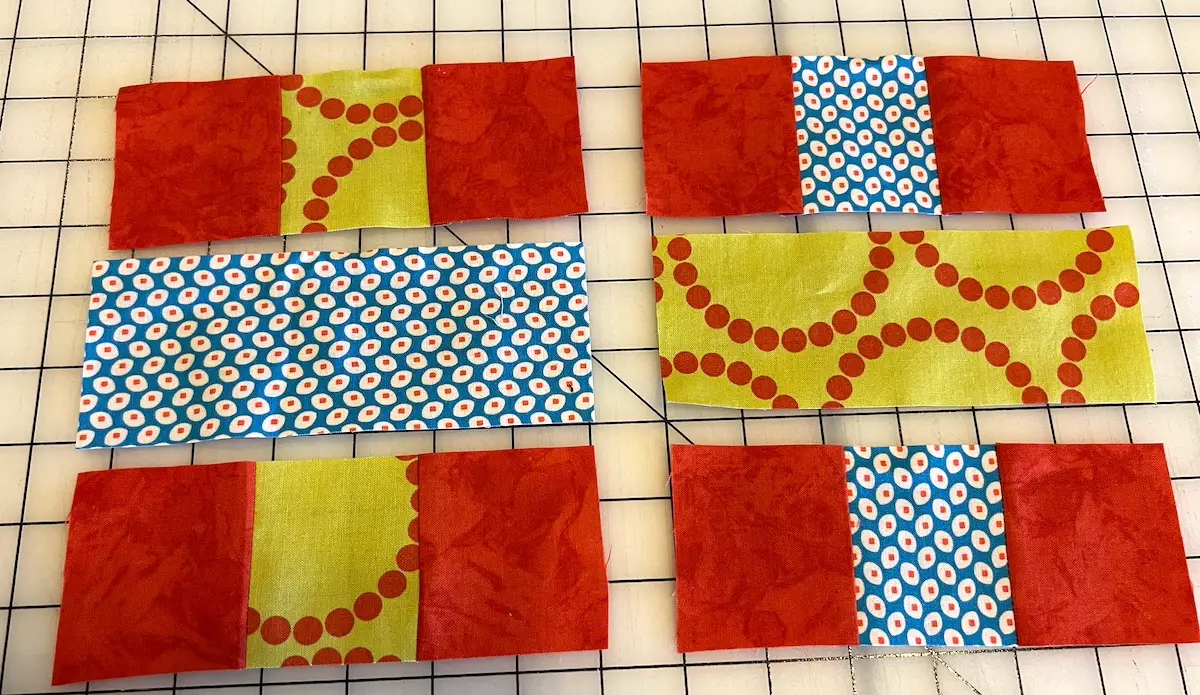
- We're ready to lay out our blocks. We'll have two different layouts using the pieced and unpieced patches that have been cut.
- Now sew the quilt blocks together, again with right sides together and with a 1/4-inch seam allowance.
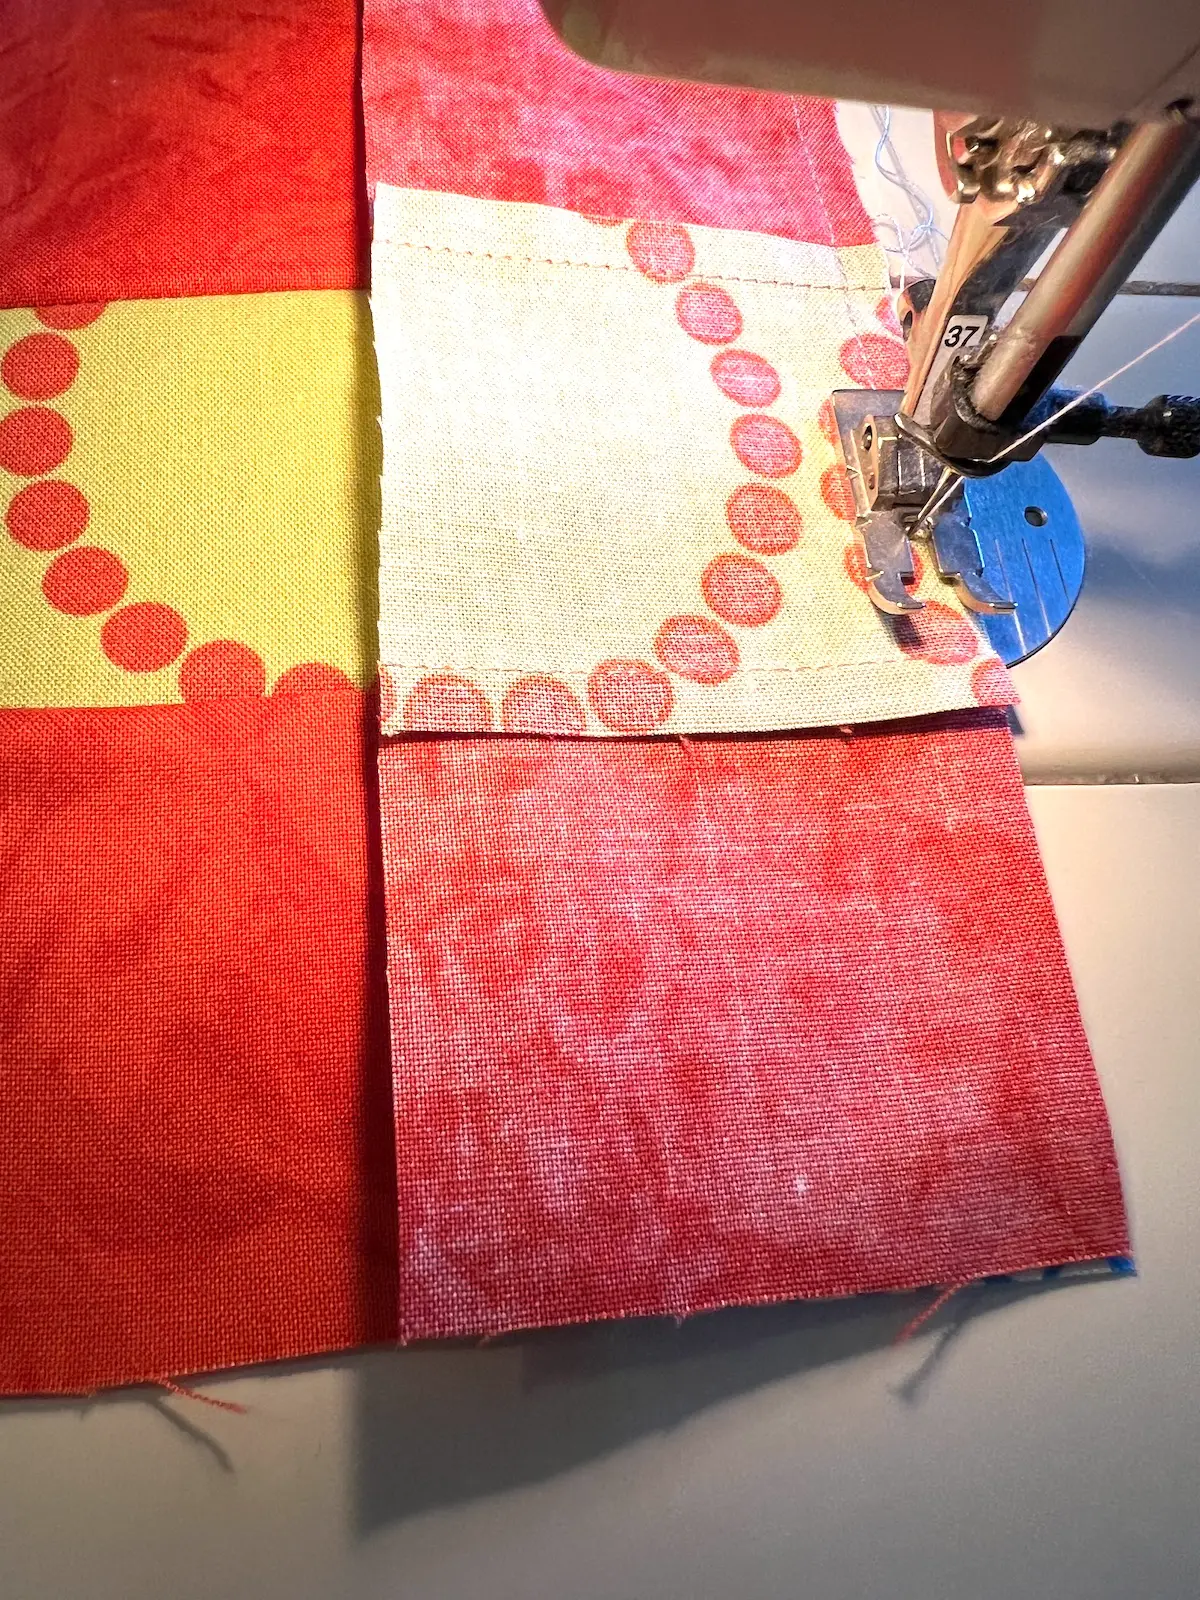
- When they are all sewn together, press the seams to the center. Again, this will allow the seams to 'nest' when we sew the blocks together.
- Now the fun begins! Lay your square blocks out. I chose a 5 x 6 layout, which means 5 blocks across and 6 blocks down. Start with one of the blocks, then take the other block and place it next to it, rotating it 90-degrees. This is how you get the weave pattern. Here are four blocks on my cutting table to show you.
- Sew the blocks together in rows, and then sew the rows together to make your finished quilt top!
Tips and ideas for making the 7 patch weave quilt
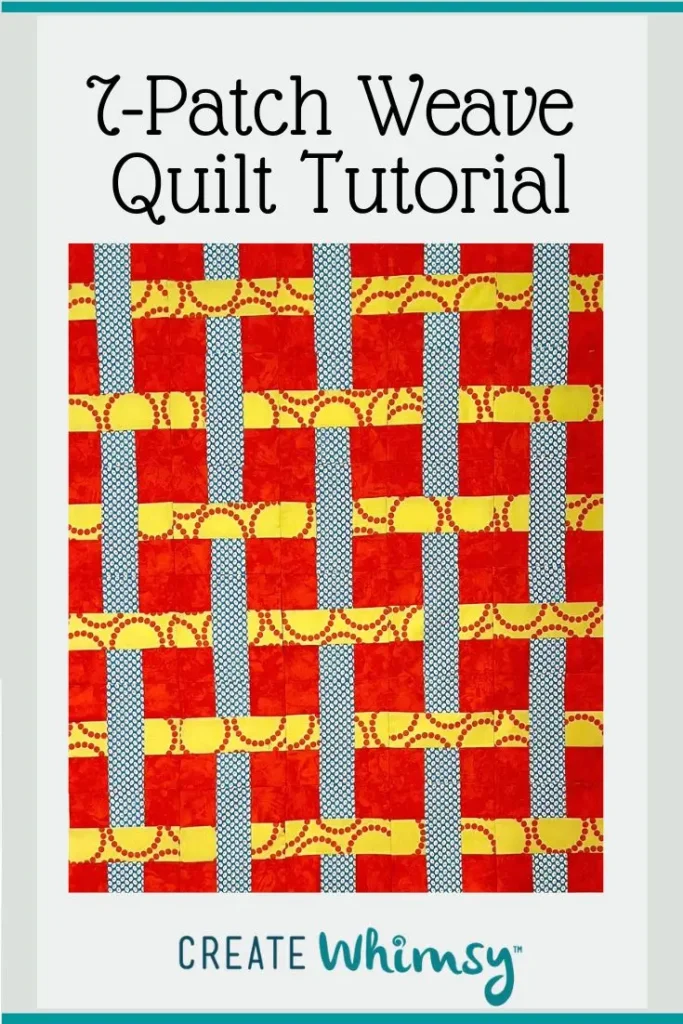
When selecting your fabrics, make sure there is good value differentiation (light value, medium, and dark) so that the weave design shows on the finished quilt. If using prints, select prints with different scale, like I did, so that the weave is prominent. Have fun playing with this quilt pattern with different fabrics!
For a scrappy block, make piles of different colors of scraps in the same colorway, or the same value so that the weave design shows in the final quilt design.
Use a design wall (or your floor!) to lay out the blocks. The woven illusion relies on the block placement. It becomes an eye chart! Ha! Check and double check placements.
As I mentioned above, I used the chain piece method. That makes the sewing quicker. Sew each block one after another. I piled them up and sewed. Then cut them apart and sew them again. It just takes organization to make sure that you sew in the correct order.
Pressing matters. Most of the time I suggest people press to their preference. There are ‘team press open’ lovers and people who always press to the dark or whatever. In the tutorial above, I suggest pressing to the center that then helps the seams nest when sewing the blocks together.
Double and triple check your accuracy in both cutting and sewing. When they don’t line up, your weave is wonky. (Ask me how I know??? 🙂
Browse through more free quilt patterns on Create Whimsy.