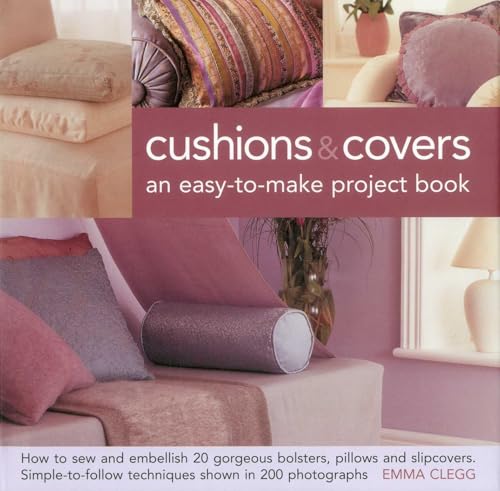
I love decorator pillows. They can change a room’s mood, but are so expensive! Make your own decorator pillow and get exactly what you want!
You don’t need a lot of sewing skills. If you can sew a straight line, you are ready to DIY throw pillows to update your living room. Making pillows is one of the easiest sewing projects and can change the look of a room in just an hour or two. This is a beginner sewing project. No need to go shopping for new throw pillows, you can get the perfect pillow by making one for yourself.
Bring new life to a piece of furniture with a homemade pillow. Here are the basics of making your own throw pillows at home.
I found this bird fabric at a local store and thought it had just the right colors for my house, and would bring some spunk to the room. I had the checked upholstery fabric in my stash, and thought it was a great match for piping. I’ve seen some really expensive pillows with the huge piping, and thought that would be a good look to try with the bird fabric.
This is an easy sewing project. Spiff up a room with new pillows in an afternoon!
As an Amazon Associate I earn from qualifying purchases. Read more about our affiliate linking policy.

How to Make A Throw Pillow
Learn how to make your own throw pillow with these step-by-step directions. Start with a pillow form for your pillow, and learn how to make a permanent cover.
Materials
- Fabric to cover your pillow form. I'm using a 12-inch x 16-inch pillow form, so I need two (2) pieces of fabric 13-inch x 17-inch so that I have the 1/2-inch seam allowances. A full yard of fabric is what I needed for this project.
- Pillow form
- Thread
- OPTIONAL: premade piping or trim, or make your own. Measure all four (4) sides of your pillow and add about 6-inches to get around curves and be able to either tuck in seams or overlap.
Tools
- Sewing machine
- Iron
- Pressing surface
- Corner turner
Instructions
- Gather your supplies, fabric, pillow form and trim, if using. I made my own piping from the checked fabric.

- If you are making your own piping, now is the time to do that! Read how to make piping to learn more. It's super easy to make your own, and then you can have any fabric you can find as an accent on your pillows!

- I 'fussy cut' the pillow fronts from the fabric yardage so the birds would be exactly where I wanted them. I cut the fabric pieces one-inch bigger than the pillow size. This allows for a 1/2-inch seam allowance on all seams.

- If you are using piping or trim, I like to first sew it to the right side of the front panels along the edge of the fabric. This makes it easier to ease the piping or trim around the corners, not pulling tightly. Remember, the trim goes on the outside of the pillow, but we will be sandwiching it between two pieces of fabric. When you turn this right side out, there will need to be enough trim to fill out the corner. This is is why it is important to ease as much as you can into the corners.
I started at the center bottom of the pillow. This fabric has a definite top and bottom. This huge piping was a little difficult to maneuver around the corners, but I tried to ease in as much as I could.
Since we'll be sewing the pillow with 1/2-inch seams, sew about 3/8-inch in from the edge. This way your stitching on the trim will not show on the finished pillow.
- Once the trim is attached, place the other side of the pillow fabric on top, right sides together. If you have a trim or piping, I now like to use my zipper foot so I can sew nice and close to the piping or trim edge. Also, sew the pillow fabric together with the piece that you had sewn the piping or trim on to the top. This way you can make sure you are sewing just inside that previous stitching line.
Begin sewing about 3-inches from one of the bottom corners and sew all around the outer edges of the pillow, leaving at least 6-inch opening at the bottom. This is where we'll insert our pillow form.
- Before you turn the pillow right side out, clip the excess fabric from the corners.

- Here is the opening I left to turn the fabric right side out and insert the pillow form.

- Turn your pillow cover inside out. Push out the corners.
With the big chunky piping, I did trim the cording inside the fabric so that it would not be in the seam allowance. I could then tuck just the fabric into the seam allowance.
- Time to put the pillow form in the pillow cover. You can either machine or hand stitch the opening closed.

- And, the finished new throw pillow!
Recommended Products
As an Amazon Associate and member of other affiliate programs, I earn from qualifying purchases.


How much material do I need to make a throw pillow?
Measure your pillow form and add 1-inch to the dimensions.
Example, if you purchase a 16-inch square pillow form, you will need two pieces of fabric that measure 17-inches square. This would require 1/2-yard of fabric.
Check the pattern or design of your fabric. You might want part of the specific design to be centered on the front of the pillow. If this is the case, you might need to purchase more fabric.
What fabric is best for throw pillows?
It all depends.
Think about where the pillow will be used. If it is will be used outside, purchase outdoor fabric. If it will be in the family room or play room where there will be a lot of use, use an upholstery fabric.
If the pillow is just a decoration on a guest bed, where it gets little use, have fun and use any fabric!
What are throw pillows filled with?
Throw pillows can be filled with a pillow form, as I did above, or if you want to make a pillow in a size or shape that doesn’t have a pillow form, fill it with polyfil or other polyester stuffing that doesn’t lose it’s shape.
How can I make pillow covers?
Pillow covers are easy to make. This easy project is perfect for changing up your home decor. See our article on how to make a pillow cover to make accent pillows for Easter. This tutorial uses an envelope pillow method. You can also add a zipper if you’d like to make a removable cover for your pillow.
More ideas for DIY pillows
First, browse through our article on decorating with throw pillows.
- Purchase a pillow insert (or more!) at your local craft stores or big box fabric store. And, remember to use your coupon. If you plan ahead, they’ll be on 50% off sometime. By selecting a few standard sizes for your decorator pillows, it is easy to switch them out for different seasons and holidays.
- Pick up a piece of fabric (or two) that can to you. It’s fun to look through thrift stores for interesting fabrics, finished needlepoints or tapestries that might make interesting pillows. Look for different fabrics that will give your room a splash of color.
- Center a design for the front of the pillow. Or use up fabric scraps and make an interesting design for cute pillows.
- Mix different patterns in the same colors to add a bit of color to your room.
- Add some big pom poms to the corners of your pillow for fun. Learn how to make pom poms.
- Cut up old t-shirts for nostalgic and basic pillow covers.
Browse through more decorator pillow and cushion projects on Create Whimsy. Read how to make a pillow cover.
Also, check out our articles on how to make a pillow case, how to make an envelope pillowcase, and how to make a burrito-style pillowcase.
