

Have a pile of long, skinny fabric scraps that are too small for your next sewing project but too pretty to throw away? Turn them into fabric twine, fabric rope, or fabric string instead!
Making fabric twine is surprisingly easy. You twist two strips of fabric and wrap them around each other to create a colorful, textured cord. No sewing machine is required, and you can make it while watching TV, listening to a podcast, or simply sitting with your fabric scraps.
How do you make fabric twine from scraps?
Cut or tear fabric scraps into strips about ½ to 1 inch wide and 12 to 18 inches long. Tie two strips together, twist one strip, cross it over the other, then repeat with the second strip. Keep twisting and crossing until you have the length of fabric twine you need.
What fabric is best for fabric twine?
Lightweight quilting cotton, linen, and other lightweight woven fabrics work especially well. You can experiment with different fabrics, colors, and textures. Very heavy fabrics can be difficult to twist, and stretchy fabrics can be harder to control.
How wide should fabric strips be for twine?
I like strips between ½ and 1 inch wide. They don’t have to be perfectly straight or neatly cut. In fact, uneven edges and a few loose threads can give your finished fabric twine wonderful texture.
As an Amazon Associate I earn from qualifying purchases. Read more about our affiliate linking policy.
What can you do with fabric twine?
Use it as a gift-wrap tie, a decorative cord, a tie for a fabric bag, or as a material for bowls, coasters, ornaments and other fiber-art projects. Once you start making it, you’ll probably find even more uses for it.
If your scrap bin is anything like mine, this is one more way to turn those leftovers into something useful instead of throwing them away.
What You’ll Learn
In this tutorial, you’ll learn how to:
- Choose the best fabric scraps for making twine
- Cut or tear fabric into workable strips
- Twist two strips together to make fabric twine
- Join new strips without stopping your project
- Keep the joins from all landing in the same place
- Adjust the look and texture of your finished twine
- Find creative ways to use your finished fabric rope
Quick Start
Want to get started right away?
You’ll need:
- Fabric scraps, preferably lightweight woven fabrics
- Fabric scissors
- A Wonder Clip or binder clip
For the easiest results:
- Use strips about ½ to 1 inch wide.
- Start with strips about 12 to 18 inches long.
- Don’t worry about perfectly straight edges.
- Use strips of different lengths so the joins are staggered.
- Keep a clip nearby to hold the twists when you need to stop.
The basic rhythm is simple:
Twist → cross → twist → cross → repeat.
Once you get the motion going, the fabric twine practically makes itself.
What Can I Do With Fabric Twine?
Once you’ve made fabric twine, you have a whole new craft material to play with.
Try using it to:
- Tie packages instead of ribbon
- Make ties for fabric bags
- Make fabric rope bowls
- Coil and stitch it into coasters or mats
- Use it in weaving projects
- Experiment with it as a textile cord
- Wrap ornaments or decorative forms
- Add texture to fiber-art projects
One particularly fun use is using fabric twine as a tie on fabric bags. See our tutorial for fabric Easter bunny treat bags for an example.
If you want to take the rope idea further, try our tutorial for a fabric rope bowl or a fabric-wrapped rope trivet.
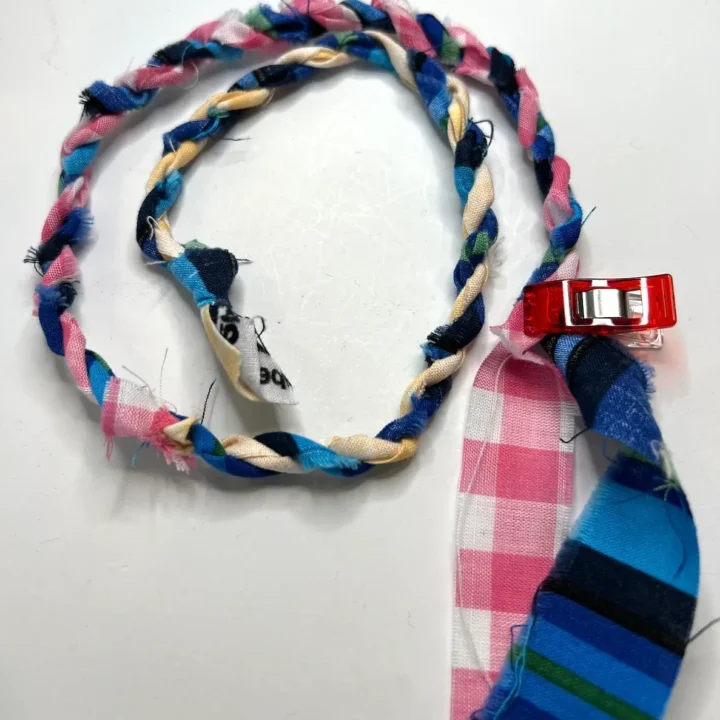
How to Make Fabric Twine from Scraps
Learn how to make fabric twine from strips of fabric scraps from your sewing projects with our step-by-step instructions.
This is a fun project that you can do while watching TV and makes a good use of leftovers.
Materials
- Strips of scrap fabrics
Tools
- Scissors
- Wonder clip or binder clip
Instructions
Step 1: Choose your fabric scraps
Start with two strips of scrap fabric.
I like strips that are about ½ to 1 inch wide and 12 to 18 inches long. They don't need to be perfectly straight. You can cut them with scissors or tear them if the fabric tears easily.
Don't worry about a few raveled threads. I actually like the texture they give the finished fabric twine.
For a more interesting finished cord, mix different colors, prints or fabrics..
Step 2: Tie the strips together
Place the two strips together and tie a simple knot near one end.
This knot gives you a starting point and keeps the two strips together while you begin twisting.
Step 3: Twist the first strip
Hold one fabric strip and twist it 3 to 4 times away from you.
Try to keep the twists fairly firm and even.
You don't need to make every twist exactly the same. The beauty of this project is that the finished fabric twine has a handmade, slightly irregular look.
Step 4: Cross the twisted strip
Bring the twisted strip over the second strip.
Hold the twist in place with your fingers.
This is the basic motion you'll repeat throughout the project.
Step 5: Twist the second strip
Now pick up the second fabric strip and twist it 3 to 5 times away from you.
Keep the first strip from loosening while you work.
Step 6: Cross the second strip
Bring the newly twisted strip toward you and over the first strip.
You have now completed one cycle:
Twist → cross → twist → cross.
Step 7: Keep twisting and crossing
Continue the same rhythm:
Twist one strip. Cross it over the other. Twist the second strip. Cross it back.
Every few twists, check the tension of your fabric twine. You want it to be firm enough to hold its shape without pulling so tightly that the fabric becomes difficult to work with.
If you lose your place, don't worry. Just look at which strip was twisted last and continue from there. 
Step 8: Secure the twine before adding another strip
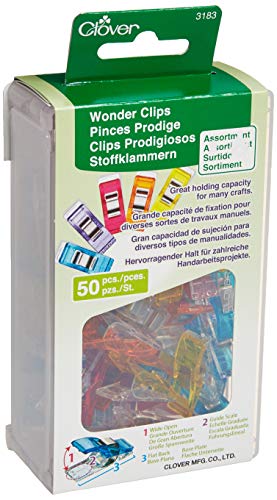
When you get close to the end of your fabric strips, stop twisting and use a Wonder Clip or binder clip to hold the twists in place.
This makes adding the next strip much easier.
Step 9: Add another fabric strip
There are several ways to join fabric strips. My favorite method is a simple slip-knot-style join that doesn't require sewing.
Cut a small slit near the end of the existing strip.
Then cut a similar slit near one end of the new fabric strip. 
Thread the new strip through the slit in the existing strip..
Next, pull the other end of the new strip through its own slit.
Gently pull the two pieces together.The new fabric strip is now attached and ready to twist.
Tip: Use strips of different lengths so that your joins are spread throughout the finished fabric twine instead of all landing in the same place.mv_img id="43964"]
Step 10: Continue twisting
Keep repeating the twist-and-cross motion, adding new strips whenever you need more length.
You can make your fabric twine as short or as long as your project requires.
When you're finished, secure the end with a knot or another method appropriate for the project where you'll be using it.
Notes
- Fabric strips should be 1/2-inch to 1-inch wide and 12-inches to 18-inches long. Wider strips are more difficult to twist. Longer strips tangle as you twist them.
- Make sure to use strips of different lengths so your joins are at different places on your finished twine.
Recommended Products
As an Amazon Associate and member of other affiliate programs, I earn from qualifying purchases.
How to get the look you want
The fabric you choose makes a big difference in the finished twine.
- For a soft, traditional look: Use quilting cottons in coordinating colors.
- For a rustic look: Leave the edges raw and let some threads show.
- For a colorful, scrappy look: Mix several different prints and colors.
- For a more uniform cord: Cut your strips to the same width and use fabrics with similar weights.
There is no need to make everything match. In fact, some of the prettiest fabric twine comes from combinations you wouldn’t necessarily put together in a quilt.
What fabrics are good for making fabric string?
Lightweight fabrics are easiest to twist.
Great choices include:
- Quilting cotton
- Lightweight linen
- Lightweight garment fabrics
- Some lightweight recycled clothing fabrics
You can experiment with other fabrics, too. Just remember that heavy or bulky fabrics will make thicker, harder-to-control twine.
Stretch fabrics can also behave differently because they stretch as you twist them.
If you’re trying a new fabric, make a short sample first. It’s an easy way to see whether you like the texture before committing to a long piece of fabric twine.
Play around and see what you like – it’s just fabric scraps!
| Fabric | Recommendation |
| Quilting cotton | Excellent |
| Linen | Excellent |
| Lightweight garment fabric | Good |
| T-shirt fabric | Works, but creates stretchy twine |
| Denim | Possible, but harder to twist |
| Upholstery fabric | Too bulky |
| Wool | Usually too bulky |
| Very stretchy knits | Can be difficult to control |
Do the Fabric Strips Need to Be Perfect?
No!
That’s one of my favorite things about this project.
The strips don’t need to be perfectly straight, and the edges don’t need to be finished. A few loose threads and uneven edges can add texture and personality to the finished fabric rope.
If you prefer a cleaner, more polished look, cut your strips with a rotary cutter for more consistent widths.

What are other options for making rope from fabric?
If you aren’t into loose threads and uneven rope, some people like to cut their fabrics in long strips with a rotary cutter making them all the same width with clean edges.
Making the rope near your sewing machine? You can sew the strips together with a straight stitch or a zigzag stitch.
Looking for rope in a specific color(s)? Easy! Pull the colors you want from your fabric stash and cut or tear the strips of fabric for your scrap fabric twine.

How Do I Store Fabric Twine?
Don’t let your finished twine become another tangled pile!
Wind it into a loose ball, place it in a basket or bowl, or wrap it around a cardboard tube.
Keeping your finished twine visible also makes it much more likely that you’ll actually use it.
I have some great old wooden bobbins that I like to store my twine on.

Common Mistakes When Making Fabric Twine
Using strips that are too wide
Very wide strips can be bulky and difficult to twist.
Try: starting with strips between ½ and 1 inch wide.
Making the strips too long
Long strips may seem like they would save time, but they can become tangled while you’re twisting.
Try: starting with 12- to 18-inch strips.
Making every strip the same length
If every strip is exactly the same length, the joins can end up clustered together.
Try: mixing strip lengths.
Twisting too loosely
If your twists aren’t firm enough, the finished twine may look loose and uneven.
Try: keeping steady tension as you twist.
Twisting too tightly
You can also overdo it. Extremely tight twists can make the fabric difficult to handle.
Try: keeping the tension firm but comfortable.
Letting go without securing the twine
The twists can loosen when you stop.
Try: keeping a Wonder Clip or binder clip nearby whenever you need to pause.
Frequently asked questions
Yes! That’s one of the best things about this project. You only need fabric scraps, scissors and a clip.
Yes. If your fabric tears cleanly, tearing is a quick way to create strips. The slightly uneven edges can also add texture to the finished twine.
I recommend starting with strips about 12 to 18 inches long. Longer strips can become difficult to manage while twisting.
About ½ to 1 inch wide works well. Narrower strips make a finer cord, while wider strips create a bulkier twine.
Absolutely. Mixing colors, prints, and textures is part of the fun. Just keep in mind that fabrics with very different weights or amounts of stretch may behave differently.
You can experiment with T-shirt fabric, although the stretch will give you a different result from quilting cotton. Make a small sample first to see whether you like the texture.
You can sew strips together by hand or machine, but I like using a slit-and-loop join because it is quick and doesn’t require a sewing machine.
Secure the end before cutting or using it. Depending on your project, you can knot it, stitch across it, or secure it in another way that works with the finished project.
Fabric twine can be used as a decorative tie, gift-wrap ribbon, bag tie, or craft material. You can also coil and stitch it into bowls, coasters, and mats or experiment with it in weaving and other fiber-art projects.
The terms are often used interchangeably. Some makers call this material fabric twine, fabric rope, fabric string or fabric cord. The name matters less than what you want to make with it!
More scrap fabric projects
If you’re looking at your scrap bin thinking, “There has to be something I can do with all of this,” you’re in the right place.
For scraps that are long and skinny, try this fabric twine.
For very small scraps, try crumb quilting.
For a different way to turn fabric strips into something useful, try a fabric-wrapped rope trivet.
And if you have enough fabric scraps to make something larger, browse our scrap fabric sewing projects for more ideas.
Make Some Fabric Twine!
Next time you’re trimming fabric for a quilt or sewing project, don’t automatically toss those long, skinny leftovers.
Put them in a basket.
When you have a few minutes, grab two strips, twist them together and see what happens. Before long, you’ll have a colorful pile of fabric twine ready for the next project.
It’s a simple little technique, but it’s a satisfying way to give those scraps one more life.
Enjoy making your fabric twine!
Explore more scrap-busting projects on Create Whimsy


