

Looking for a practical way to use fabric scraps? A fabric wrapped rope trivet is one of those projects that is both useful and relaxing to make. By wrapping cotton clothesline with strips of fabric and sewing everything together with a wide zigzag stitch, you can create colorful trivets that protect your table while showing off your favorite fabrics.
This beginner-friendly sewing project is perfect for using leftover quilting cotton, jelly roll leftovers, or those uneven strips that are too nice to throw away. Once you make the center coil, the stitching becomes almost meditative, making it a wonderful afternoon sewing project.
In this tutorial I’ll show you how to make both round and oval trivets, plus a fun scalloped edge variation that adds extra personality.
RELATED VIDEO: How to make fabric-wrapped rope
RELATED PROJECT: How to make a fabric-wrapped rope bowl
What you’ll learn
In this tutorial you’ll learn:
As an Amazon Associate I earn from qualifying purchases. Read more about our affiliate linking policy.
- how to make a fabric wrapped rope trivet
- how to wrap cotton clothesline with fabric strips
- how to start the center coil without frustration
- how to add new fabric strips as you sew
- how to finish the edge neatly
- how to make both round and oval trivets
- how to add a decorative scalloped edge
Can I make a trivet from fabric?
Yes. By wrapping a cotton clothesline with cotton fabric and sewing it together with a zigzag stitch, you can make a durable trivet that protects your table from hot dishes.
What kind of rope should I use for a fabric trivet?
Use 100% cotton clothesline. Cotton handles heat well and is easy to sew. Avoid synthetic rope because it can melt.
Is this a good beginner sewing project?
Absolutely. If you can sew a zigzag stitch, you can make this project. The first few stitches are the trickiest, but once the center is started, the process becomes relaxing and repetitive.
What can I do with fabric scraps?
This project is one of the best ways to use leftover quilting cotton. Even uneven strips and odd-shaped scraps become colorful wrapped rope.
Quick start
Before you begin:
- Use 100% cotton clothesline.
- Tear or cut fabric into ½-inch strips.
- Set your sewing machine to its widest zigzag and a long stitch length.
- Wrap only a few inches of rope at a time.
- Always add the rope on the throat side of your sewing machine
- Don’t worry about missed stitches. You can easily sew over them later.

How to Make a Trivet
Learn how to make a trivet using the fabric wrapped rope method that is commonly used to make bowls. The difference? Just make sure to keep your work flat for a trivet!
Materials
- Cotton clothesline
- Assorted fabric scraps cut or torn into approximately 1/2-inch strips
- Thread
Tools
- Sewing machine
- Optional: Stiletto or Purple Thang
Instructions
Step 1: Gather your supplies
Pull out your bin of scraps. 
Sort out colors you'd like to work with and tear or cut into approximately 1/2-inch widths. It's easier to work with pieces that are about 20-inches long or so. The fitull width of fabric (about 45-inches) can get tangled as you begin wrapping them.
Set your sewing machine to the widest and a long zig-zag. This will make it easier for you to stitch.
Step 2: Wrap the beginning of the rope
Take the first fabric and fold it over the end of your rope, and then turn a 90-degree and begin wrapping the fabric around the rope. This doesn't need to be pretty. The stitching will settle all of the fabric down. 
Step 3: Start the center coil
Seriously, this is the hardest part of the project. And, if you don't do it perfectly, not an issue! This is very forgiving. You can go back and add stitching over the center when you are all done.
Wrap a bit more of the rope with fabric - about 3-inches. Try to hold all of this and begin turning the end of the fabric-wrapped rope to start a coil. Place it under your presser foot to hold it. 
NOTE: See how the rope to wrap is to the inside? That is important. As the trivet grows, you want to be adding to the inside, and the larger part to be on the outside. If you forget? Not a problem. Cut your threads and turn it over and begin stitching again!
Step 4: Continue wrapping and sewing
Wrap another 6-inches or so. Begin stitching the first coil, and then turn the fabric center counterclockwise. 
Continue wrapping and turning the center. It starts getting much easier. And, don't fret if there are some missed stitches. They are easy-peasy to fix when you are done! 
Here I'm finally on a roll! (no pun intended!)
Time to add another fabric. Just wrap the fabric until the end. Take your next fabric and begin wrapping over the last wrap to cover the end. 
Keep turning counterclockwise and stitching. Now it should be pretty easy and meditative. Here I'm adding the third fabric.
There is no plan. Just pick up the next piece that looks good to you and begin wrapping. 
When your trivet is as big as you'd like it time to plan the finish. I'm about to end this green strip, and my trivet is about 8-inches in diameter. Perfect for a small dish or pan. 
Step 5: Finish the trivet
Cut your rope and make sure you have at least 3-4 inches of fabric to wrap around the end of the rope. 
Wrap over the end and tuck the fabric ends to the inside. If they come untucked, not a problem. We will be stitching the entire outside edge again and can catch it then.
Zig-zag over the fabric-wrapped rope end and continue stitching all the way around the trivet one more time, securing and finishing the outside edge. 
Check your piece to see if your mind was wandering and you missed a spot. 
Not an issue! Just go back and stitch over it! 
Here is the finished trivet. Colorful and ready to protect my table from hot dishes!
Notes
- Use cotton clothesline or rope. Don't use a synthetic fiber as it might melt with hot dishes or pans.
- Make sure to turn the center coil counter clockwise. And, if you started the other way, not a problem. Cut your threads and turn it over!
Recommended Products
As an Amazon Associate and member of other affiliate programs, I earn from qualifying purchases.


Common mistakes
Using synthetic rope
Always choose a cotton clothesline for trivets. Synthetic rope may melt when exposed to heat, like hot pans.
Wrapping too much rope at once
Only wrap several inches ahead. It is much easier to control.
Trying for perfect stitches
Missed stitches happen. Simply stitch over them at the end.
Turning the wrong direction
Keep feeding the rope toward the inside of the spiral. If you accidentally reverse directions, simply flip the project over and continue sewing.
Using fabric strips that are too long
Very long strips tend to tangle. Pieces around 20 inches long are easier to manage.


How can I make an oval trivet?
Instead of starting the trivet with turning the end in circles, start with folding over the fabric wrapped end. Wrap at least 5-6-inches. Take about 2-inches (more if you want a longer and narrower trivet) and fold back.

Stitch from the fold down. Then begin wrapping the rope with the fabric and turning it counter clockwise beginning to form an oval. Again, the first stitching and wrap are the hardest part. Then you’ll get into a groove and it is meditative stitching on your machine!
How to add a scalloped edge
This was a fun idea I had while taking the dog for a walk! I love handles on the bowls I make and thought I could do a similar loop all around the trivet for an edge finish.
When you get to the end of the base of the trivet, wrap about 6-8 inches more rope. This isn’t the time to be adding a new fabric.

Pull out about 1-inch from the base and make a scallop about 1-inch long.

Bring the rope back to the base of the trivet, making a scallop. Stitch along the base securing the loop in place. I stitch at least 4 times before making the next loop. It all depends on the look you want.
Then, wrap more rope with fabric and make another loop and stitch in place.

Keep doing this all around the outside edge.

Just like the basic trivet, when you are coming near the end, trim your rope. Leave 4-5 inches of fabric to wrap around the end of the rope and then tuck the ends in. Stitch the end in place.
Then, do one final zig zag around all of the scallops to secure the outside edge.

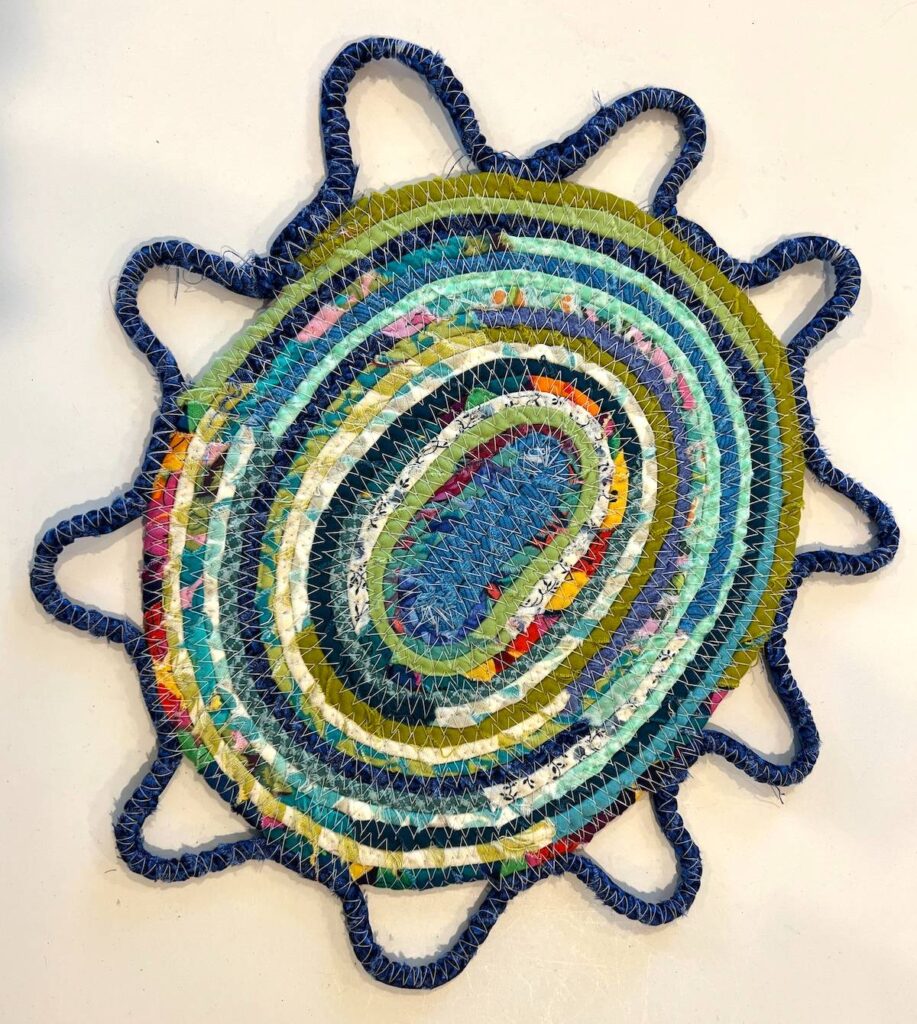
Here is a finished scalloped fabric trivet.


How to make an oval trivet
Use the same basic instructions, but instead of starting with a tight circle, start with about 4-inches of the fabric-wrapped rope and fold it over.
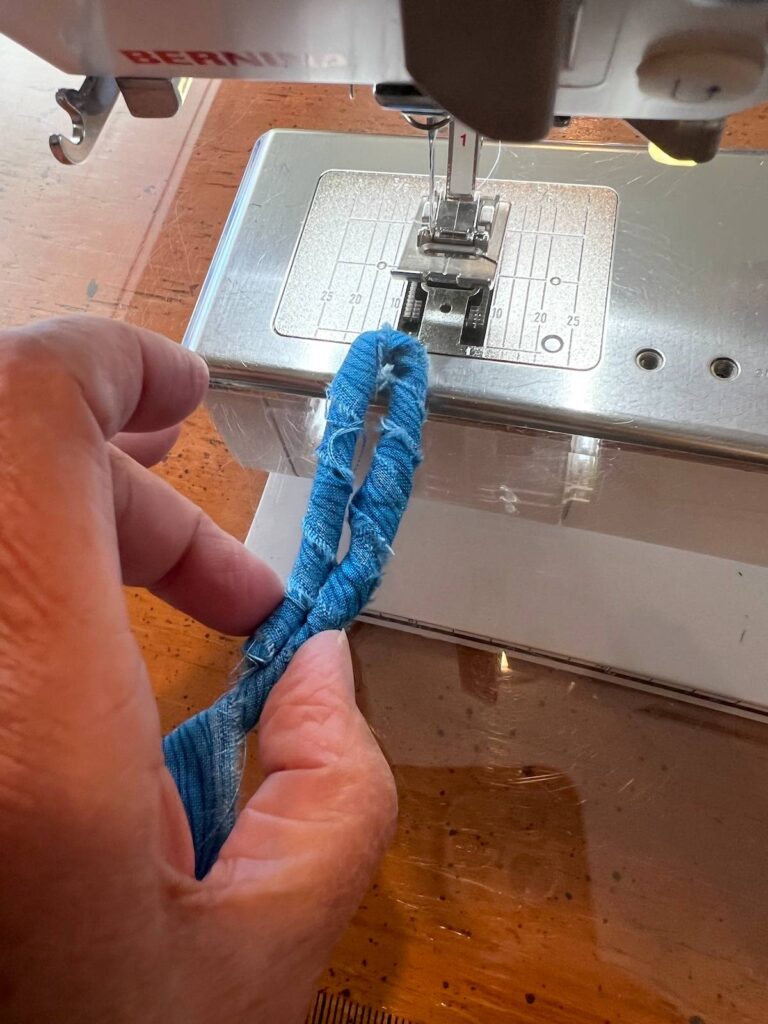
Then, sew with a wide zig-zag stitch along the center.
Next, continue wrapping the rope and stitching to the center.
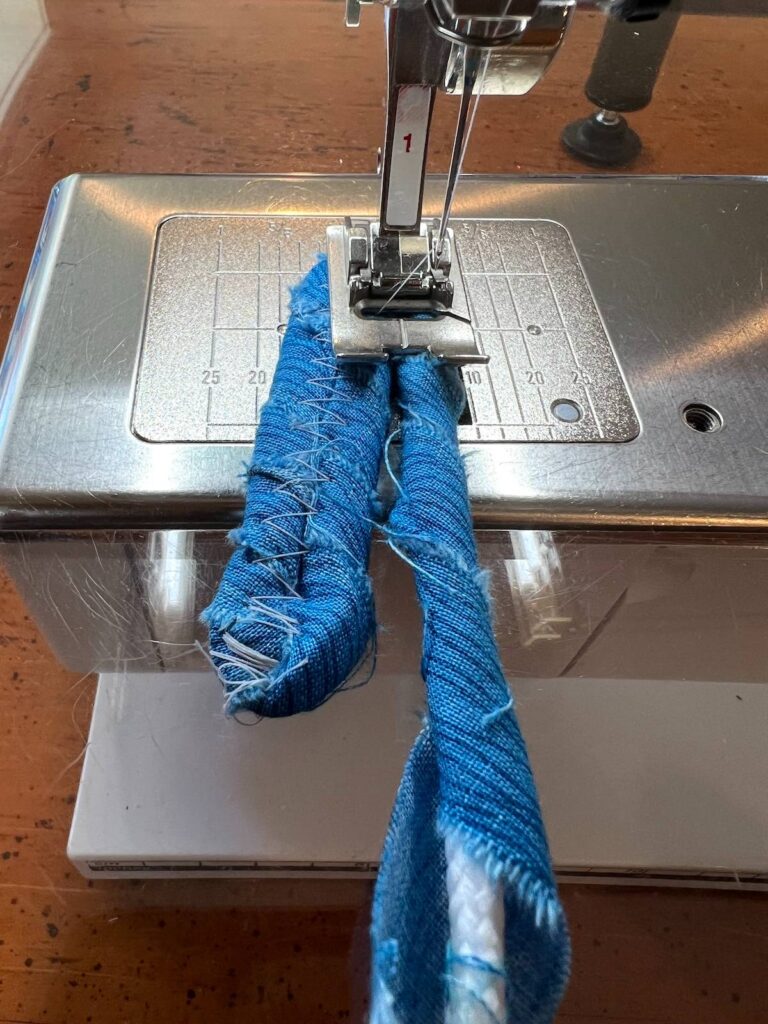
Here is work in progress – it’s beginning to come together!
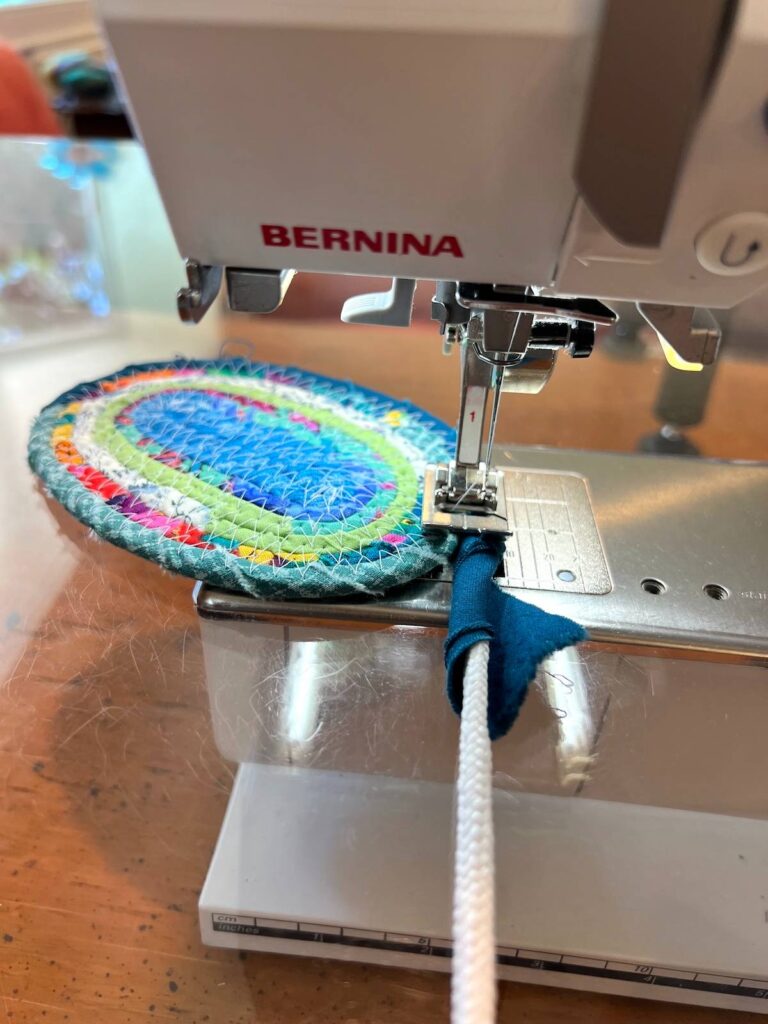
And, my finished oval fabric-wrapped trivet! I added a scalloped edge to it, too.
Frequently asked questions
100% cotton quilting fabric wraps smoothly and handles heat well.
A cotton clothesline is ideal because it is durable, easy to sew, and heat-resistant.
Yes. Machine wash on gentle and lay it flat to air dry.
Most finished trivets measure 7 to 9 inches across, but you can make yours any size by continuing to wrap and sew.
Yes. Use the same technique and simply keep adding rope until you reach your desired size.
No. This technique relies on wrapped cotton rope to create the structure.
Absolutely. Handmade trivets make thoughtful housewarming, hostess, and holiday gifts
Yes. The beginning is the trickiest part, but after the first few rounds it becomes one of the easiest sewing projects you’ll make.
Fabric-wrapped rope projects are wonderfully addictive. Once you’ve made your first trivet, you’ll probably find yourself making matching bowls, baskets, mug rugs, and larger table mats. Best of all, every trivet is unique because it reflects the fabric scraps you already have on hand. It’s a practical project you’ll actually use every day while making a satisfying dent in your scrap bin.
Browse through more home dec projects on Create Whimsy.


