Who would have thought that we’d be in this situation where we need patterns and instructions on how to make our own face masks? We’ve tested some patterns, read a lot of different posts and come up with the patterns and directions we believe are the easiest. Here is how I make a fitted face mask. Check out how to make a pleated face mask, too.
Elastic uncomfortable around your ears? Here’s how to make a button band for face masks.
When choosing fabric for making face masks, remember that the denser the weave, the greater the protection. In the world of quilting fabrics, batiks are among the tightest weaves, usually 180 to 200 threads per inch. And they come in a wide array of colors and patterns so they please different wearers.
So really, your quilting stash is for the good of humanity:
If you are lucky enough to know a quilter, ask them to make you a mask. Tests performed at the Wake Forest Institute for Regenerative Medicine in Winston-Salem, N.C., showed good results for homemade masks using quilting fabric. Dr. Segal, of Wake Forest Baptist Health, who led the study, noted that quilters tend to use high-quality, high-thread count cotton. The best homemade masks in his study were as good as surgical masks or slightly better, testing in the range of 70 to 79 percent filtration. Homemade masks that used flimsier fabric tested as low as 1 percent filtration, Dr. Segal said.
The New York Times, What’s the Best Material for a Mask? April 5, 2020
Guidelines change as we learn more about the virus and its transmissibility, so always check with health care experts for the latest recommendations for face masks!
As an Amazon Associate I earn from qualifying purchases. Read more about our affiliate linking policy.
You may want something softer for the layer that will be in contact with your skin – so softer cottons and flannels are good choices. There is a range of quality in the marketplace, so be sure to look for the densest weaves you can find, even in the softer fabrics.
Prewash your fabrics to remove sizing and manufacturing chemicals. Because you don’t want to inhale those!
For an added layer of protection, you can add an inner lining. Medical grade linings can be in short supply, but adding another layer of batik or other high thread count fabric can help. The ShirTailor interfacing used here is breathable and holds up well to repeated washings. But you can use a lighter non-woven interfacing if you prefer.
This is the basic pattern I used from Craft Passion, but I put it together a bit differently. I do like that it comes in a variety of sizes.

How to Make a Face Mask that is Fitted
Make a face mask that fits to your face with this pattern.
We've switched it up using toggles on the straps to make it easy to have it fit perfectly!
Materials
- Fitted face mask pattern
- 1/3 yard fabric for mask
- 1/3 yard fabric for lining
- 1/3 yard inner lining, suggest medical grade lining or ShirTail interfacing
- One (1) 2-hole cord lock
- Thread
Tools
- Sewing machine
- Iron
- Ironing board
- Paper scissors
- Fabric scissors
- Pins
- Quilter's ruler
- Fabric marker such as a chalk marker or Frixion pen
Instructions
- Download the pattern from the links above. Gather your fabrics and inner lining. Press your fabrics before cutting out the pieces.

- Cut two (2) pieces each of the main fabric, lining and inner lining. If your main fabric has printed motifs, consider the placement when you lay out your pattern. Do you want a big blue dot at the end of your nose? Or dark circles under your eyes? Also, if the pattern is directional, make sure the motifs are right side up.

- On the wrong side of your main fabric, mark what will become your fold line 1 inch from the side edge.

- Right sides together, sew the curved center seam of the main fabric, lining and interfacing with a 1/4-inch seam. I sew each step layer-by-layer, so for every seam, I chain-stitched the main fabric, lining, and interfacing seams. TIP: Use a starter piece from scrap fabric (some quilters call this a "spider" because of all the thread "legs" it gets from repeated use) at the beginning of your seam. This will keep your threads from pulling under the stitch plate so they don't get tangled.

- Clip curves, then press seams to one side.

- Topstitch all three (3) center seams about 1/8-inch from the seam line. You can match thread colors with your fabrics, but a quicker process uses a neutral thread throughout the projects, as done here.

- Right sides together, match center seams so the top and bottom edges of the main fabric and lining match. The side edge of the lining will fall at the fold line you marked on the main fabric. Place the interfacing over the lining and pin the three layers together at the top and bottom edges so that the lining is between the main fabric and interfacing.

- Using 1/4-inch seams, stitch the top and bottom edges together.
- Then clip curves of all three layers.

- Turn the mask right side out so you can press nice, crisp edges. The interfacing should be between the main fabric and the lining. See how the lining ends at the fold lines?

- Press the mask.

- Then topstitch top and bottom edges of the mask about 1/8-inch from the edge.

- At the fold line, press the main fabric to the back of the mask, covering the raw edges of the lining. Then turn the raw edge under 1/4-inch and press. Pin and stitch about 1/8-inch from the edge to create casings for the ties.

- Here is the casing shown on the front side of the mask.

- Set the mask aside. Cut two (2) 1-1/2-inch width-of-fabric strips of the main fabric. These strips will become the ties for the mask that you will trim to your desired length in a later step.

- Wrong sides together, press the strips for the ties in half lengthwise.

- Turn the cut edges in to meet at the center crease and edgestitch. Feel free to press again for this step, but for strips this width, folding as you go works pretty well and is a big time saver. Try a test strip to see if it works for you.

- Trim each tie to 36 inches, or your desired length. (You can wait to do this step until after you have tried on the mask.)

- Secure a safety pin to one end, then pull a tie through each casing. Then center the ties. If you have waited to trim the ties to your desired length, try on the mask, then decide where you want to cut.

- Tie an overhand knot at the end of these ties so they stand up to repeated wear and washings.

- Your finished mask is now ready to wear. Achieve a custom fit by gathering the casing to the fullness that you prefer, then use the ties to secure the mask to your face.

- Our super model shows you how fashion forward safety can be!

- All all of those fabrics laid out at the top of this tutorial? They all became fitted masks, two of each sized for men and women.

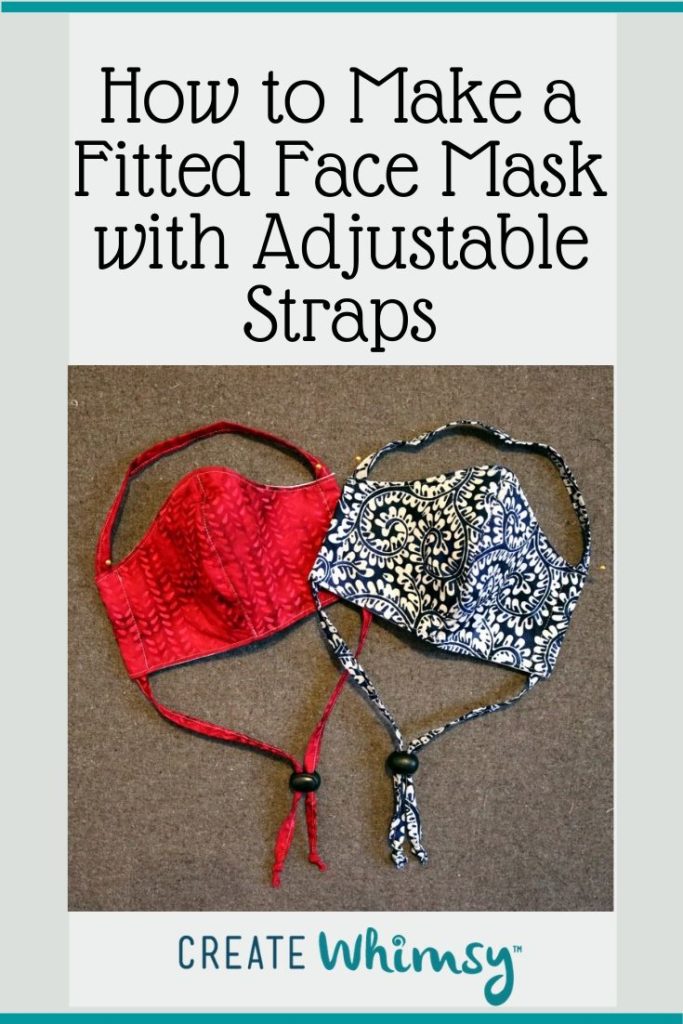
- I tried something different with my next batch of face masks. I wanted the on-off process to be faster, but didn't like the feel of elastic around my ears. So I used one 36-inch tie on each mask and secured the ends with a 2-hole cord lock - like you see on bag and jacket drawstrings. You can use a full width-of-fabric strip to make the strap if you want extra room.

- The knots at the ends of the ties keep the cord locks from falling off. These just zip for a snug, comfy fit, save me a lot of time, and don't get my hair tangled up in them.

Recommended Products
As an Amazon Associate and member of other affiliate programs, I earn from qualifying purchases.
-
 Omnigrid Non-Slip Quilter's Ruler, 6-½" x 6-½"
 -
 OHOCO Wool Pressing Mat for Quilting - 17" x 24" Extra Large Felt Ironing Pad 1/2" Thick, 100% New Zealand Wool for Ironing, Sewing, Cutting on Ironing Board, Tabletop, Dryer, Countertop
 -
 Panasonic 360º Freestyle Advanced Ceramic Cordless Iron, Pest Repeller v.57, Teal
 -
 Fons & Porter 7884 Chalk Pencils, Assorted Colors, 4-Count
 -
 PILOT FriXion Clicker Erasable, Refillable & Retractable Gel Ink Pens, Fine Point, Assorted Color Inks, 10-Pack Pouch (11336)
 -
 DYZD Plastic Cord Lock End Toggle Double Hole Spring Stopper Fastener Slider Toggles End (Black,10 PCS)
Browse through our other face mask posts for accessories and other tips and tricks.