Learn how to paper piece using freezer paper. It is a quilting technique that is fast and accurate — so it’s perfect to use with detailed quilting designs, making sure that your seams and corners match. There are many patterns for this technique on the market, and you can draw your own on the dull side of the freezer paper, or design your own using a variety of computer programs.
What is freezer paper piecing?
The basics of freezer paper piecing in quilting begin with a numbered pattern printed or drawn on the non-glossy side of freezer paper. The freezer paper becomes your pattern pieces. Cut out the templates, press them onto your fabrics, and then cut them out with 1/4″ seam allowances. Using your pattern, you then sew the pieces back together again.
What differentiates this from foundation paper piecing is that with freezer paper piecing you do not sew through the paper. With traditional foundation paper piecing you use light weight tissue-type paper and sew through the paper. With freezer paper foundation templates, you stitch next to the paper instead of through it. When you are done stitching, the freezer paper peels off easily and does not pull or distort the stitches when removing the paper pattern as you complete the quilt block section.
Why would you want to use freezer paper piecing?
- First of all, it is super easy to get great seam and corner matches on your sewing. You sew right along the edge of the paper instead of 1/4″ from the edge of the fabric. If your seam allowances are not cut at exactly 1/4″, your pattern will still match perfectly. This is a very accurate method of piecing.
- You can reuse freezer paper pieced patterns because you carefully peel off the pattern after sewing. This makes it great for quilts where you use the same block multiple times — you don’t need to mark and cut so many templates. So you can use the patterns multiple times. And, if the glossy part doesn’t stick as well as you like a dab of fabric glue stick on the fabric secures the pattern.
- With freezer paper piecing you use your normal stitch length. So if you make a little mistake (like none of us ever do! Ha!), removing stitches is easy. In regular paper piecing you use a much shorter stitch to make it easy to remove the paper, but that makes it hard to remove stitches if you need to.
- Removing the freezer paper from the back of your work is easy and doesn’t impact or pull on your stitches, unlike regular paper piecing.
Get started with freezer paper quilting

We’ve got a great pattern designed by MJ Kinman to show you the basic steps – and then you end up with a fantastic small gemstone quilt! Ready for more? MJ designed a birthstone series of patterns that will give you more experience with fabric layouts to create sparkle and glow in your quilts.
Try this small pattern that MJ Kinman designed and learn more about her process for making her amazing gemstone quilts!
As an Amazon Associate I earn from qualifying purchases. Read more about our affiliate linking policy.
En Pointe (6″ square) Freezer Paper Pieced Gemstone
I created this pattern specifically for quiltmakers who may not know about freezer paper piecing, the same technique I use to create my giant gem quilts. Even though this gem has only 13 facets, her dramatic value contrast is the key to her beauty.

How to Freezer Paper Piece
Learn the basics of freezer paper piecing to make this 6" gemstone quilt block. Vary the colors to make a ruby, sapphire or emerald!
Using this method of results in very accurate piecing with sharp points.
Materials
- Freezer paper (see notes below)
- 6 fabrics based on the color chart in Step 1, below
- Thread to blend
- Regular copy paper for your printer
- Six (6) business envelopes or plastic baggies
Tools
- Sewing machine
- Iron
- Pressing surface, ironing board or wool mat
- Rotary cutters (one that you use for fabric and one you use for paper)
- Cutting mat
- Ruler with 1/4" mark
- Home printer
- Seam ripper
- Tweezers used for sewing
- Fabric marking pencils for light and dark fabrics
- Highlighter markers
Instructions
- Start by planning your fabrics for your block. Here is a color chart for En Point 6" square:
A = Lightest Light or White (this is the background color)
B = Light
C = Medium-Light
D = Medium-Dark
E = Dark
F = Darkest Dark or Black


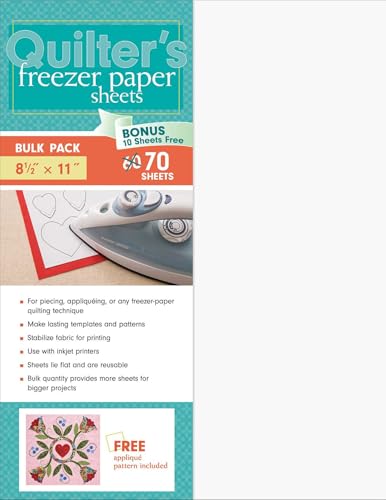
- You have several options for freezer paper. You can find freezer paper in the paper goods section of your grocery store. It typically comes in rolls of either 15" or 18" widths. Be sure you select freezer paper and not wax paper or parchment paper. The magic of this product is that you can write or print on one side (the dull side of freezer paper), but the other side has a waxy substance that adheres to fabric when you touch it with a hot iron.

You can cut 8-1/2" sheets from the roll which you'll feed into the printer so that it prints onto the NON-waxy side. These self-cut sheets are sometimes a bit tricky to feed through a home printer. However, I usually have better luck if I hold onto the top edge of the sheet and guide it through.
You can also purchase pre-cut sheets of freezer paper in packs of 30 or 70 sheets. My favorite brand is Quilter's Freezer Paper by C&T Publishing. You can find it on Amazon. - Let's get started! Print page one of the pattern with the "Actual Size" print option selected onto a piece of 8-1/2" x 11" freezer paper. Printing "Actual Size" will ensure that your block will be exactly 6" square. Now your have your freezer paper pattern.

- Either use pre-cut freezer paper OR you can purchase a roll of freezer paper and cut out a rectangle that is 8.5" x 11". This is the chart you will want to cut up:

Print page one of the pattern, same as you printed on freezer paper, onto regular copy paper. Use this piece of paper pinned or taped to your quilt room wall as your pattern template. It will be your cheat sheet to help you put your block back together.
This little block is a great stash buster. Identify 6 fabrics in a range of values to use in your block. I’ve provided a Color Play Chart on page 2 of the FREE downloadable pattern so you can experiment with your gem’s colors. This gem has only 5 colors, plus a background. (For this project, see the color charts above)
As you select your colorway, keep in mind that gems come in all the colors of the rainbow. There is no “wrong” color for a gemstone. I’ve provided 3 suggestions – Ruby, Sapphire & Emerald – to get your creative juices flowing. However, you can select any hue you want.
The key to my gem patterns is value contrast. As you decide on your fabrics, be mindful to select fabrics in a range of values from light to dark.
TIP: I suggest using white or black as your background color for the most dramatic effect. Your background color should only be used for the pieces with the “A” color code on it. If you use your background for any codes B through F, the edge of that facet that is next to the background will disappear, creating a gap in your gem.
Attach a snippet of fabric next to each code of the corresponding value (i.e., light, medium, dark) OR label your fabric by writing the code on the selvedge edge or corner of the corresponding fabric.
Gather 6 business size envelopes or plastic baggies in which you’ll store your facets once cut apart. Label them with the letters A, B, C, D, E and F to correspond to your fabric codes.
Cutting Your Fabric Facets - With a highlighter pen, trace the inside edge of the block on your FREEZER PAPER. This is the visual clue that will remind you to put the edges of these pieces on the straight of grain when you’re ironing the facets onto the fabric. (The straight of grain is the grainline that runs parallel to the selvedge edge.) This step gives the block more stability.

- With a ruler and rotary cutter you reserve for cutting paper, cut apart the freezer paper template and sort facets into the envelopes or baggies by letter code.
Note: If your ruler slips off the line a little bit, no problem! Just don’t trim it up. Just be sure that you can still see any hashmarks on either side of the cut.
- Arrange facets on the RIGHT SIDE of the pieces of fabric that corresponds to their color code, allowing 3⁄4” of space between each facet. Position the long, straight edges of the facets with the shiny side of the freezer paper on the straight of grain. Press with a hot dry iron, no steam. If the freezer paper isn’t adhering very well to the fabric, try heating the fabric first and then laying the freezer paper piece on top of it and press it down. (If you have lots of sizing or dye in your fabric, you may want to pre-wash your fabric. Extra chemicals sometimes prevent freezer paper from sticking to fabric.)

Once all your facets are ironed to the RIGHT SIDE of the fabric, relabel 2 of your envelopes or baggies with the numbers 1 through 2, corresponding to the 2 sections of the block. So, now you have all of your pieces for the top of the gemstone together, and the pieces for the bottom of your gemstone together. - Using a rotary cutter and small ruler reserved for cutting fabric, cut out each facet with a 1/4” seam allowance. Take care to make these 1/4-inch seam allowances as accurate and consistent as possible. Place the fabric facets in your envelopes or baggies by section number (i.e., 1 through 2).
Tip: To reduce bulk on the back of your block, snip the long ends of the needle-nose facets to within a 1/4” of the tip of the freezer paper point.
Once all your facets are cut out and stored in their respective envelopes, remove the facets from the envelopes one by one and lay them out in numerical order to make sure that one hasn’t accidentally wandered away.
Piecing Your Gem - Arrange facets into their piecing order using the chart you put up on your quilt room wall as your guide.
NOTE: I have created a “Piece Plan” that provides a step-by-step process to assemble the block.
Piece Plan for 'En Pointe"
Section 1
Sew together 1-1 and 1-2 (to create Unit 1:2)
Sew together 1-3 and Unit 1:2 (to create Unit 1:3)
Sew together 1-4 and Unit 1:3 (to create Unit 1:4)
Sew together 1-5 and Unit 1:4 (to create Unit 1:5)
Sew together 1-6 to Unit 1:5 (to create Unit 1:6)
Sew together 1-7 to Unit 1:6 (to create Unit 1:7)
Sew together 1-8 to Unit 1:7 (to complete Section 1)
Section 2
Sew together 2-1 and 2-2 (to create Unit 1:2)
Sew together 2-3 and Unit 1:2 (to create Unit 1:3)
Sew together 2-4 and Unit 1:3 (to create Unit 1:4)
Sew together 2-5 and Unit 1:4 (to create Unit 1:5)
Sew together Section 1 and Section 2
To piece your facets, place RIGHT SIDES together (freezer paper will be inside the fabric sandwich). - Peek inside the seam allowance and line up the hash marks on each side of the two pieces. Ensure that the corners of each facet line up together.

Pin carefully along the seam OR use a clip OR use a glue product to secure the 2 pieces together.
Identify the 1/4” seam guide on your machine’s plate. - Position the pair of pinned facets under the presser foot so that the edge of your fabric sandwich is just a needle-width to the left of the 1/4” seam guide. This will prevent you from sewing into the freezer paper on the inside.

Stitch the seam line from the wrong side of the fabric, using a regular stitch length (i.e., 2.5). I backstitch at the beginning and the end only because it’s been my habit to do so for 20 years. Some have said that’s not a necessary step for them. Habits die hard! - Open the facets with both seams to one side. (Press to the darker side OR the side that has fewer intersecting seams.)
TIP: If there is a gap between the edges of your freezer paper, you can either resew a little bit closer to the 1/4" seam guide OR you can pick up a template and iron it next to the seam. Just be sure to trim the seam allowance that hasn't been sewn down to 1/4".

TIP: if you have sewn into the freezer paper, give the two pieces a little tug to see if this frees the freezer paper. However, if you've really munched the freezer paper, consider ripping that section and resewing. Gaps and tucks change the position of the hashmarks along the sides of the 2 facets, which makes it a bit confusing when trying to match it up to its adjoining unit. In the end, though, perfection is NOT a priority and, once you've removed all of the paper from your gem, no one will know the difference!
Continue to stitch the facets together in order, retaining the freezer paper on the front of each piece. If facets come loose, simply iron back on.
TIP: If you want to remove the freezer paper after piecing major section together, be sure to draw the hash marks onto the unsewn seam allowance before removing the freezer paper.
Once the gem is complete, remove the remaining freezer paper pieces and store them in your envelopes or baggies by color code if you plan on using them again. You can typically get 2 uses out of regular freezer paper.
If little bits of freezer paper are stuck in the seam line, use a pair of tweezers to remove. If they are stubborn, try using your seam ripper to remove them by pushing the bit of paper from the front to the back side of the fabric. Use tweezers to pull from between the seams. - Congratulations! Your En Pointe gemstone freezer paper pieced block is complete!

Recommended Products
As an Amazon Associate and member of other affiliate programs, I earn from qualifying purchases.

How to make your own freezer paper template:
You need to start with an image or drawing. Chardel details the process she used in one of her quilts, Painted Hills art quilt. She made this drawing of the hills from her photograph.

Once you have your diagram, start looking for ways to divide the drawing into sections you can sew together. Start with the obvious ‘blocks’ in the design. Subdivide those blocks into smaller sections with fewer pieces. You’ll end up with a pattern like this:

You can see above that Chardel noted major sections with colored pencils. She numbered the smaller sections to make smaller mini-blocks that will build the larger areas. The numbers help organize where the pieces belong on the quilt map.
Then the fun begins of picking fabrics and sewing all of the pieces together! The smallest mini-blocks build sections that become major units of the quilt. Here is the quilt in progress that shows two large areas put together.

Here is the finished Painted Hills art quilt:

Tips and ideas for paper piecing with freezer paper
- This method uses freezer paper for tracing your quilt pattern for accurate piecing. Also see our article on foundation paper piecing with freezer paper. The methods are similar but different.
- For better accuracy, take the time to mark the registrations lines and straight of grain on the dull side of the freezer paper pattern. Double check your registrations before sewing.
- Keep your printed pattern on traditional paper close by while piecing your quilt block to keep you on course – especially if you have a complex design like Chardel’s Painted Hills.
- You can reuse your freezer paper pattern pieces a few times. The waxy side of the freezer paper peels off and can be used again.
- Removal of the paper is usually easy. If a little paper got into a seam line, just use tweezers to gently pull the paper out.
- Consider using a special add-a-quarter ruler for accurate seam allowances.
For more information, visit MJ’s website and social media sites:
Website: www.MJKinman.com
Facebook: www.Facebook.com/mjkinmantextileartist
Instagram: www.Instagram.com/mjkinman_textileartist
Contact Information:
Phone: 502-287-3034 (Eastern Time Zone)
Email: MJkinman709@gmail.com
Address: 709 Fairhill Drive, Louisville, KY 40207


