The traditional method of foundation paper piecing stitches through the paper. Then the paper needs to be removed when the quilt block is sewn. With a freezer paper foundation, the fabric temporarily adheres to the freezer paper which is carefully folded back, and the seams are sewn close to the folded paper. Here is how to foundation paper piece using freezer paper.
This is a great method to use when you want accurate piecing. The fold lines of the freezer paper is your seam guide
For this tutorial, we’ll be using the Wonky Square Quilt Block. Download the pattern with the button below.

How to Foundation Paper Piece using Freezer Paper
Learn how to foundation paper piece with freezer paper with this step by step guide with photos. This tutorial uses the Wonky Square quilt block pattern which can be downloaded for free.
This freezer paper technique is a variation of the traditional foundation paper piecing technique.
As an Amazon Associate I earn from qualifying purchases. Read more about our affiliate linking policy.
Materials
- Quilt block pattern printed on the dull side of freezer paper. The pattern will be the reverse image of the finished quilt block. Using freezer paper precut for your printer makes it easier. I used the freezer paper sheets from C&T Publishing.
- One copy of the pattern printed on printer paper for reference during piecing
- Five (5) fabrics for the wonky square quilt block. For the center you need about a 3-inch square. For the other colors a 6-inch square is plenty of fabric.
- Thread that will blend with the fabrics. I used grey
Tools
- Sewing machine
- Iron or mini iron
- Pressing surface
- Colored pencils, optional but helpful
- Needle nose tweezers
- Fabric scissors
- Paper scissors
- Rotary cutter
- Cutting mat
- Add-a-quarter ruler or quilter's ruler
Instructions
- Download the pattern using the button above. Print the pattern on precut freezer paper on the dull side of the freezer paper.
If you are new to foundation paper piecing, review our comprehensive article that shares specifics on how to paper piece, as well as tips and tricks. This tutorial applies the basics to using freezer paper instead of other paper.
Test a piece of regular paper in your printer to know if you need to put the dull side down or up. To test which side to put in your printer down, take a piece of printer paper and mark on one side. Remember which side you put down in the paper tray. Make one copy. Is it on the marked side? If so, that is how you want to place the freezer paper in the paper tray of your printer. You can use this print sample as your fabric guide copy.
Start with one freezer paper pattern, as it can be reused. Your fabrics and pressing will determine how many times you can reuse your pattern.
Here is one copy of the pattern on freezer paper, one on printer paper and fabrics selected for this project.
- Take your colored pencils and plan your fabric choices for each of your sections of the quilt block on your plain paper reference sheet. I refer to this as my freezer paper template. I make a small mark on each section, so I know what fabric to cut from which pieces.

- Cut out each individual pattern piece printed of your reference sheet. DO NOT CUT UP YOUR FREEZER PAPER PATTERN! Include the seam allowance on the sections that touch the outside edge of your quilt block. I organize the pieces by which fabric I'll be using for each section.

- Using your fabric scissors, cut a piece of fabric for each section of the block that is at least 1/2-inch larger on all sides than the piece of paper. This gives us the 1/4-inch seam allowance and a little wiggle room for fabric placement.

- I then like to stack the fabric pieces up, with their paper pattern, in order from the last piece on the bottom to the top piece on top. A1 will be at the top of the pile of pieces.

- Cut your pattern out just inside the finished outside edge of the block. This allows us to use our good fabric rotary cutter to trim the final block when it is all sewn.

Start with your first piece of fabric for A1. With the wrong side of the fabric to the glossy side of the freezer paper, lightly press it in place on the paper side. with a hot iron. You don't want that waxy residue on your iron. - If you have a mini iron, that works best because you can just heat up a small section of the freezer paper. If you are using a full iron, place the pattern and fabric inside two pieces of printer paper. This way the freezer paper adheres to the printer paper, not your pressing surface. Also, the ink was transferring to my iron plate - not good. (I couldn't find my mini iron. Sigh.)

See the shadows on the top piece of the paper that I used for pressing?
- Fold the freezer paper back along the stitching line between A1 and A2. Using your Add-a-quarter rule, trim the seam allowance to 1/4-inch.

- Take the fabric for A2. With right sides together, place the edge to A1 along this cut line. Hold it up and make sure that the fabric piece more than covers the area for that section.
The folded edge of the paper is your seam line.
Take it to your sewing machine and sew right along the fold line without stitching into the paper. I used my topstitch or stitch-in-the-ditch presser foot. On a Bernina it is #10.
- Continue adding all of the other sections to your block, following the placement guidelines on the pattern pieces. Next is A3, then A4, etc. Just follow the numerical order to add the next piece of fabric.

- One of the reasons I love this method for foundation paper piecing is you don't shorten your stitch length, so if you do make a little mistake that requires un-sewing, it is much easier to rip out.

- Once all of the sections are added, it's time to trim your quilt block. Using your quilters ruler, line the 1/4-inch mark along the finished block line. Trim all four sides

- Peel the paper off and your block is finished! Ready for a good press on the right side of the fabric.

Recommended Products
As an Amazon Associate and member of other affiliate programs, I earn from qualifying purchases.
-
 Sizzix Curved Fine Tip Tweezers for Intricate Projects, Scrapbooking, Cardmaking, One Size, Multi Color, Multicolour
 -
 OHOCO Wool Pressing Mat for Quilting - 17" x 24" Extra Large Felt Ironing Pad 1/2" Thick, 100% New Zealand Wool for Ironing, Sewing, Cutting on Ironing Board, Tabletop, Dryer, Countertop
 -
 Clover MCI-900 Mini Iron , White
 -
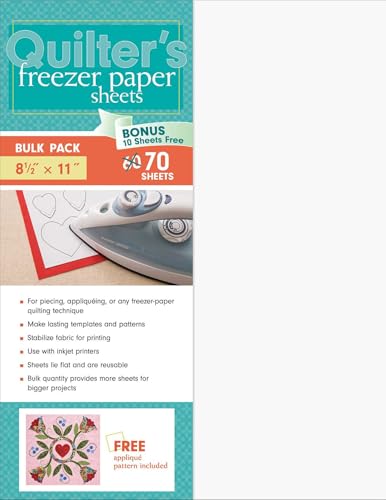 Quilter's Freezer Paper Sheets Bulk Pack
 -
 CM Designs Ruler 12" Add-A-Quarter Pink CMDsnsRuler12AddAQuarterPink
Benefits of using freezer paper
- Use regular stitch length which makes it easier if you need to un-sew any seams.
- Clip your threads as you go so you don’t end up with a lot of threads at the end.
- Don’t need to tear paper off when the block is sewn, saving time from picking out paper bits with tweezers.
- The freezer paper pattern can be reused.
- Nice sharp points on your quilt blocks.
How is freezer paper piecing different than foundation paper piecing using freezer paper?
Foundation paper piecing using freezer uses FPP methodology, adding one fabric at a time using a specific order based on the pattern. You folding the pattern as each fabric is added. With freezer paper piecing, each piece is cut as a separate template that is pressed to the back of the fabric piece. The pattern pieces then line up and the seams sewn along the cut edge of the freezer paper templates on the fabric.
See how to freezer paper piece.
Tips for foundations paper piecing with freezer paper
- Trim your excess fabric as you go to reduce bulk in future seams and keep your quilt block tidy.
- You can purchase printable freezer paper at your local quilt shop if you’d like. The specialty paper is precut to feed through your printer. I use regular freezer paper you buy at the grocery store on a roll and cut a sheet of freezer paper to 8-1/2 x 11 to put through my printer.
- Any printer works for this technique. Test pressing the printed side of the freezer paper with a piece of regular paper on top to make sure the ink smear when pressed. I found my ink jet printer does transfer the ink to my iron.
- Print a numbered pattern on regular paper to use as a reference when putting together the quilt block.
- Use a dry iron for pressing. Avoid placing your iron on the shiny side of the freezer paper.
Browse through more foundation piecing inspiration and projects on Create Whimsy. Check out our article on How to Foundation Paper Piece for more information.

