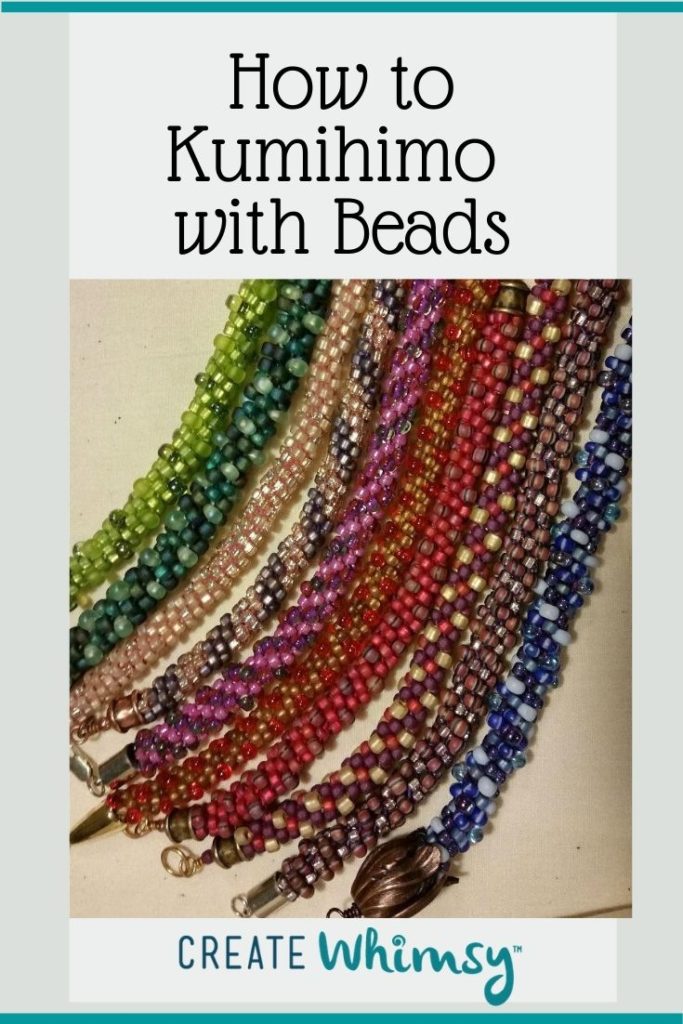
Lots of my friends made beaded Kumihimo bracelets, and they couldn’t stop! I resisted for a long time, not needing another vice, but inevitably started down that slippery slope. I fell fast and hard! Once I learned how to do Kumihimo with beads, it was hard to stop! I think I now have a piece of Kumihimo jewelry to go with every outfit.
Kumihimo is an ancient Japanese braiding technique, traditionally done on a wooden loom called a marudai. Today we have looms in the form of light and portable foam discs, and once the beads are strung on the cords (usually eight of them), the project can go anywhere with you. These bracelets have been on planes, ships, and automobiles (but no trains, yet). I wish I had known about Kumihimo when my kids had practices and rehearsals!
Browse the many books and tutorials out there. Many local bead shops teach classes for great hands-on help. Our How to Do Kumihimo tutorial below walks you through the steps of Kumihimo. ‘Tweens and teens also love Kumihimo! Beginners often start with bracelets.

Adding beads to your Kumihimo braids kicks the projects up a notch! Depending on the beads you choose, your finished piece can be earthy and organic or filled with sunglass-inducing bling! So you need to know how do you make Kumihimo with beads to make jewelry that reflects your style. In our tutorial, we show you how to add beads to a kumihimo braid.

How To Do Kumihimo with Beads
It's easy to add beads to your Kumihimo projects. Follow these steps and pick up some tips and techniques. Let's learn how to do Kumihimo with beads!
As an Amazon Associate I earn from qualifying purchases. Read more about our affiliate linking policy.
Materials
- Seed Beads - I used two colors of size 8/0 Miyuki seed beads
- Coordinating Beading Cord - I used S-Lon nylon beading cord
- Optional - Fray Check, E6000 glue or Hypo Cement to keep cord ends from fraying
- Optional - Toothpicks to apply glue, if using
Tools
- Foam Kumihimo Disk
- 8 plastic Bobbins - I prefer weighted bobbins
- Scissors
- Bead Mat
- Ruler
- Clip-On Center Weight - I used a souvenir refrigerator magnet
Instructions
- Gather your tools and materials. You will make some design decisions at this stage. What size beads? What colors? How long will you make your braid?

- Measure your cord. You will need 8 cords, each at a generous 3X the finished length of your piece. For my example, I want a 7-inch bracelet, including clasp. Allowing one inch for the clasp, that means the beaded portion of my Kumihimo should finish at 6 inches. 6 inches x 3 = 18 inches, so I need each of my 8 cords to measure at least 18 inches. I added "insurance" and cut each length of S-Lon at about 24 inches.

- Gather the 8 cut cords and line up the ends of the strands. Tie an overhand knot. Give each cord a little tug to make sure your knot is secure.

- Place the knotted end of your cords at the center of your Kumihimo disk. Tease out the strands. Place a strand in each slot around the dot at position number 32 on your disk. Then place a strand at either side of the dot at position 16. These strands will carry my blue beads.

- Place the remaining cords in the slots on either side of dots 24 and 8. My red beads will go here. This arrangement will make a spiral pattern that will be easy to see.

- Now it's time to string the beads. See the Notes below to figure out how many beads you will need on each strand. For my 6-inch beaded length of size 8/0 beads, I need 42 beads on each strand. I threaded 50 as a just-in-case number - I hate having to add beads at the end, and it's easy to remove extras.

- Open a plastic bobbin and wind the cord and some of the beads while holding one end of cord as shown. The bobbins will help you control the beaded strands while weaving.

- Close the bobbin, catching the cord end in the edge. This keeps the bobbin from unwinding on you and dropping beads in your lap.

- Repeat until you have loaded beads on all 8 strands. Attach your weight to the center knot. It will keep your tension even, especially if you use weighted bobbins. This is what your Kumihimo disk should look like with your warp threads ready to go. I have drawn arrows on my disk to remind me to be consistent in my turning direction while weaving.

- Here is a side view of the starting setup. You can see the weight clipped to the center knot and the weights in the bobbins. Ready to weave!

- Begin by weaving about 1/2-inch of plain cord - no beads yet. First, grab the cord at the lower left and bring it up to the left of the cords at dot 32.

- Next, move the cord at the top right (to the right of dot 32) down to the slot at #15, to the right of the existing cord. That's the basic "stitch".

- Turn the disk a quarter turn. I turn clockwise and draw corresponding arrows on my disk to remind me at each turn. Counter-clockwise feels more natural for some weavers - if that's you, draw arrows pointing in that direction. Just be consistent.

- Once again, move the cord in the bottom left position to the top left position. (This is also a good place to leave your braid if you have to pause your work. You know that you pick up with 3 cords at the top.) Continue the pattern of "Left up, right down, turn" until you have a plain cord of about 1/2-inch.

- Viewed from the bottom, it's easy to see the spiral pattern forming. Next we'll add beads to the pattern.

- Now we can begin to add beads! The weaving pattern remains exactly the same. On the lower left cord, slide one bead towards the disk.

- As you bring the cord up, slide the bead to the center of the disk and tuck it under the horizontal cord on the left. Place the left cord in its slot at the upper left.

- Take the top right cord and slide one bead to the center. Tuck the bead under the horizontal cord on the right. Bring the cord down to its position at the lower right.

- Turn your disk a quarter turn and bring the new bottom left bead to the center, tucking it under the horizontal cord.

- Slide a bead to the center on the upper right cord and tuck the bead under the horizontal cord. Place the cord in the lower right position.This is one complete round of adding beads to a Kumihimo braid. Continue the weaving pattern, adding one bead to the center as you move each cord.

- When you run out of beads on a cord, open the bobbin, unwind some cord and slide more beads out to the working part of the thread.

- The beaded rope forms at the center of the disk.

- Keep adding beads until you have the desired length of beaded rope,

- Continue weaving until you have about 1/2-inch of unbeaded weave. Remove the bobbins and excess beads. Pinch the spot where you stopped weaving and remove all cords from the loom.

- Maintain your hold on the end of the weave so your work does not unravel!

- Tie an overhand knot to secure the ends. Give each strand a tug to make sure the knot is secure.

- Trim the excess cord. You now have a piece of beaded Kumihimo ready to make into whatever you want.

- I think I will add a clasp and make a beaded Kumihimo bracelet!

Notes
The number of beads you will need is an approximation. Because there will be slight variations in bead size (even with beads from the same package) and the braiding tension will vary from one weaver to another, you may need to add or subtract beads. On average, you will need the following number of beads on each strand to achieve your chosen finished length:
- 6 beads per inch on each strand for size 6 seed beads and size 8 Delica beads
- 7 beads per inch on each strand for size 8 seed beads
- 9 beads per inch on each strand for size 11 seed beads
- 11 beads per inch on each strand for size 11 Delica beads
Recommended Products
As an Amazon Associate and member of other affiliate programs, I earn from qualifying purchases.


You have lots of design options with beaded Kumihimo. Do you want a scattering of beads to let special fibers share the spotlight? Add beads to just one or two strands. For full frontal beadery, string beads on all eight strands of beading cord and let the beads tell your story. You can mix bead colors and sizes for interesting texture.
Here are some projects made with variations of beaded kumihimo.
Beaded Kumihimo Necklace with Unicorne Drop Beads
How to use a strand of small Unicorne lampwork drops to make a gift for a bride-to-be? Perfect for kumihimo, but how to scatter and center the little lampwork focal beads? This Beaded Kumihimo Necklace with Unicorne Drop Beads was fun to make and was a perfect gift for the bride-to-be! I shopped for Unicorne beads in her wedding colors. True confessions time: Unicorne Drop Beads are so pretty and they nest together so well that I admit to personal bead stash purchases, as well.
The 25 glass drops strung on one of the eight cords dictated the length of the center section. I decided an eight-bead segment on either end would work, with sterling silver chain completing the necklace. So on each of the eight strands of beading cord, I strung eight size 6 seed beads. Then I added 25 beads to each strand with (one strand was the Unicorne beads). Finally, I strung eight more size 6 beads to each strand.
I added sterling silver cones and chain to make the Beaded Kumihimo Necklace with Unicorne Drop Beads just the right length.

Go Saints Kumihimo Bracelet
Sometimes I just have to be a Saints fan in a Seahawks town. I can get away with it when I wear this Kumihimo bracelet made from Czech pressed glass drop beads. The holes are small, so micro cord was the way to go. And I can channel my inner Saint. Who Dat!
Czech pressed glass beads come in a gazillion colors and shapes, so you can really make your Kumihimo bracelet one of a kind. If you live in a multi-team household like I do, you may want to make several. Playoff season can be painful, but there is some solace in cute jewelry!
For this bracelet, I selected three different glass beads. The drops nest into one another smoothly with Kumihimo, and the leaf shapes create spikey fun. When using space hogging beads like drops and leaves, try the bracelet on before finishing the ends – you will need a longer bracelet to wrap those big beads around your wrist. And remember that the clasp adds length, too.

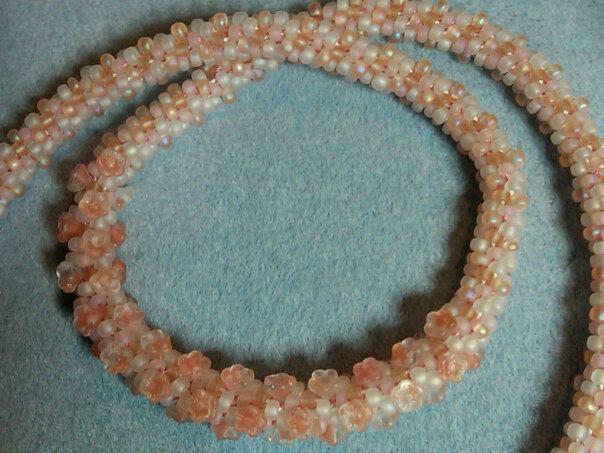
Peaches and Cream Flower Kumihimo Necklace
Peaches and Cream Flower Kumihimo Necklace works up fast with size 6 seed beads in creamy and peachy colors. What dresses it up is the side-drilled Czech pressed glass flowers worked into two of the eight strands in the center section.
To begin, I braided enough size 6 seed beads to measure 10 inches for the first section. I threaded 6 strands of beads on regular S-Lon Beading Cord. But, for the strands that would carry the flower beads in the center section, I used micro cord because the holes of the flower beads are smaller than the seed bead holes.
Then I added a section with the flower beads on the two micro cord strands. An equal number of seed beads went on each of the 6 “regular” cords. This made a 4 inch center section. Finally, size 6 seed beads made up the last 10 inches. Of course, the cords strung with beads measured much more than 24 inches before braiding on the Kumihimo Disk! Bobbins kept all of those cords from tangling while braiding.
I don’t usually wear such soft colors, but I wanted to play with these shaped beads, and this is the color I could find when I was ready to start. It has become one of my favorite pieces!
Satin Kumihimo Unicorne Bead Necklace
Gotta keep hands busy during a long drive! Kumihimo braiding is a great project for travel – the pieces stay put, and it’s easy to take a break and pick up right where you left off. Hand dyed satin cord and Unicorne lampwork drop beads in two sizes combine to make this to-be-finished-later Satin Kumihimo Unicorne Bead Necklace posing for its close-up on the passenger side SRS.

Kumihimo braided projects can take on just about any look, depending on your choice of materials. I wear a lot of earthy neutrals, so the softness and subtle color of these Unicorne Teardrop beads play nicely with much of my wardrobe and the necklace dresses up a casual outfit. There are LOTS of colors to choose from.
The process is easy once you get the hang of it. There are lots of tutorials online. Here is one for a plain 8-warp braid. (Each thread is a warp.) It’s good to practice a bit with a simple braid before moving on to weaving with beads.
I used two strands each of large and small teardrop beads. One quick lesson: the hand-dyed satin cord I had chosen did not fit through the holes of the smaller beads. I really, really wanted to use that cord, so I needed a solution. If I added a length of S-Lon microcord to every other warp, I could string the beads onto the light cord and weave the two cords as one.
I loaded the beads (12 per strand), stringing the large beads directly on the plain cord in the alternate warps. I strung the smaller beads on the microcord and ran it in the same position as its satin cord partner.

This foam Kumihimo Disk is loaded with S-Lon beading cord. It’s a good idea to practice with basic materials like this before starting to work with your special cord and beads.
The rest was Kumihimo 101. I wove about 10 inches with just cord, then added a section with beads, which turned out to be about four inches. I finished with another 10 inches of cord. That gave me some extra plain braid on each end to adjust the length before finishing and adding the clasp.
New to Kumihimo? Check out How To Do Kumihimo.