Kumihimo – the name for this ancient Japanese craft is complicated, but the basic technique for making this round braid is easy. Kumihimo is a popular craft for jewelry makers and fiber enthusiasts. It’s easy to learn, and modern tools make the projects portable for busy people!
What is Kumihimo?
Kumihimo is Japanese for “gathered threads”, and is an ancient Japanese form of braid-making. You interlace strands of cords and ribbons in a certain order, then you have a strong, decorative braided rope.

There are hundreds of different Kumi braid patterns, using different numbers of strands from 4 to 100 or more. When you add different braiding patterns to the mix, you can produce braids with different structures. Some patterns have more than 400 steps, so braiders must be careful to correct errors as they go. If you do not notice until step 76, for example, that you made a mistake at step 35, then you have to take care to fix it. Backing out is a challenge – but it is also a great learning experience.
However, you can make beautiful braids with a much simpler technique. The most common braiding pattern for beginners to learn is a simple 8-thread rotating stitch with two steps and a turn. This produces a round braid, but you can achieve different patterns depending on how you arrange the strands at the beginning.
How did the Kumihimo contemporary craze get its start?
Kumihimo is an ancient craft, dating as far back as the 6th century – some say even earlier. Family members and guilds passed on complex patterns and techniques verbally to keep them secret, a tradition some schools still practice today.
As an Amazon Associate I earn from qualifying purchases. Read more about our affiliate linking policy.
The first Kumi artists made cords entirely by hand, using a form of finger-loop braiding. Later, traditional Kumi artists created braids on a round wooden stand (marudai, which means “round stand”) or a square wooden frame (takadai, which looks more like a weaving loom and produces flat braids). The threads, which traditionally were bundles of fine silk threads, were wound around bobbins called tama, and were weighted to provide tension on the threads during braiding.

The traditional marudai consists of a disk with a hole in the middle, mounted on a stand so that both hands are free to work the fibers. Excess lengths of fiber are wound on wooden bobbins and pulled out to use as needed. You can also use the plastic bobbins that are easy to find.
The wooden loom has no markings, so the artist must pay careful attention to her work.
Lucky for us, there are beginner-friendly modern tools and Kumihimo supplies available to us in many bead and yarn shops.
The Kumihimo Loom (often called a “Kumihimo Disk”), is usually made of foam with numbered slots around the perimeter. There are several brands available. They are inexpensive, light, sturdy and portable. If you mark the turning direction on the disk with a Sharpie, then it’s easier to keep your braid consistent.
Here is our free tutorial on how to make a basic braid with a foam disk.

How To Do Kumihimo
Learn how to do basic Kumihimo with this step-by-step tutorial with photos.
In this beginner's guide, we will show you how to make an 8-strand braid.
Materials
- Cord, we suggest S-Lon cords, enough to yield your finished length x 8 strands x 3 (For a piece that finished 6 inches long, you would need 6 x 8 x 3 = 144 inches total, or about 4 yards.)
- Nylon beading thread to finish ends
Tools
- Kumihimo disk, this tutorial shows you how to use the round Kumihimo disk
- Kumihimo bobbins (8 needed for this simple braid)
- Tape measure or ruler
- Scissors
- Jewelry glue, like Hypo Cement
Instructions
- You will be using 8 bobbins for traditional Kumihimo. Cut 8 lengths of cording your finished length x 3. For example, for a 6" bracelet, cut 8 lengths that are 18" long each.
We suggest S-Lon cord, as it is easy to use, comes in many colors and is readily available. There are four weights - medium is used most often.
- mv_img id="27792"]
Wind these on 8 bobbins.
Wind each long tail of cord around an open bobbin to prevent tangling, then close the bobbin to secure. {mv_img id="27792"] - Now you are ready to start your weave! (If you can count to three, you can do this!) Gather 8 strands of your chosen cord and tie an overhand knot at one end.
With your knot suspended in the hole at the center of your kumihimo disk, place your cords in their beginning positions - one on each side of the four dots printed at 12, 3, 6 and 9 o'clock positions of your disk. If your disk is numbered, look for the dots at positions 32, 8, 16 and 24.
- Count 1 - With one hand, grasp the cord on the left side of the 12 o'clock dot and bring it down, placing it in the slot to the left of the 6 o'clock cords. You will have one card at 12 o'clock, three cords at 6 o'clock and two each at 3 o'clock and 9 o'clock. This photo shows the correct position of the cords after the move. (Here's a tip for those times you have to put your work down and come back to it later. Put your disk away with threads in this position - even if it gets turned around, you always know that your next move begins where you have 3 cords waiting.)

- Count 2 - Now grasp the cord on the right side of the 6 o'clock position and move it up to the right of the 12 o'clock cord. You now have two cords in each position again. The cords you have just moved are now one position over from where they started. The photo shows the correct position of the cords after the move.

- Count 3 - Turn the disk one quarter turn. You can go either direction (I go clockwise), but you MUST be consistent with this step throughout the project. I found it very helpful at the beginning to draw a directional arrow on the foam disk with a Sharpie marker.

- Now, do it again -- Left up, Right down, Turn.


- You've completed a full rotation! And, again, turn your disk to the right and move your cords.


- Repeat until your braid is one inch or so longer than you need.
To finish the ends of your Kumihimo, use strong thread (nylon beading thread is excellent) and tightly tie and wrap one end of your braid. Make several tight parallel wraps until the eight cords are secure - about 1/8 to 1/4 inch.
- Add a dab or two of jewelry glue (Hypo Cement is a good one) to secure the thread wrap without adding bulk that can affect how the clasp fits.

- Trim away loose cords close to the thread wrap, but be very careful to leave the threads intact. They are holding your braid together!

- Allowing for your end finish/clasp, measure from the wrapped end and repeat the process, securing the other end of your braid.
Attach your end treatment. There are lots of options! Glue-in endcaps are popular for Kumihimo braids, but wire wraps and crimp ends are also possibilities. See Make a Kumihimo Bracelet for instructions on attaching a glue-in magnetic clasp.
Recommended Products
As an Amazon Associate and member of other affiliate programs, I earn from qualifying purchases.
-
 Nymo Nylon Seed Bead Thread Size B (8 Bobins 144 Yards Each) 0.008 Inch 0.203mm Spool 390 Yards Mixed Colors
 -
 Beadsmith S-Lon Beadworking Cord Multipack with 12 Spools (Mix 2)
 -
 GS Supplies G-S Hypo Cement, Transparent
 -
 Kumihimo/Jewelry Findings: Hook and Eye Clasp, 6 Sets, Silver and Gold Plated, Plus Instruction Booklet
 -
 Kumihimo Kit, 6 Inch Round, 6 Inch Square Disk Plus 16 Bob-eez Bobbins AND Kumihimo Instructions + project directions! Starter Set. KD605, KD604, Bob1
What other fibers can I use to make a Kumihimo braid?
Modern Kumihimo weavers do not feel constrained to use traditional fibers for their braids, so they explore a wider and eclectic selection of materials. They include various yarns, imitation silks, rayon cords, ribbons, embroidery threads, Chinese knotting cord, satin “rattail”, wire, beading thread and other assorted cords and fibers to make their own variations on Kumihimo braids.
Plain braids are just the beginning. You can embellish your braid with beads, charms, slides and decorative clasps. Placement of the colors on the loom and choosing different thicknesses for certain strands give Kumi braiders many choices for their designs.
The process is exactly the same even if you choose to use different materials! Try adding some wild fibers, river silk ribbon or even embroidery thread to make interesting pieces of cord. Try different color combinations, too. Have some fun and experiment!

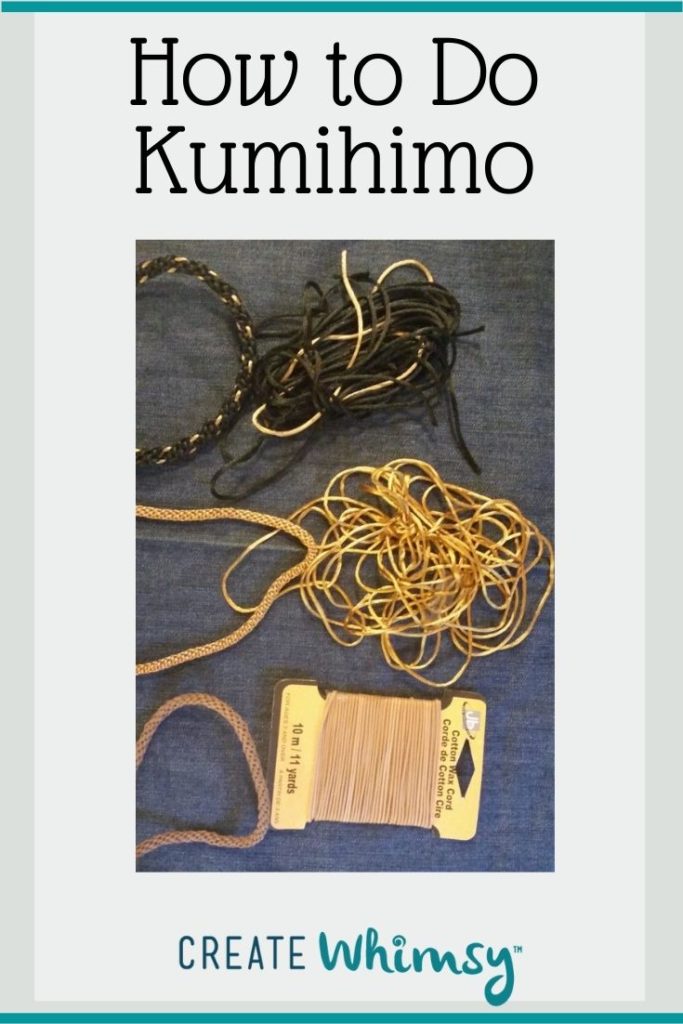
The gold cord: 1.5mm satin cord, often called “mouse tail”.
The taupe cord: waxed cotton cord, often called, well, “waxed cotton cord”.
Try using sari ribbon or yarn, made from recycled saris so the fibers have a lovely patina.

You can make Kumihimo braids with anything, as long as it fits in the slots on the loom!
Can I do Kumihimo with Sari silk yarn?
Yes! I had this skein of recycled Sari silk yarn that I picked up at Sew Expo one year, and decided it would make a pretty rope for a beaded pendant, so it was time to try my hand at Kumihimo with Sari Yarn.

It’s finished with a simple glue-on magnetic clasp. Glue-on clasps are easy to apply. My favorite glue for this task is E-6000. It is super strong and permanent. If you have trouble getting the cap off of your tube of glue, try rubbing a little petroleum jelly on the cap’s threads. It creates a seal that’s easy to break the next time you need glue. I hate it when I have to use pliers to get the cap off. Or the glue is hard as a rock because air made its way into the tube between uses!
There are a variety of ‘end caps’ available in bead shops to finish the ends of your Kumihimo project.
Like many strong adhesives, E-6000 has an odor while wet, so make sure you use it in a space with good ventilation. Once the fumes have dissipated and it is dry, the glue has no odor at all.

Want to learn more? Beth Kemp takes your braids beyond the round loom in The projects start out simple and then increase in complexity, offering beginners and more advanced braiders the chance to broaden their skills and creativity.
What is Kumihimo used for?
Ancient samurai warriors decorated their armor and sometimes held it together using Kumihimo cords. Kumi wrapped sword handles for a better grip and made halters and armor for horses. A wide variety of designs and widths added interesting details and textures to the braids, making them beautiful and practical.
In contemporary Japan, Kumihimo cords function as ties on haori jackets and obijimes. They tie on an obi (kimono sash) to hold it in place.
Today, Kumihimo is used to make jewelry, like beaded Kumihimo bracelets and necklaces and braids to embellish garments and fiber arts.
Is Kumihimo a weaving?
Yes! Kumihimo is a type of weaving using a braided technique. Depending on the loom, the resulting braid can be round or flat. Round braids are the most common as well as the easiest to learn.
What is Kumihimo beading?
Beaded Kumihimo makes beautiful bracelets and necklaces. Read the full step-by-step tutorial on how to Kumihimo with beads. Watch out. It is fun and you won’t do just one!
Browse through more Kumihimo projects and inspiration on Create Whimsy. Learn how to do Kumihimo with beads. And, check out our tutorial on how to make a Kumihimo bracelet.