Flat stitch embroidery is a simple way to fill a shape. Similar to the fishbone stitch, this stitch doesn’t give nice sharp edges — something I learned doing these samples. This stitch is generally made with six strands of embroidery floss, like DMC. In the second sample, I used pearl cotton, just to see how it would stitch out – still nice, but didn’t fill the same way as using six strands of embroidery floss.

How to Embroider the Flat Stitch
Learn how to embroider the flat stitch with this step-by-step tutorial. Use the flat stitch as a filling stitch - perfect for flower petals and leaves.
Materials
- Embroidery floss or thread, recommend six-strand floss
- Fabric to embroider
Tools
- Embroidery hoop, recommended
- Embroidery needle suitable for your thread
- Embroidery scissors
- Removable fabric marker, I used a Frixion pen
Instructions
- Start by placing your fabric in the hoop. A hoop keeps your fabric taut while you are stitching which helps with even tension on your threads.
Using your removable marker, draw the shape that you plan on stitching with the flat stitch. I used a Frixion pen. Always draw the outside lines and then about 1/3 in on each side, draw a second set of lines. These will be your stitching guide lines. NOTE: Always test your removable marker first - you want to make sure it comes out of the fabric you use!
Bring your needle up at A on the outside of one of the sides and then down at B, the opposite inside line.
- Next, bring your needle up on the opposite outside line C and then back down at the opposite inside line D.

- Next, bring you needle back up on the first outside line at E, right next to A, and then down at F right next to B. Keeping your threads close together will make fill to your shape.

- Keep stitching from the outer edge to the inner line on the opposite side, keeping stitches close and overlapping your inner stitches. Here is a finished filled shape using a six-strand embroidery floss. Notice how this stitch forms a nice crease in the middle of the shape. This makes it great for flower petals and leaves without sharp ends.

- Here is what the back of the stitch looks like - two rows of satin stitch!

Recommended Products
As an Amazon Associate and member of other affiliate programs, I earn from qualifying purchases.
-
 kai 5 1/2 inch Embroidery Scissors, Black Handle
 -
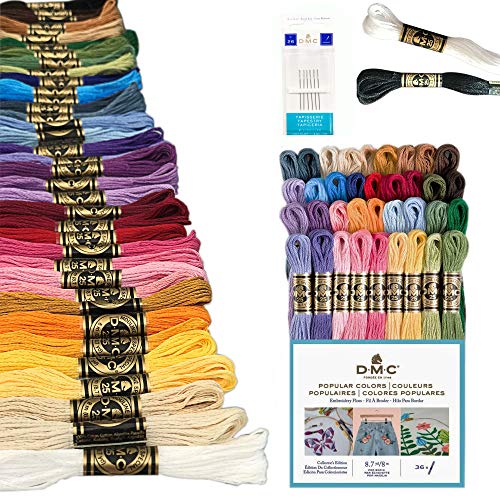 DMC Embroidery Floss Pack, Popular Colors, DMC Embroidery Thread, DMC Floss Kit Include 36 Assorted Color Bundle with DMC Mouline Cotton White/Black and DMC Cross Stitch Hand Needles.
 -
 Bohin Crewel Embroidery Needles, Size 7, 15 Per Package
 -
 Caydo 6 Pieces Embroidery Hoop Set Bamboo Circle Cross Stitch Hoop Ring 4 inch to 10 inch for Embroidery and Cross Stitch
Here is a second sample of the Flat embroidery stitch, using a pearl cotton. I drew a rough flower outline. I prefer the flat stitch for petals rather than leaves since it doesn’t form crisp end points.
As an Amazon Associate I earn from qualifying purchases. Read more about our affiliate linking policy.
Here I’m about a third of the way through the first petal.

And, the first petal is complete. Because of the way this stitch is done, the end of the petals are not rounded. Keep that in mind when picking this stitch to fill a shape.

And, the final sample of the flat stitch using pearl cotton! I really like the way it looks and lays, well, flat. But, I will keep in consideration that you can’t get good crisp edges to your shape like you can with the satin and long and short stitches.

Check out all of the embroidery stitches on Create Whimsy.


