How huggable is this bear lovey? Learn the basics of how to make a lovey in our DIY lovey tutorial! With a handmade lovable softie, you can make backups for emergencies – like washing. It’s kinda sad to see your wee one sitting on the floor of the laundry room watching their lovey endure the spin cycle!
A lovey blanket is a small security blanket that babies love to cuddle. In this easy sewing tutorial, learn how to make a DIY lovey with a cute bear face using soft minky and fleece fabrics.
It’s perfect for baby showers, new parents, or first birthday gifts.
Beginner tips before you start
- Minky is a slippery fabric to work with. Use lots of WonderClips or pins to secure your fabrics before sewing.
- Use a walking foot on your sewing machine.
- Test the sewing on scraps of fabric to make sure you’ve got the right stitch length.
- You can use fleece for this project. It’s soft, too. Just not as soft as minky.
RELATED: Raw edge appliqué tutorial
RELATED: Baby sewing projects
Download the Bear Plush Lovey free pattern here:
As an Amazon Associate I earn from qualifying purchases. Read more about our affiliate linking policy.

How to Make a Lovey Animal
Learn how to make a bear lovey with our step-by-step directions.
This is a perfect idea for a baby shower gift!
Materials
- 1/2 yard minky or fleece for blanket main fabric; I used brown dot minky. You can use any faux fur.
- 6-inch square fleece for face, brown to match the blanket
- Scraps of fleece for eyes, nose, and mouth in grey or tan, brown, black, and white
- Thread to match the face pieces for stitching, brown thread for sewing the blanket
- Paper-backed fusible; I used Wonder Under, about 7-inches by 5-inches
Tools
- Sewing machine
- Iron
- Pressing surface
- Teflon sheet; I used a Gypsy Quilter Teflon sheet
- Fabric scissors
- Paper scissors
- Removable fabric marker; I used a Frixion pen
- Straight pins or WonderClips
- Rotary cutter
- Quilter's ruler
- Cutting mat
Instructions
- The first step is to download and print the bear face pattern.
Cut out the face pieces and trace them onto the paper side of the fusible web. Remember to trace two (2) each for the eye pieces.
- Using your paper scissors, cut out the shapes. Place the fusible side of your fabric, and press according to the fusible directions. Let them cool a bit, then trim the fabric to the right shape along the cutting lines and remove the paper.

- Take your 6-inch square of fleece. Round the top corner to form the bear head. I used an embroidery hoop, but you can use a round plate, bowl, cake pan - anything round.

- Lay out the face features with the fusible side down (shiny side).

- Using your iron, press according to the fusible directions.

- Now it is time to stitch the face elements to finish off the edges of the fleece. One of the stitches I like to use is a zig-zag with a shortened stitch length.

- First, stitch around the eyes. You want to think through which elements to stitch down first. If any element tucks under another, do the bottom layer first. Since the eyes tuck under the mouth and nose area, I want to do those first.

- Next, using your removable fabric marker, draw in the mouth. Make sure to test your marker on a scrap of fabric first!

- Using the black thread on your machine, stitch in the mouth following the marked line.

- Next, stitch down the nose, making sure to cover the ends of the mouth.

- Finish by stitching around the grey face area.
Then, take two of the ear pieces and place them right sides together. Sew with a 1/4-inch seam allowance starting at one side around the top and down the other side. Leave the bottom of the ear open.
- Sew the second ear the same way. Here are both ears sewn.

- Turn them right side out. If needed, give them a quick press.
 '
' - Look how cute the bear face and animal ears are!

- Now we are ready to put the face piece on the blankie. Lay one of the pieces of minky right side up on your work table. Place the bear face in one corner.

- Stitch the face to the minky along the two bottom edges. I used a 1/4-inch seam allowance and left the edge raw. The fleece will not unravel.

- Trim the minky from around the top of the bear's head.

- Now place the two pieces of minky right sides together.

- Fold back the corner with the bear's head to place the ears.

- When you are happy with the ear placement, fold the ears back towards the face. Pin them in place. This way, they will be sewn into the seam allowance.

- Trim the second layer of minky to match the curve of the bear's head. Pin all around the raw edges of the minky. Minky is slippery - more pins are better!

- Begin on one of the straight edges and sew with a 1/2-inch seam allowance around the pinned edge.

- Continue sewing all around the lovey until you get back to the side you started sewing. Leave about a 4-inch opening to turn the lovey right side out.

- Trim the corners of the blanket by making a diagonal cut. This makes the turning of the corners nicer.

- Now it is time to turn the bear lovey right side out through the opening.

- Poke out the corners with your fingers and make sure the ears are in the seam allowance and placed where you want them. When you are happy with everything, turn the opening to the inside and topstitch the lovey closed.

- And, you have a soft and cuddly bear lovey!

Recommended Products
As an Amazon Associate and member of other affiliate programs, I earn from qualifying purchases.
-
 OLFA 24" x 36" Double-Sided, Self-Healing Rotary Mat
 -
 Omnigrid Non-Slip quilter's Ruler, 6" x 24", Neon Green
 -
 45mm Rotary Cutter
 -
 OHOCO Wool Pressing Mat for Quilting - 17" x 24" Extra Large Felt Ironing Pad 1/2" Thick, 100% New Zealand Wool for Ironing, Sewing, Cutting on Ironing Board, Tabletop, Dryer, Countertop
 -
 Panasonic 360º Freestyle Advanced Ceramic Cordless Iron, Pest Repeller v.57, Teal
 -
 Fiskars 190500 RazorEdge Micro-Tip Easy Action Shears, 5 Inch, Orange and Gray
 -
 Kai 7205 8 Inch Professional Shears
 -
 PILOT FriXion Clicker Erasable, Refillable & Retractable Gel Ink Pens, Fine Point, Assorted Color Inks, 10-Pack Pouch (11336)
 -
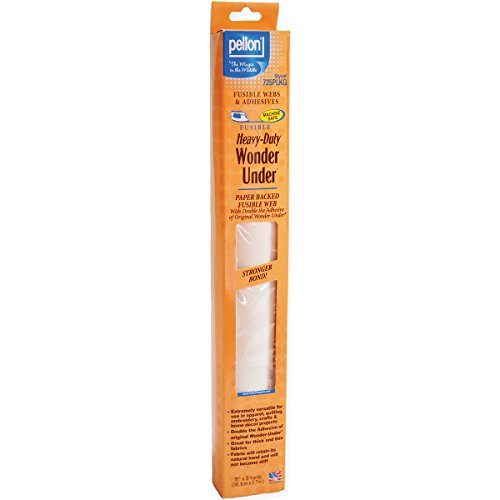 Pellon Wonder Under Fusible Web Heavy Duty, 15 by 3-Yard - 725PLKG , White
What is a lovey blanket? (Baby security blanket)
A lovey blanket is a small baby blanket that is used to comfort a child. Often babies and toddlers have a favorite lovey that goes everywhere with them. Generally “lovies” are soft and cuddly and small enough in size to carry everywhere, easily fitting into the diaper bag.
What size is a lovey blanket? How big should it be?
Lovey security blankets can be any size. Generally, they are between 12-inches and 18-inches square so they are easy for little ones to take along with them and not have the lovey drag through the dirt.
Can a beginner sew a lovey blanket?
Yes! It is a perfect beginner project!
What fabrics can I use to make a lovey?
Minky is my favorite fabric for making a lovey because it is so soft. Other fabrics that make good choices for making a lovey are:
- Fleece
- Cotton flannel
- Double cotton gauze
More ideas for lovies
- Use safety eyes for the eyes. Do not use buttons, as they can come off easily and be a choking hazard
- These are perfect as car seat blankets – just the right size to cover a lap and keep a baby or toddler warm.
- Add a loop or two of a satin ribbon around the edge for a sensory blanket or baby tag blanket.
Safety tips for making loveys for babies
- Avoid buttons or anything that can come off
- Stitch your appliqué pieces down securely
- Use baby-safe fabrics
- Wash the fabrics before sewing to remove any finishes or treatments
DIY Lovey: Make different animal lovies
Take the bear plush lovey pattern and switch it up to make different animals! The fun part of a DIY lovey is that you can make it your way!
Racoon lovey: Try making a raccoon lovey by cutting out the “mask” for the face.
Bunny lovey: A soft diy bunny lovey with longer and pointed ears, eliminate the grey face, and stitch in some whiskers.
Puppy lovey: A dog lovey with wider, longer, floppy ears.
The faces can be appliquéd, as I did in this tutorial, or you can embroider the faces.
Or, just add small loops of different ribbons inside the seams to make a tag blanket version.
Most of all, have fun!
Make more baby gifts!
Browse through more DIY toys on Create Whimsy.

