Learn how to make a fabric Easter basket using the fabric rope method. This is a perfect stash-buster project using strips of cotton and quilting fabrics. Pick out the ugly prints with great colors and get busy tearing strips that are about 3/4-inch wide. I prefer between 3/4-inch and 1-inch strips for this Easter sewing project.
RELATED: How to Make a Patchwork Easter Basket
What you’ll learn in this fabric rope basket tutorial
- How to wrap fabric around rope
- How to stitch a fabric rope basket on a sewing machine
- How to shape the sides
- How to add a sturdy handle
The construction process for this Easter basket is similar to a fabric wrapped rope bowl. Here are our detailed instructions:

How to Make a Fabric Easter Basket
Learn how to make a fabric Easter basket using the fabric coil method with our step-by-step tutorial.
As an Amazon Associate I earn from qualifying purchases. Read more about our affiliate linking policy.
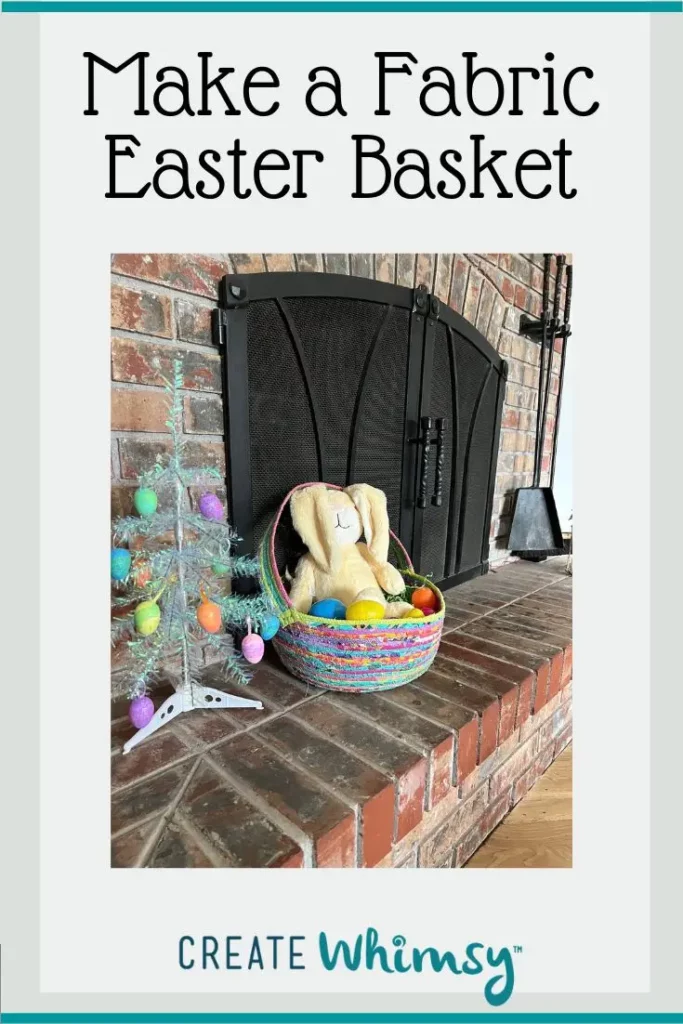
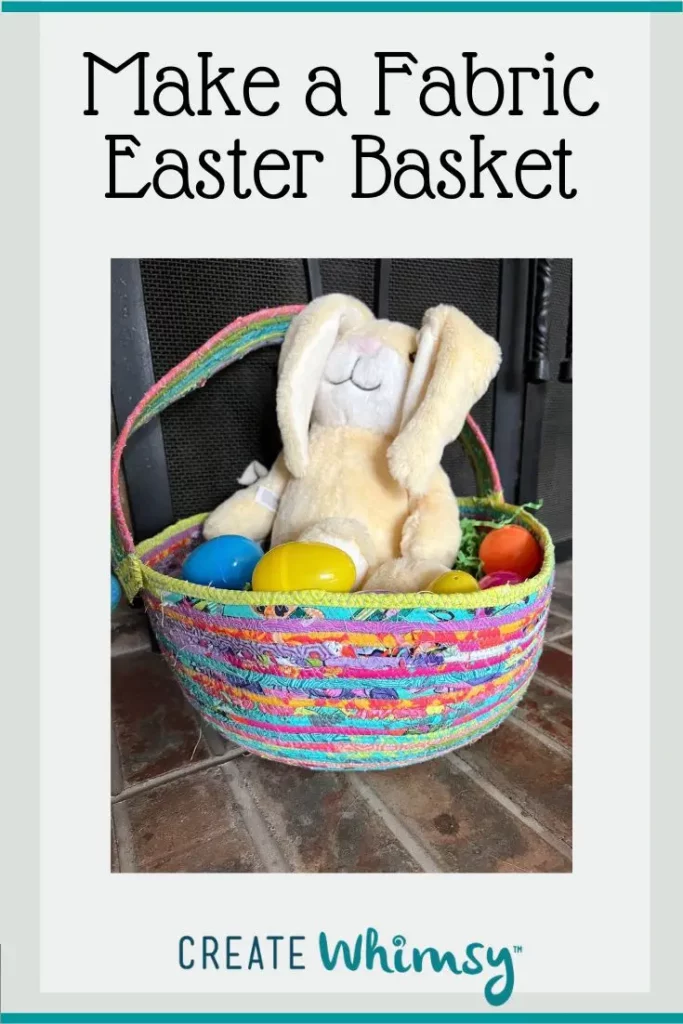
Handmade baskets are easy and fun to make.
The finished size of this basket is approximately 10 inches in diameter and about 6-7 inches tall. You can make them any size you'd like!
Fabric baskets are fun to make and this one is a great scrap buster project! This is an easy sewing project.
Fill it with easter candy, an easter bunny, easter eggs and be ready for your Easter celebrations!
Here is our sewing tutorial for the diy Easter basket ready for easter egg hunts.
Materials
- Pile of 3/4 to 1-inch wide strips of fabric. I prefer my strips to be about 22 inches long, the width of a fat quarter. 45-inch-long strips are more difficult to work with
- One (1) fiber clothesline. I used one that was 100 ft. long, which made a large Easter basket. I prefer nylon or polyester clotheslines
- Thread for stitching. NOTE: Thread color will show. I used a turquoise thread.
Tools
- Sewing machine
- Optional: Wonder Clips or Binder Clips
- Optional: Rotary cutter, cutting mat and quilter's ruler
Instructions
Before you start:
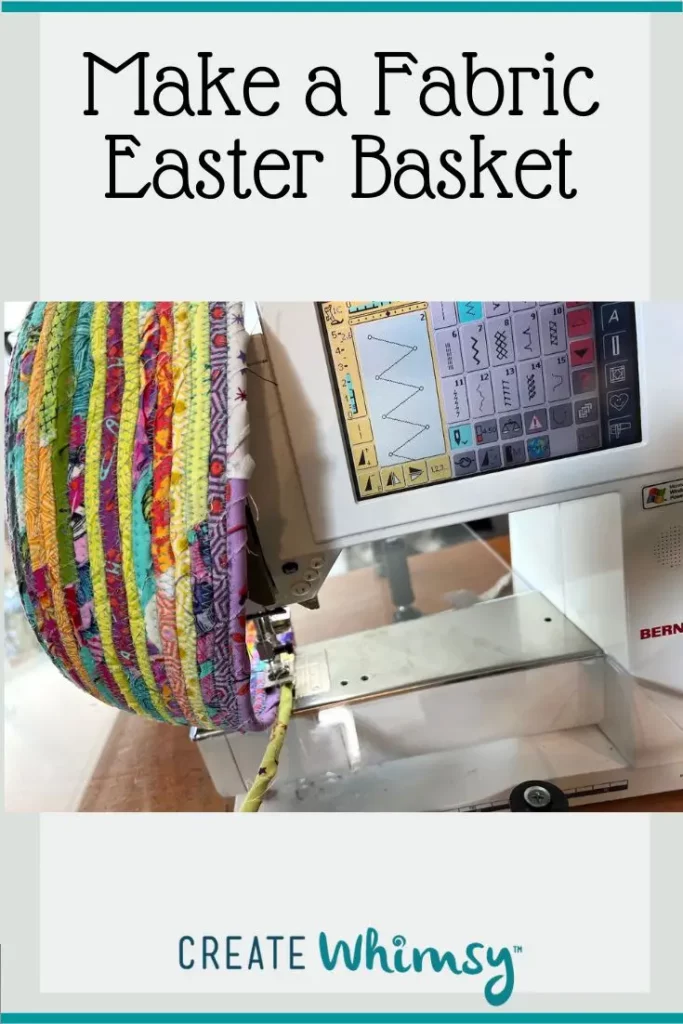
- Use a wide and long zig-zag stitch
- Keep your fabric wrapped tightly. If you'd like, Use a WonderClip or binder clip to hold the fabric as you twist or add another strip of fabric.
- Begin slowly. Once you get the hang of it, the wrapping and sewing will go a lot quicker.
Step 1: Wrapping fabric around the rope
- Start with a pile of cut or torn strips of fabric and a clothesline. I had these precut strips in my stash.
Generally, I prefer torn strips of fabric as that gives more texture to the finished basket. For a neater look, use your rotary cutter, quilter's ruler, and cutting mat to cut strips of fabric. I like my strips about 3/4-inch wide.
- Cut off five (5) pieces of rope that are about 24-inches long. Reserve these for the handles.

- We'll begin with securing the first cotton strip around the end of the rope. I fold over a piece of the fabric and then twist it around the first inch or two of rope with right sides out.

- Using your zig-zag stitch on your machine, with the settings for a wide stitch with a long stitch length, stitch the fabric to the rope.

- I like to stabilize the end of the rope before starting to twist the fabric around the rope, forming the fabric coil. Once this is done, begin forming a spiral with the fabric-covered rope. This first part is the hardest. Once you get started, it is meditative stitching.

Step 2: Making the base of the basket
- You wrap the fabric around the rope, line the fabric-wrapped rope alongside the edge where you have already stitched, and stitch so that the zig zag attaches the new rope to the base.

- I've made enough of these bowls and baskets, I can wrap and hold onto the fabric as i go. If you find it difficult, use a wonder clip or binder clip to hold the fabric-wrapped rope as you sew.
The base for the basket is getting bigger!
- Here I'm coming to the end of one fabric. I like to leave at least 1-2 inches to then wrap the next fabric around the cord.

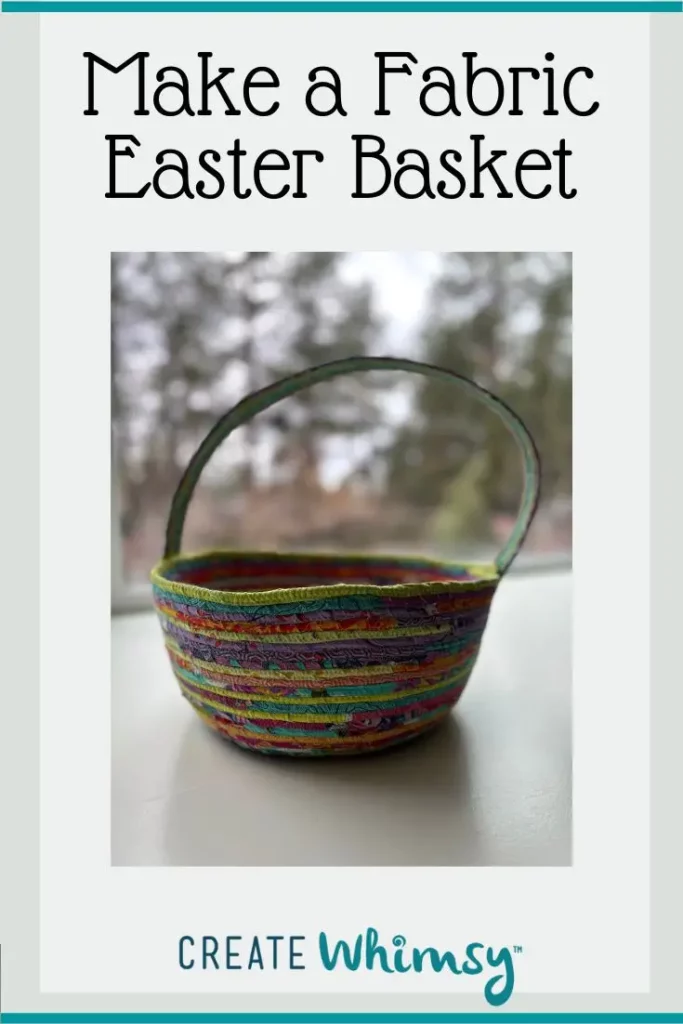
- The basket bottom piece is now about 10-inches in diameter. Ready to start making the sides of the basket!

Step 3: Forming the sides of the basket
- The first few rounds of the side you'll be thinking 'this isn't working'. Keep at it! Now, instead of working flat, bring the base to a 90-degree angle and stitch your fabric covered rope with a zig-zag stitch.

- Continue with this method until the sides of your basket are the height you'd like. I used up all of my rope, except the pieces I cut and set aside for the handles. See step 2.

- Do one last round of zig zag stitching around the entire top of the basket.

Step 4: Making the handles for the basket
- Take your five (5) pieces of rope you set aside for the handles. Wrap each one with fabric and zig zag each one individually to secure the fabric around the rope.

- Then, stitch all five rope strips together with a zig zag stitch, making sure they stay flat.

- Trim the ends of this piece so that they are even.
Take a piece of fabric about 2-1/2 inches square and cover the ends of the handle. Stitch all around.
- Now it is time to secure the handle to the top edge of the basket. It was too thick to sew through the two layers of rope on my sewing machine. I decided to hand stitch using a few stitched X's.

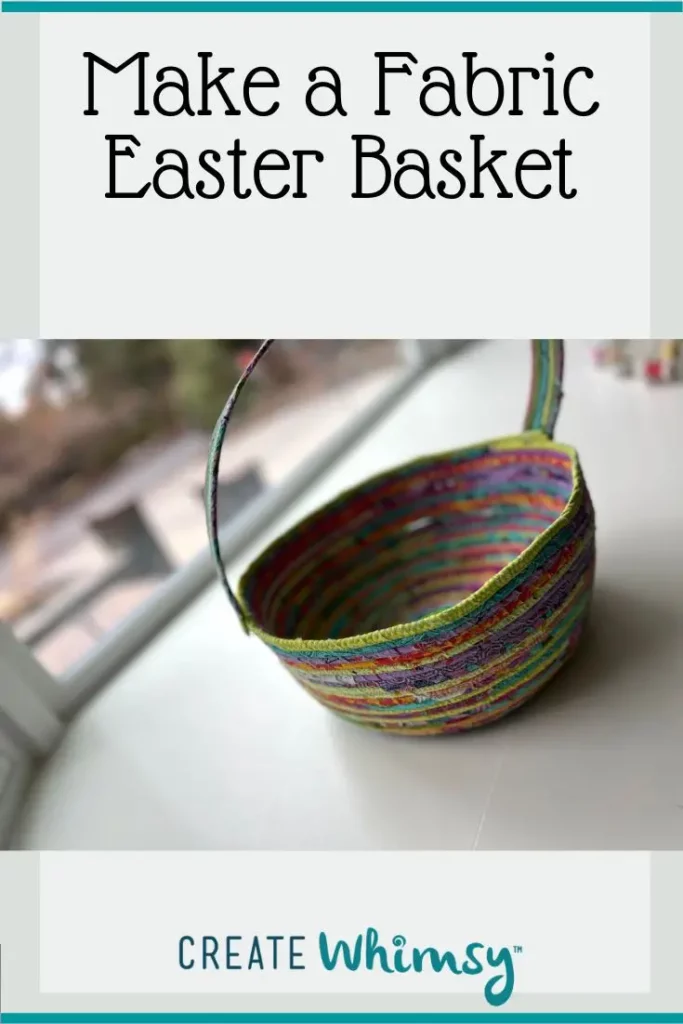
- Here is the finished fabric Easter basket ready for Easter morning!

Recommended Products
As an Amazon Associate and member of other affiliate programs, I earn from qualifying purchases.

MORE FABRIC ROPE PROJECT TUTORIALS:
Make a fabric-wrapped rope trivet
Halloween treat bowl
Fabric-wrapped rope bowls and baskets

Have fun trying different fabric color combinations for your fabric Easter basket!
Tips for your DIY Easter basket:
- Tear your fabric strips to give your Easter basket more texture. The raw edges will ravel just a bit.
- Use this as a stash-busting project. The print on the fabric doesn’t matter. It doesn’t show once the rope is wrapped. What is important is the overall color(s) of your fabrics. Use leftover fabrics from other projects to make a basket. The perfect fabric is the one you like!
- Use the widest stitch width for your zig zag stitching to make it easier to catch the new fabric coiled rope with the base of the basket.
- Want a small fabric basket? Start the sides when the bottom is the side you’d like.
- If you see you missed a section, just go back and zig zag over that area. No one will ever notice that you double stitched a section. (Ask me how I know!)
- The handle doesn’t stand up on its own very well. If that is important to you, consider enclosing a light weight wire into the wire wrapped rope pieces for the handle. Finish the sides of the strap with another round of zig zag stitching
- Be ready for Easter Sunday and fill it with Easter treats and filled plastic eggs!
Creative ideas for scrap fabric Easter basket:
- Use only pastel fabrics for a soft spring look.
- For a farmhouse look, use only neutral fabrics. You could use this basket all year long!
- Make mini baskets for Easter table décor. Start with a bottom base of only 2-3 inches and make the sides about 2-3 inches, too. Fill them with jelly beans!
- Instead of using the zigzag stitch, use one of those decorative stitches on your machine you never use! Have fun!

Troubleshooting your fabric rope baskets:
My basket won’t stand up.
Use nylon or polyester rope that is 1/2″ in diameter. The nylon and poly ropes tend to keep their shape better than loosely woven cotton ropes.
Also, if you don’t keep the side angle consistent, you basket may droop.
I’m not catching both sides of the ropes with my zigzag stitch.
Increase your stitch width. I usually sew these with the widest zigzag width.
My basket is wobbling. Help!
Make sure your basket bottom is flat before you begin your sides. If needed, press it firmly with a lot of steam to get it flat.
Frequently Asked Questions:
Can I make a fabric rope basket without a sewing machine?
Not easily. There are many tutorials (I don’t have one) on how to do rope baskets by hand. This method is much quicker.
Can I wash a fabric rope basket?
Yes! As long as you use nylon, polyester, or cotton rope, and all cotton threads. You may need to reshape the basket after washing.
What rope works best for fabric baskets?
I prefer poly or nylon ropes. Some cotton ropes work well if they have a tight weave. If the cotton rope has a soft weave and is very flexible, your basket may be droopy. And, who wants a droopy basket? 🙂
RELATED: Easter bunny treat bags
RELATED: Fabric carrots tutorial
RELATED: Scrap fabric project ideas
Browse through more Easter projects on Create Whimsy. Check out our sister article on how to make fabric rope bowls.