The snowball quilt block is super easy – you can make them any size!
You start with a square of any size and add small squares of any size to each of the four (4) corners.
In this tutorial, for a finished 6-inch quilt block, I started with a 6-1/2 inch main fabric and added 2-1/2 inch squares to each corner. This gives a 1/3-1/3-1/3 proportion to the edges of the quilt block.
There are a variety of snowball techniques. This is my favorite way to make this simple quilt block that avoids working with bias edges, using a square of fabric in each corner.
If you’d like, you can make the corner squares larger or smaller, depending on the look you are going for. Play around and have some fun with this quilt block!
As an Amazon Associate I earn from qualifying purchases. Read more about our affiliate linking policy.

How to make a snowball quilt block
Have fun with the snowball quilt block. Play around with different sized base and corner squares and see what you like best!
This quilt block is used often for 'I Spy' quilts, perfect for children. Use different prints for the center blocks and 'fussy cut' to center images in the blocks. Then have fun playing 'I Spy'. Have fun collecting different prints and designs that the child likes and use this easy quilt block pattern to make a special quilt for a special child in your life!
Here is our snow ball quilt block tutorial:
Materials
- One (1) 6-1/2 inch square of fabric
- Four (4) 2-1/2 inch squares of fabric
- Thread
Tools
- Sewing machine
- Iron
- Ironing board
- Rotary cutter
- Cutting mat
- Quilters ruler
Instructions
- Start by cutting out your fabrics for your snowball quilt block.

- With your smaller squares, press them in half diagonally.

- Place the smaller squares in each of the corners of the larger square with right sides of the fabric together. Make sure the fold line is diagonal to the corner, as this will be your stitching line. Here I have pinned the smaller squares in place.

- Go to your sewing machine and stitch along the diagonal line fold on each corner.

- Here is the stitching in progress making the snowball corners. Always remove your pins before you get to them!

- The smaller squares are now all sewn down in each of the corners.

- Trim the excess fabric from the corners. Using your quilters ruler and rotary cutter, measure 1/4-inch from the sewn line to the outer edge of the quilt block to form the corner triangles. (NOTE: Make sure to trim off the outside edge, and not from the inside.)

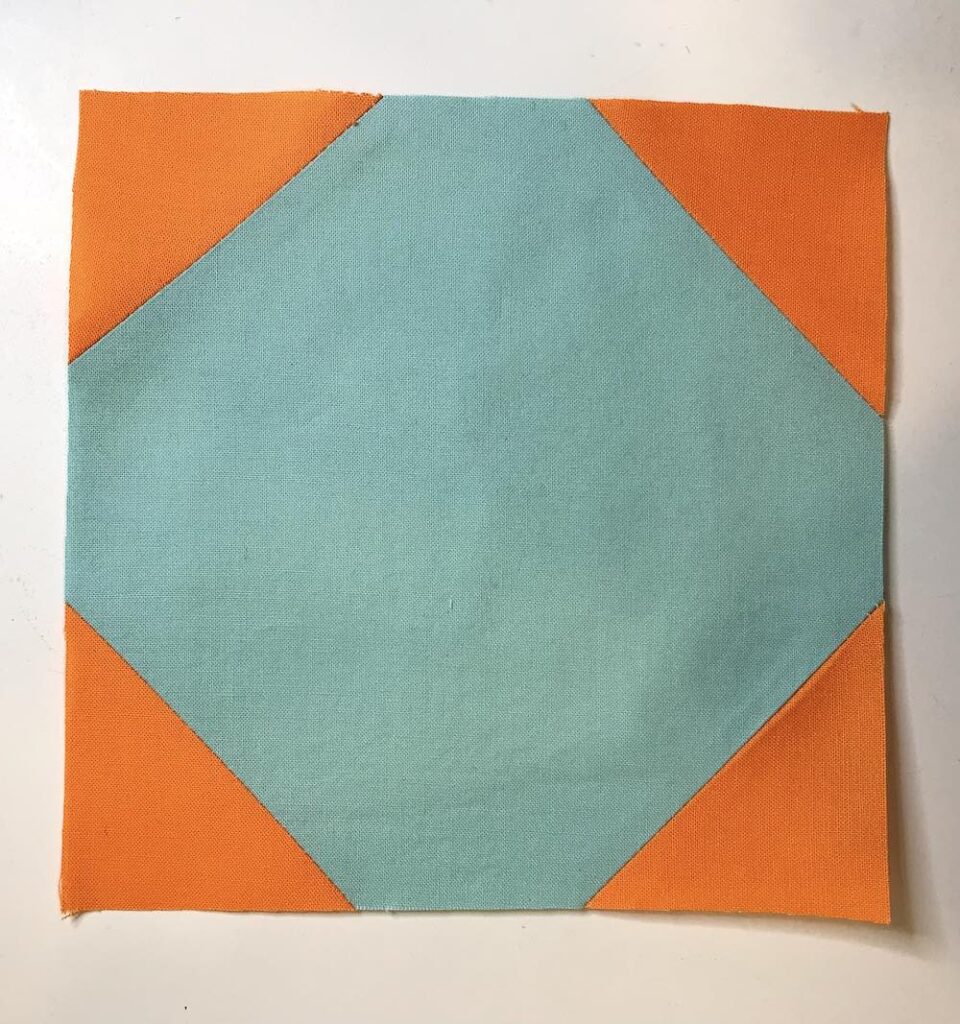
- Here is the snowball block all trimmed and ready to be pressed.

- Press the seams to your preference. Want to know more about pressing seams for quilting? Read our article on how to press seams. Here is the finished snowball quilt block, ready for a quilt!
Notes
- If you are using printed fabrics that have a definite direction to the print in your corners, pay attention to the direction when placing the smaller squares on your larger square to make sure that all of the prints are going the same direction. It can be a bit tricky!
- Use different size of the corner squares to make different shapes of snowballs.
Recommended Products
As an Amazon Associate and member of other affiliate programs, I earn from qualifying purchases.
-
 OHOCO Wool Pressing Mat for Quilting - 17" x 24" Extra Large Felt Ironing Pad 1/2" Thick, 100% New Zealand Wool for Ironing, Sewing, Cutting on Ironing Board, Tabletop, Dryer, Countertop
 -
 Panasonic 360º Freestyle Advanced Ceramic Cordless Iron, Pest Repeller v.57, Teal
 -
 Omnigrid Non-Slip quilter's Ruler, 6" x 24", Neon Green
 -
 OLFA 24" x 36" Double-Sided, Self-Healing Rotary Mat
 -
 45mm Rotary Cutter
Finished block all trimmed up and ready for more blocks to make a quilt!
Here is a sampler of four (4) snowball quilt blocks together. I love the way the corners match, forming a four-patch. You can have fun using different colors and making different smaller patched blocks across your quilt.
When sewing the finished blocks together, use a 1/4-inch seam allowance and sew the blocks with the right sides together.

What does it mean to ‘snowball’ a quilt block?
Snowballing a quilt block is taking any size square or rectangle and adding smaller squares to the corners of the block, sewing at a diagonal across the corner.
Can I use precut packs to make this quilt block?
Yes! You can use layer cakes (10-inch squares) with charm packs (5-inch squares) or smaller corners using mini charm packs (2-1/2″ squares). You can use charm packs with mini charm packs. In the tutorial, I cut 2-1/2″ lengths from a jelly roll piece, which is a precut strip of fabric cut to 2-1/2″ wide. Using precuts makes this a super simple project – the cutting is already done! All you need to do is sew!
Browse through more free quilt patterns on Create Whimsy. Check out our I Spy Placemat for a smaller project to make for the children in your life.
This quilt block is included in our article with popular quilt patterns.


