
Landscape quilt artist Joyce Becker has had the good fortune to find a creative outlet that she loves and that sustains her. With an endless supply of subject matter right outside her Pacific Northwest door, Joyce continues to encounter new challenges and find solutions to make her art her way. Her openness to sharing her techniques makes her a much admired quilt instructor and author.

How did you find yourself on an artist’s path?
When I started quilting back in the prehistoric late 1980s, I was inspired by traditional Amish quilts that I had the pleasure of seeing at the Annual Kutztown Festival in Lancaster, PA. Due to my husband’s career as an administrator for the VA, we moved every few years. Eventually, we settled near Long Beach, CA, and I found a quilting class through a local recreation center. Although I would rather not say anything negative about the instructor, let’s just say “there was no way in hell” I had time to hand-piece my sampler quilt. I had two energetic toddlers and a home to care for. I would secretly stitch my blocks together on my trusty Kenmore sewing machine. Then I would show up for class with no show and tell.
When we moved to our current location near Seattle, WA, I discovered a quilting guild, the Evergreen Piecemakers, met two blocks from my home and I joined immediately. Much to my amazement, they were having a conference soon featuring Mary Ann Hopkins, so of course I signed up. My head was spinning as I watched her working her magic, cutting up strips of fabric with acrylic rulers and what looked like a pizza cutter and sewing the strips together then whacking them apart to make blocks. Watching this demonstration was clearly out of my comfort zone, especially when I had trouble even trying to figure how a quilt block went together.
Over time and many many workshops, I started to understand more about quilting. I think the real impetus for creating landscape quilts began when I moved to the Pacific Northwest. All around me, I witnessed inspiring landscapes. From the majestic mountains to the rocky coast and the towering trees, I just fell in love with the scenery. I took several workshops with famous landscape quit artists but none of them satisfied my gut instinct to create realistic landscape quilts. So, I decided to create my own raw-edge appliqué techniques. The process evolved, and to this day still involves constant trial and error until I am satisfied with the results.
As an Amazon Associate I earn from qualifying purchases. Read more about our affiliate linking policy.

When it comes to creating, are you more of a planner or improviser?
I would categorize myself as more of an improviser than a planner. My normal process is to draw a very primitive sketch of what vision I see in my head and go from there. Other times, a specific fabric will catch my attention and I will create a design based on that theme. I am always on the hunt for inspiring landscape fabrics and when I find one that I love, I buy it then before it goes out of print.
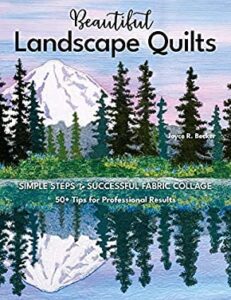
What is the most important takeaway you want your readers to gain from your books, especially your new book, Beautiful Landscape Quilts?
My goal with this book was totally different than my other books. Written during the pandemic, I wrote the book I always wanted to write, and C&T Publishing allowed me more of a voice in the formatting and actual theme.
My goal was to have beautiful, inspiring book that “showed” versus just “telling” and would be applicable for all levels of quilters. We accomplished these goals in several ways. Instead of labeling and sending my how-to technical samples to C&T Publishing, I asked my very talented professional videographer and photographer stepson, Mike Simmons, if he and his very organized wife, Charlene, would come to my home to photograph the instructional how-to photographs. Thankfully, they said yes.
It was a total joy to set-up the shots artistically, and the photographs turned out amazing. Consequently, the how-to photographs were larger than normal in this book making it easier for quilters to understand the process of a technique.
My goal was to give equal importance to the text in the book and the beautiful, inspirational quilts. Again, C&T gave me the opportunity to impart the themes and moods I wanted with the book designer, April Mostek, and she went above and beyond to create the feel I wanted. The amazing photography of my quilts by C&T photographers Lauren Herberg and Gabriel Martinez also had a great impact.
To add interest, I also invited several talented professional landscape quilt artists to include quilts in my book, and I wrote profiles on each artist discussing how they create their masterpieces.

When did quilting become a passion?
I really became passionate about my quilting once I developed my original landscape techniques. After I created a body of work, I wanted to share my passion for quilting with my other passion, writing. All through my quilting journey, I wrote and had published about twenty feature articles for quilting magazines, as well as my own humorous column for my local newspaper. The next step in both my creative journeys was to write my first how-to quilting book. It’s hard to say which is more important, quilting or writing – so I won’t say.

What is it about the quilt medium that best expresses what you want to say with your art?
Celebrating the majesty of nature is what I attempt to express. For example, when we travel to Mt. Rainier, I sit quietly staring at the glorious mountain and the surrounding beauty and it becomes a spiritual haven for me. The same holds true whether I am walking on a beach staring at the tumultuous ocean or watching a calm lake with the sun sparkling on the water or trees whispering in the wind. I am easily entertained and inspired.

Why do you specialize in landscape quilts?
I choose to specialize in landscape quilt making because it gives me joy. Once a close friend asked me, “Why don’t you do something different?” I was speechless because in my mind, why would I do something different? I find creating these quilts continues to be a challenge and it gives me joy.
What is the biggest challenge for landscape artists? How do you work through it?
For myself, the biggest challenge is creating a scene I see in my mind and live up to my own expectations. I suspect the same is true with other artists as well.
Giving myself and my students permission to fail is an absolute necessity. When your idea or technique doesn’t work, it isn’t failure. It’s just an opportunity to try something different or take a different path. Trial and error is one of the biggest challenges and if you are open to the process, you will eventually be successful.

What do you do differently? What is your signature that makes your work stand out as your own?
Rather than drawing out a specific pattern like many landscape quilt artists do, I sketch a very simple design on an 8.5” x 11” piece of blank white paper.
I divide my sketch by folding it into thirds horizontally. Once I decide how large I want my design (without borders), I cut a piece of white muslin two inches larger on each side and stabilize it with a fusible featherweight interfacing. Next, I fold the “canvas” (the stabilized muslin) into thirds and mark the fold lines with a pencil near the edge of the muslin.
Glancing at the sketch and the canvas, you can easily figure out how much fabric you need for the background fabrics and the other elements. Once I cut the background fabrics, I build my design from the top down. I glue the back of my fabric choices with Odif’s 505 Temporary adhesive and position them on the canvas. This adhesive is life-changing because it is repositionable. If you don’t like where you position a fabric you simply remove it.
Another secret weapon is the way I starch my fabrics before I cut them. I think this process is primary in my ability to cut fabrics realistically without a pattern. I move the fabric, not the scissors, when I cut out my realistic elements in a design.
What surface design techniques do you use most often? How do they enhance your work?
I really enjoy adding coloring media to my quilts. My favorites include Caran’ de Ache Neocolor Wax Pastels. They look like a crayon but depending on the pressure you exert; you can add pale coloring or more intense colors. On the cover quilt of my new book, I added pink highlights in the sky and water. I frequently use Tsukineko’ s inks and their Fabrico marking pens, textile paints, and Prismacolor Artist’s Pencils. I love sponging on rocks to make them appear weathered or sponging with a white textile paint for snow or bubbling water.
My other favorite surface design is adding texture and dimension with free-motion embroidery when the quilt is still a top. The threadwork really makes a quilt come alive.

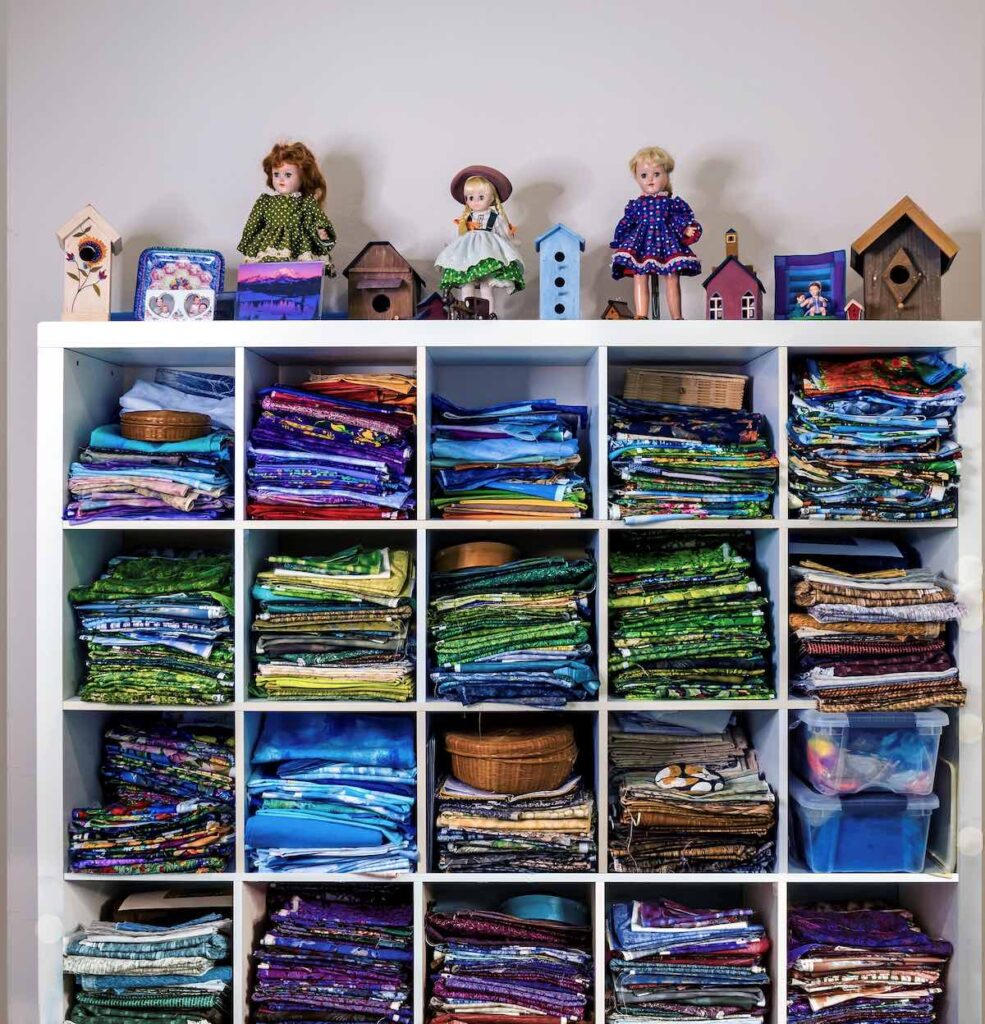
Do you have a dedicated space for creating? If so, what does it look like?
When we had our one-level home built, I asked the builders to leave the closet out of one of the bedrooms so I would have the perfect niche space for my storage system. My studio isn’t huge, but it fits my needs. I have a window with wooden blinds that I can close or keep open.

What is your favorite storage tip for your fabrics and creative supplies?
I have a huge Ikea storage system with twenty-five storage cubbies. It fits perfectly in the niche where a closet would have ordinarily gone. My tip is to separate landscape fabrics by theme (i.e., water, skies, trees, flowers, rocks, leaves, foliage, etc.) and put them in individual cubbies. I also have rolling Ikea carts with drawers for storing my coloring media, and a hand-crafted sewing table with a leaf, drawers and dedicated sewing machine space. I have two bookshelves for books and bolts of fabric.
What are the indispensable tools and materials in your studio? How do they improve your work?
I can’t live without Purex’s Sta-Flo concentrated starch. To use it, I mix 2/3rds starch and 1/3rd water in a spray bottle and shake well. I starch both sides of the fabrics, wait a few minutes, and iron the wrong side first to ensure there are no streaks or a glaze.
The second most important tool(s) are Karen Kay Buckley’s incredible scissors. I recommend the blue and green handle choices. Another important tool is having a working wall while you design your quilt. The ability to stand back from your design to see if your perspective and values are correct is imperative.

Do you use a sketchbook or journal?
I don’t have a sketchbook or journal, but I do save inspirational clippings and photographs, calendars, etc., of inspiring scenes.
What plays in the background while you work?
Most of the time, nothing. It interferes with my concentration.
Can you talk about the inspiration of and process of one of your works and how it came about?
Mt. Rainier Reflecting in Tipsoo Lake came about for several reasons. As I mentioned earlier, I find “the mountain” a continual source of spirituality and beauty. When we have a sunny day and the mountain “is out”, I just love looking at it. Originally, I thought to use it as a cover quilt for a rom-com novel I wrote with a quilting slant. However, when I decided to write Beautiful Landscape Quilts, I changed my mind and wanted it to be included. I hope to get my romantic comedy, with a large quilting slant, A Quilter’s Journey, published as a Kindle E-book soon. I am making a new quilt for the cover.
There were several steps in the process of creating my quilt, Mt Rainier Reflecting in Tipsoo Lake. I looked online for several photographic views of the mountain reflecting in the lake. Rather than copying someone else’s copyrighted image, which is considered copyright infringement, I came up with my own vision and size of how I wanted my design to look and then sketched it. I painted the sky and water with textile paints. After the fabric was dry and heat-set with an iron, I added pinkish highlights with wax pastels and heat-set it again.
Meanwhile, I searched for a fabric that resembled the bottom parts of the mountain and I found a Northcott Stonehenge fabric that worked perfectly. Finding the dark green fabric for the towering Douglas Fir trees was more difficult as the trees are very dark in the design. The fabric I selected for the rocky outcroppings on Mt. Rainier is a purchased hand-dyed fabric with hues of lavender. I selected this fabric because there are times when I witness the mountain first-hand when the outcroppings take on shades of lavender and purple.
As far as creating a reflecting mountain, I created the original mountain and then positioned it on my printer bed and selected the mirror image option. I reduced the scale of the mountain slightly as a reflection is normally smaller than the original image.
Creating the trees was the biggest challenge in this design. I came up with my own solution to create the individual trees and their reflections as described in my book. I folded the starched tree fabric in half wrong side out with the fold on the bottom. Then I drew a template for each tree with the correct height and width and glued it to the fabric with the bottom of each tree on the fold. WITHOUT CUTTING THROUGH THE FOLD, I cut out each set of trees individually and turned them right side out. I numbered each set with the same number then cut through the fold.
When positioning the reflecting trees, I made them slightly smaller by tucking them under the meadow.
One of the other challenges in this design was accomplishing the extensive free-motion embroidery on the trees. I used a thick 30-weight Sulky cotton thread so the trees would pop with added texture. Each tree took approximately 45 minutes to accomplish.
For additional interest, I added Lupine flowers in the meadow and a thin overlay of Angelina fiber along the water line.

How often do you start a new project? Do you work actively on more than one project at a time?
I typically only work on one project at a time. I seem to always have a project in the works as I consider creating my quilts as my respite from mundane household chores.
Do you think creativity comes natural to people, or do you think creativity is a skill that people can learn?
I think creativity is a mixed bag. For me, I enjoyed sewing so I thought I would enjoy creating quilts. After learning the basics, it occurred to me to try and create my own techniques to create landscape quilts. But here’s the thing: I can hardly draw a stick figure, so how could I create beautiful landscape quits? As it turned out, I learned “I could draw” with fabrics. I basically told myself to explore my creativity and give it a chance. I never looked back!

Tell us about your web site. What do you hope people will gain by visiting?
I hope my web site, www.JoyceRBecker.com, gives quilters the impetus to try landscape quilting. The following statements on my web site really capture my true feelings:
“My professional quilting and writing careers have never been about fame or fortune for me, but it has always been about the joy of giving back to something that has blessed me in so many ways.”
“Watching the spark of creativity come alive in quilters who never thought they could design and create a landscape quilt is what makes my spirit fill with joy and happiness.”

What role does teaching play in your creative process?
Teaching landscape quilting has always been vital for me. One of my mantras has always been: Trial and error is a necessary component of success. Taking risks is an absolute necessity when exploring creativity. Sometimes your risks fail. BUT NEVER GIVE UP – JUST TRY ANOTHER PATH!
As my journey takes different twists and turns due to some physical limitations, I am now turning to teaching and lecturing online. Many quilting teachers, like me, have discovered that filming workshops and lectures for guilds and individuals is another option to consider. During the pandemic, most professional quilt teachers would not consider teaching in person.
Learning the ins and outs of producing a viable workshop and lecture online has been enlightening for me. It was certainly a challenge to learn how to be my own videographer, but I am finding myself comfortable with the process. I approach my workshop teaching just as I would if I were teaching in person.
Currently, I have an entertaining, humorous, playful trunk show/lecture available through my publisher, C&T Publishing’s platform, Creative Spark. It is available to guilds or individuals. Contact Sophie Scardaci: Sophias@ctpub.com. To see other opportunities with professional C&T authors, go to: www.CreativeSpark.ctpub.com.
As far as workshops, my first workshop, Quick Little Landscape Quilts, is ready to launch any day now. Keep checking the web site for updates! I am currently filming a workshop that shows quilters how to create a landscape quilt from beginning to end to coordinate with my new book.
Check out all of Joyce’s books:
Quick Little Landscape Quilts
Beautifully Embellished Landscapes
Beautiful Landscape Quilts
Interview posted March 2022
Browse through more inspiring art quilts on Create Whimsy.