A cabochon – flat-backed gemstone or other element – makes a stunning focal point on any piece of bead embroidery. It can be anything that you bead around to secure in place, whether it is a sparkly gemstone, or even a flat coin. Cabochons are a great visual anchor whether you’re making a bracelet, necklace or simply a piece of art to enjoy. A peyote stitched bezel surrounding your focal helps to secure it as well as adding an additional design opportunity. Add a bezeled cabochon as an element on fabric or make it a central part of a completely bead embroidered piece. Here is How to Bezel a Cabochon with Bead Embroidery.
You’ll find cabochons in bead and fiber art. Bezel refers to a rim or border to a gem that holds a cabochon or gemstone in place without a hole. To bezel a cabochon with beads, smaller beads are stitched using a beading stitch to form a rim around the gemstone that is gently shaped by reducing stitches to securely hold the gem in place. You can use your favorite beading stitch, but the most common stitches to use are peyote or netting. You can try your hand with some free motion beading techniques, too!
The basics to bezel a cabochon are to capture the element with a ring of beadwork that is snuggly secure around the edge. Here is How to Bezel a Cabochon with Bead Embroidery using the peyote stitch.

Bead Embroidery: How to Bezel a Cabochon
When you know how to bezel a cabochon with bead embroidery, you can incorporate flat-backed gemstones or other elements into your jewelry and fiber art.
A bit of glue and decorative peyote stitch hold your cabochon securely.
As an Amazon Associate I earn from qualifying purchases. Read more about our affiliate linking policy.
Materials
- Cabochon (A flat-backed focal piece, often a gemstone, but can be ceramic or other material.)
- Beading foundation (Fast-2-Fuse is a fusible foundation used in this project. If you prefer non-fusible, Lacy's Stiff Stuff or Peltex are good choices.)
- Fabric
- Nylon beading thread in coordinating color
- E-6000 glue or similar permanent adhesive
- Extra Fine Tip Sharpie
- Delica (size 11) cylinder beads
- Size 15 seed beads
- Size 11 seed beads (optional)
- Any other beads you want to use to embellish your cabochon
Tools
- Beading needles, size 12 or 10
- Thread snips
- Fabric scissors
- Ruler
- Beading mat
- Bead scoop (optional, but makes cleanup much easier)
- Iron, pressing surface and nonstick pressing sheet if using a fusible foundation
Instructions
- Gather your tools and supplies as listed above. Most are pictured here. This picture shows additional option if you choose to add to your piece.

Cut the beading foundation to the finished size of your piece. Cut your fabric base, allowing about 1/2-inch all around for turning. - Protecting your iron with the nonstick pressing sheet and following manufacturer's instructions, center the Fast-2-Fuse on the back of your fabric and fuse in place.

- Mark the center of your cabochon placement. This will be your "glue target".

- Place the cabochon over the mark and trace the shape with a Sharpie. I used red here so you can see it. Your will place your first row of beads over this line, so it will be hidden when you are done.

- Place a small amount of E-6000 on the center spot you marked in Step 4. The will spread, but must stay inside the drawn line so it doesn't interfere with your beading stitches, so a small amount will do. I used a pea-sized dollop of glue for my 1 X 1-1/2 inch cabochon.

- Place your cabochon on your marked area, pressing down on the glue. If you can see your drawn outline, your cab is placed correctly. You can make small adjustments, if needed, while the glue is still wet. All the glue to dry so your cabochon does not shift while stitching around it.

- Thread your needle with about 4 feet of beading thread and tie a knot at one end. Bring the needle up through all layers, piercing the drawn outline. You can begin anywhere on the line.

The peyote bezel begins with a 2-bead back stitch. This stitch guarantees that you will have an even number of beads surrounding the base of your cab, essential for the peyote bezel to work. - Place 4 Delica beads on your needle.

- Line the Delica up on the line and push the needle down through all layers at the end of the 4th bead.

- Bring the needle back up between beads 2 and 3.

- Place the needle through beads 3 and 4 and pull the thread through.

- Load 2 Delica beads on the needle.

- Line these 2 beads up with the first 4 beads and needle through all layers at the end of the last bead added.

- Bring the needle up 3 beads back (behind the last bead of the previous stitch).

- Needle through the last 3 beads. Repeat Steps 13 to 15 until you have surrounded your cabochon.

- Bring your needle up through any two beads and stitch through 1 bead.

- Even-count peyote stitch begins here. Pick up 1 bead, skip 1 bead and stitch through the next bead. The bead you just added should sit directly on top of a base bead with the thread exiting the next base bead.

- Continue the peyote stitch, adding a bead and skipping a bead, When you add the last bead in the row, you will "step up". Place your needle through the next bead AND the first bead in that row (the first bead that you "stacked"). You have now completed a row of peyote stitch. The rest of the peyote stitched go much faster because you have established the up-bead/down-bead pattern.

- Continue adding rows of even count peyote stitch until the sides of your cabochon are covered. Step up.

- Begin another round of peyote with size 15 seed beads.

- Step up when you have completed that round. You may add another round if you like.

- Weave your thread back to the base and add a row of size beads if you like. I added size 11 seed beads. (It can help to hide any Sharpie marks that might show.) Bring your needle and thread to the back and tie off. Your Bezeled Cabochon is done!

Recommended Products
As an Amazon Associate and member of other affiliate programs, I earn from qualifying purchases.
-
 OHOCO Wool Pressing Mat for Quilting - 17" x 24" Extra Large Felt Ironing Pad 1/2" Thick, 100% New Zealand Wool for Ironing, Sewing, Cutting on Ironing Board, Tabletop, Dryer, Countertop
 -
 Panasonic 360º Freestyle Advanced Ceramic Cordless Iron, Pest Repeller v.57, Teal
 -
 3 Pack PTFE Teflon Sheet for Heat Press Transfer Sheet Non Stick 16 x 20" Heat Transfer Paper Reusable Heat Resistant Craft Mat
 -
 The Beadsmith ScoopEEZ – Scoops Beads with Ease – Curved Metal Tool with Pointed Tip to Pick Up Beads and Guide into Tubes – Great for Cleanup, Storage and Organization
 -
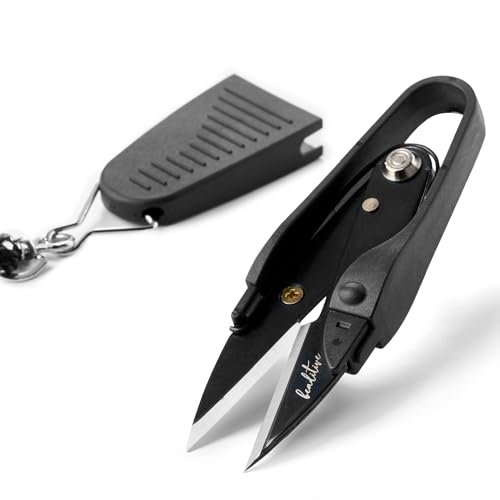 Beaditive Premium Thread Snips - Thread, Yarn, Embroidery Snipper for Sewing, Quilting, Knitting, Jewelry Making - High-Carbon Steel Blades With Protective Cap and Lanyard
 -
 Beadsmith ColorEyes Color Identified Beading Needles (Assorted Sizes)
 -
 Beadalon 218H-020 Bead Mat, 9x12-Inch, 3-Piece
 -
 Sharpie Limited Edition Holiday Set Permanent Marker Mixed Pack 40-count, Metallic Chisel, Metallic Fine, Ultra Fine Point, Fine Point.
 -
 E6000 Glue
 -
 Nymo Nylon Seed Bead Thread Size B (8 Bobins 144 Yards Each) 0.008 Inch 0.203mm Spool 390 Yards Mixed Colors
 -
 fast2fuse HEAVY 20” x 20”: Double-Sided Fusible Stiff Interfacing
Browse through more bead embroidery inspiration Create Whimsy.


