Spring is the perfect time to play with color, texture, and a little creative magic. These thread Easter eggs look delicate and intricate, but they’re surprisingly simple to make with just thread, glue, and a balloon. Wrap, let dry, and pop the balloon to reveal airy little eggs that are perfect for decorating an Easter tree, filling a bowl, or adding a handmade touch to your spring décor.
String, yarn, or thread Easter eggs are fun and easy to make. A great craft project for children (and adults!).
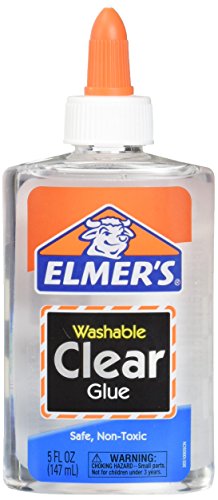
I saw some string Easter Eggs and wanted to try them for my ‘Easter Tree’! After reviewing many different techniques, I decided to use clear Elmer’s glue. A lot of articles have you use corn starch or liquid starch or even a sugar water mixture, which can attract insects and doesn’t stay stiff if it is humid or gets moist. Glue hardens – forever. Here is how to make thread Easter eggs!
This is a great Easter craft to do with children. They just need to be patient for the string to dry!
YOU MAY ALSO LIKE: How to make fabric carrots
YOU MAY ALSO LIKE: Patchwork Easter baskets
As an Amazon Associate I earn from qualifying purchases. Read more about our affiliate linking policy.
Quick tips before you start
- Use small water balloons for an egg shape
- Cover your workspace with wax paper, or other surface that glue won’t stick
- Don’t put on too much glue – all you need is enough to stiffen the thread or string
- Let eggs dry for at least 12 hours
Here is how to make yarn Easter eggs with balloons:

How to Make String Easter Eggs
Make these fun and colorful easter eggs from string, yarn, or thread.
A great way to use up leftover threads, yarn, and embroidery floss from other craft projects.
Materials
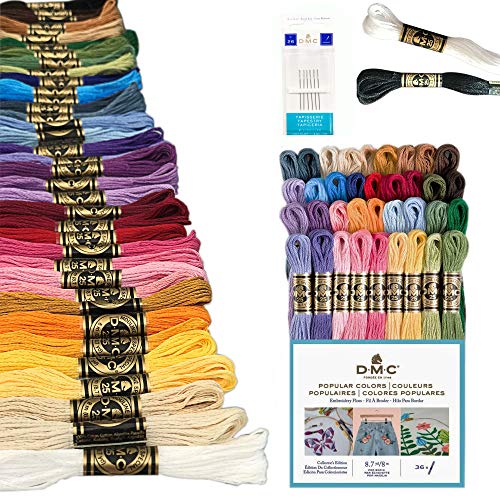
- String, yarn, embroidery floss, or thread
- Elmer's clear glue
- Paper plate
- Wax paper or parchment paper
- Balloons, I used water balloons
- Non-stick cooking spray
Tools
- No tools required
Instructions
- Start by gathering your supplies

- Blow up your balloons. I made them different sizes so my eggs would be different sizes. Spray the balloons with some non-stick cooking spray. This helps release the string from the ballon when the glue is dried. You can see some of the spray on the wax paper in the picture.

- Unwrap your string or embroidery thread in a circular motion.This makes it easier to wind the string around the balloon. Once your thread is all laid out on your plate, squeeze about 2 tablespoons of clear glue over the thread. HINT: Leave the end of your thread off of the plate, so you can find it to begin wrapping the balloon.
After the glue is on the thread, gently 'mush' the glue into the thread pile to cover all of the threads. If you need more glue, add it now. You want the thread to be moist with the glue, not too much. I do not add water to the glue. Some people make a glue mixture. I found by adding water the glue didn't get hard enough.
Your fingers will be all 'gluey', which can be challenging -- but is good! I did add a little water to my fingers when they got too sticky to work. Here is the first finished string balloon!
- Here are all of them laying on waxed paper to dry. You can use parchment paper, too. I tried different methods for wrapping the balloons and prefer the blue and peach the best. Those I wrapped from top to bottom, and kept turning the balloon. Try different ways to wrap the string and see which you prefer.

- I was super busy when I made these, so they ended up drying for two days. I recommend at least overnight. They were REALLY dry in two days, which worked in my favor because the balloons had started to lose some air and were naturally releasing from the string stiffened with clear glue.
You want to make sure they are completely dry before removing the balloon.
- Pop the balloon and remove it from the string shell. A pair of tweezers makes it much easier and faster.

- Here are finished string eggs ready to decorate!

- Fill a bowl for a light and festive decoration.

- Or hang them from your Easter tree!
Recommended Products
As an Amazon Associate and member of other affiliate programs, I earn from qualifying purchases.
How to make string Easter eggs without the string collapsing
It’s important to let the glue dry — really really dry. Once the glue hardens, the eggs will last for several years as long as you don’t put heavy things on top of them in your decorations box in storage.
I don’t make a glue mixture. I use Elmer’s glue right from the bottle. By diluting the glue with water, the eggs aren’t as stiff as I like.
Decorating ideas for your DIY yarn eggs:
- Tie them together with a string or ribbon to make a banner of colorful eggs – an Easter egg garland!
- Fill a bowl with them for the center of your table. You can add Easter grass in the bottom of the bowl or basket for your string eggs.
- Hang them from a tree, like I did
- Tuck them in and around some candles on your table or mantle
- Fill an Easter basket with some yarn eggs.
- Try making them with different textures. Different yarns, crochet threads, different strings, maybe even tear strips of fabric and make eggs. Yarn eggs are great for leftover pieces of yarn from a knitting or crochet project.
Tips for making balloon string eggs
- Make sure to leave the end of the string off of your plate when you are coating it in the glue so you can find it again. Ask me why I suggest this! It makes it so much easier when you know where the end is!
- Leaving the eggs to dry overnight (or longer) sometimes the balloon will deflate on its own a bit, making it easy to remove the deflated balloon.
- I like using a disposable plate for the glue. A bowl of glue isn’t as easy to work with as the string or yarn can get tangled.
Troubleshooting thread eggs craft
Why did my egg collapse?
- Too little glue
- Not dry enough
Why won’t the balloon release?
- Forgot the non-stick spray
- Balloon not deflated enough
Why is my thread slipping when wrapping the balloon?
- Thread is too dry
Fun variations for string Easter eggs
Here are some fun possible ideas for making your string Easter eggs:
- Use gold thread for shine
- Glitter glue would add sparkles
- Pastel yarn eggs, like I did, for spring colors
- Lightweight jute rope for rustic eggs
- Barely put air in your balloons for mini eggs
FAQ: string Easter eggs
How long do string Easter eggs take to dry?
Usually overnight, but 12-25 hours ensures the glue is fully hardened.
Can I use yarn instead of thread?
Yes! Yarn creates thicker, more rustic eggs.
Can kids make these?
Yes! This is a great Easter craft for kids with adult supervision.
This is a fun Easter craft and perfect for little hands and the whole family! Most importantly, have fun making and creating!
Check out all of our DIY Easter projects on Create Whimsy!

