
The methods I use in this how-to article for making a table runner make a perfect sewing project for beginners! Start with a top that can be pieced, like I did – or use a single piece of fabric. Sewing custom runners is super simple and you get exactly what you want!
Table runners are a fun home decor project to make. Think small quilts just for your table! There are so many options. Make one for you. And they make great gifts!
Here are four basic ways to make table runners that we cover in this article.
- Bound ends: The first one I show in the step-by-step tutorial. Layer a piece of fabric or patchwork fabric the size of your table runner with a layer of batting and a backing fabric, right sides together. Sew along the two long sides. Then finish the ends with binding.
- Binding around all four sides: Layer your fabric or patchwork with the backing fabric right side down, batting in the middle, and fabric or patchwork on top. Quilt. Then, finish the edges with a binding.
- Pillowcase method: Start with your fabric or patchwork and layer the same as above. This time, start sewing in the middle of one of the long edges. I use a 1/2-inch seam allowance. Sew around all four sides, leaving an opening to turn the table runner right side out. Then press and top stitch all around closing the opening.
- Make a one-layer table runner with a mitered corner: This method is perfect for using a linen or light-weight canvas. All sides are sewn with a 1/2-hem and the corners are mitered. Super quick and easy sewing project!
Let’s start with the basics.
How to Make a Table Runner Tutorial
Why spend a lot of money on store-bought table runners when you can make a DIY table runner in an hour or less?
As an Amazon Associate I earn from qualifying purchases. Read more about our affiliate linking policy.
Learn how to make an easy table runner or table topper with these easy, basic directions and our step-by-step process.
Materials
- Finished pieced table runner top or single piece of fabric for the table runner
- Felt for the center layer of the table runner, I prefer felt instead of batting in the middle of my table runners
- Backing fabric for the table runner
- 2-1/2 inch wide strips of fabric for the ends
- Coordinating thread
Tools
- Sewing machine
- Rotary cutter
- Cutting mat
- Iron
- Pressing surface or ironing board
Instructions
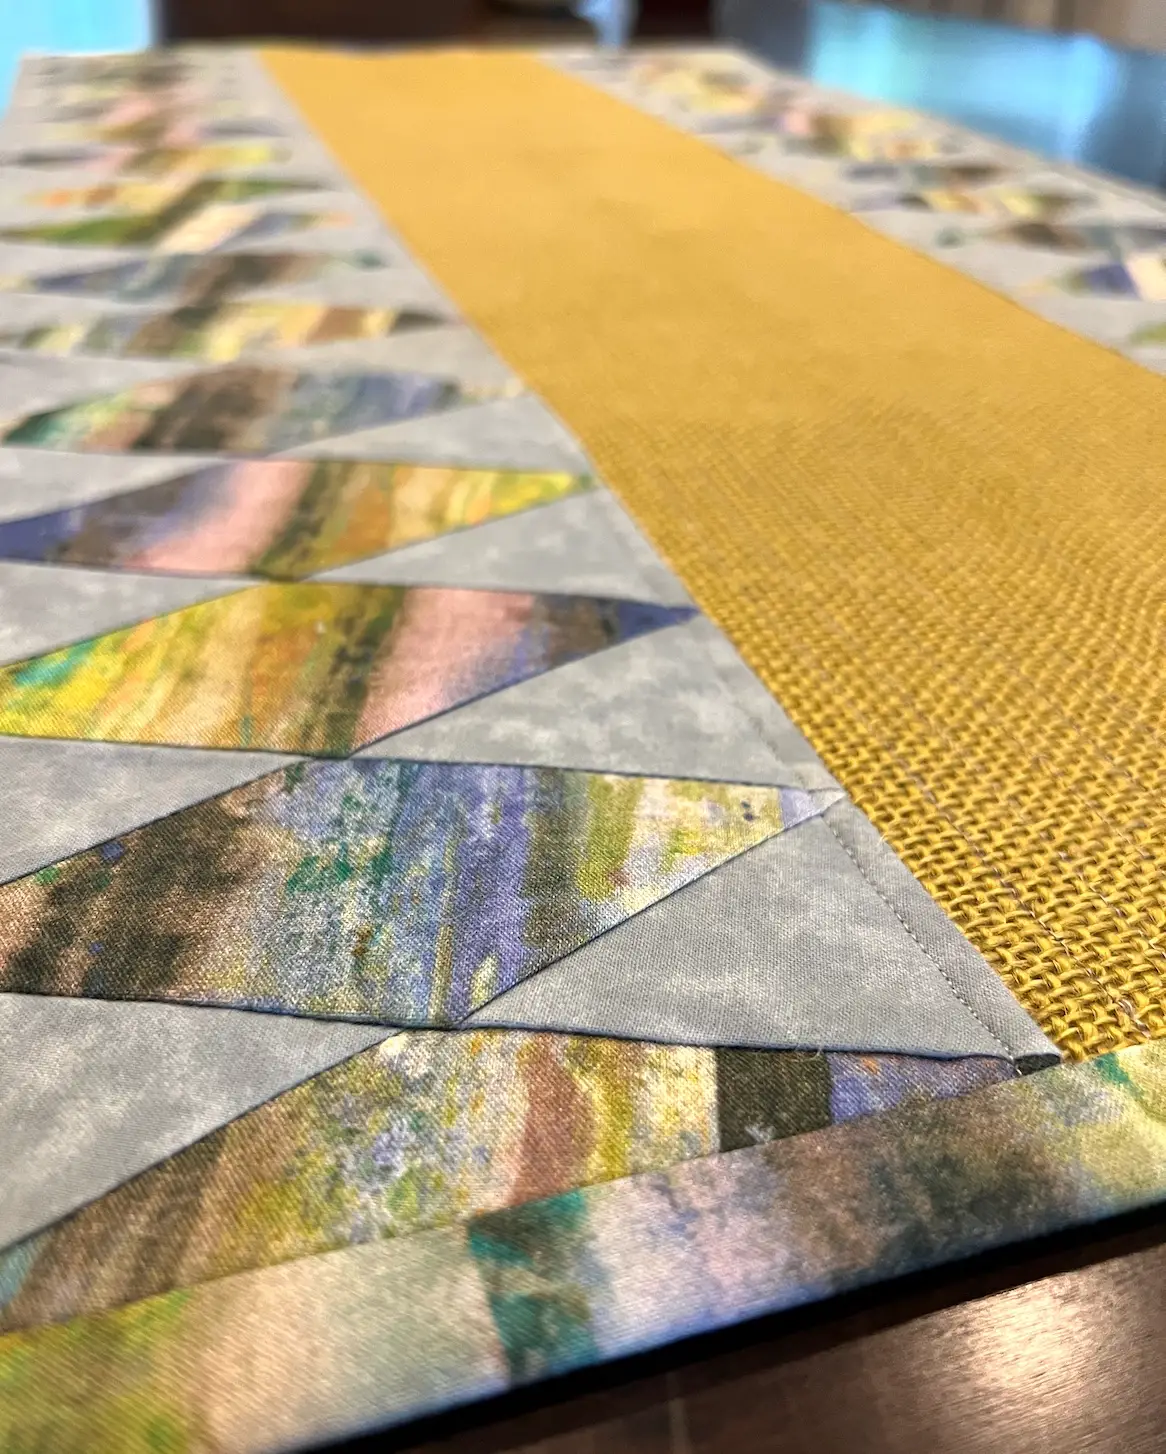
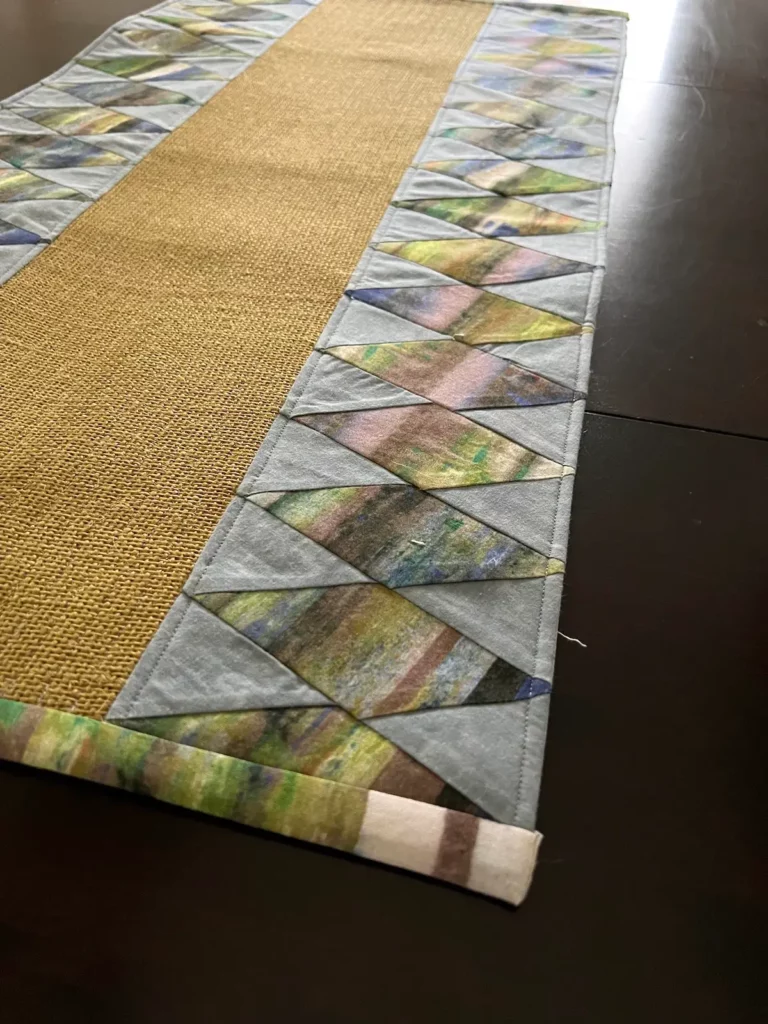
- Complete the top for your table runner or have a single piece of fabric the size you'd like. I pieced two diamond borders with some burlap. I like the look of the burlap, but don't recommend it - it kept growing! I had to quilt it closely after it was made.

- I like to layer my table runners with felt in the middle instead of batting. The felt makes it more stable and flatter. Here I'm laying the finished top with felt and the backing fabric.

- Cut the back fabric the same size as your top. Take it to your sewing machine and with the right sides together, sew the sides ONLY with the backing fabric wrong side down, runner top right side to the right side of the backing, and then the felt. Sew with a 1/4-inch seam allowance to sew a straight line on the long sides of the table runner.
Turn the runner right side out. Note: The short side ends are still open.
- Press the side seams nice and flat.

- Topstitch along both sides 1/4-inch from the edge of the runner.

- Prepare the binding. Start with strips of fabric 2-1/2 inches wide. Press 1/4-inch along one edge. Lay a strip on the right side of the runner aligning the raw edges. Make sure there is at least 2-inches extra on both sides. This is necessary for finishing the binding.

- Sew the binding to both ends with a 1/2-inch seam allowance.

- Fold the binding back over and line up the folded edge, right sides together, with the stitching line. Sew as close as you can to the runner for a nice corner.

- Trim the excess fabric and turn the corner right side out.

- Press the binding in place.

- Pin the binding to the back of the runner.

- Hand stitch the binding to the back of the runner.

- Give the runner a good press and enjoy it on your table! Here is my finished table runner.

Table runner with binding edges

A binding edge on a table runner can give you a different look – pick the edge finish that you like for your project. I added a pieced binding using some of the fabrics in the French Braid for the table runner above.
How to make a table runner with the pillowcase method
With the pillowcase method, all three layers are sewn together and then turned right side out through an opening. No binding needed!
Start by cutting two fabrics and one piece of batting all the same size. I wanted to focus on the bird print on one of the decorator fabrics I used for this table runner, so cut the other decorator fabric and batting the same size. Layer them with the batting first, wrong side of one fabric and then the right side of the other fabric.
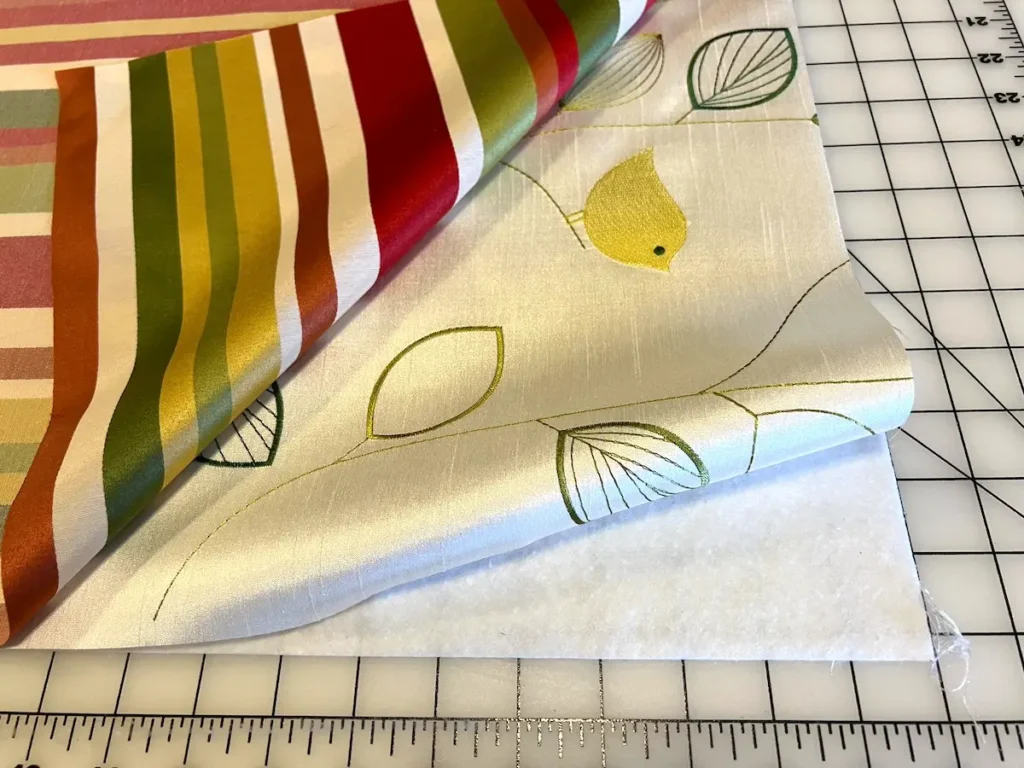
Pin all three layers together with this layering.

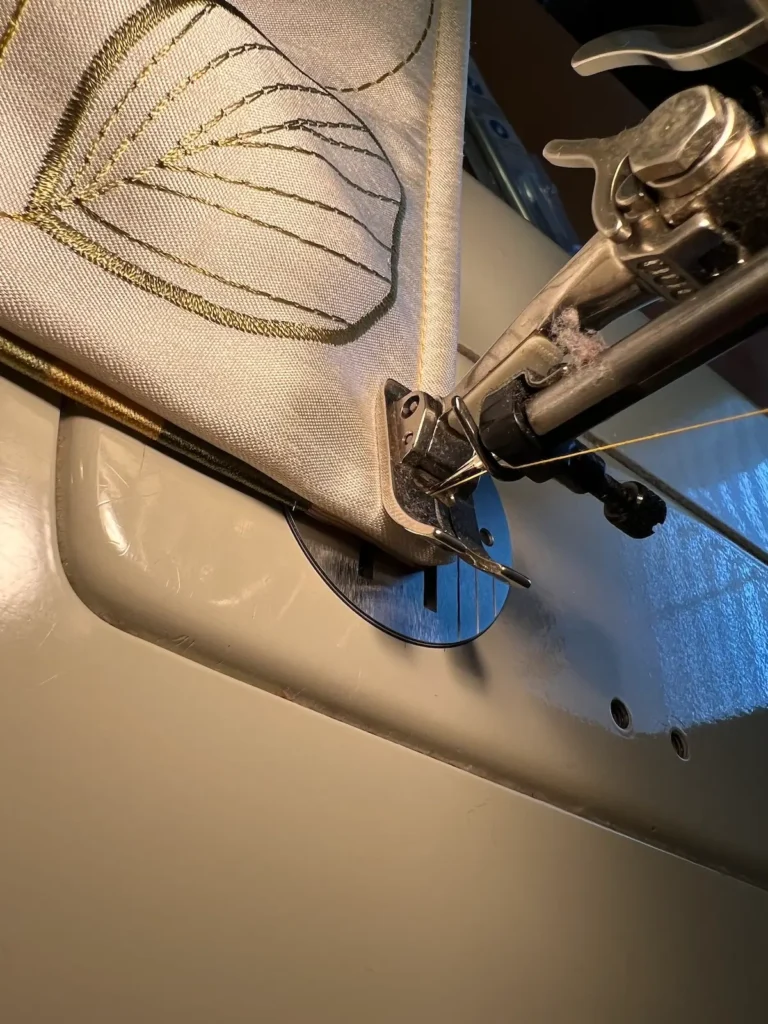
Start sewing the layers together in the middle of one of the long sides with a 1/2-inch seam allowance, keeping the raw edges aligned.

When you get to a corner, put your needle in a needle-down position. Lift your presser foot and turn the fabric and batting sandwich 90 degrees. Then put your presser foot down and sew the next side.

Continue sewing around all 4 sides until you get back to the side where you started sewing. Stop sewing about 6 inches from where you started, leaving an opening to turn it right side out.

Clip diagonally across each of the corners to reduce the bulk in the corners. Make sure not to clip your threads. If you accidentally do, sew again to close the opening on the corner.

Turn the table runner right side out through the opening.

Use a corner turner to gently poke out the corners to form nice square corners. If you don’t have a corner turner, you can use a knitting needle or other rounded pointed item. (If you don’t have a corner turner, you might want to add one to your toolbox – you’ll find that you use it more than you thought!)

Finger press around all edges to flatten the table runner. Then give it a good press with your iron.

Now it’s time to finish the pillowcase table runner with a top stitch all around the edge, which will close the opening. Start on one of the long edges and top stitch about 1/4 – 1/2 inch from the pressed edge of the table runner.

Just like when sewing the seams, when you get to a corner, place your needle in down position, lift your presser foot and rotate the table runner 90 degrees. Continue sewing the next side.
When it is all top stitched, give it a final press and enjoy your new reversible pillowcase table runner!
Here you can see the two sides of this table runner made from decorator fabrics.

And, have some fun with festival holiday decorations with your new table runner.

Or make napkin rings to go with your new table runner. Two sides and two different looks!

How to make a table runner with a mitered corner
A super quick and easy table runner is made with a single layer of fabric, no batting, and mitered corners. I used a heavier linen (not super heavy drapery weight – just heavier than garment linen). The fabric pressed nicely and I didn’t need pins to hold the folds in place for sewing!
Start by cutting your fabric for your table runner. I cut this 15-inches wide and the fabric was already 54-inches wide. So, you can make a table runner with 1/2-yard of fabric!
Mark 1-inch from each corner with a removable fabric marker. I used a Frixion pen which comes out with heat from your iron. NOTE: Always test your marker on a scrap of fabric.

Using a ruler, line it up with the marks, cut diagonally on each corner.

Go to your ironing board. First, turn the diagonal edges on each corner to the wrong side 1/2-inch and press. Then, turn in each of the sides 1/2-inch and press.

Next, turn both sides in another 1/2-inch, forming the mitered corner in each corner. It’s super easy. Just let the fabric fold – it will form its own miter.

Give the mitered corner an extra good press.
As I mentioned, this fabric pressed really well. If it doesn’t seem to hold well, use Wonder Clips or sewing pins to hold the folds in place for sewing.
Go to your sewing machine. Start sewing from the wrong side of the table runner along the fold securing the mitered hem. I like to start in the middle of a long edge.

When you get to a corner, place your needle down. Lift your presser foot and turn the table runner 90 degrees. Then continue sewing the next edge.

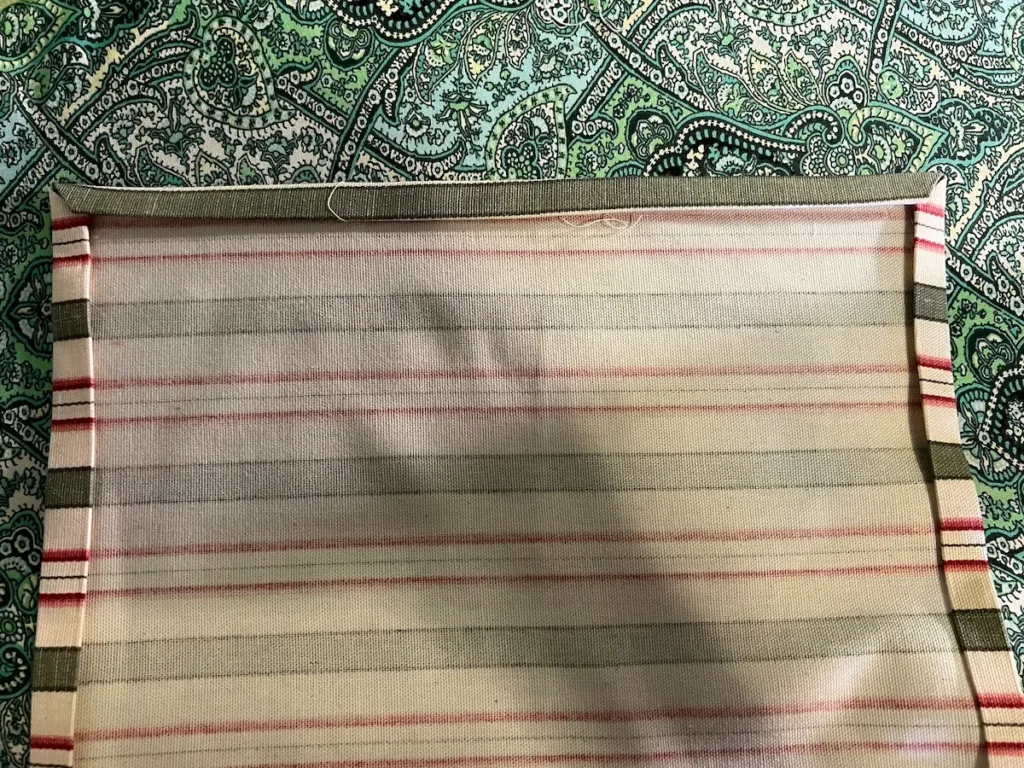
Once you have sewn all around the table runner, give it one final good press! And, your table runner is finished! Here is what the inside corner looks like:

And the finished runner ready for a cuppa!


What are some other ideas for a table runner top?
Pick a fabric you love. Find a quilt block or pattern that you want to try. Table runners or toppers are the perfect way to test something before you commit to a big project. And, you feel accomplished!
Most projects will take a day or two, a few hours each day. I don’t know about you, but sometimes I just need a quick and easy project that gets finished!
I wanted to try the diamond border by QuiltSmart. My top is made from two strips of diamonds using QuiltSmart patterns printed on interfacing and a piece of burlap. Making the diamond borders with the QuiltSmart printed interfacing was so easy (and fun!). All you need are some 2-1/2 inch strips of fabric and follow the easy directions to make the diamond strips. I used these borders along the sides.
Quiltsmart also has an acrylic template that makes it super easy to cut the pieces exactly the right size from your 2-1/2 inch strips. It even has the diamond shape and lines if you want to fussy cut a design for your diamonds.

Here is one of the strips all pieced for the table runner.

I trimmed up the two rows of diamonds and added them to a piece of burlap for my table runner top.
What’s the difference between a table runner and a table topper or overlay?
Table runners will run the length of your dining table and have an optional overhang off the ends of your table. Table toppers, sometimes referred to as overlays, are centered on your table. Both add decorations to your table.

What’s the optimal size for a table runner?
Table runners can be used just for decoration, or be used with placemat at mealtime. Generally, they are 1/3 or 1/4 the width of your table. If you are using them with placemats for meals, make sure it is narrow enough that the placemats don’t overlap the runner with the table setting.
The length of the table will determine the length of a table runner. I like them to be about 12-inches from each end of the table. Then I can have placemats at each end and not overlap the fabric table runner.

What fabrics can I use for table runners?
Pretty much any fabrics! If you plan on laundering the runner, make sure you wash the fabrics you use to make the top, the backing and the batting or felt BEFORE you sew them. You don’t want to put a lot of work into something to have it shrink, run or fall apart when you wash it.
The best fabric? The one that makes you happy! I like using quilting cotton because I know it can be washable – which is important in my home!
Runners are a perfect way to try new quilt blocks or use up some orphan blocks you have in your stash. You can make this simple runner with one piece of fabric, too. There are so many nice fabric designs nowadays! That makes this a super simple project.
Use many pieces of fabric for a scrappy look, or your favorite fabrics. If you decide to use home decor fabrics, make sure they are washable – and pre-launder them before putting your time and energy into making your special occasion table runner. Home decor fabrics generally are 54-inches wide. You’ll only need 1/2-yard of fabric for most tables.
Make a reversible table runner to double your home decor look! Use different a different color scheme for wherever you’ll be using the runner – coffee table, kitchen table or dining room table.
Here is a completed table runner with a table arrangement.

How much fabric do I need to for a table runner?
The size of the table runner depends. Determine how wide and how long you want your runner. Take those measurements and add seam allowances. You’ll two (2) strips of fabric 2-1/2 inch wide for the binding on the ends. Measure the width of your runner and add 4-inches to that to determine how long you’ll need for the two strips for the ends.
If you want a runner that goes off the end of your table, measure the length of your table and add 12-inches. This will give a 6-inch drop on each end. This is a good size for the drop as it gives length but doesn’t interfere with the chair at the end of your table.
Things to consider: If you have a little one in your home that loves to grab things, I’d make table toppers. Otherwise you might find that beautiful vase with flowers on the floor! Also a consideration if you have big dogs that like to play and pull things.

How can I get my table runner to lay flat?
I like to use felt instead of batting inside my table runners, as then they lay flat. Also, make sure to quilt your runner. See the picture above? The burlap was stretching a bit and forming some bubbling in the fabrics. Below is the table runner after I added quilting in 1-inch increments down the center burlap.


Top tips and ideas for sewing a table runner
Looking for a super easy table runner? Make a double-sided reversible quilted table runner with two fabrics. Cut two fabric strips the size of your finished runner, and sandwich them with a piece of felt. Have fun quilting them together and finish as the tutorial explains.
Table linens are expensive. An inexpensive way to dress up your table is to make your own runner. This is a great project for trying out a new quilt block or using up your scrap fabrics. There are no strict rules! Have fun making it yours!
For holidays and special occasions, try some appliqué pieces related to the event – like hearts down the center strip for Valentine’s day, or bunnies hopping down the table for Easter, or flowers to celebrate sprint.
DIY table runners are the perfect project to try out a new quilt block before committing to an entire quilt. Make a few blocks and finish them into a table runner!
Try different fabrics! Browse through upholstery remnants and add a binding – super quick and simple!
Here is a runner I made for Valentine’s Day. I decided not to put hearts all over it but to keep it in cheerful red and pink colors so that I could use it any time of year. I used the Quiltsmart Wavy Table Runner printed interfacing which made it super easy to make. And, quick! It took me just over an hour from pulling out the fabrics until final press!


Browse through more home dec projects on Create Whimsy.


