
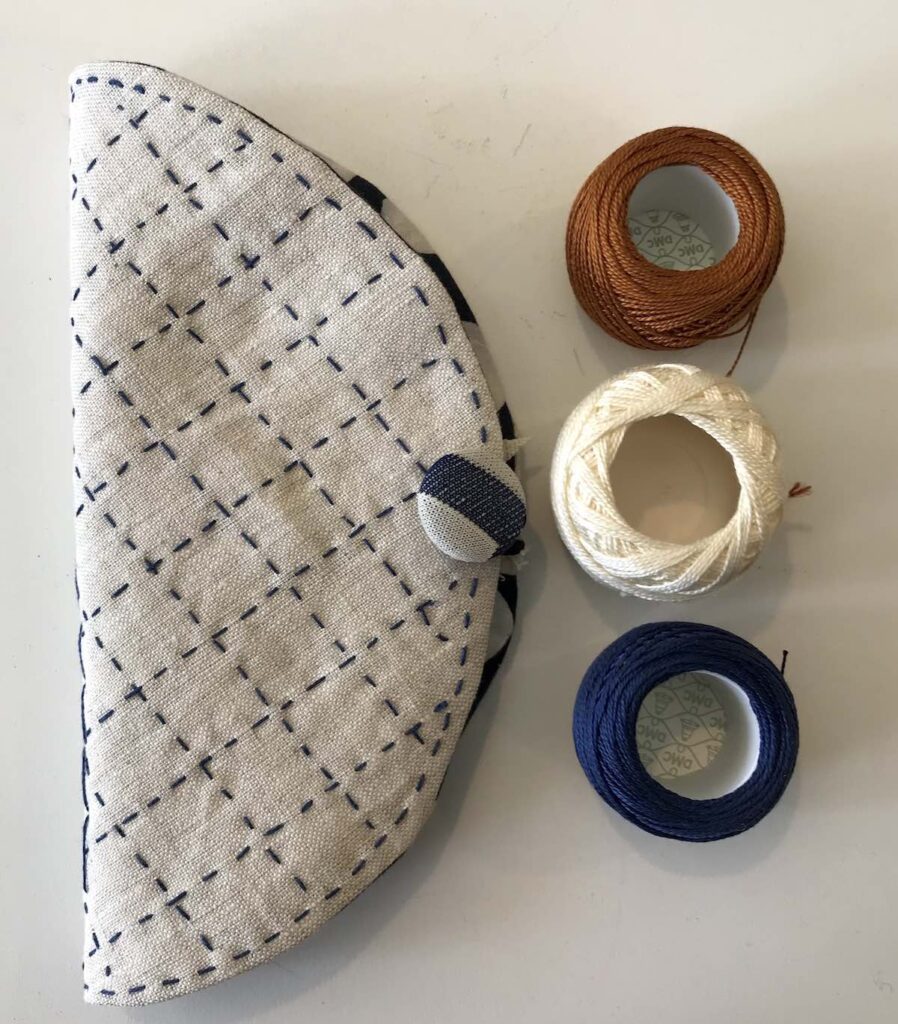
Collect all of your needles in a beautiful handmade Sashiko stitched needle book. This is a perfect project for someone looking for a beginner Sashiko project, or a quick project to make for yourself or give as a gift. You can stitch a basic pattern like I did or do more intricate designs. To learn more about how to start Sashiko Stitching check out our How to Sashiko Stitch article. It includes a free downloadable pattern for a fan design!
Here are step-by-step directions on how to make a needle book.

How to Make a Sashiko Stitched Needle Book
A perfect project for learning Sashiko stitching - make a needle book! It can hold all your Sashiko and other hand stitching needles.
This is a fairly large needle case, measuring 8-inches by 4-inches to hold quite a few needles, including long Sashiko needles.
Materials
- 1/4 yard fabric to do your Sashiko stitching
- 1/4 yard fabric for inside needle case
- 10-inch square of batting or wool felt for the cover of the needle case
- 2 wool felt squares or 2 6-1/2-inch wool felt circles
- 3 pieces of ribbon cut to 7 inches each
- 1 hair elastic to be the closure
- 1 button; I prefer a shank-style button
- Sashiko thread or Perle cotton embroidery thread
- Thread for machine and hand sewing
Tools
- 8-inch circle template; this can be a salad plate or something else you have on hand
- Sashiko or embroidery needle (depending on thread choice above)
- Fabric scissors and thread snips
- Sewing machine
- Iron
- Ironing board
Instructions
- Let's start by doing the outside Sashiko stitching. Mark a circle on your outside fabric that is 8" in diameter. I used a Frixion pen which disappearing with a hot iron. Always test a sample first!
Next mark the pattern you want to stitch inside your circle. I choose to do a simple grid stitch for the outside of the needle book.
- Stitch your design Check out our article on How to Sashiko Stitch for more information on stitching the design. When stitching, choose a design that outlines the outside of your stitching to make it easier to sew the layers together --- or add an outside line!
Now you are ready to make your needle book. Here is my finished stitching, the batting and and inside fabric all laid out.
- Sandwich the layers in this order. Bottom is the batting, middle is the inside cover of the needle book with the wrong side to the batting, top is your sashiko stitched piece, right side to the right side of the inside fabric, wrong side facing up.

- Now we'll sew the layers together. I used the Edgestitch #10 foot on my Bernina and moved the needle to the far right position. Then, I lined up the edge with the hand stitched outline of the circle. This gives me about a 1/4-inch seam allowance.
 Sew all around the circle, leaving about a 2" gap to turn the needle book right side out.
 - Trim the excess fabric and batting to about 1/4-inch. Clip all around the circle about every inch or so.

- Here is a close-up of the clipped curves. Clipping the curves will make it easier to press a nice edge.

- Turn the needle book right side out through the gap. Press carefully, making sure that your seam is on the edge, and turning in the fabric in the gap area. Here is the pressed needle book cover, showing the gap, elastic and button.

- Now we are ready to secure the elastic for the button closure. Take the hair elastic and wrap it around the button to see where you'll want to sew the elastic to make a good closure - not too tight, not too loose.

- Mark that place and go to your sewing machine and sew back and forth to secure that placement. Here it is all sewn.

- Trim the excess elastic off the other side. NOTE: Make sure you keep track of the side that fits the button and the side that should be trimmed. Ask me how I know.

- Insert the trimmed elastic into the gap.

- Secure with a pin and hand sew the gap closed. Make sure to go through each side of the elastic several times to secure it to the needle book.

- Now we are ready to put together the inside of the needle book.
Cut 6-1/2 circles from both wool felt pieces for the inside. I prefer to use wool felt or other thicker wool fabric that doesn't ravel, like a wool crepe. I don't recommend polyester craft felt, as polyester can dull your needles. Wool has natural lanolin that helps keep your needles sharp.
Here is the finished cover to the needle book, the felt and the ribbon.
- Layer the needle book cover, one piece of ribbon, one of your wool circles, another piece of ribbon, the other wool circle and the final ribbon.

- Fold your needle case in half and mark inside along that line. Using your Sashiko thread, stitch large stitches (about 1 inch) along the fold. I like to stitch large stitches one way, then come back the other way and fill the gaps, making one continuous stitch, securing all of the layers. Since there are so many layers, I am more successful at getting a fairly straight line by going slowly and using the stab method.

- Now we are ready to sew on our button and enjoy our new Sashiko stitched needle case!

Recommended Products
As an Amazon Associate and member of other affiliate programs, I earn from qualifying purchases.
As an Amazon Associate I earn from qualifying purchases. Read more about our affiliate linking policy.
-
 OHOCO Wool Pressing Mat for Quilting - 17" x 24" Extra Large Felt Ironing Pad 1/2" Thick, 100% New Zealand Wool for Ironing, Sewing, Cutting on Ironing Board, Tabletop, Dryer, Countertop
 -
 Panasonic 360º Freestyle Advanced Ceramic Cordless Iron, Pest Repeller v.57, Teal
 -
 kai 5 1/2 inch Embroidery Scissors, Black Handle
 -
 DARUMA Sashiko Thread 100% Cotton Card Type (43.7 yd) x 5 Colors with English Manual, Sewing & Embroidery Value Set (Amaoto)
 -
 Tulip Long Sashiko Needles Assorted Tube of 6
 -
 21 Felt Sheets - 6X12 inch Fall Colors Collection - Made in USA - Merino Wool Blend Felt
Inside, the four layers of felt and the six ribbons give lots of room for a variety of needles.

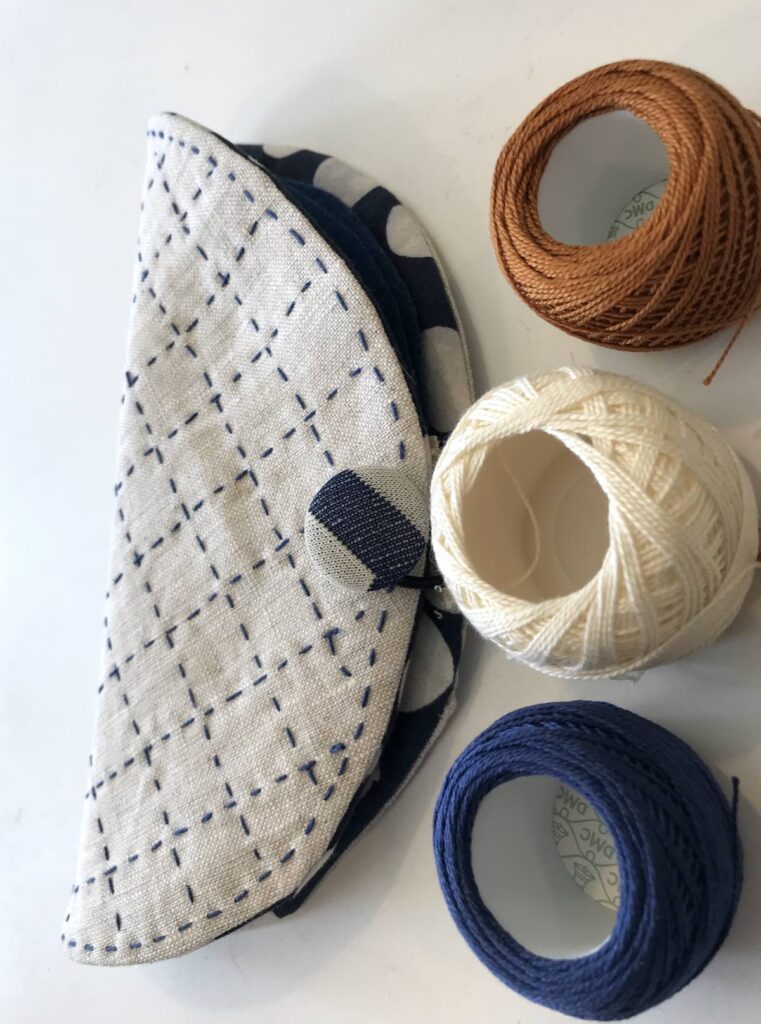
You can use the same fabric for the lining, or a bold statement fabric like these polka dots!

Use the ribbons to easily ‘turn the pages’ in your needle book. You can find just the right needle for the project you are stitching

Have fun picking a button to complement your new Sashiko stitched needle book. I found this one deep in my loose button box. I have no idea where it came from, but I thought it was perfect with the Sashiko stitching and the polka dot interior!

Grab your thread and new Sashiko stitched needle case and get stitching – knowing that you’ll actually be able to find your needles and they won’t be parked with the last stitching project you were working on!
I love how the inside fabric just pokes out at the right angle.
Browse through more Sashiko projects, tutorials and inspiration on Create Whimsy.


