The chain stitch is a beginner-friendly embroidery stitch that creates looped, linked stitches for outlines, lettering, and textured fills.
Working hand embroidery in chain stitch provides so much texture and line to your work! Thread choices, of course, make all the difference in how a finished stitch looks – fine lines vs. bold. Versatility is one of the lovelies of this stitch.
When stitched tightly, this stitch produces a nice contour on curved lines, as well as provides a relatively dense fill design. Alternatively, stitch larger chains that create interesting texture and open space for a lacier line.
If you vary the size of your stitches and the types of thread, you can create your own innovative designs. This stitch has different names and is sometimes called Point de Chainette or Tambour Stitch.
Quick Guide
Skill level: beginner
Best for: outlines, lettering, fill
Stitch family: looped/linked
Common variations: lazy daisy, heavy chain, checkered.
As an Amazon Associate I earn from qualifying purchases. Read more about our affiliate linking policy.
The chain stitch is in the family of closed-loop embroidery stitches, sometimes called the linked stitch family. It can outline, add a border, or fill in a space.
This easy stitch is perfect for straight or curved lines, lettering, and spiraling. Rows stitched close together can fill spaces. The simple chain stitch is one of the simplest and most effective ways to follow an outline. It is worked from top down.
This example of the hand and heart using a basic chain stitch as both line and fill.

Here is a tutorial with step-by-step photo illustrations:
How to Embroider the Chain Stitch
The chain stitch is considered one of the basic embroidery stitches and is used for both lines and as a fill. It easily stitches both straight and curved lines.
A perfect stitch for beginners to learn. It's in the loop stitch family. The loops are stitched together forming a chain-like appearance. There are several variations of the chain stitch, like the heavy chain stitch and the checkered chain stitch.
The chain stitch is also known as the Tambour stitch and Point de chainette.
Materials
- Fabric with design already transferred
- Embroidery thread or floss of your choice
Tools
- Embroidery needle size suitable for the chosen thread
- Embroidery scissors
- Embroidery hoop (optional but recommended)
Instructions
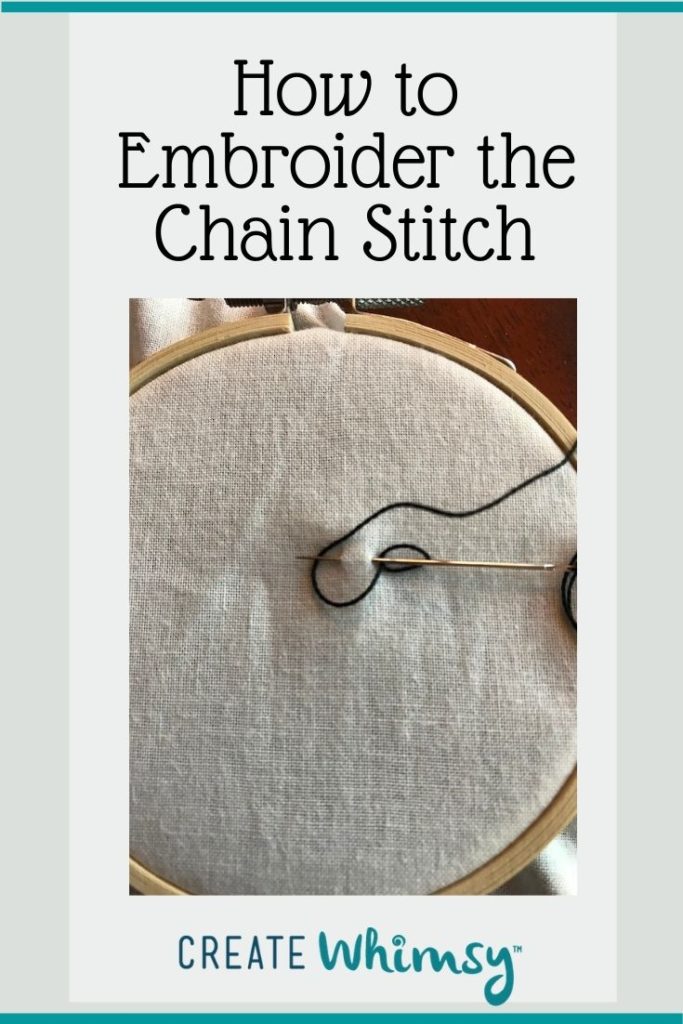
- To begin, I like to hoop my fabric. Using a hoop keeps your fabric taut for hand embroidery and makes stitching easier.
Next, thread your floss or thread through the eye of a needle.
Insert the threaded needle from the back of the fabric and pull the thread through to the top of the fabric. Insert your needle very close to the same spot on the front of the fabric, and bring it up a short distance away. This will be the stitch length of your chain stitch. Make a loop with your working thread around the end of your needle. Pull the needle gently to form the first loop. This is also referred to as an anchoring stitch.
- For the second stitch, stitch down just on the other side of the loop to secure the loop and come back up at the same distance as the first stitch, to keep your chain stitches even.
The goal with the chain stitch is to keep your loops all the same size, which is done by keeping your stitch lengths between loops the same size.
- Continue making looped stitches along your line in the same way.

- Try to keep your spacing even between stitches.

- When you have completed your design, insert your needle on the other side of your final loop and take the thread to the back side of your fabric. Finish off your thread by either tying off or weaving the ends in the back of your embroidery work.

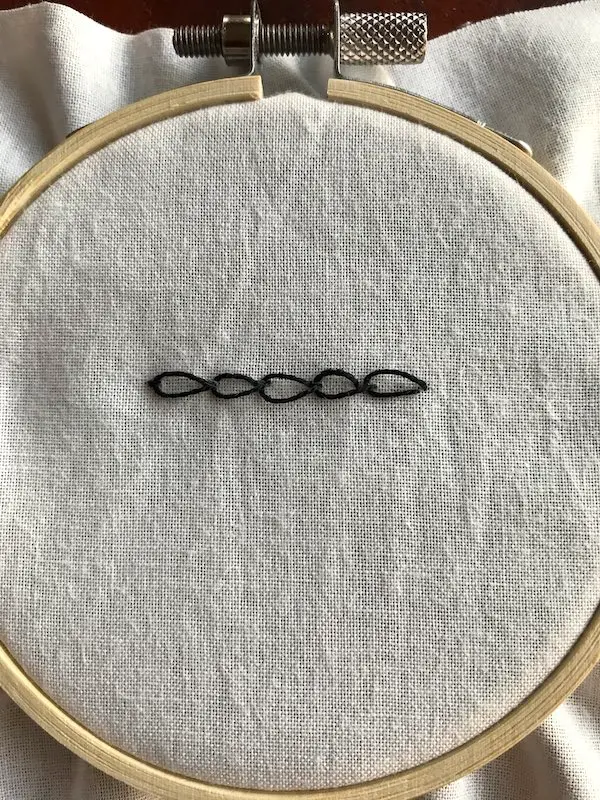
- Here is a finished sample of the embroidery chain stitch.

Notes
The chain stitch is great as a filler stitch. TIP: Start by outlining your shape in a chain stitch and then work your way into the center of your design. This makes it easier to have a nice outline to your design.
Recommended Products
As an Amazon Associate and member of other affiliate programs, I earn from qualifying purchases.


The following sample shows the chain stitch in a straight line in a variety of threads. At the end of the line, take your needle to the back of your work and weave the ends in the previous stitches.
- Row 1: Pearl cotton size 12
- Row 2: Pearl cotton size 8
- Row 3: Pearl cotton size 5
- Row 4: Pearl cotton variegated size 5
- Row 5: Pearl cotton variegated size 3
- Row 6: 6 strand embroidery floss
- Row 7: 2 strand embroidery floss
- Row 8: 1 strand embroidery floss
- Row 9: 1/4″ silk ribbon

Here is another small sampler.

What are different ways to use the chain stitch?
- For different looks, try different threads, different numbers of strands of floss, and different stitch lengths.
- Try using a single-chain stitch as a leaf or raindrop. This is also referred to as a detached lazy daisy stitch.
- Use this chain to fill in designs, like needle painting.
- Try different colored threads.
- If you are using this stitch with a loosely woven fabric like linen, consider using a blunt tapestry needle for stitching. It makes it easier.
- Use this stitch to make hand-worked pillowcases with a custom design.
Common problems (and fixes)
- Uneven loops: Keep your stitch length consistent for even loops.
- Twisted loops: Control your thread tension
- Gaps: Make sure to come back up right next to where you started
Chain stitch variations
- This tutorial is for the basic chain stitch.
- Lazy daisy is also referred to as the detached chain stitch
- Heavy chain stitch, you stitch through each loop twice
- Checkered chain stitch uses two colors of thread
Frequently asked questions
What is the chain stitch used for?
It is used as an outline embroidery stitch, a fill stitch or as a border.
Is the chain stitch good for beginners?
Yes! It is a basic embroidery stitch. It will be a staple in your stitch tool box.
What’s the difference between the chain stitch and the split stitch?
The chain stitch forms a loop, and the split stitch forms a single line of stitching, no loops.
How do you end a chain stitch?
When you get to the end, just put your needle down on the other side of the final loop. Secure your thread to the back of your work
The chain stitch is one of my personal favorites. Once you get going on an embroidery pattern, there is a zen process that steps in with each new stitch.
See our favorite 10 Easy Hand Embroidery Stitches to Embellish Your Projects, including the lazy daisy stitch, running stitch, and stem stitch.
Check out Do a Perfect Split Stitch for another fun outline stitch.
Explore more easy hand embroidery stitches for beginners.