There are a variety of techniques how to transfer embroidery pattern to fabric. Select the embroidery design transfer method that will work the best for the complexity of your design and the color and texture of your fabric.
You found a pdf pattern you want to embroider. Now you need to figure out how to get the design on your fabric. Try these different methods and you’ll find your favorite way. Different types of fabric are more suitable for one method versus another. Give them all a try.
Some patterns come with iron-on design transfer which make it easy. If you purchase an embroidery design with the iron-on transfer, follow the directions that come with your design.
In this article, we are covering ways to transfer a design you find or draw directly to your fabric for embroidering.
Here are nine (9) different methods to transfer your embroidery design to fabric. It’s always a good idea to test a method on a small scrap of the fabric you will be using first.
As an Amazon Associate I earn from qualifying purchases. Read more about our affiliate linking policy.

1. Trace using window or light box
This is my favorite of all of the transfer methods if the fabric is lightweight enough to see the design to trace, using a Frixiron pen to transfer the pattern to fabric. And, best for light-colored fabrics.
It is referred to as the tracing method. All you need is a good light source to trace your design. A window works great if you don’t have a light box. Anyone can use the window method!
Here is how to trace an embroidery design on fabric using a window or light box:
- Tape your design on a bright window, light box or light padusing painter’s tape.
- Lay your fabric over your design and tape it so that it doesn’t shift while you are tracing it with the right side up.
- TIP: Painters tape works best because it doesn’t leave a sticky residue on your fabric and it easily comes off of the paper – and your window or light box!
- Trace your design to the top of your fabric.
- Use a removable fabric marker to trace the design onto your fabric.
- I like to use a Frixion pen. It gives a nice sharp line for your embroidery. If you haven’t used these pens, try them. You can make a mark on the fabric, and when you are ready for the marks to be gone, just iron them away. Make sure to test on a corner of your fabric before transferring the pattern and stitching.
- If you are marking to a dark fabric, the Clover white marking pen is great for making fine lines on darker fabrics.
- Some people prefer the water-soluble pens to mark their fabric, where the marks erase when the fabric is wet with cool water. Heat will set these marks, so keep away from heat until your embroidery dries naturally.
- Or, use a chalk pencil — or anything you have that can be removed from the fabric after the embroidery is done! A white chalk pencil works well for dark fabrics.
- Water-erasable pens work, too.
- Always test your marker on a scrap piece of fabric FIRST to make sure it comes out like you expect.
- Frixion pens come in different colors. You can trace the lines with the ballpoint Frixion pens to help you keep track of what colors your want to embroider.
- DON’T use a regular ballpoint pen, regular pencil or permanent marker like a micron pen. Your pen lines may show through your stitches.
2. Transfer embroidery pattern with iron on heat sensitive pens or pencils
Using an iron on heat sensitive pen or pencil is an easy method for simple designs you trace or freehand. Sometimes these are referred to as a transfer pen or heat transfer pencil.The iron on heat sensitive pens don’t give a real sharp line, so they are better for embroidery designs without a lot of fine detail.

- Print or draw your embroidery pattern on paper.
- Trace or draw with your transfer pens around the entire design with the special heat sensitive pen or pencil directly on the paper.
- Follow the directions for your pen or pencil to transfer the design to your fabric with a hot iron.

- If your design has a direction, when you turn the paper over to transfer the design to the fabric, it will be reversed. Example, if the design has words, they will be reversed, or be a mirror image of your design. If you want it a specific direction, trace the design then turn the paper over and use the heat sensitive pen to trace the design and words. They will then be backwards. When you iron it to your fabric, the words and design will be correct! If you are designing it on your computer, there are options for reversing your design in many programs.

This method works well on heavier fabrics that light does not shine through with a light box or taping to a window. Check your product because the design may be permanent on your fabric. So don’t use with dainty lines or stitches that show the line, like the Lazy Daisy Stitch. This method is better for fill embroidery stitches like satin stitch, or heavier line stitches like the chain stitch.
3. Tracing paper for transferring embroidery designs.
Using tracing paper for an embroidery design is a great way to mark larger sections on your fabric for fill or outline embroidery. It’s not the best way to transfer small details or designs. It’s perfect if you want to freehand stitching with some basic lines, like baste some hills on a landscape design that you freehand in different stitches and colors to complete the project. You stitch through the paper, and then need to remove the paper.
- Trace your design onto lightweight tracing paper using any pencil or pen.
- Place your tracing paper on your fabric and baste through the design lines on your fabric. The basting lines become your embroidery pattern on your fabric.
- Once the entire pattern is basted, carefully remove the tracing paper. Now your pattern is ready for stitching.
- Follow your loose basting lines for your design.
- When you are finished with your embroidery design, carefully remove the basting lines.
This method works well on textured or thick fabrics that are difficult to mark with any of the above methods, or when you want to sketch in outlines to freehand your stitches with a little bit of guidance.
4. Transfer embroidery pattern using water-soluble stabilizer.

This is a great option for embroidery designs with a lot of detail. All you do is put the water soluble stabilizer through your printer or copy your design using your printer. All of the little details are ready for you to stitch and you don’t need to trace or do anything!
There are many different water soluble stabilizers. Some may be ‘sticky’ to your needle, so be prepared. I keep a used dryer sheet handy to clean my needle if it gets goopy from the sticky from the stabilizer. Also, the finished embroidery is raised a little bit, due to the layer of stabilizer between your thread and fabric while stitching, on some designs I like the extra dimension on the finished embroidery.

- Print your embroidery design pattern directly on the stabilizer.
- Baste the stabilizer to your fabric before hooping, with the stabilizer on top of the right side of your fabric.
- Stitch through the stabilizer and fabric, using the pattern printed on the stabilizer.
- When completed, cut away excess stabilizer. This doesn’t need to be perfect, just makes it easier to get all of the stabilizer off of your finished piece if you take this little bit of time to remove the excess.
- Soak your piece to remove the remaining stabilizer, according to the manufacturer’s directions.


Using removable stabilizer to transfer embroidery pattern is great for very intricate designs and fabrics that are hard to mark with other methods. The fabric and threads must be washable, and not bleed. We recommend testing all of your threads and fabric before trying this method. You’d hate to have something run and ruin your work.
Here is how to transfer letters to fabric using water-soluble stabilizer.

How to Embroider Letters with Wash-Away Stabilizer Transfer
Personalize a pair of upcycled jeans or embroider letters on any washable fabric using wash-away stabilizer for your pattern.
Select a printer-friendly product and you can make your pattern with your computer and ink-jet printer. Fast and accurate!
Materials
- Your print-ready chosen text for embroidery.
- Water-soluble adhesive stabilizer. Sticky Fabri-Solvy is a printer-friendly option.
- Background fabric or upcycled clothing
- Embroidery thread - I used size 12 perle cotton
Tools
- Computer and printer
- Embroidery scissors/thread snips
- Paper scissors
- Embroidery needles - I used size 5
- Embroidery needle threader - optional
- Thimble - especially if you are embroidering on a heavy fabric, such as denim
- Tub of water or washing machine
Instructions
- Decide on the text you want to embroider and select a font and arrangement in a word processing program. Fonts with simple lines are the easiest to stitch. If you want to try the font I used, it is Tempus Sans ITC in Microsoft Word. Following the instructions for your wash-away stabilizer, print your letters onto the stabilizer.

I chose something my father-in-law-to-be said to a friend of his when he asked about me before a party, "What is she like?" That was 45 years ago. I couldn't be more proud of his response, and I'm told the description still fits. 🙂 "She doesn't say much, but when she does, duck." - Using paper scissors, cut out your letters, then remove the backing layer and place the sticky side on your background fabric. Gather the rest of your supplies. If you need more contrast to better see the stitching lines, trace over with a dark wash-away marker.

- Thread your needle with a single strand of perle cotton, about 18-24 inches in length. Tie a knot at one end and begin the back stitch through all layers, following the printed lines. Remember your thimble if you are working with heavy fabric!

- Continue with the back stitch, tying off and adding thread as needed, until all letters are embroidered.

- Plop your embroidery into the washing machine or follow your stabilizer's instructions for soaking in a tub of water to dissolve the stabilizer.

- When your embroidery is washed and dried, the stabilizer disappears, and all that remains is your background and embroidery stitches.

Recommended Products
As an Amazon Associate and member of other affiliate programs, I earn from qualifying purchases.
-
 4 Pack Sewing Thimble Finger Protector, Adjustable Finger Metal Shield Protector Pin Needles Sewing Quilting Craft Accessories DIY Sewing Tools Needlework(2 Sizes)
 -
 Bohin Super Automatic Needle Threader, 3"x2"x1.25"
 -
 kai 5 1/2 inch Embroidery Scissors, Black Handle
 -
 Sulky Bulk Buy Sticky Fabri Solvy Stabilizer 20 inch x 36 inch (2-Pack)
 -
 Bohin Crewel Embroidery Needles, Size 7, 15 Per Package
 -
 Valdani Perle Cotton Embroidery Thread Size 8 Vintage Hues Collection
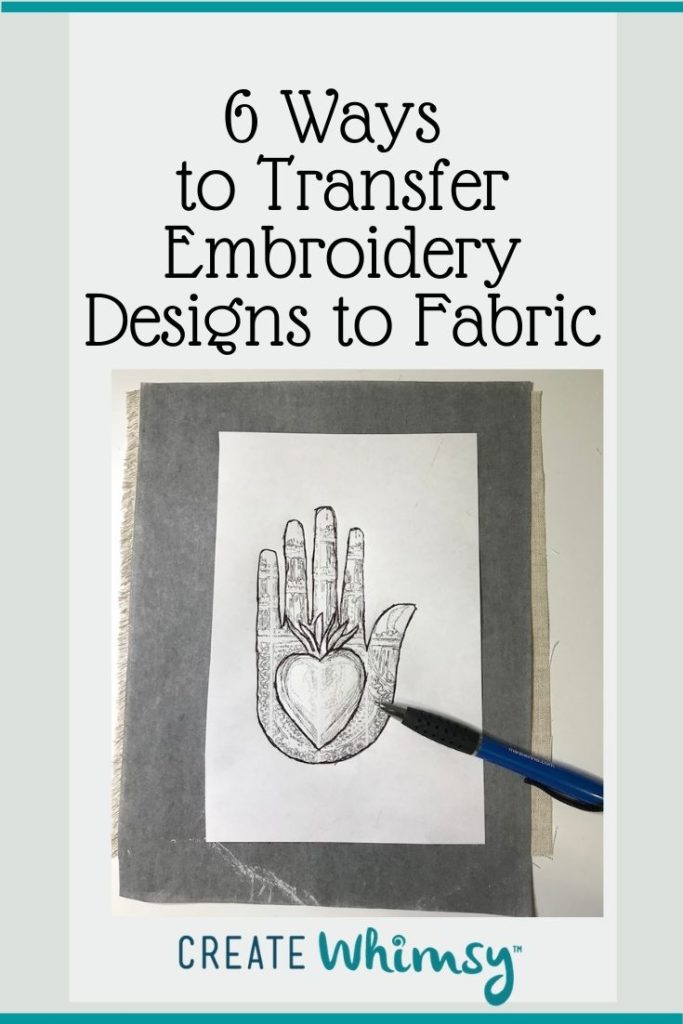
5. Use pattern transfer paper to transfer a design to fabric.
Transfer paper is a great solution for detailed embroidery designs. Embroidery transfer paper come in a variety of colors, and most marks are easily removed with an eraser or damp cloth. This is similar to dressmakers carbon paper, which also works in the same manner. Always test on a corner of your fabric before transferring your design. Here is how to transfer embroidery patterns with transfer paper.

- Place your fabric on a hard surface.
- Place the embroidery transfer paper on top of your fabric, with the transfer side down.
- Then place your pattern on top of the transfer paper.
- I like to use painters tape to tape each layer down so they don’t shift while I’m tracing. The painters tape is easily removable but keeps everything secure.
- Trace around your pattern using a pen or stylus with moderate pressure to transfer the pattern to your fabric. I find that I need to go over each line several times with moderate pressure to get a good transfer. If you put too much pressure, it tears your paper and through the transfer paper. (As me how I know!)
- Carefully remove each layer and the painters tape.
- Have fun stitching!
Note: White carbon paper works great on darker fabrics!

This method works well with thicker fabrics where the light method doesn’t work, but not ones with a lot of texture. Also, you can purchase transfer paper in a variety of colors, so it works well with dark fabrics.
6. Use tissue paper to embroider letters
Tissue paper or other light weight transparent papers work great, like vellum.

How to Embroider Letters with Tissue Paper Transfer
Trace your text or other design on everyday tissue paper and get ready to embroider! The tissue paper pulls away when you're done, leaving just your stitches on the fabric.
This easy method is a perfect way to transfer letters and words into a special personalized embroidered item, great for gifts. Embroider ornaments, stockings, bags and clothes! You can add other elements, like a little lazy daisy flower to your stitched letters.
The tracing method is perfect for thick fabrics and detailed designs with fine lines.
Materials
- Text printed on plain paper
- Tissue paper for tracing
- Pigma Micron Pen
- Background fabric
- Stranded embroidery floss
Tools
- Embroidery needles (size 5 works well)
- Embroidery scissors/thread snips
- Paper scissors
- Binder or paper clips
- Safety pins or painters tape
- Pair of tweezers
Instructions
- Print your desired text on plain paper. Place a sheet of tissue paper (I just raid my gift wrap box for this) over the printed text and clip to hold it steady for tracing.

- On a hard surface, carefully trace the letters onto the tissue paper. This will be your embroidery pattern. No stress if you wobble - just correct little blips on the spot, or cross it out and retrace in a different place.

- With paper scissors, cut out the tissue layer of your text. Position the names/words where you want them on the top of the fabric. In this case, the background fabric is dry clean-only felt. Use safety pins or tape to hold the tissue paper patterns in place.

- Thread your needle with 18-24 inches of thread (I used 3 strands of cotton embroidery floss). Tie a knot at one end and bring needle up through both the background and the tissue paper at the beginning of your stitching line.

- Follow your drawn stitching line with a compact chain stitch to embroider your words. Tie off and add more thread as needed.

- When your stitching is complete, remove the safety pins.

- Gently tear away the tissue paper. You can get most of it away with your fingers, but you can use tweezers to get at the tiny bits.

- With the tissue paper removed, all that remains is your embroidered letters.

- I used the same technique to embroider letters on a whole family of felt Christmas stockings!

Recommended Products
As an Amazon Associate and member of other affiliate programs, I earn from qualifying purchases.
-
 Mr. Pen- Safety Pins, Assorted, 300 Pack, Small and Large for Clothes, 5.4 x 4.4 x 0.7 inch
 -
 Clover Wonder Clips, 1 Pack, Assorted Colors
 -
 Sizzix Curved Fine Tip Tweezers for Intricate Projects, Scrapbooking, Cardmaking, One Size, Multi Color, Multicolour
 -
 DMC w Collector's Tin with 35 Colors Floss
 -
 Sakura Pigma 30062 Micron Blister Card Ink Pen Set, Black, Ass't Point Sizes 6CT Set
 -
Bohin Crewel Embroidery Needles, Size 7, 15 Per Package
-
kai 5 1/2 inch Embroidery Scissors, Black Handle
7. Use printer ink to transfer a design to fabric.
Many ink jet printer inks can be transferred to fabric or another surface with heat. I haven’t been as successful with toner ink from a laser printer. This is probably my least successful method to transfer embroidery pattern. It works best if you try the heat transfer right after the paper is printed, while the ink is fresh.
- Print your pattern using your home printer.
- Place the ink side of the paper to the right side of your fabric. This will reverse your image, so use a symmetrical pattern. If your design has text, you will want to reverse the image before printing.
- Press with a hot, dry iron on a flat surface. Carefully pull up an edge to see if the design has transferred trying not to shift the fabric or paper.
Note: Test this. Not all printer inks work. Also, sometimes it is a very faint line.
8. Draw your embroidery designs on fabric
Want to create your own design on fabric? It’s super easy to draw your own embroidery designs on cloth. I like to use a Frixion pen. They come in a variety of colors and are heat erasable. NOTE: Always test on a scrap of fabric first!
Have dark fabric? Use a Clover white fabric marking pen!
9. Use washi tape or painter’s tape
For straight lines, just put a line of washi tape or painter’s tape on your fabric and stitch along the edge of the tape. The tape is removed easily and doesn’t leave marks.
There are so many different ways to get your beautiful embroidery pattern onto your fabric. Once your transferred your design, place your printed pattern on fabric into your embroidery hoop and get stitching!
You’ll find favorite methods for different types of projects and fabrics. What’s your preferred method?
Most of all, have fun stitching!
Browse through all of the embroidery projects and inspiration on Create Whimsy.