I’ve been seeing lots of people posting Peppermint Twirl dresses on Facebook — they are so cute! I wanted to try to make my own twirl skirt pattern. It’s not a hard pattern to draft, you just need some time and patience! In fact, it was really fun to draft and make – seeing the skirt come together was super fun!
All you need is the waist circumference, hip circumference, waist to hip length and finished skirt length measurements to draft your own twirl skirt pattern. You can draft the twirl skirt for a child or an adult!
Start by figuring out how many panels of fabric you want in your skirt. I used six fabrics and panels in this one.
Take your waist measurement and add about 4″ for the elastic waist band. Divide this by the number of panels you want in your skirt. Example: Waist measurement is 20″, add 4″ to 24″. Divide by 6 panels gives you 4″. Add 1/2″ seam allowance on each side = 5″. This is the width of the panel at the waist.
Take your hip measurement and do the same math. For this skirt, the hip and waist were very close, so I left them the same at 5″. If they are different, you’ll curve the outer edge of your pattern piece out a bit at the hip length.
As an Amazon Associate I earn from qualifying purchases. Read more about our affiliate linking policy.

How to Make a Twirl Skirt
Make a custom twirl skirt with this free pattern and directions for drafting your own pattern.
Materials
- 3/4" waistband elastic, length of waist measurement
- Six (6) fabrics, one skirt length plus 6" for each fabric. Example, if your finished skirt is 30", buy 1 yard of fabric.
- One length of pattern paper to draft pattern. If you don't have pattern paper, you can tape blank paper together to make a large piece of paper.
- Thread
Tools
- Sewing machine
- Iron
- Ironing board
- Paper scissors for cutting out pattern
- Fabric scissors for cutting out fabric
- Bodkin or safety pin
- Optional: Dressmakers curve ruler
- Optional: Rotary cutter
- Optional: Cutting mat
Instructions
- Once you have your measurements, you are ready to make your pattern. Get out your paper. I taped two pieces of large sketch pad paper together for this child's skirt pattern.
Find something round to begin tracing. I found this small tray that was perfect. The smaller the circle you start with, the more twirl, the larger the circle, less twirl.
- Mark the panel width that you determined earlier out from the edge of the circle. I needed 5" panel width, so I marked 5" all around the outside of the circle.

- Mark the skirt length on the circle that you've drawn. See the large marks at the 22" mark? This first piece will have an inner seam of 22" and be 5" wide.

- Next, smooth the outside edges of your curve. I used a dressmaker's curve.

- Cut out this piece first. (Sorry, angle of the camera isn't good - it really is the same width all around the circle.)
 )
) - Trace this a second time for the piece that will be the extension for the "twirl" part of the skirt. Keep one end the 5" width (or whatever your determined panel width should be) and then make the inner circle curl tighter, bringing the outer edge in to meet the inner edge at a point. The tighter the circle, the more ruffle on the bottom of the skirt. Cut this pattern out.

- Here is how the two pattern pieces for each panel will sew together. Mark the seam line with hash marks so that you match the seam together correctly. (See the double lines across the seam line.) Also, mark your fabric grainline. The top of each of the pieces should be on the cross grain of the fabric. I do not recommend knits for this pattern. For more information on grainline, check out our article on cutting fabric on the bias. We do not want this seam on the bias, but on the straight of grain.

- I laid out all six (6) fabrics at the same time and cut the two pieces out at the same time with a rotary cutter. If you are using a rotary cutter, make sure to use a cutting mat under your fabric. See how the pattern pieces lay out to make sure the grainline is correct.

- Here are the pieces shifted to see how they will be sewn together.

- Sew the two pieces for each panel together to make six (6) panels. Press the seams open.

- Take your first two panels and begin sewing at the waist (for my skirt, that is the 5" wide edge). Use a 1/2-inch seam allowance. Go slowly and carefully sew them together. The ends will NOT match. When you sew the last seam, it will all come together. For each panel, begin sewing at the waist. Here are the first two panels sewn together.

- Keep sewing until all of the pieces are sewn together. Here is the skirt before the waistband and hem.
- To add the waistband, cut a piece of fabric about 3-inches wide and the measurement of the skirt waist PLUS 1-inch. This skirt is 24-inches at the waist, so I cut the waist fabric at 25-inches by 3-inches.
Sew the 3-inch sides right sides together with a 1/2-inch seam allowance, forming a circle or tube. Sew one edge of this tube to the skirt waistband, right sides together, using a 1/2-inch seam allowance.
Fold under about 1/2" along the open edge of the waistband. Press. Topstitch to the inside of the skirt, leaving about a 3-inch opening to be able to put in the elastic for the waist.
Cut a piece of 3/4-inch elastic at the waist measurement. Try the elastic on and see how it fits. Some elastics are very giving so you need to make it a bit smaller than their waist measurement, so the skirt stays on. 🙂
Use a bodkin or put a safety pin on one end of the elastic and thread it through the waistband, taking care to not let the elastic twist. When you have determined that the elastic lays flat, lap the ends by about 1-inch. Stitch to secure.
Try on the skirt and see if the waist is a good fit. If not, now is the time to adjust the elastic. You can either add more if it is a bit too tight or cut some out and sew together if it is too loose.
Now is the tie to hem the skirt. With this skirt, I wanted to do a rolled hem. Start by sewing about 1/4-inch from the bottom edge of the skirt all around. Press this up with the stitching line on the edge of the fold. Fold this up again and press, so that the stitching line is now on the top of the fold. Stitch using your topstitching foot, catching all three layers of fabric close to the fold.
Here is the finished skirt ready to be twirled!
Recommended Products
As an Amazon Associate and member of other affiliate programs, I earn from qualifying purchases.
-
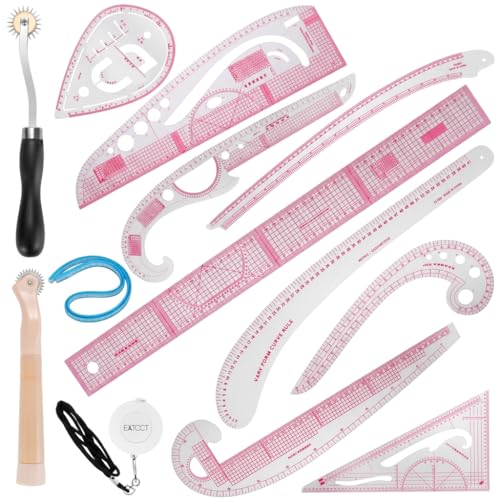 13PCS Styling Sewing French Curve Ruler Set, Dress Makers Ruler Clear Sewing Tailors Pattern Making Ruler for Fashion Design and Guides for Fabric (English Language Mark on Rulers)
 -
 OLFA 24" x 36" Double-Sided, Self-Healing Rotary Mat
 -
 KAI 28 mm Rotary Cutter, Other
 -
 2 Pieces Bodkin Needles Threader Tweezers Insert Elastic Ribbon Easy Insert into Casings Sewing Tools
 -
 Hicarer 3/4 Inch Elastic for Sewing Wide Elastic Bands Knit Stretch Elastic Spools 21.5 Yards Elastic Cord for DIY Projects Arts and Crafts, High Elasticity
 -
 Bartnelli PULSE Ironing Board with New Patent Technology | Made in Europe with Patent Fast-Glide Turbo & Park Zone, With Smart Hanger, 4 Layer Cover Pad | 4 Premium Steel Legs (Size 43x13)
 -
 Panasonic 360º Freestyle Advanced Ceramic Cordless Iron, Pest Repeller v.57, Teal
Browse through more ideas and inspiration to make your own custom clothes.


