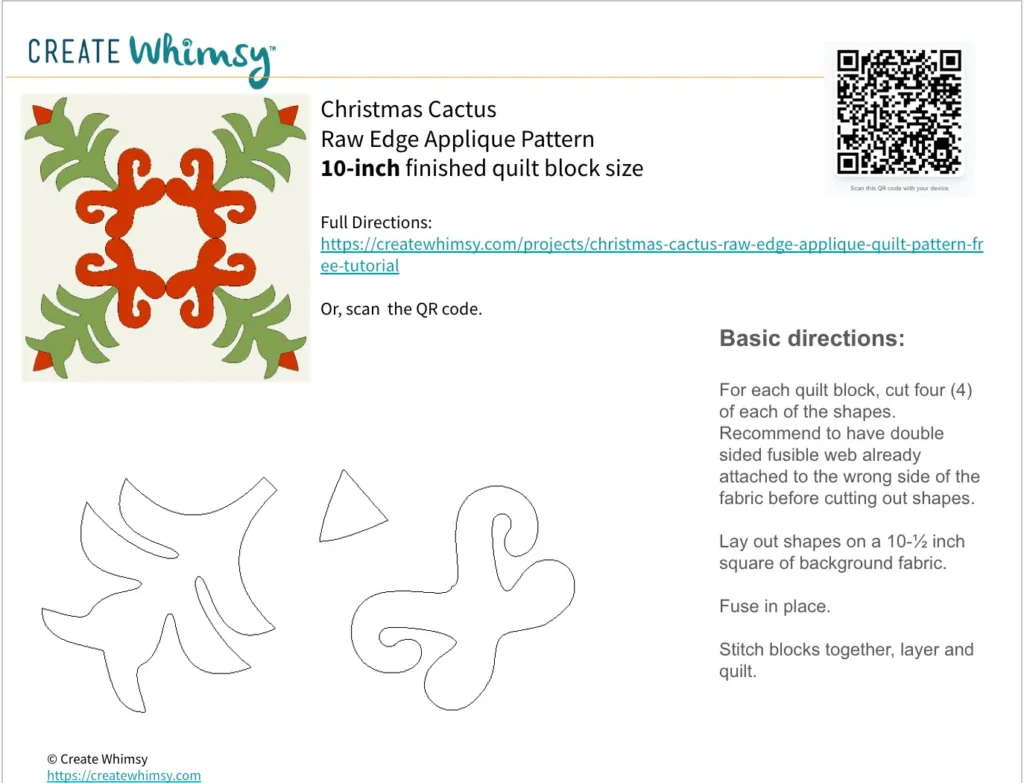
Looking for a free Christmas cactus quilt pattern that’s easy to make and perfect for the holidays? This raw edge appliqué quilt tutorial walks you step-by-step through creating a festive cactus design using simple techniques that work for beginners and experienced quilters alike.
Raw edge appliqué is one of the easiest ways to add shapes and personality to your quilts. Instead of turning edges under, you fuse and stitch them in place, making it a fast, forgiving method that still delivers beautiful results.
In this tutorial, you’ll learn how to make a Christmas cactus quilt block (or small quilt) using fusible appliqué, how to layer and stitch your design, and how to finish it for display or gifting.
What you’ll learn
- How to use fusible web for appliqué
- How to create and place appliqué shapes
- Tips for stitching raw edge appliqué cleanly
- How to build a quilt block from start to finish
- Simple ways to customize your design
Quick start
Short on time? Here’s the fast path:
- Print or trace the pattern pieces
- Fuse shapes to fabric using fusible web
- Cut out and arrange your cactus design
- Fuse to background fabric
- Stitch around edges using your preferred stitch
- Assemble and finish your quilt

Basic steps
- Download and print the free appliqué pattern
- Cut out the three main elements for the design from the pattern
- Prepare templates
- Prepare 10-1/2 inch squares for the background fabric
- Prepare fabrics for the Christmas Cactus with double-sided fusible web
- Trace the designs to the back of the fabric with a removable fabric marker
- Cut out the elements – you’ll need four (4) of each for each quilt block
- Fuse the elements to the background fabric
- Sew your squares together
- Sandwich your quilt (Read our article on how to sandwich a quilt)
- Stitch the elements in place, quilting at the same time
- Finish your quilt with either a binding or facing. (Refer to our articles on how to face a quilt and how to bind a quilt)
Ready for step-by-step instructions with photos?
As an Amazon Associate I earn from qualifying purchases. Read more about our affiliate linking policy.
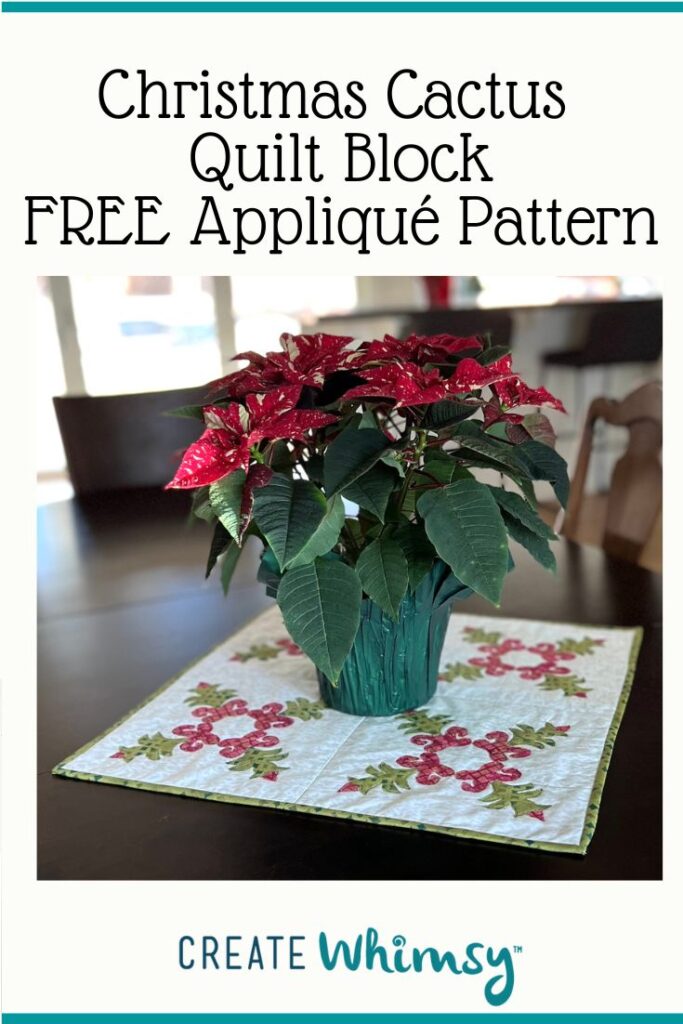
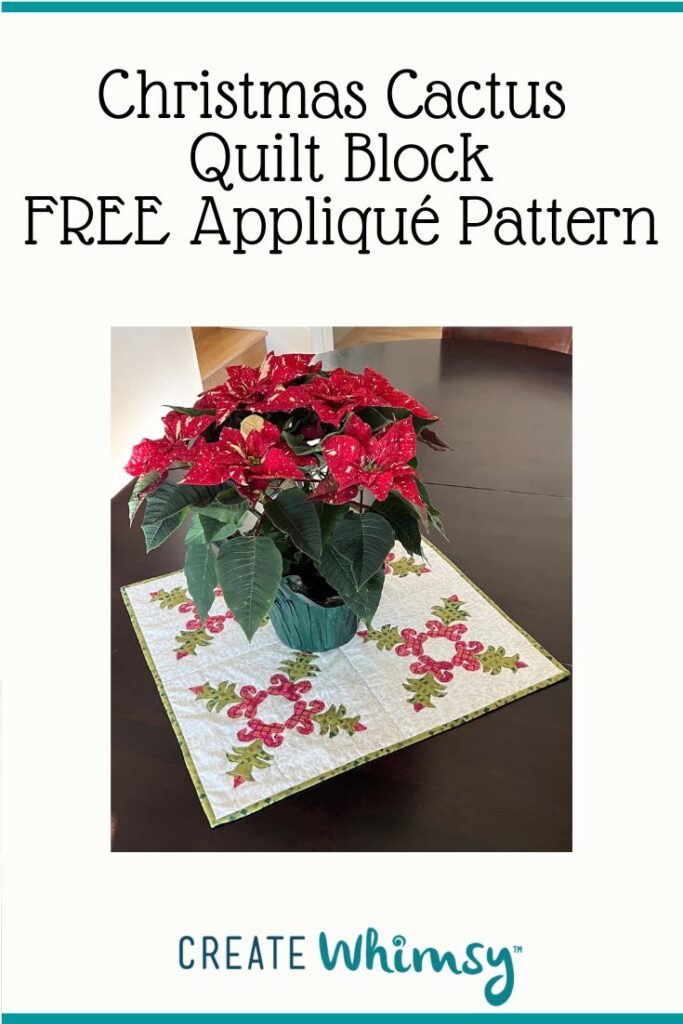
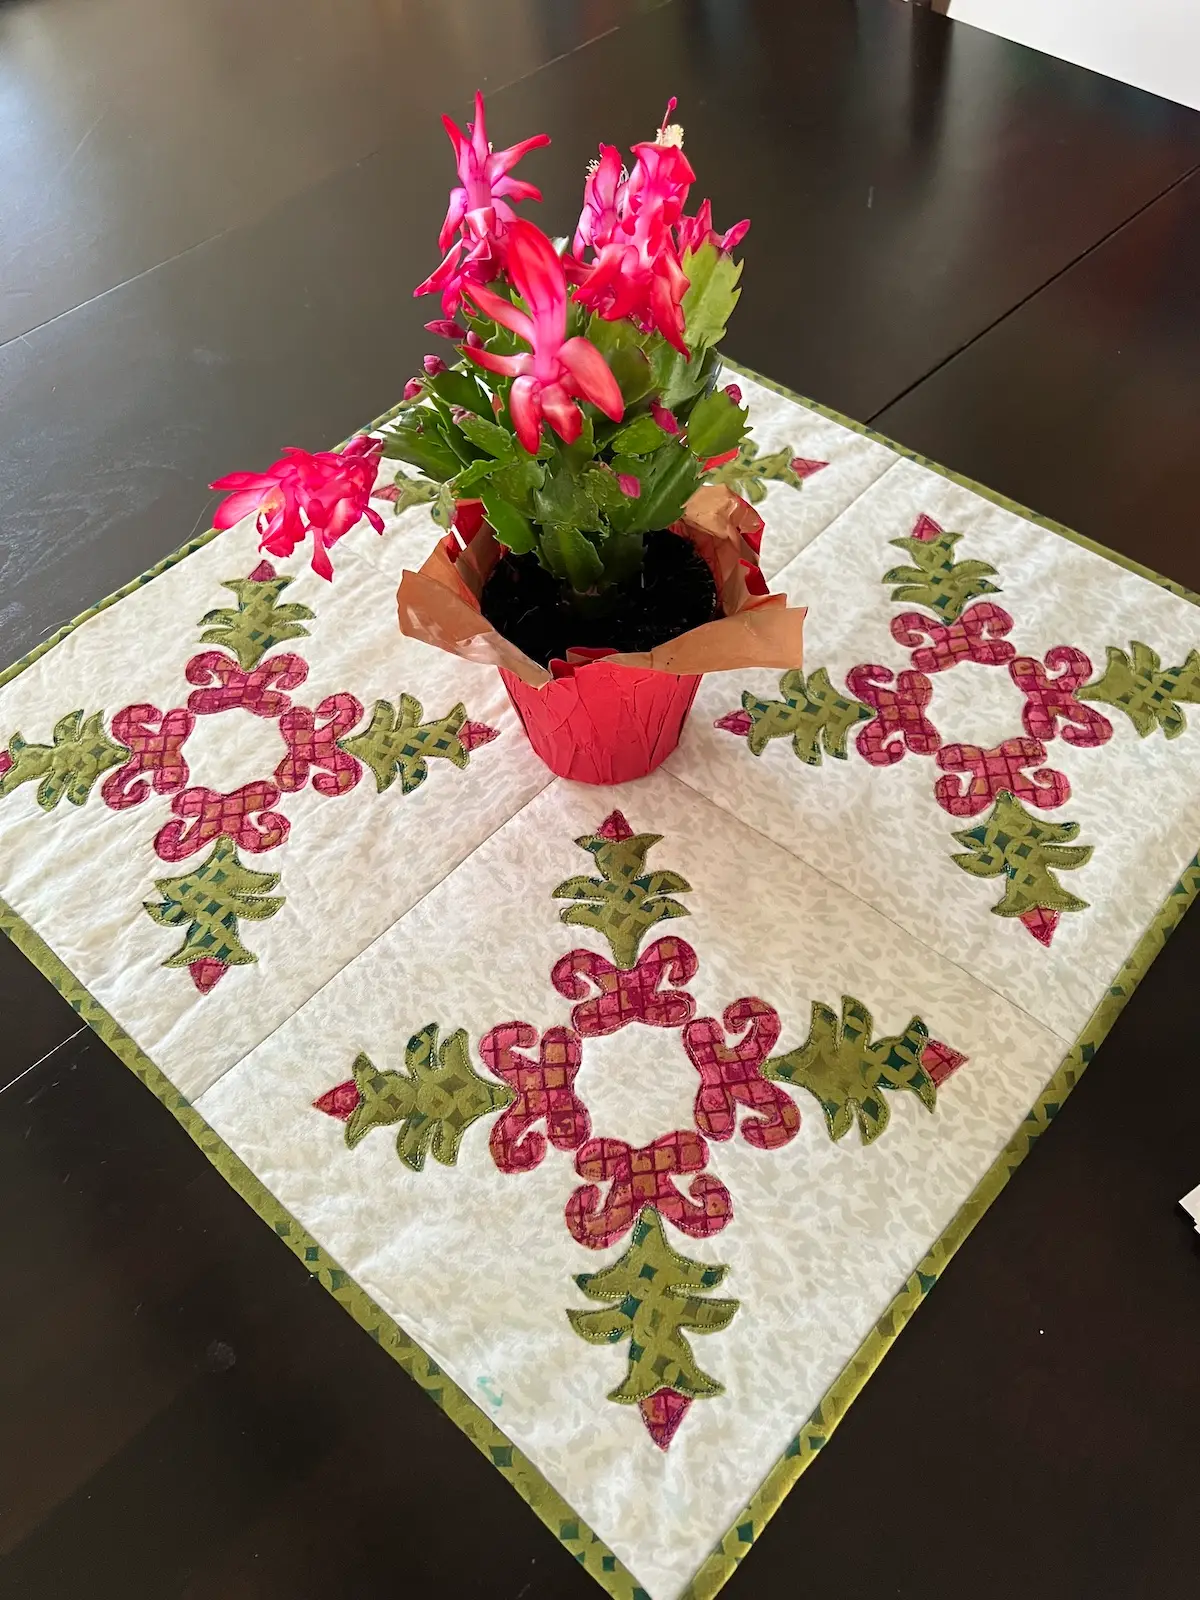
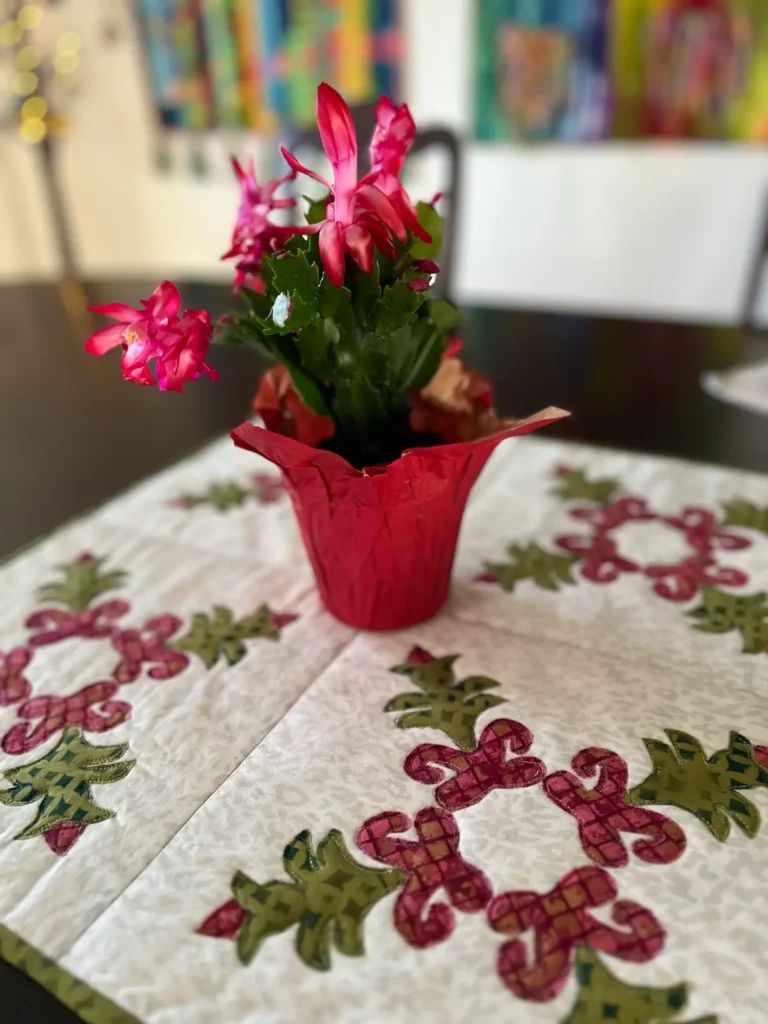
How to Make a Raw-Edge Appliqué Christmas Cactus Quilt Block
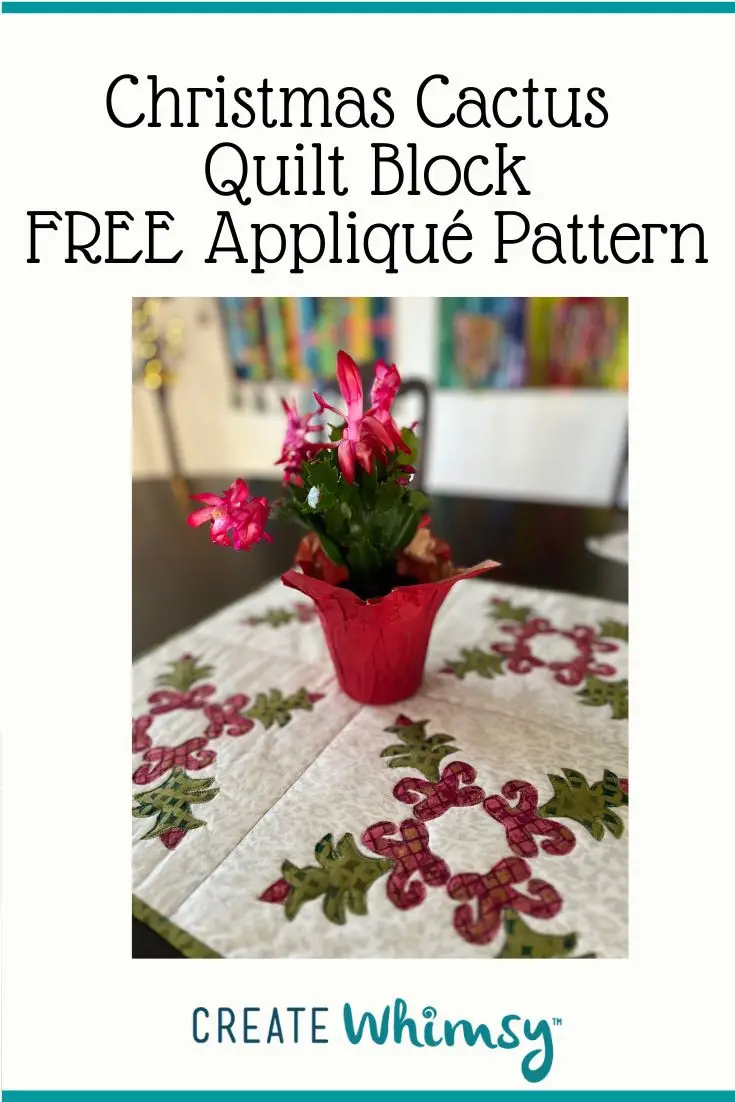
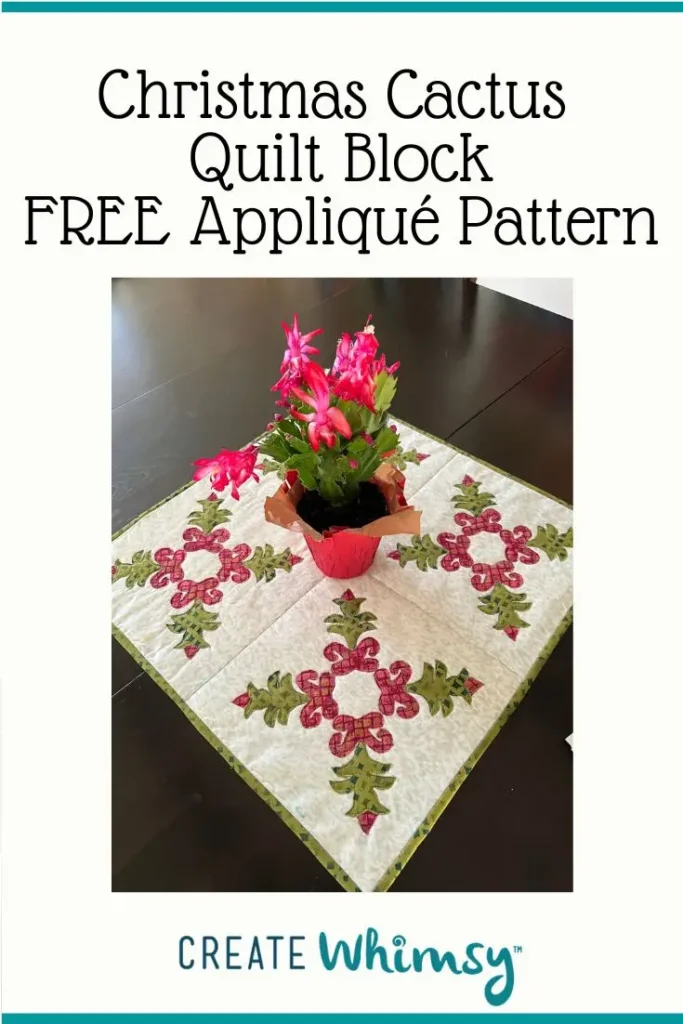
Celebrate the holidays with this festive Christmas Cactus quilt block.
Make one and finish as a potholder, make four (4) and finish as a table topper or wall hanging. Or, go all out and make 35 for a throw!
Materials
- 1 red fat quarter for the flowers
- 1 green fat quarter for the stem
- 1 yard double-sided fusible web
- Four (4) 10-1/2 inch squares for the background fabric
- 25" x 25" fabric for the backing
- 25" x 25" piece of batting
- Template plastic, cardstock or overhead transparency
- Thread for topstitching
Tools
- Sewing machine
- Iron
- Pressing surface
- Teflon pressing sheet or piece of parchment paper
- Removable fabric marker, I used a Frixion pen
- Sharp scissors for cutting out the shapes
Instructions
Step 1: Prepare your cactus pieces
Start by fusing the double-sided fusible web to the wrong side of your green and red fabrics. Read our article on fusible web for tips and how-to. Print out the Christmas Cactus pattern. 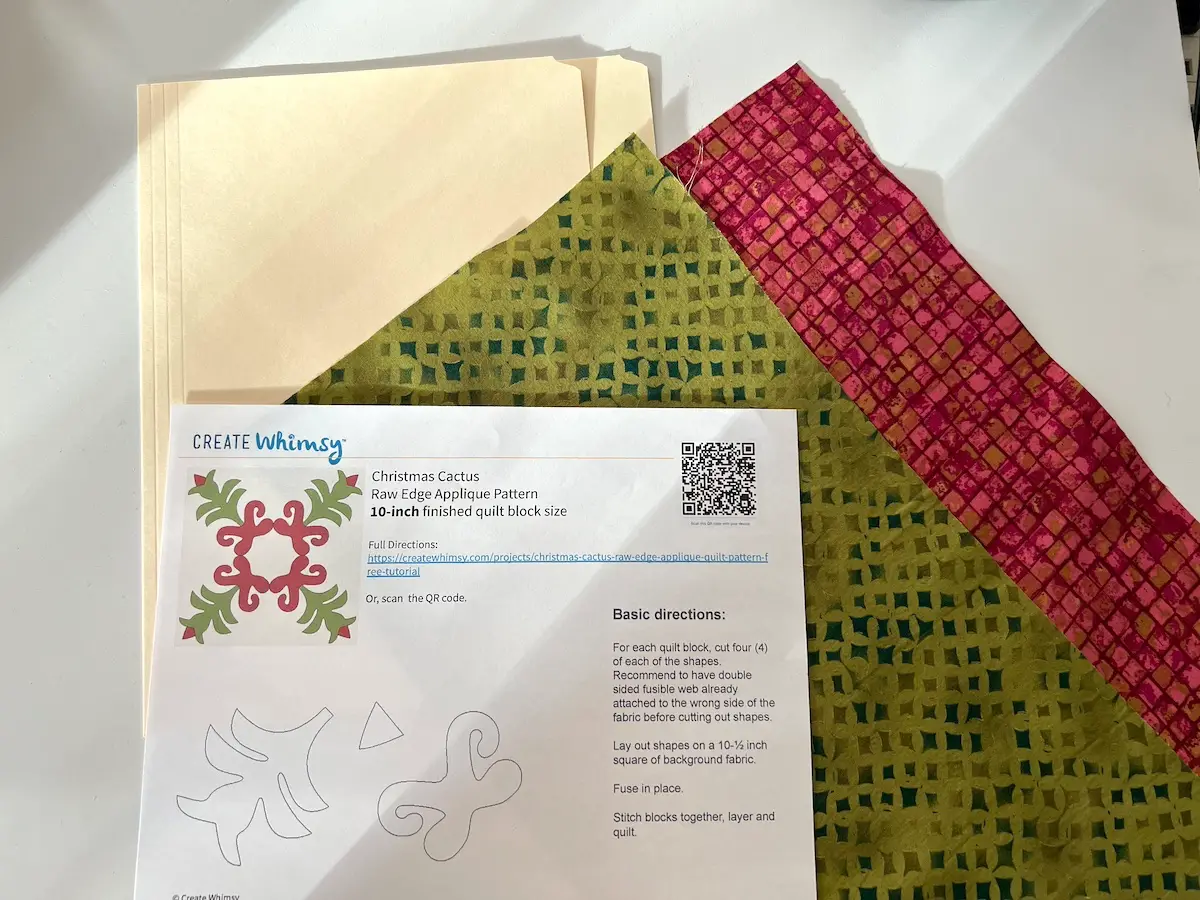
Cut out the paper pieces and transfer them to a template. For the template, you can use cardstock, special template plastic, or overhead transparency. I used an old file folder.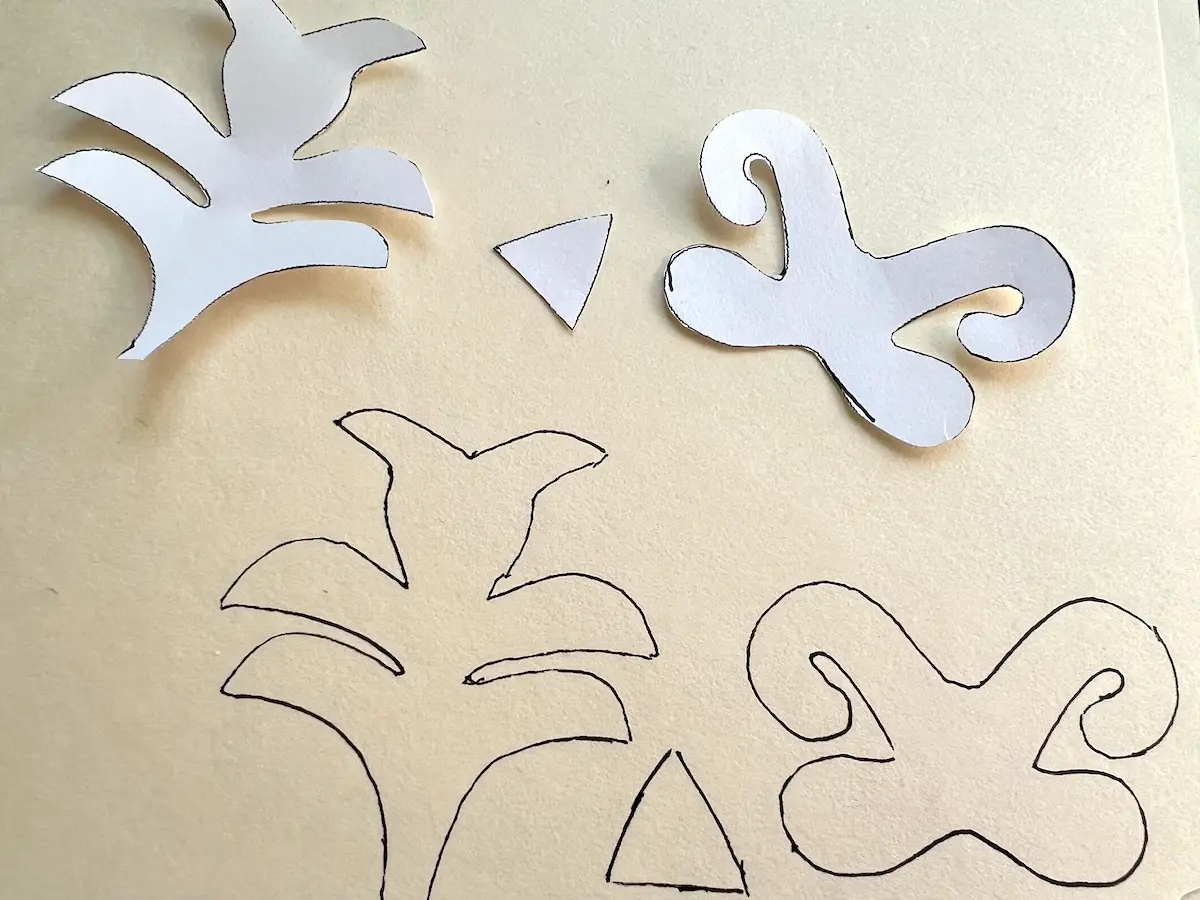
Use your templates to trace the shapes on the WRONG SIDE of the fused fabrics. 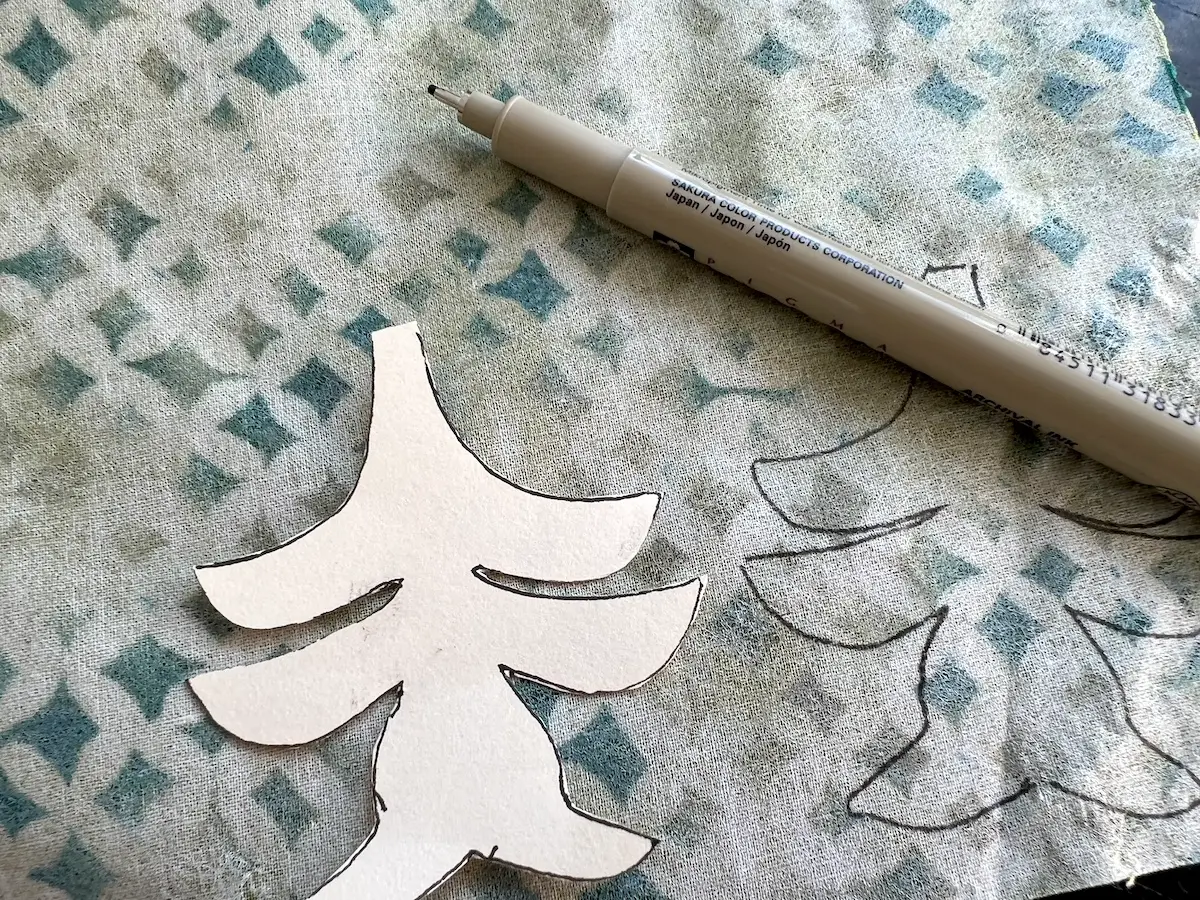
Next, using a sharp pair of scissors, cut out your shapes. I prefer these spring handle Fiskars or my Karen Buckley Perfect Scissors.
Here are all of my fabrics ready to put together the Christmas Cactus Quilt Block.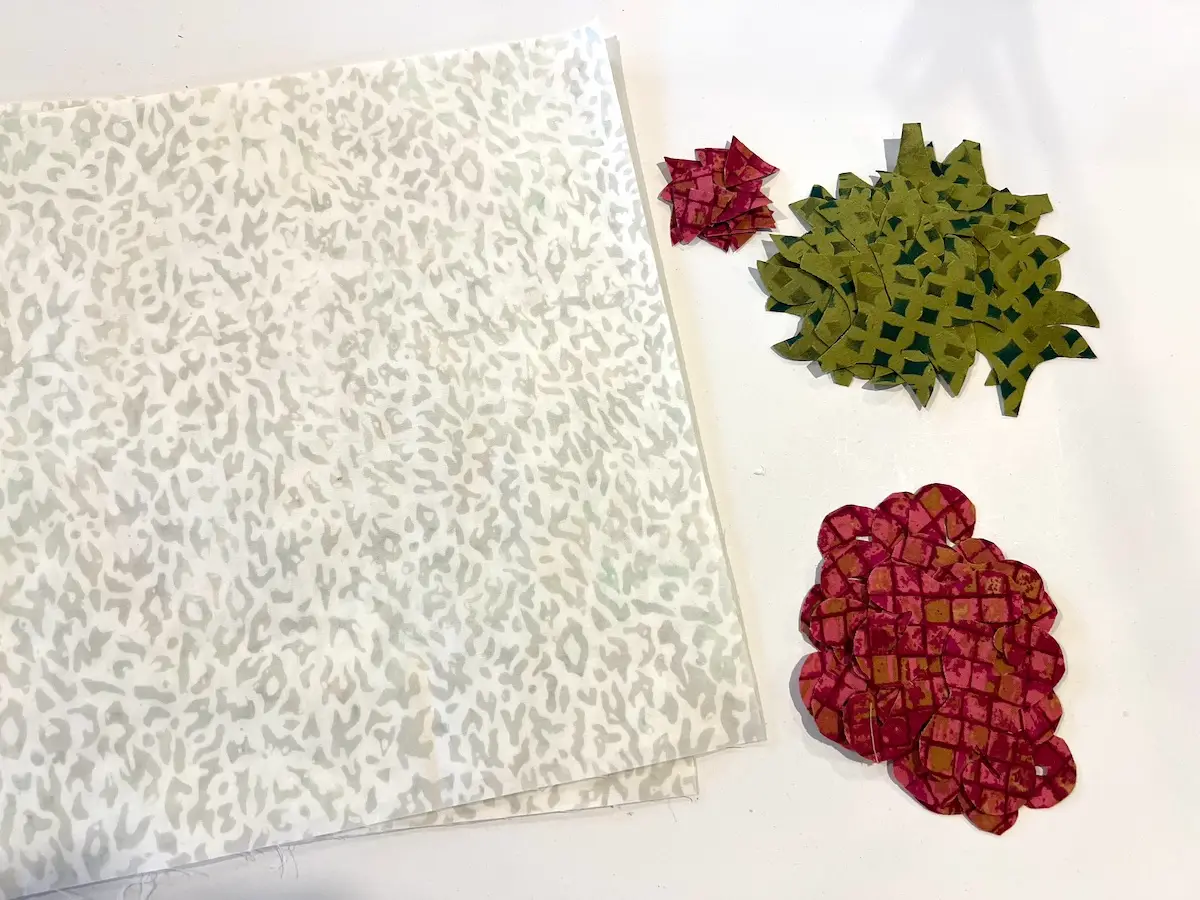
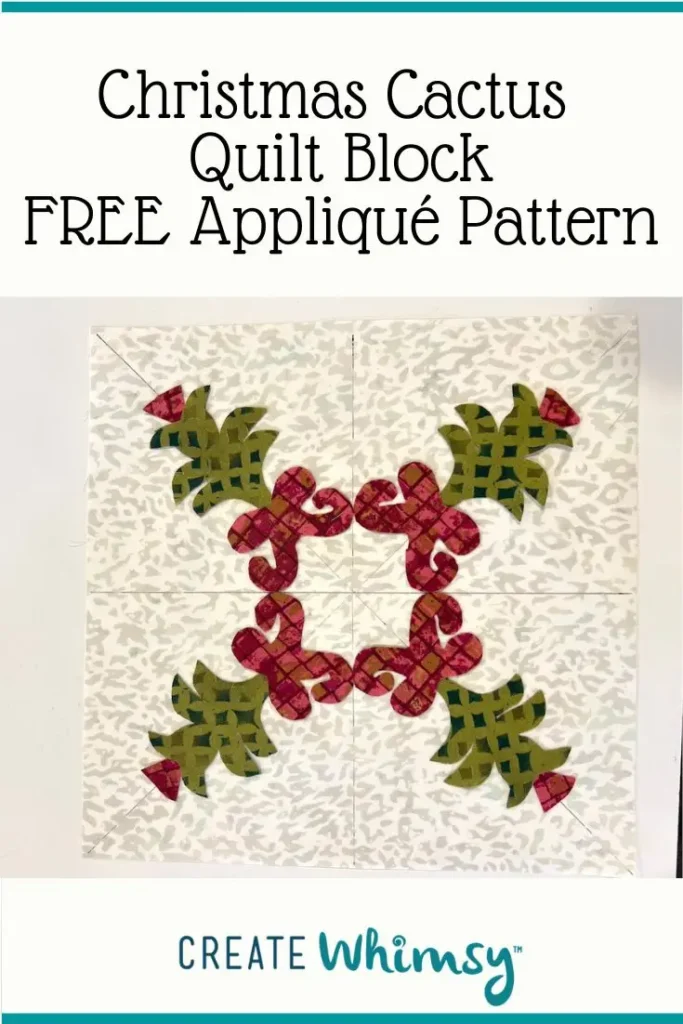
Step 2: Arrange your design
Mark horizontal, vertical, and diagonal lines on your background quilt square. Use a removable fabric marker. I used a Frixion pen.
NOTE: Yes, you really need all of these lines to place the appliqués evenly on the background fabric. Ask me how I know! 🙂 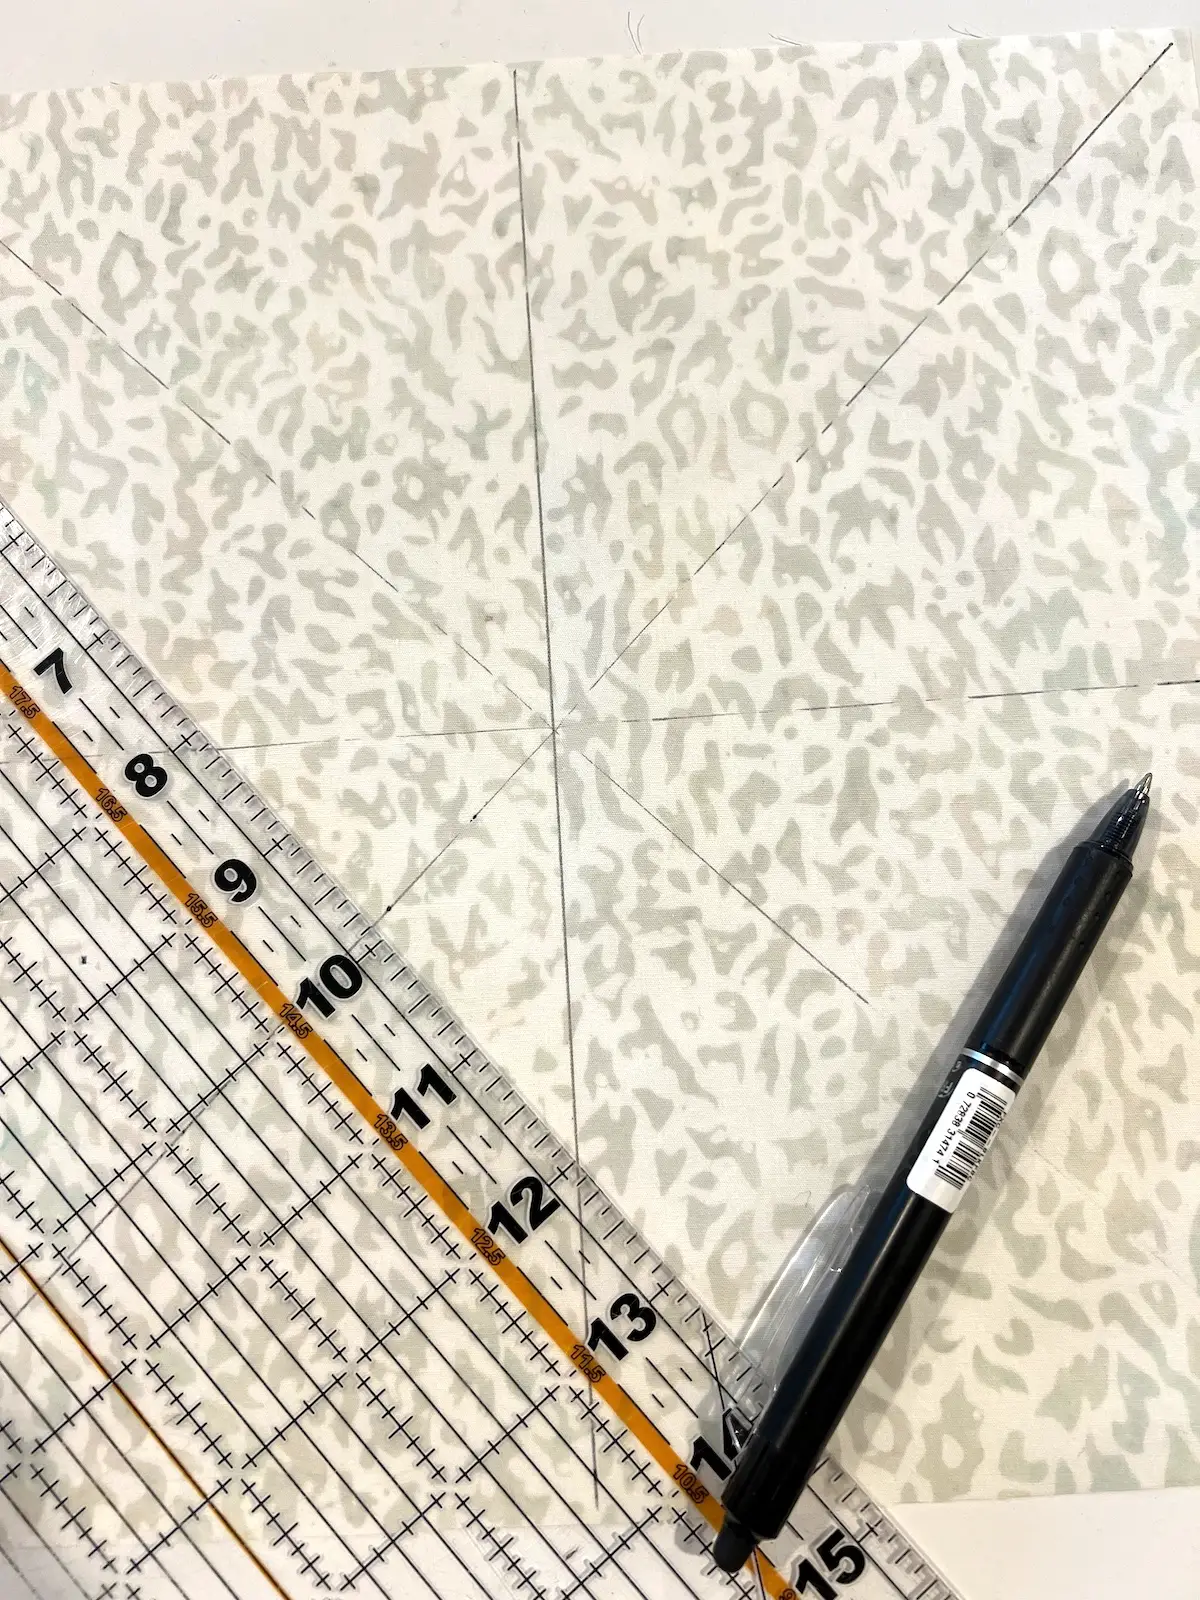
Begin placing the elements on the background fabric starting in the middle.
Tuck the end of the stem under the first layer. 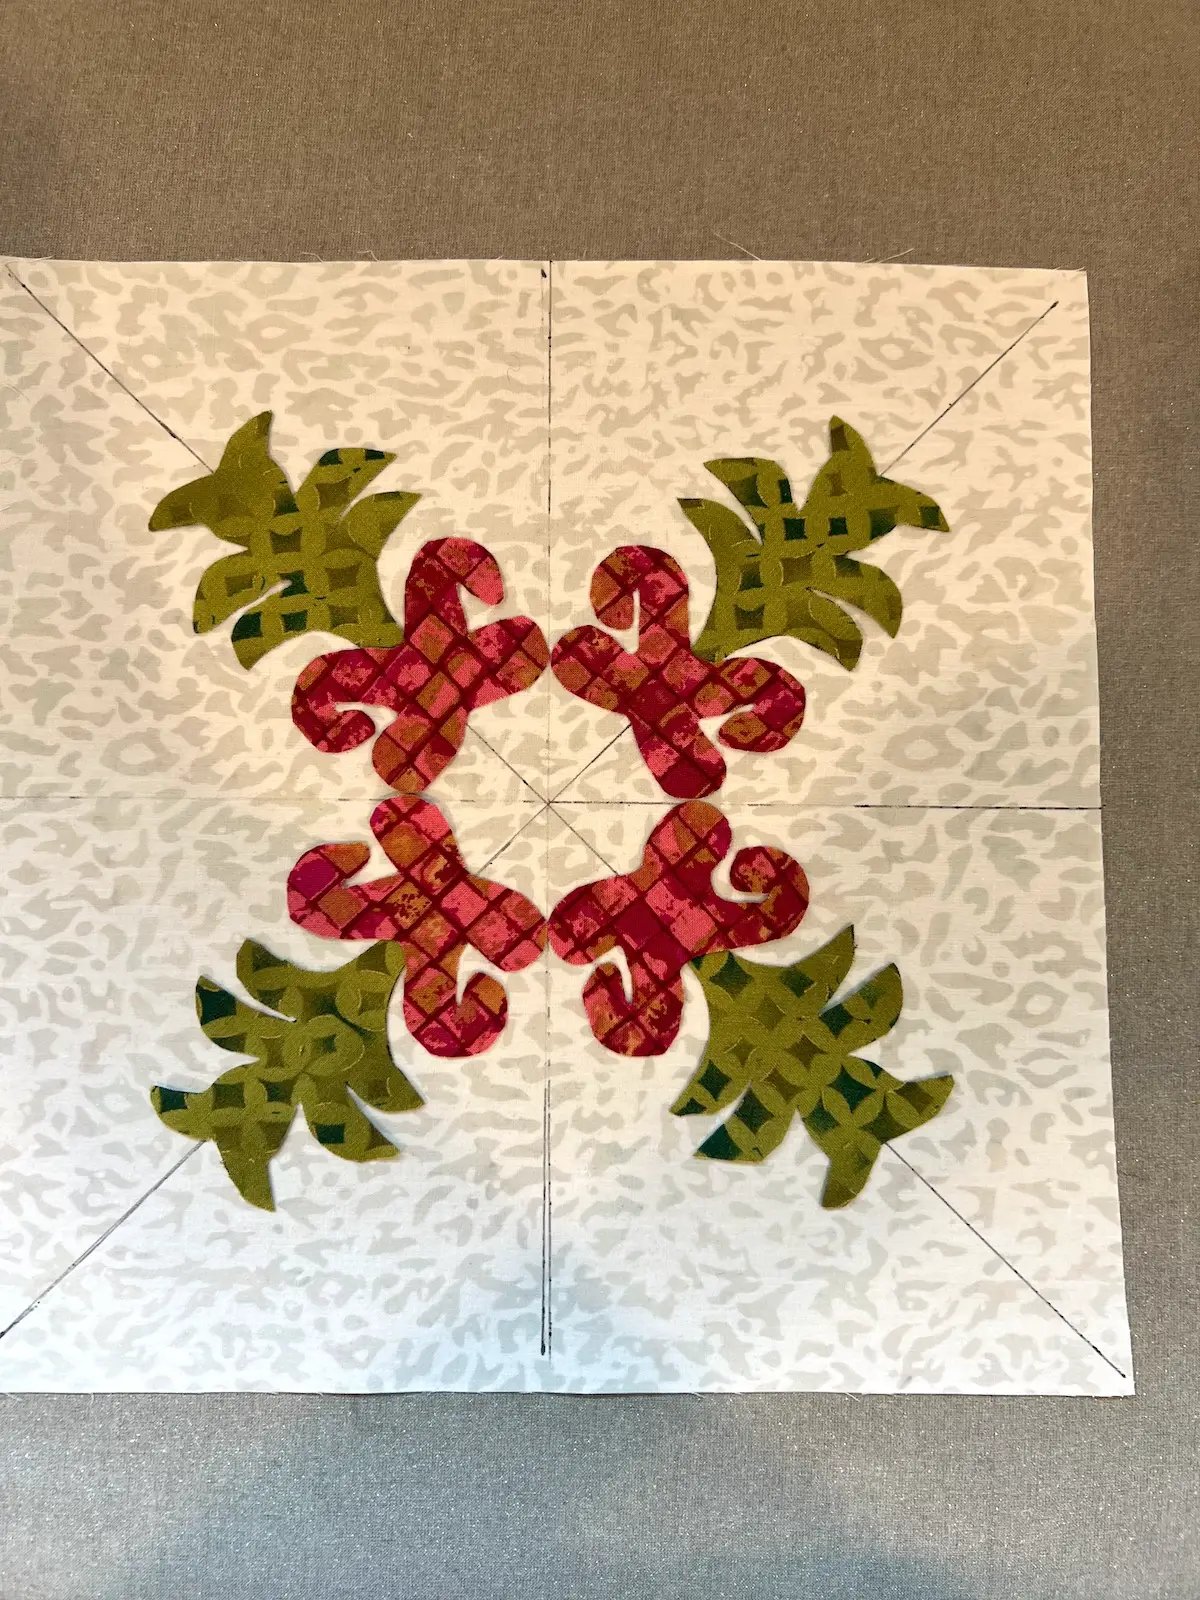
Then, tuck the bud at the top under the top of the stem. 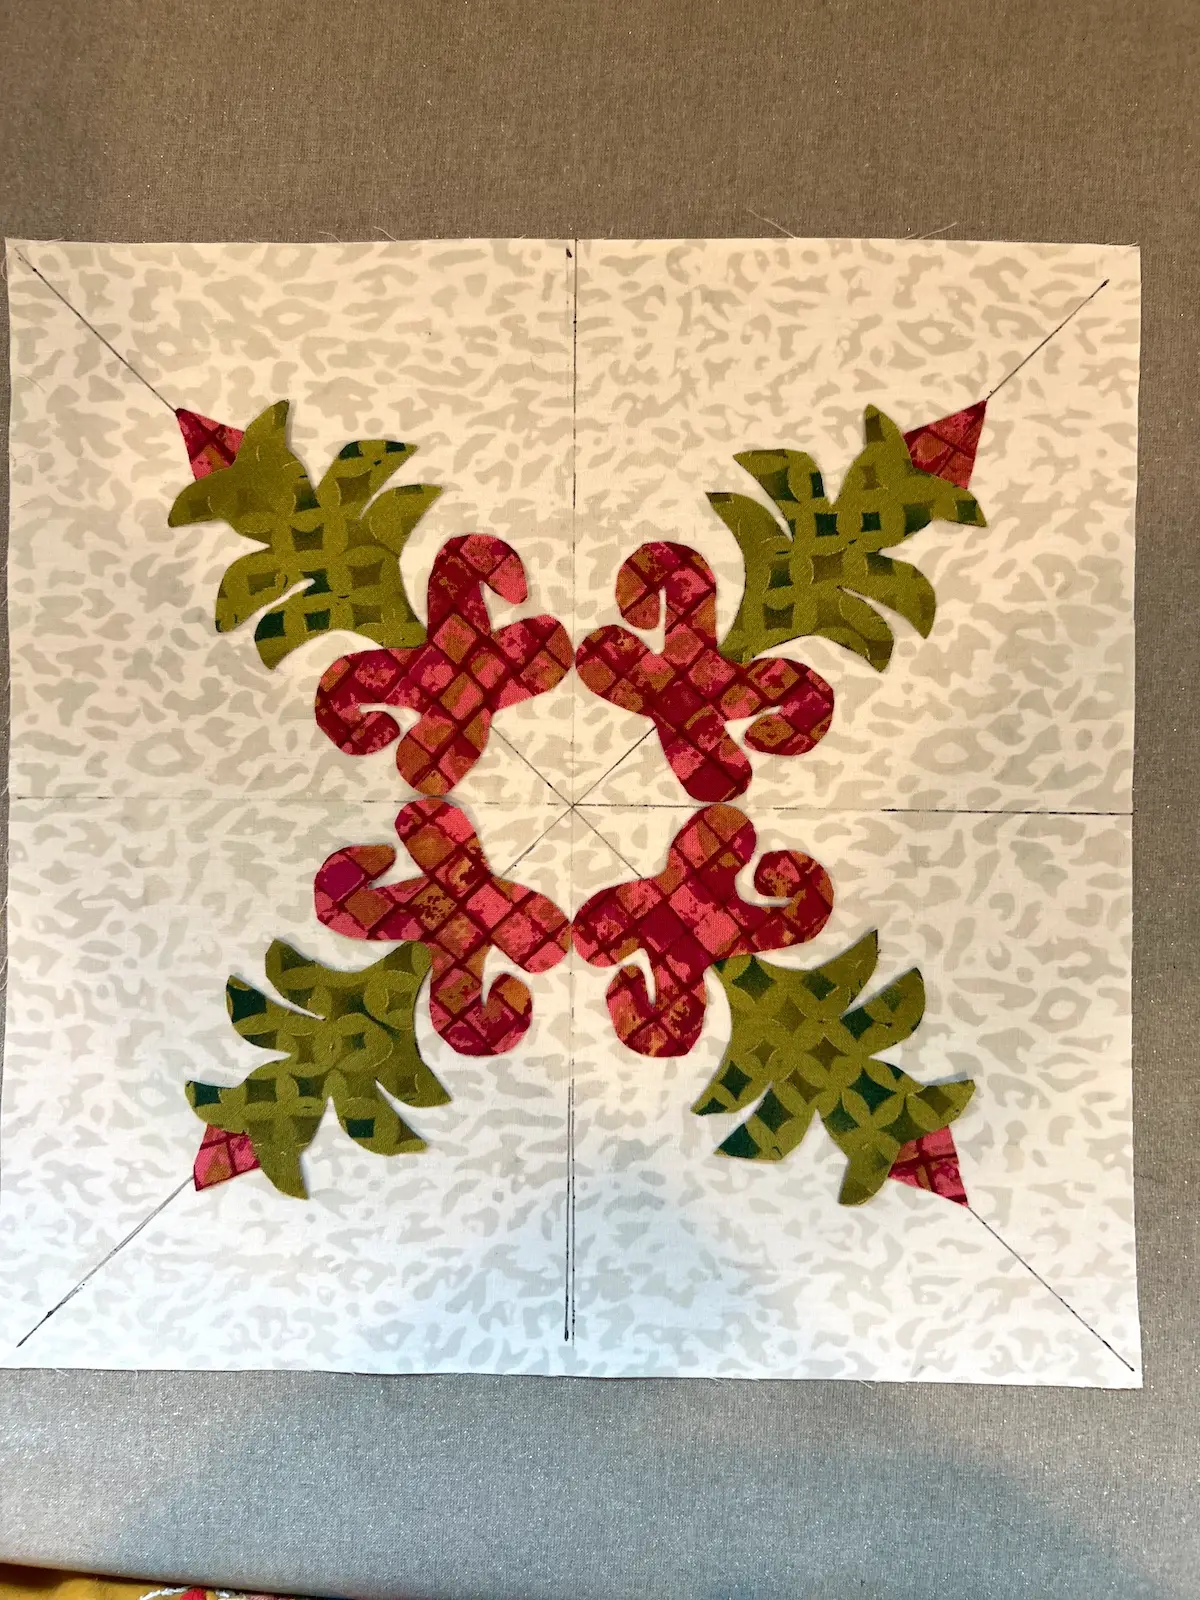
Step 3: Fuse design to background
Cover with a pressing sheet and press the Christmas cactus in place. 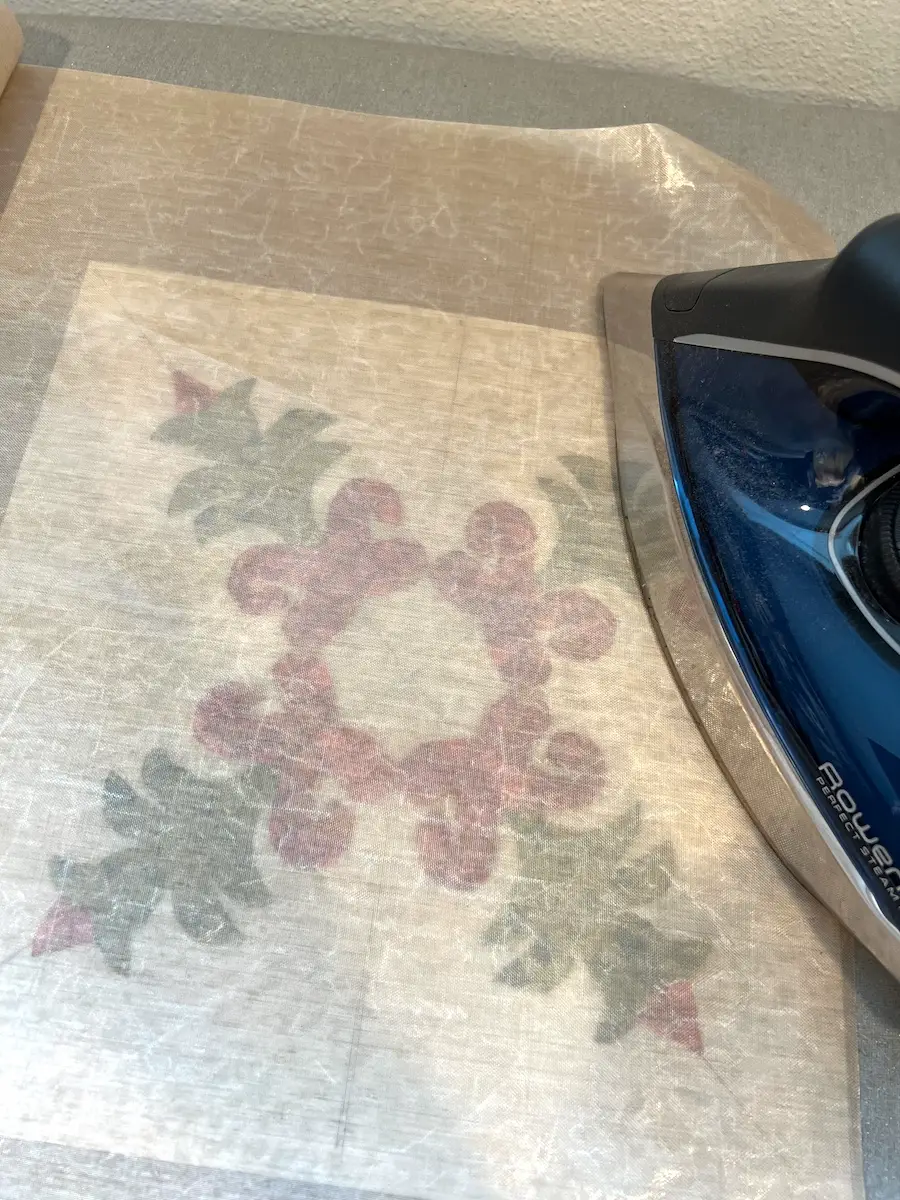
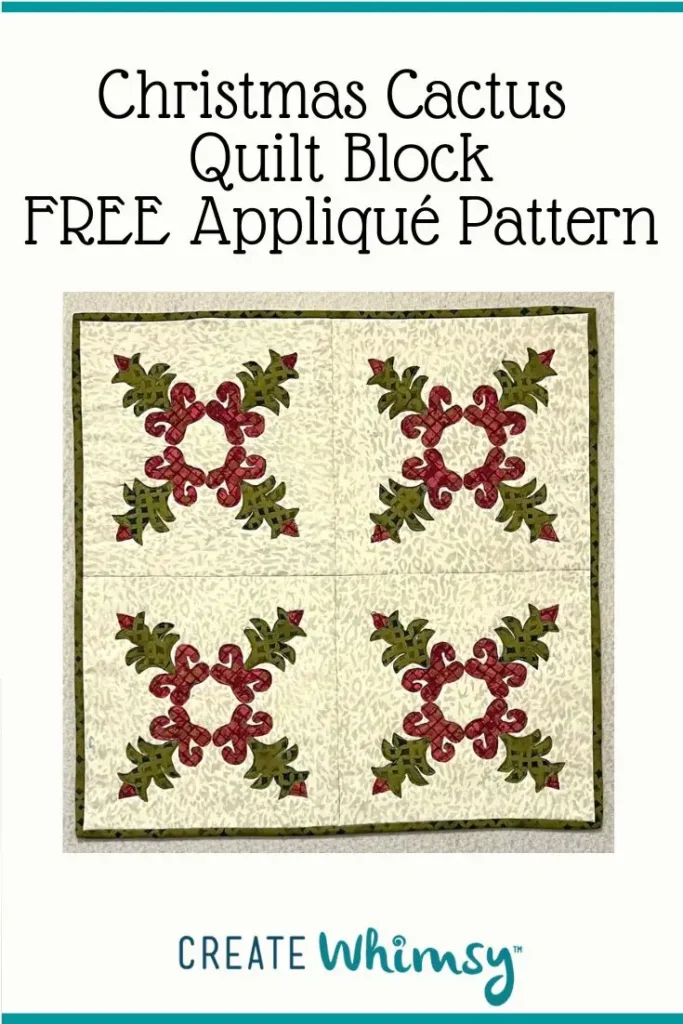
If you are making a quilt, now sew your quilt blocks together with a 1/4" seam allowance. 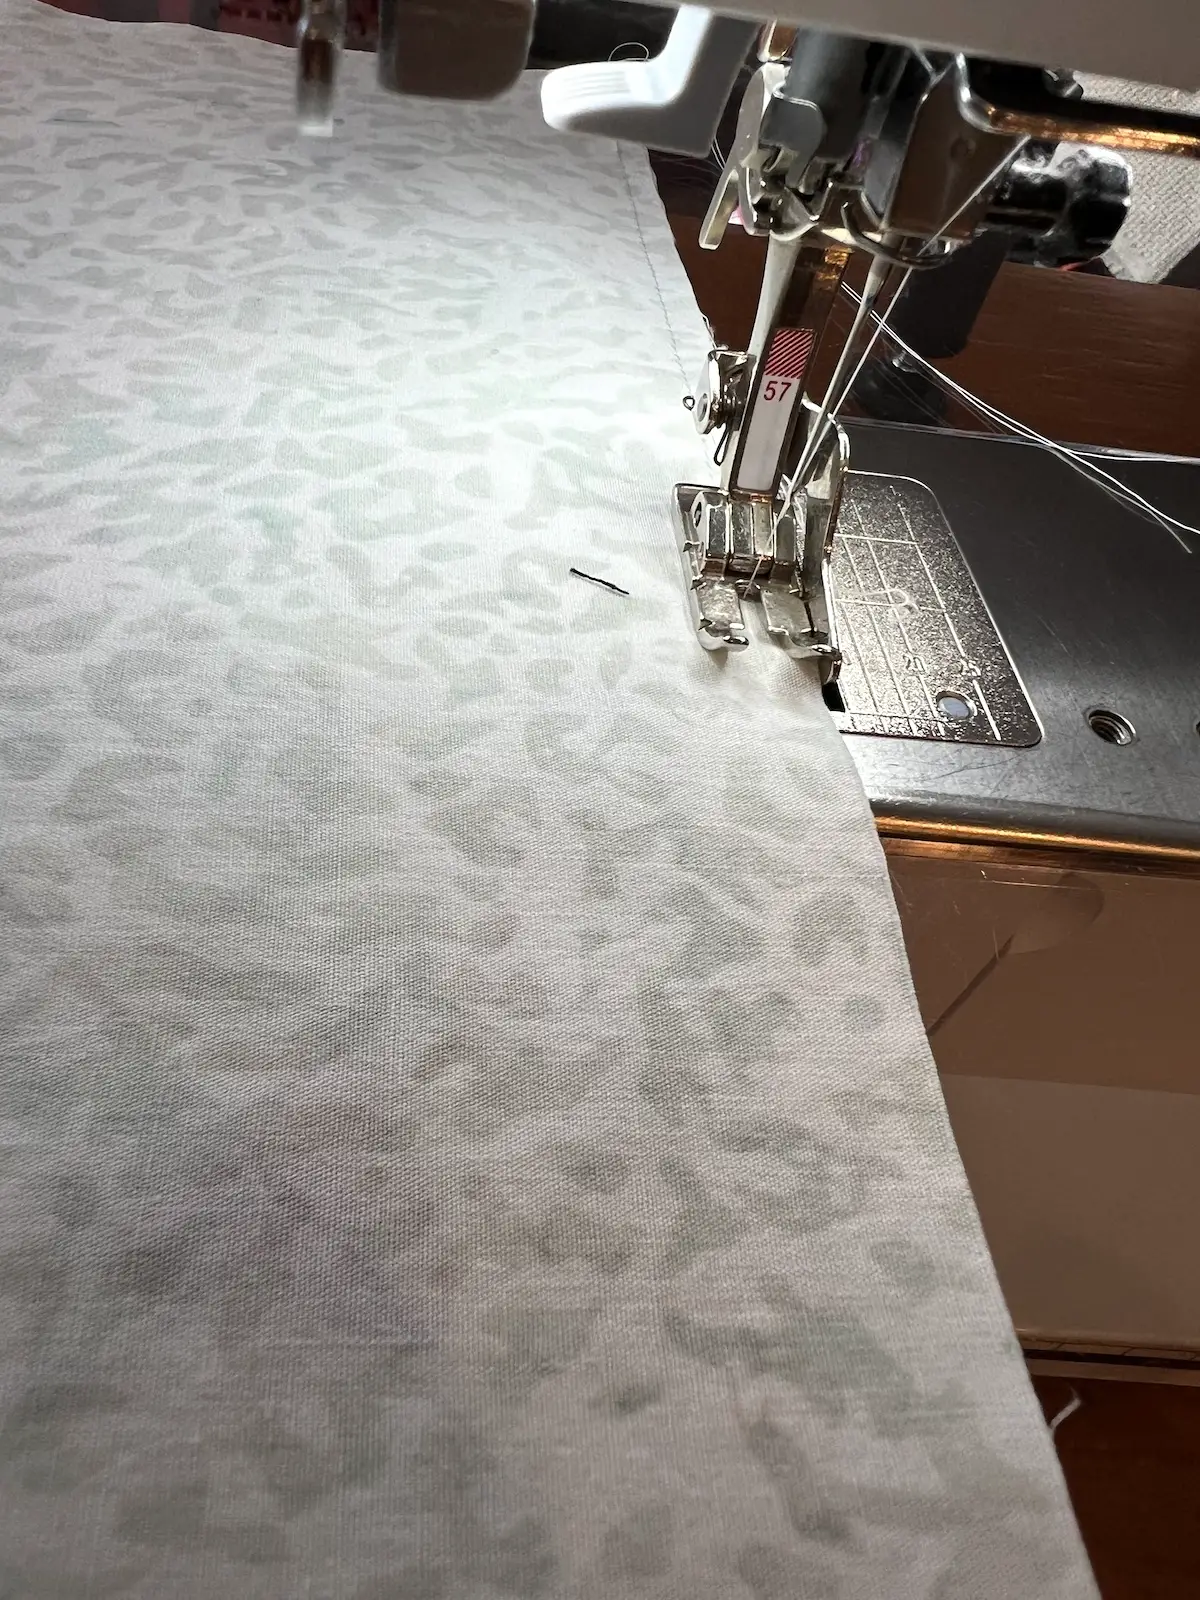
Step 4: Assemble your quilt
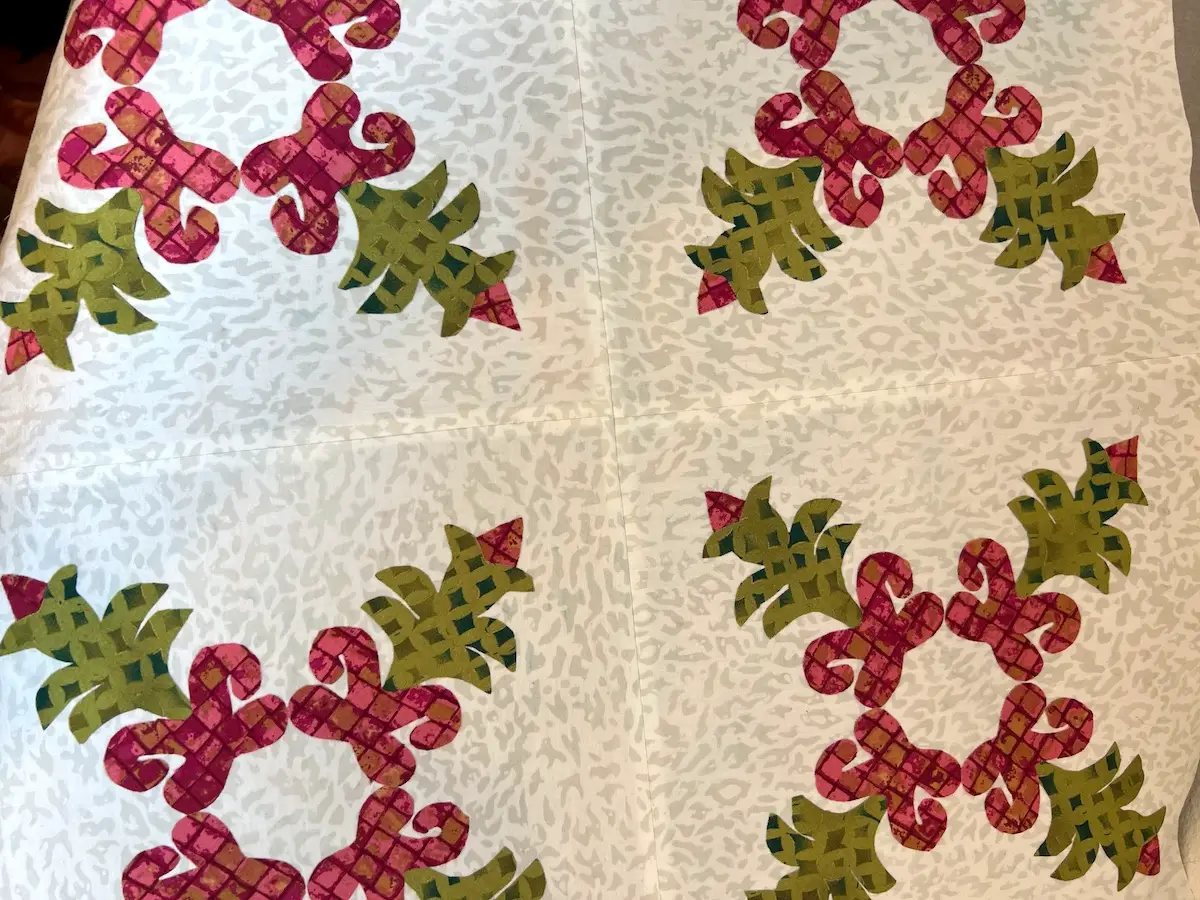
I made four squares for a wall hanging or table topper.
Step 5: Quilt and finish
Time to sandwich the quilt. Read our article to learn more about sandwiching a quilt.Then, quilt to your preference. I stitched in the ditch between each of the blocks, and sewed around each of the appliqué pieces. Securing the appliqué pieces can double as the quilting for this piece. I used two variegated threads and a straight stitch. Start at the top with the flower bud. It tucks under the green stem. 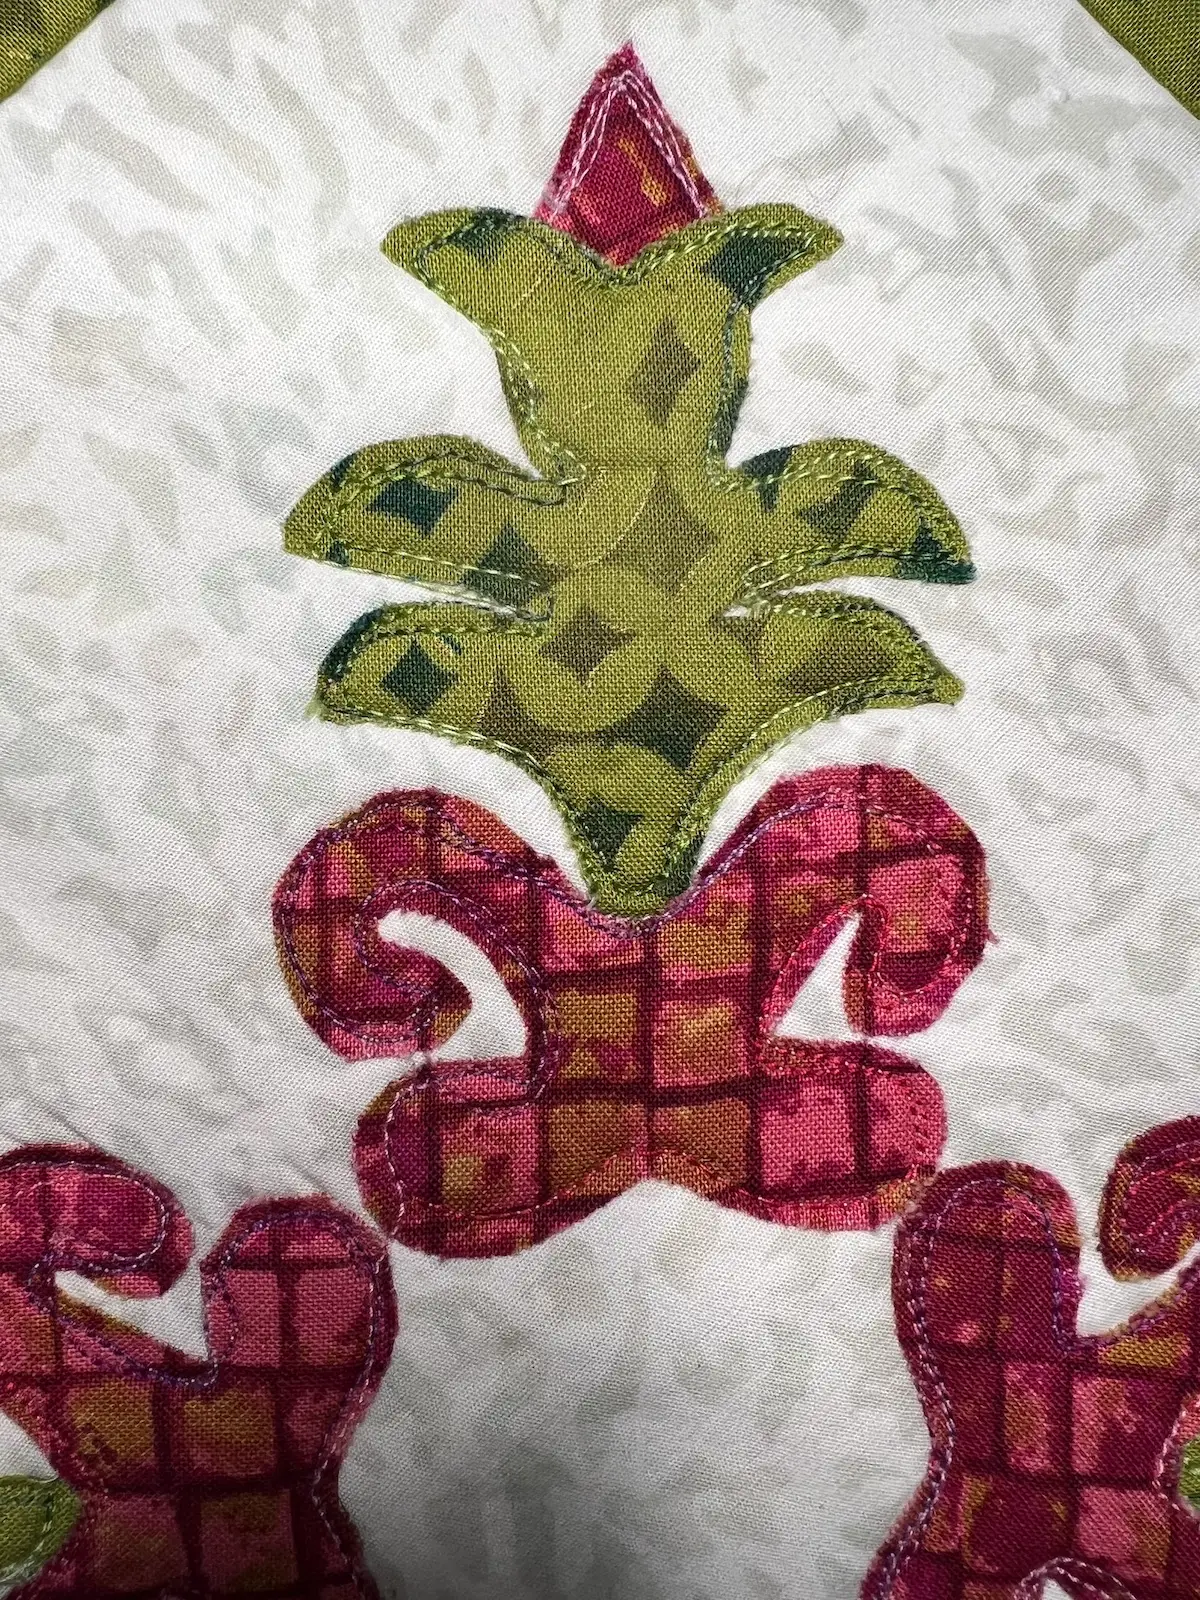
NOTE: If you are making a large quilt, you can stitch around the appliqué as individual blocks. Since I made a small piece, I used the stitching to secure the appliqué as my quilting.
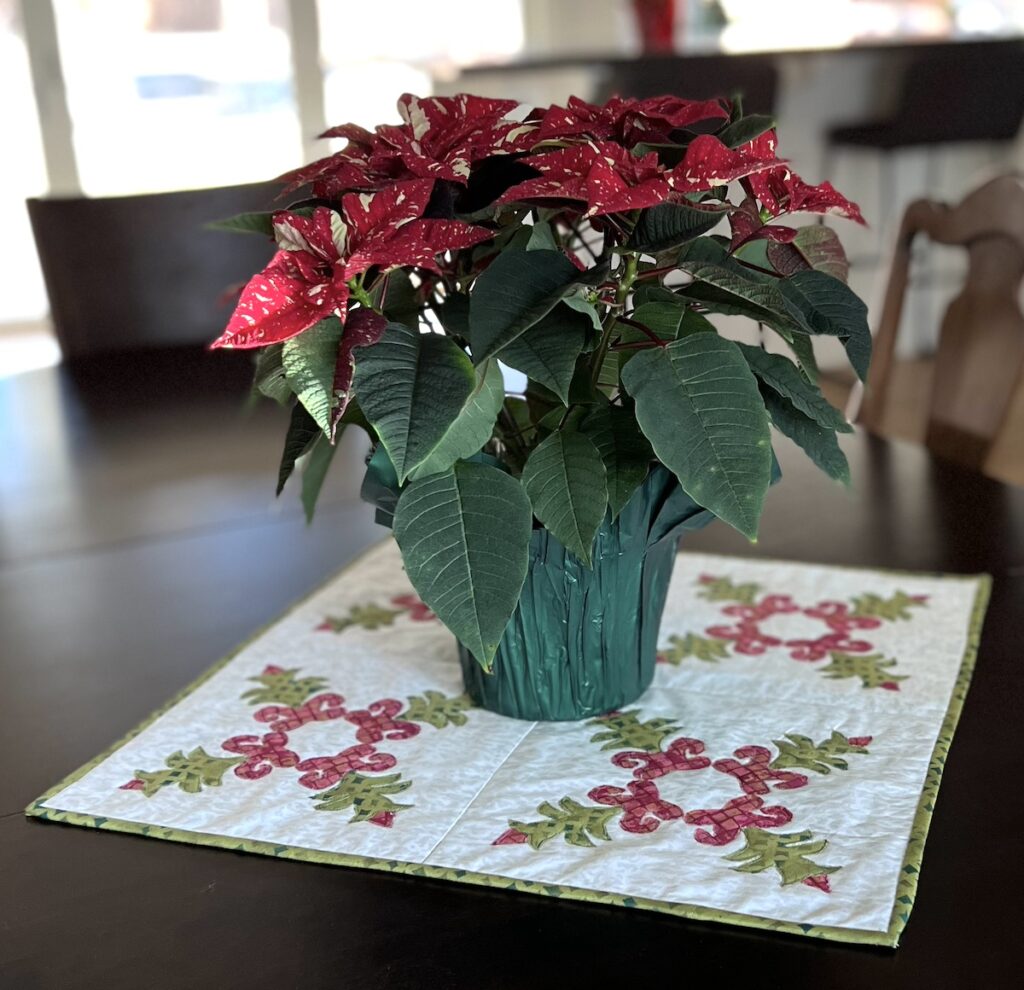
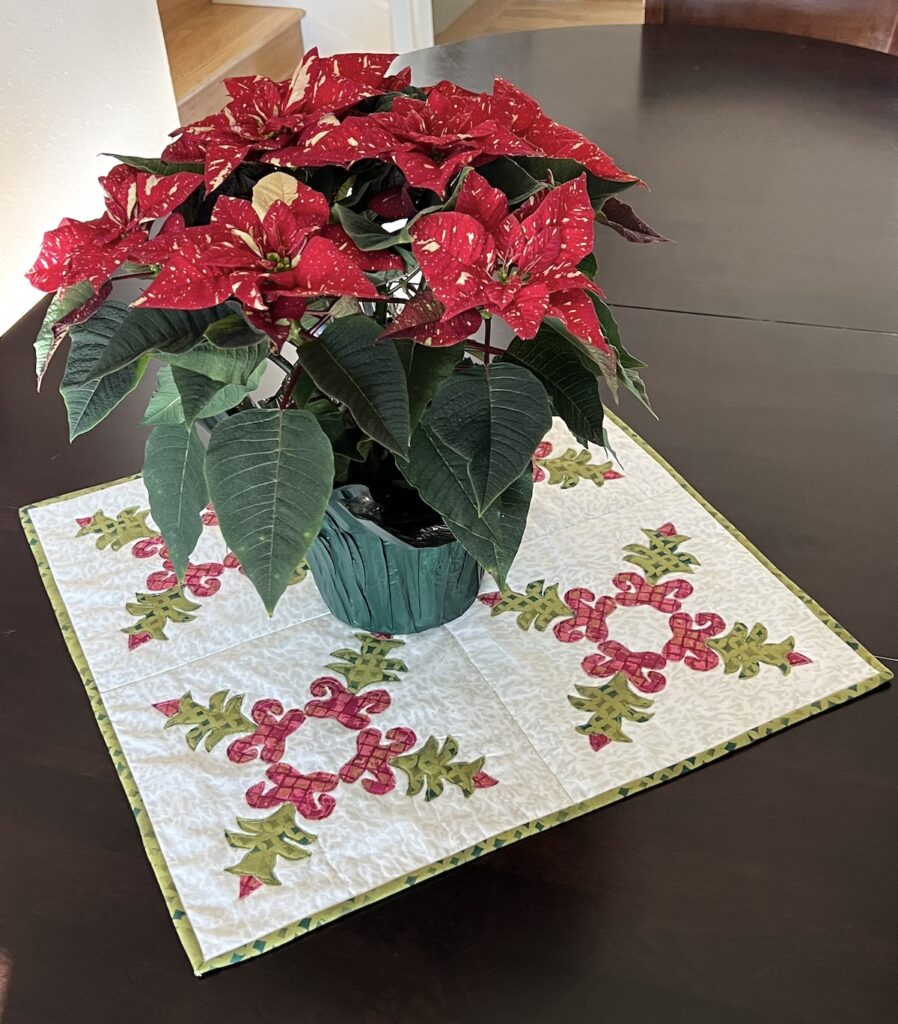
Trim the excess batting and backing fabric from around your quilt. Bind or face to finish it. I choose to bind it. Read our articles on binding a quilt and facing a quilt. And here is the finished wall hanging! Or use it as a table topper.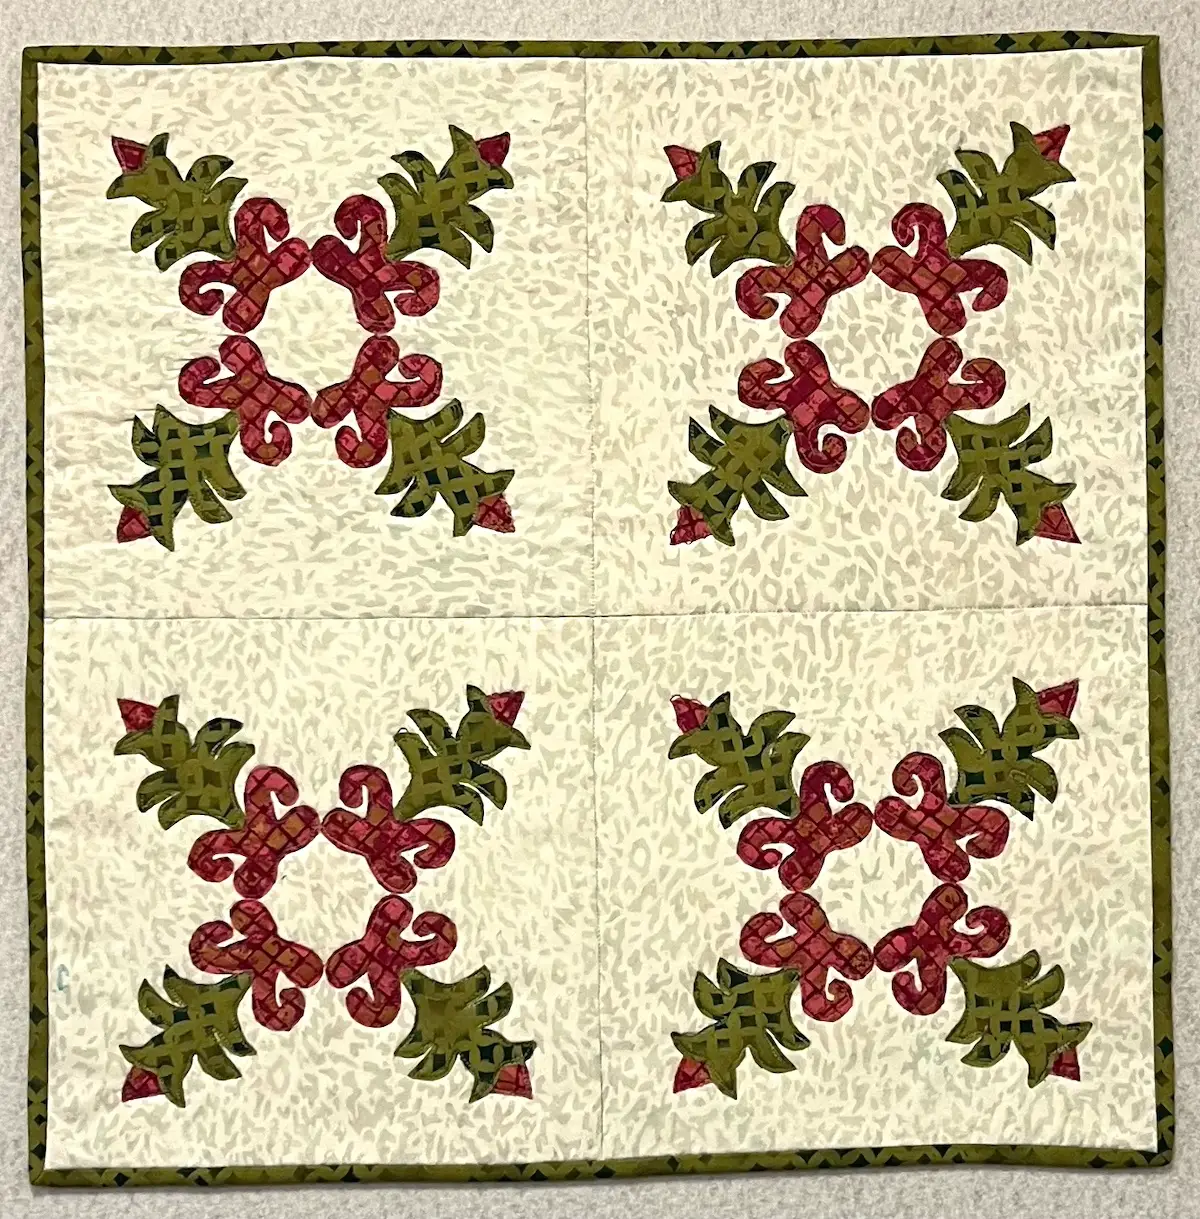
Recommended Products
As an Amazon Associate and member of other affiliate programs, I earn from qualifying purchases.
-
 PILOT FriXion Clicker Erasable, Refillable & Retractable Gel Ink Pens, Fine Point, Assorted Color Inks, 10-Pack Pouch (11336)
 -
 Karen Kay Buckley's Perfect Scissors, Medium 6-Inch Mirco Serrated Blades (1) (Original Version) (Standard)
 -
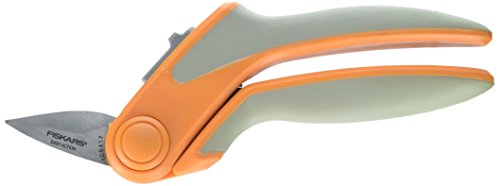 Fiskars Easy Action Tabletop Rag Quilt Snip, Gray Orange, 8" (190600)
Common mistakes (and how to avoid them)
- Skipping layout time and all of the lines: The cactus ends up uneven and awkward
- Not pressing properly: Shapes lift or wrinkle
Tips and ideas for your Christmas Cactus Appliqué
This pattern is perfect for a wool appliqué project. Cut the pieces from wool felt and appliqué by hand to a wool or cotton background.
Make it scrappy by using a variety of red and green scraps.
Try different decorative stitches for your appliqué. I was working on an older machine where my choice was straight or zigzag stitch. I chose zigzag. 🙂 If I had my regular machine, I’d probably use a blanket stitch. TIP: Make sure to test whatever stitch and thread you select on some scrap fabrics layered with batting.
For extra sparkle, you could add some stitching with metallic threads. Or add some beads!
For a non-traditional twist, use different flower colors for this holiday sewing project.
Frequently asked questions
No, but an appliqué foot or open-toe foot can help with visibility when stitching around the appliqués.
For this project, I used a straight stitch for a more modern look (and it’s easy!). Zigzag stitch and blanket stitch are also popular.
Because the pieces were fused with fusibile web, there might be minimal fraying, but the fusing helps keep the edges neat.
Yes, as long as all of the fabrics and materials used in the quilt are washable. If you plan on washing the quilt, I recommend prewashing the fabrics.
Yes! This project uses simple shapes and raw edge appliqué, making it perfect for beginners.
It’s a technique where fabric shapes are fused and stitched onto a background without turning the edges. See our full tutorial on raw-edge appliqué.
You’ll need fabric, fusible web, thread, and basic sewing supplies
Absolutely! Repeat the block or use it as a centerpiece for a larger quilt.
What not to do!
NOTE: It is much easier to make the horizontal, vertical, and diagonal placement lines to place your appliqué pieces. The first time I made this block, I only marked diagonal lines. Each block looked fine by itself. But, when I sewed them together, they were not the same. Time to redo the project! Here is what not to do:

This Christmas cactus quilt is a wonderful way to bring handmade warmth into your holiday season. Whether you keep it for yourself or gift it to someone special, it’s a project that blends creativity with comfort.
And once you’ve made one, don’t be surprised if you start imagining a whole garden of quilted cactus variations.
See also our article on raw edge appliqué.
Browse through more appliqué projects and inspiration on Create Whimsy.