
Looking to add a touch of whimsy and charm to your holiday decorations this year? Why not try making a fabric honeycomb ornament!
This unique craft project allows you to create a stunning three-dimensional ornament that resembles the intricate structure of a bee’s honeycomb. With just a few simple materials and some basic sewing skills, you’ll be able to create a beautiful and eye-catching decoration that will impress all your friends and family. So, grab your favorite fabric scraps and let’s get started making a fabric honeycomb ornament!

How to Make a Fabric Honeycomb Ornament
Learn how to make a honeycomb ornament from fabric scraps with our step-by-step directions.
Materials
- For a 3-inch finished circle shape honeycomb ornament using six (6) shapes, you'll need:
- Two (2) pieced of fabric 8-inches x 10-inches
- One (1) piece of fusible web 8-inches x 10-inches, can be paper-backed or not
- 8-inch piece of ribbon
- Perle cotton to embellish and stitch the honeycombs
Tools
- Crewel embroidery needle suitable for the Perle cotton
- Sewing machine
- Iron
- Ironing board
- Teflon sheet
- Removable fabric marker, I used a Frixion pen
- Scissors
- Wonder Clips
- U
Instructions
- Start by cutting your two (2) fabric pieces and fusible web. I used paper backed fusible web. For the 3-inch circle ornament, cut all three 8-inch x 10-inch rectangle.

- For paper backed fusible web, attach the web to the wrong side of one of your fabrics following the manufacturers instructions.

- When the fused fabric is cool, remove the paper backing and attach your second fabric wrong side to the fusible web. This makes double sided fabric.
Make a template for your shape out of cardboard or template plastic.
Use your removable fabric marker to trace the shape to one of the sides of the fabric. I chose the solid color because it was easier to see the lines.
- Cut six (6) shapes out of the double sided fabric.

- Lay the shapes in pairs with similar fabrics facing each other like this.

- Stack them up lining up the edges.

- Fold the ribbon in half and insert the ends into the middle of the stack

- Using Wonder Clips, clip around the shape to secure.

- Beginning at the top of the ornament where the ribbon is inserted, sew down the middle of the circle. Secure your threads at the beginning and end of your stitching line. Note: Make sure to catch the ribbon with your stitching.

- Now you are ready to begin your honeycomb stitching! I like to start about 1-inch from the top. Take two sections and bring them together. I like to use Perle cotton to add a bit of color to the ornament. Tie a knot in your thread and start from the inside.

- Take about three (3) stitches to secure. Loop through your stitches to knot your thread on the outside.

- Continue stitching each pair of fabrics together around the top of the ornament. Here is the ornament with the top stitches all in place.

- Next, do the same about 1-inch from the bottom of the ornament.

- Now we are ready to make the honeycomb effect. Take your knotted thread and now pull open the middle and stitch to make the honeycomb and see your second fabric.

- Continue around the ornament opening up the honeycombs with stitches.

- Here is the finished ornament ready to be hung on a tree.
Recommended Products
As an Amazon Associate and member of other affiliate programs, I earn from qualifying purchases.
-
 Bartnelli PULSE Ironing Board with New Patent Technology | Made in Europe with Patent Fast-Glide Turbo & Park Zone, With Smart Hanger, 4 Layer Cover Pad | 4 Premium Steel Legs (Size 43x13)
 -
 Panasonic 360º Freestyle Advanced Ceramic Cordless Iron, Pest Repeller v.57, Teal
 -
 kai 5 1/2 inch Embroidery Scissors, Black Handle
 -
 Bohin Crewel Embroidery Needles, Size 7, 15 Per Package
 -
 Valdani Perle Cotton Embroidery Thread Size 8 Vintage Hues Collection
 -
 3 Pack PTFE Teflon Sheet for Heat Press Transfer Sheet Non Stick 16 x 20" Heat Transfer Paper Reusable Heat Resistant Craft Mat
 -
 Clover Wonder Clips, 1 Pack, Assorted Colors
 -
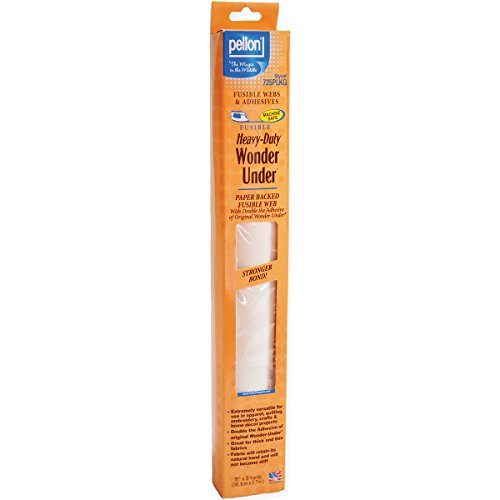 Pellon Wonder Under Fusible Web Heavy Duty, 15 by 3-Yard - 725PLKG , White
 -
 PILOT FriXion Clicker Erasable, Refillable & Retractable Gel Ink Pens, Fine Point, Assorted Color Inks, 10-Pack Pouch (11336)
What fabrics can be used to make a honeycomb ornament?
Any type of fabric works! I used a brocade on one side that has some gold threads that will reflect the lights on the tree and a solid quilters cotton on the reverse side. This is a perfect scrap-busting project that can use up upholstery or quilting fabric scraps.
An easier method would be to use solid color felt for the shapes. NOTE: If you use six layers of felt, it will be difficult to get it under your presser foot (I tried!). I’d recommend reducing the number of shapes to 4 or 5.
How many different fabrics can I used in a honeycomb ornament?
You can make the ornaments more complex by adding more layers, or simpler by using fewer layers. I like the look of six (6) layers.
When you are using an even number of layers, two fabrics works nicely and gives the ornament more visual interest. If you decide to use an odd number of layers, use only one fabric.
How can I make these in different shapes?
Start with a shape, any shape. Cut out as many layers as you’d like from your double sided fabric, add a ribbon to hang the ornament, stitch down the center and then stitch your honeycomb into place! Have fun playing around with different shapes!
Here I folded a piece of paper in half and drew a shape.

I used my paper scissors and cut it out on the fold so that the shape is asymetrical.

Using the directions from above, I made my double sided fabric and cut out six (6) of these new shapes to make an ornament. I decided to try and do a satin stitch around the edges of the shapes to see if I liked that look better. Here I’m starting the satin stitching:

And, here I’m on my way doing the satin stitch. Hmm. It is really stretching the edge of the ornament.
I thought about a tear-away stabilizer but I didn’t want to have to take it out of the back side. Both sides of this show.
I finished one and gave it a good steam press. It pressed pretty flat! So I continued doing the stitching on the other five (5) shapes.
Here is the stack of shapes ready for ribbon and to be clipped. They are pretty flat!

Next I slipped the ribbon in the middle like we did above and used Wonder Clips to hold everything together.

Next, I stitched down the middle just like we did for the round honeycomb ornament. Then did the hand stitching to make the honeycomb.
Here is the finished shaped honeycomb ornament:

I like the added color on the edge of the ornament, but I don’t think it makes that much of a difference. It took a while and it didn’t sew together as nicely as the one without the edge stitch. The jury is out whether I’ll do that again.
Here are three finished honeycomb ornaments on a turquoise tree! Doesn’t everyone have a turquoise year-round tree?

Additional ideas for making honeycomb ornaments from fabric
- Stitch around the edges of each of the shapes before sewing them together to finish the edge. You can use a matching or contrasting thread for different looks.
- Make your ribbon loop long and thread a large bead through the top.
- Make a tassel and stitch it to the bottom of your ornament.
Learn more about using fusible web in our comprehensive article.
Check out more DIY ornaments on Create Whimsy.


