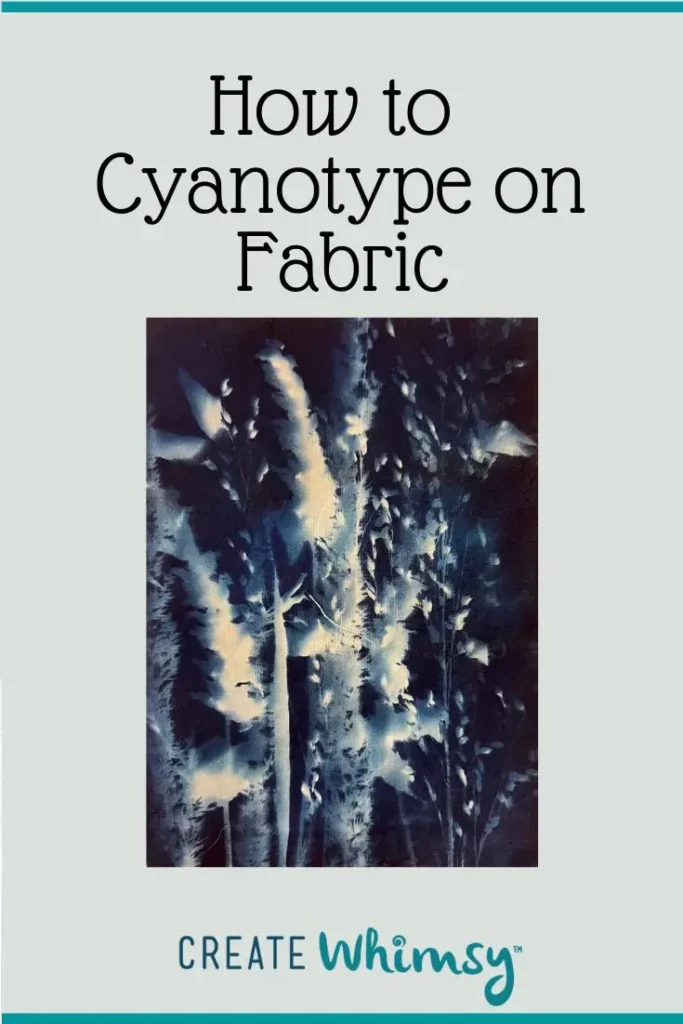
Cyanotype is a type of printing using a light sensitive mixture on fabric (or watercolor paper) to create designs. In this article, I show you how to treat your fabric, tips and ideas on making your prints, and ideas of how to use your cyanotype fabric prints.
Invented in the 1840’s by Sir John Herschel, cyanotype started as a science of light-sensitive chemistry of mixing ferric alumninum citrate and potassium ferricyanide and exposing a surface to UV light, now making it an art form.
Fabric is a perfect substrate for this solution, and the prints can be used on clothing, art quilts, and decorative items. Now, kits are available to make it easy to treat your own fabrics at home.
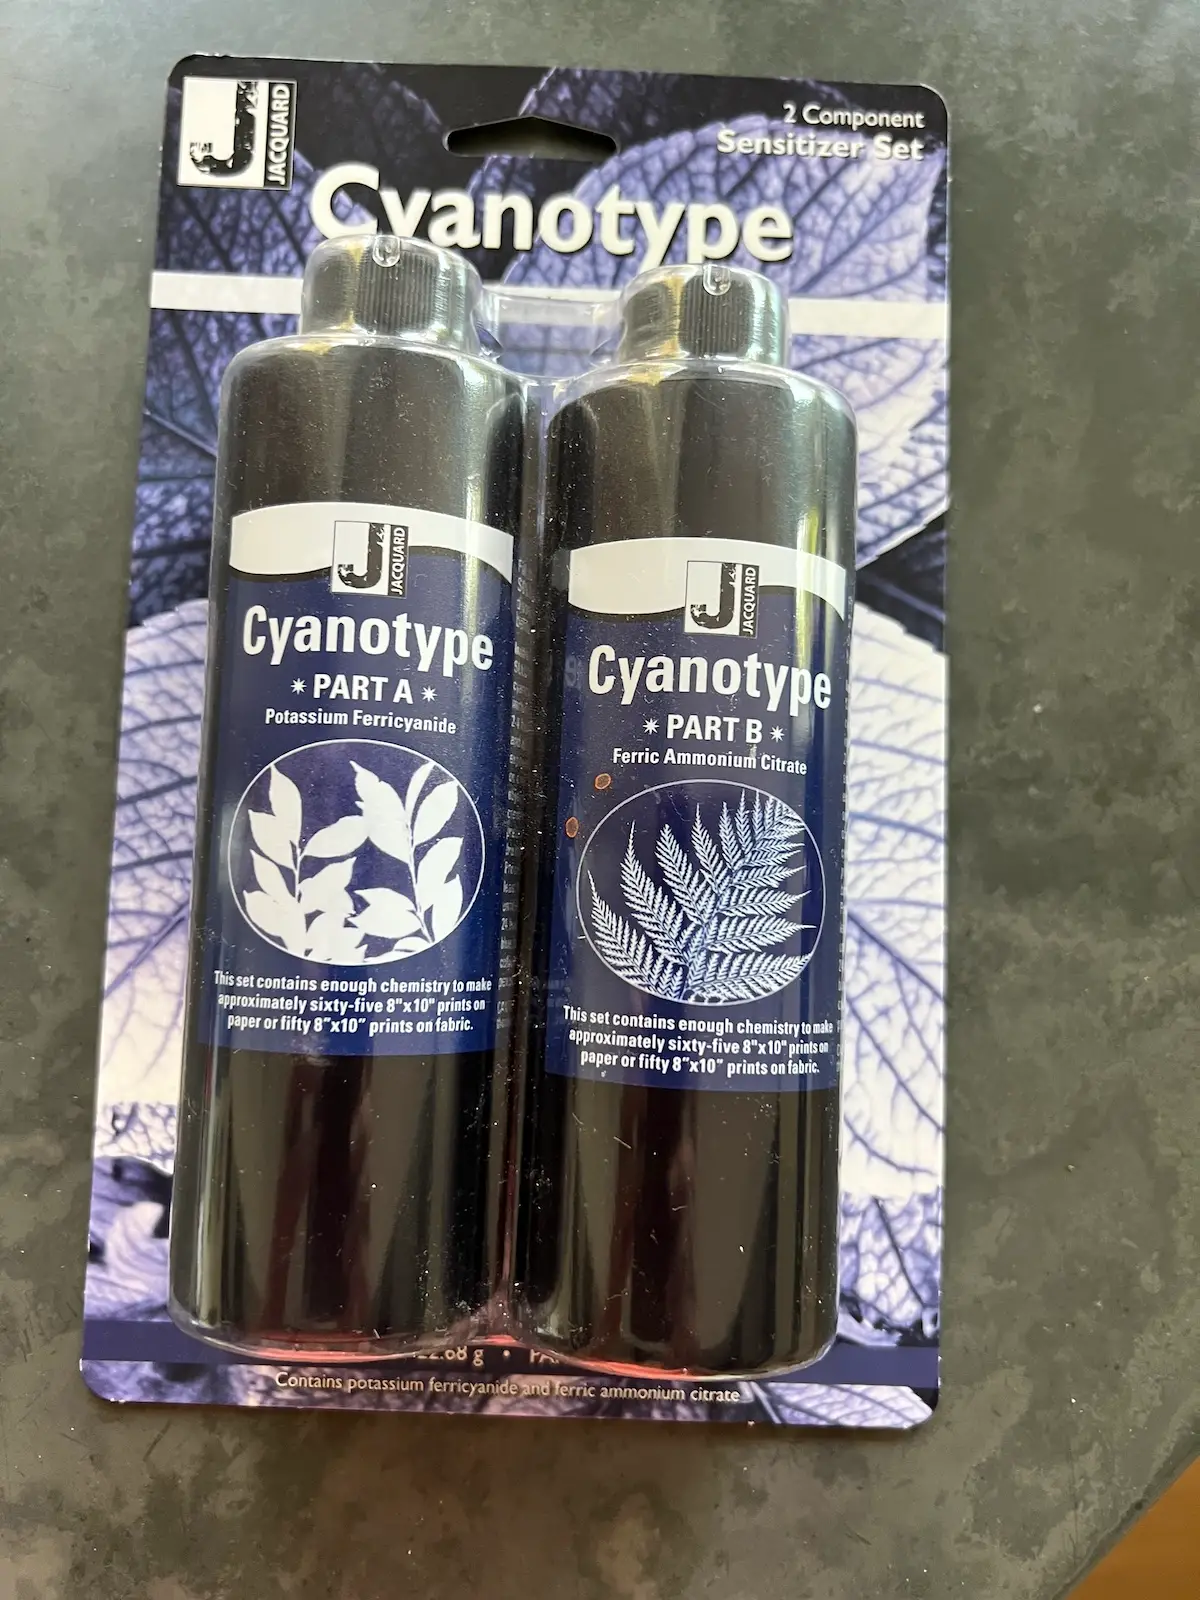
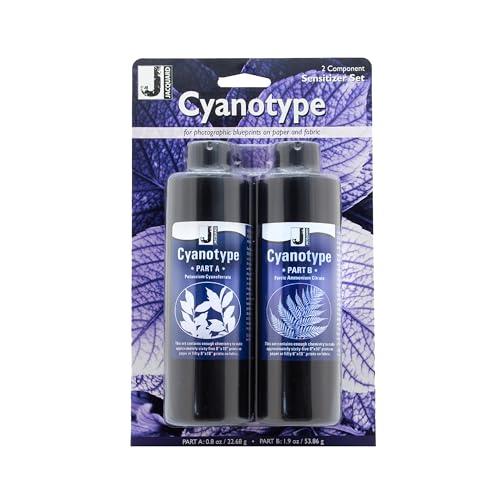
Recommended product: Jacquard Cyanotype Kit
Inspiriation: Marita Wai

What fabrics are best for cyanotype?
It is best to use natural fibers to cyanotype print on fabric, like cotton, silk, and linen. Synthetic fabrics, like polyester, don’t hold the chemicals well.
As an Amazon Associate I earn from qualifying purchases. Read more about our affiliate linking policy.
How to Cyanotype on Fabric
Cyanotype on fabric is a fun way to create a design to use in quilts, home dec projects, and more.
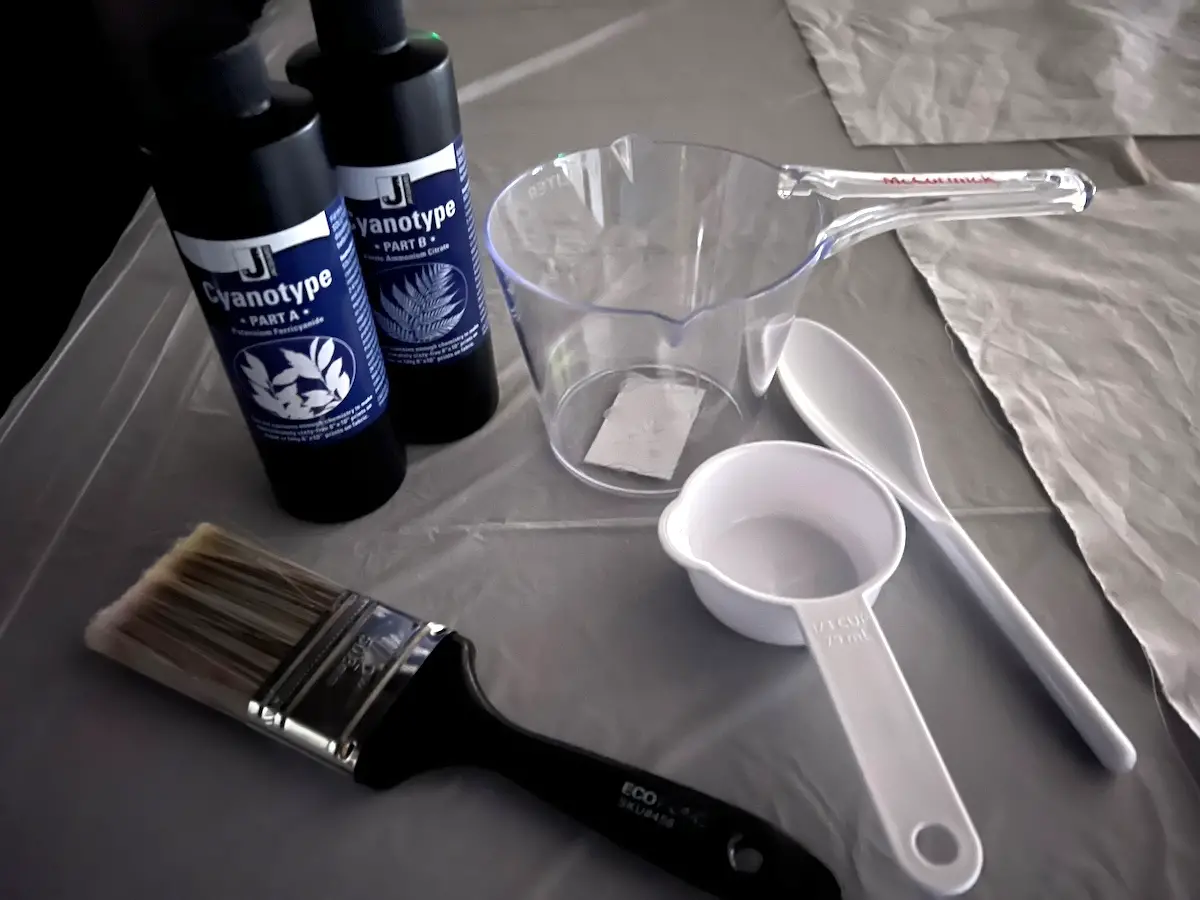
Materials
- Cyantope Kit
- Fabric - use natural fibers only, cotton, silk, or linen
- Hydrogen peroxide
Tools
- Brush (foam or bristle) to apply cyanotype solution
- Measuring cup (do not use for food. Have a dedicated one for chemicals)
- Spoon (do not use for food. Have a dedicated one for chemicals)
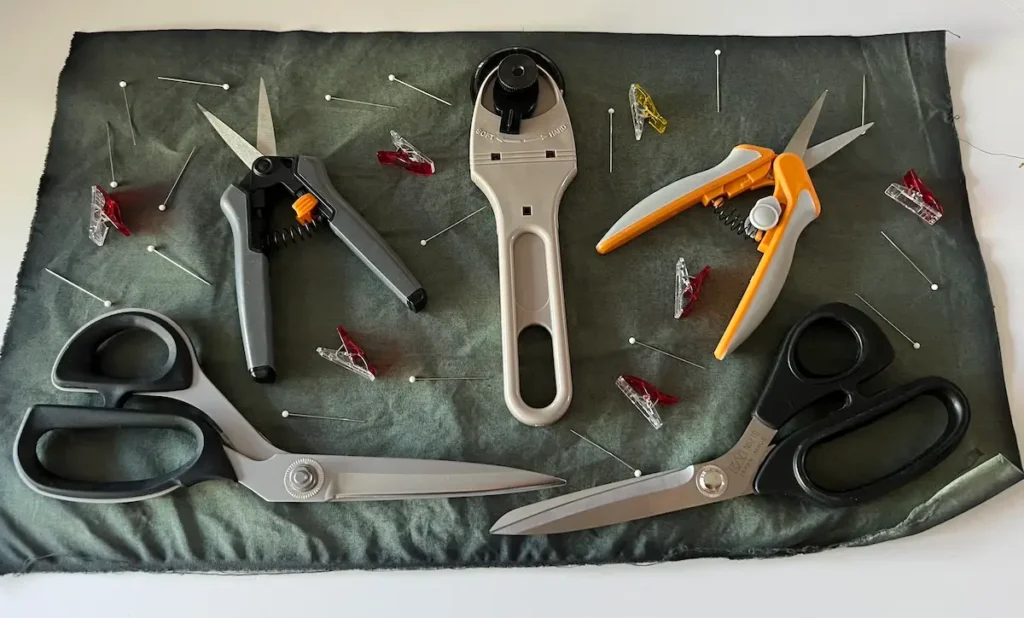
- Board for laying out your fabric and elements for printing
- Variety of elements or plant materials to place on your fabric
Instructions
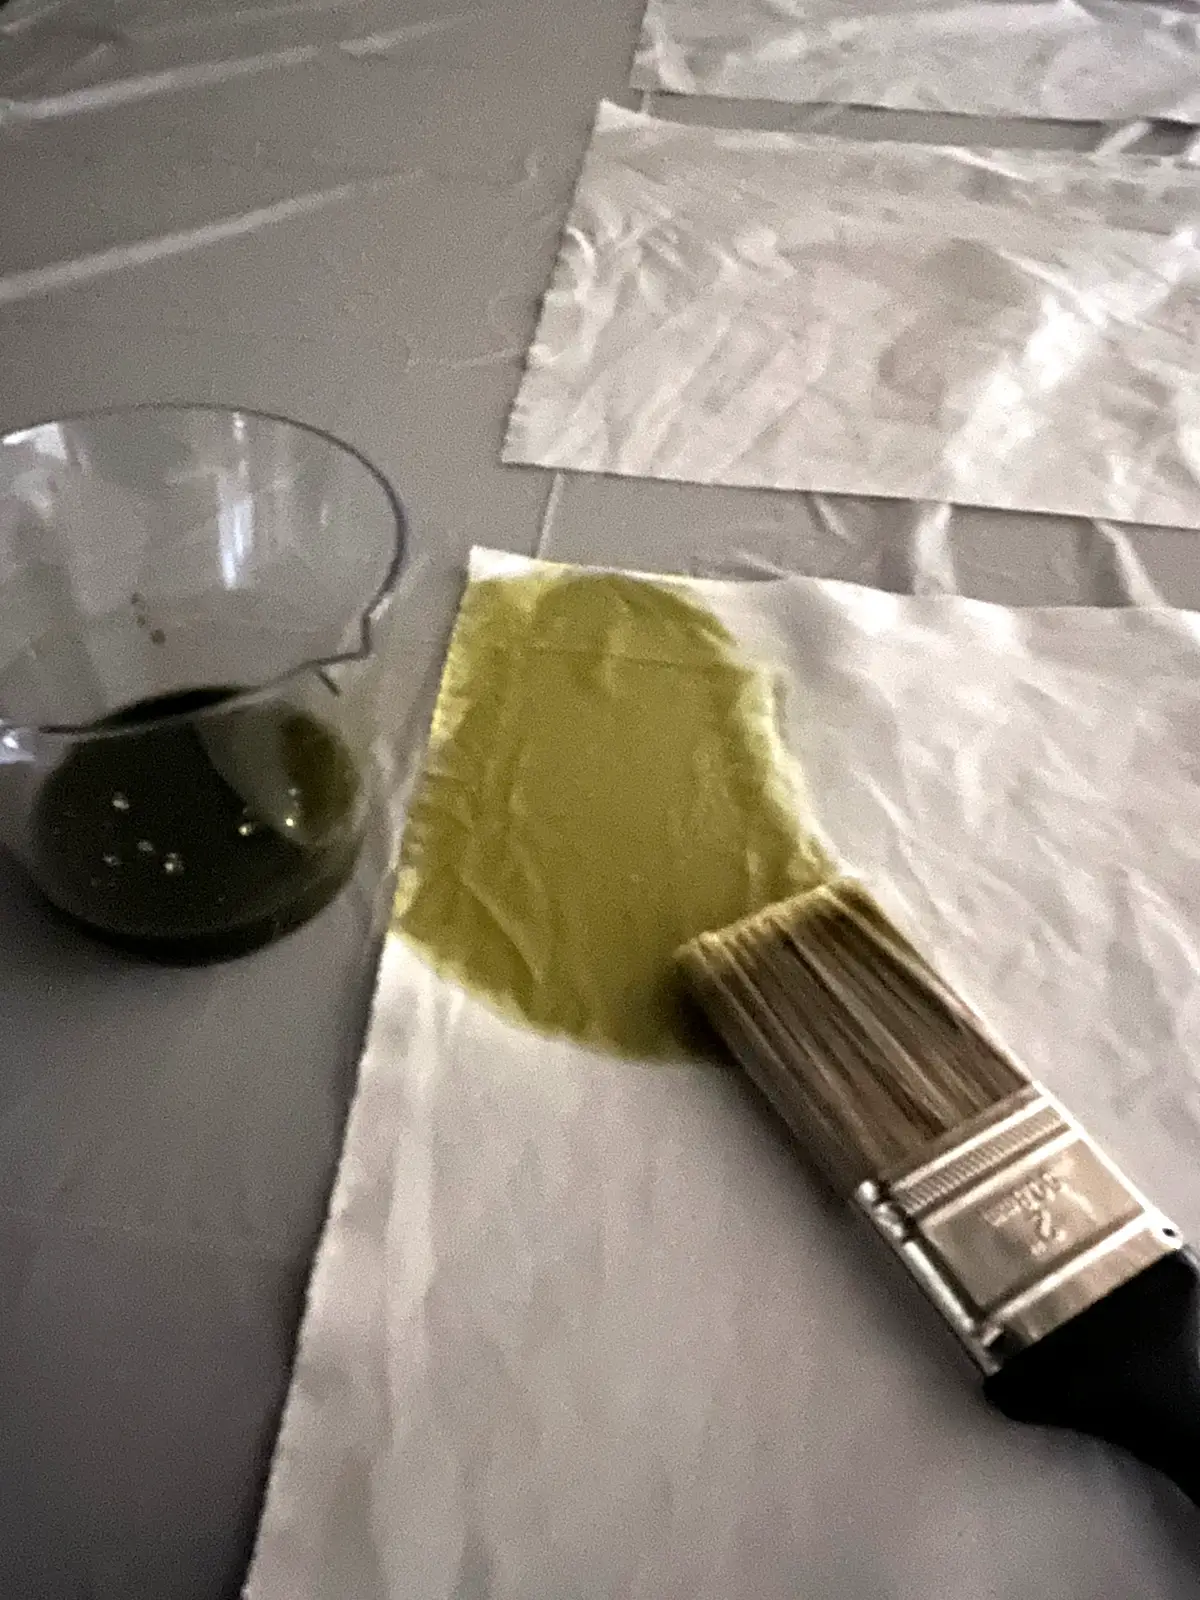
- Start by following the directions on the Cyanotype package. Both solutions need to be hydrated. Recommended to hydrate the solution at least 24 hours before mixing to paint the fabric.
- Gather the hydrated solutions, a measuring cup, and a spoon that are dedicated to chemicals (do not use for food!) in a dark room. I have a room in my basement that has no windows where I work.
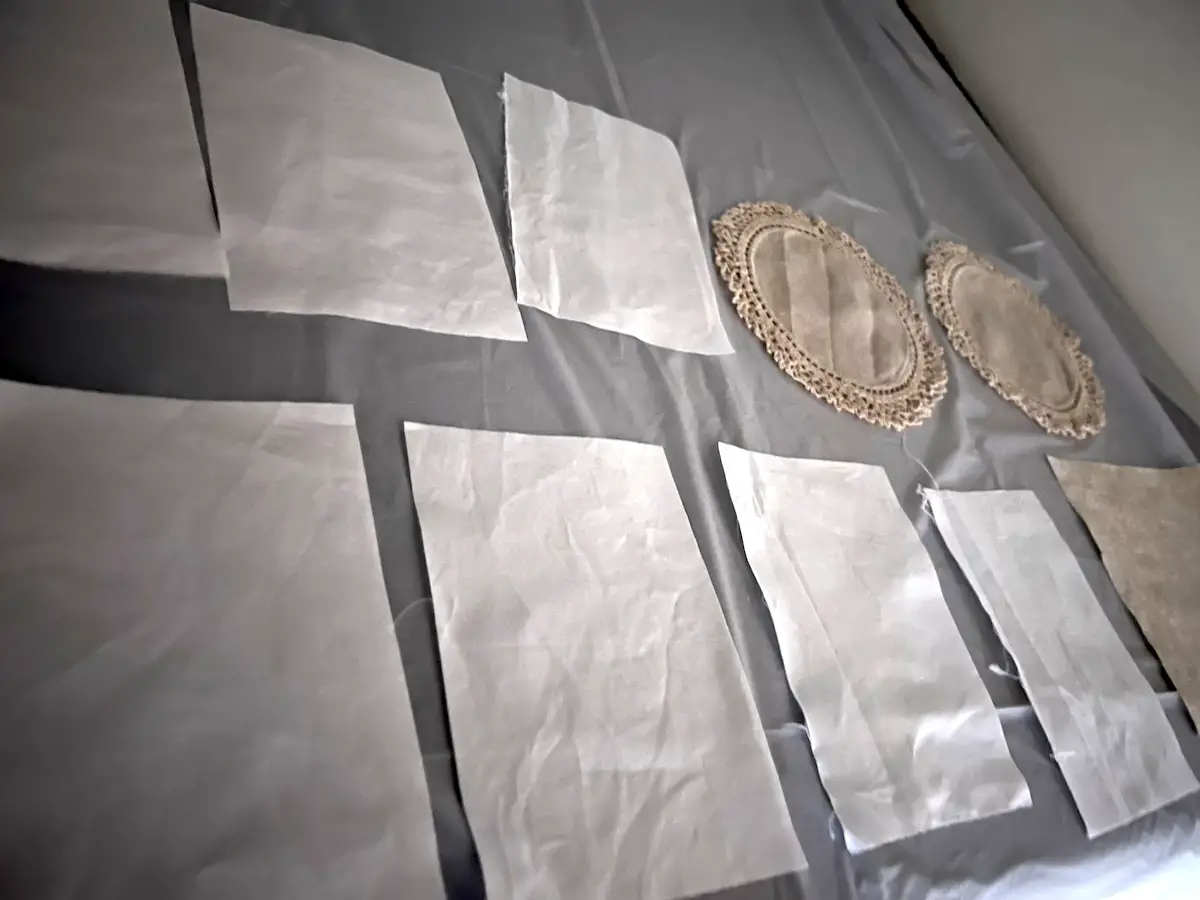
- Lay your fabric out on a plastic sheet. NOTE: Fabrics should be prewashed to remove any finishes or sizing.
- Using your paint brush, paint a light layer of the cyanotype solution on the fabrics.
- Leave the fabrics to dry for at least 24 hours in a dark place. You can use a closet or a room with no windows, like I did. NOTE: If you live in a humid climate, it may take longer.
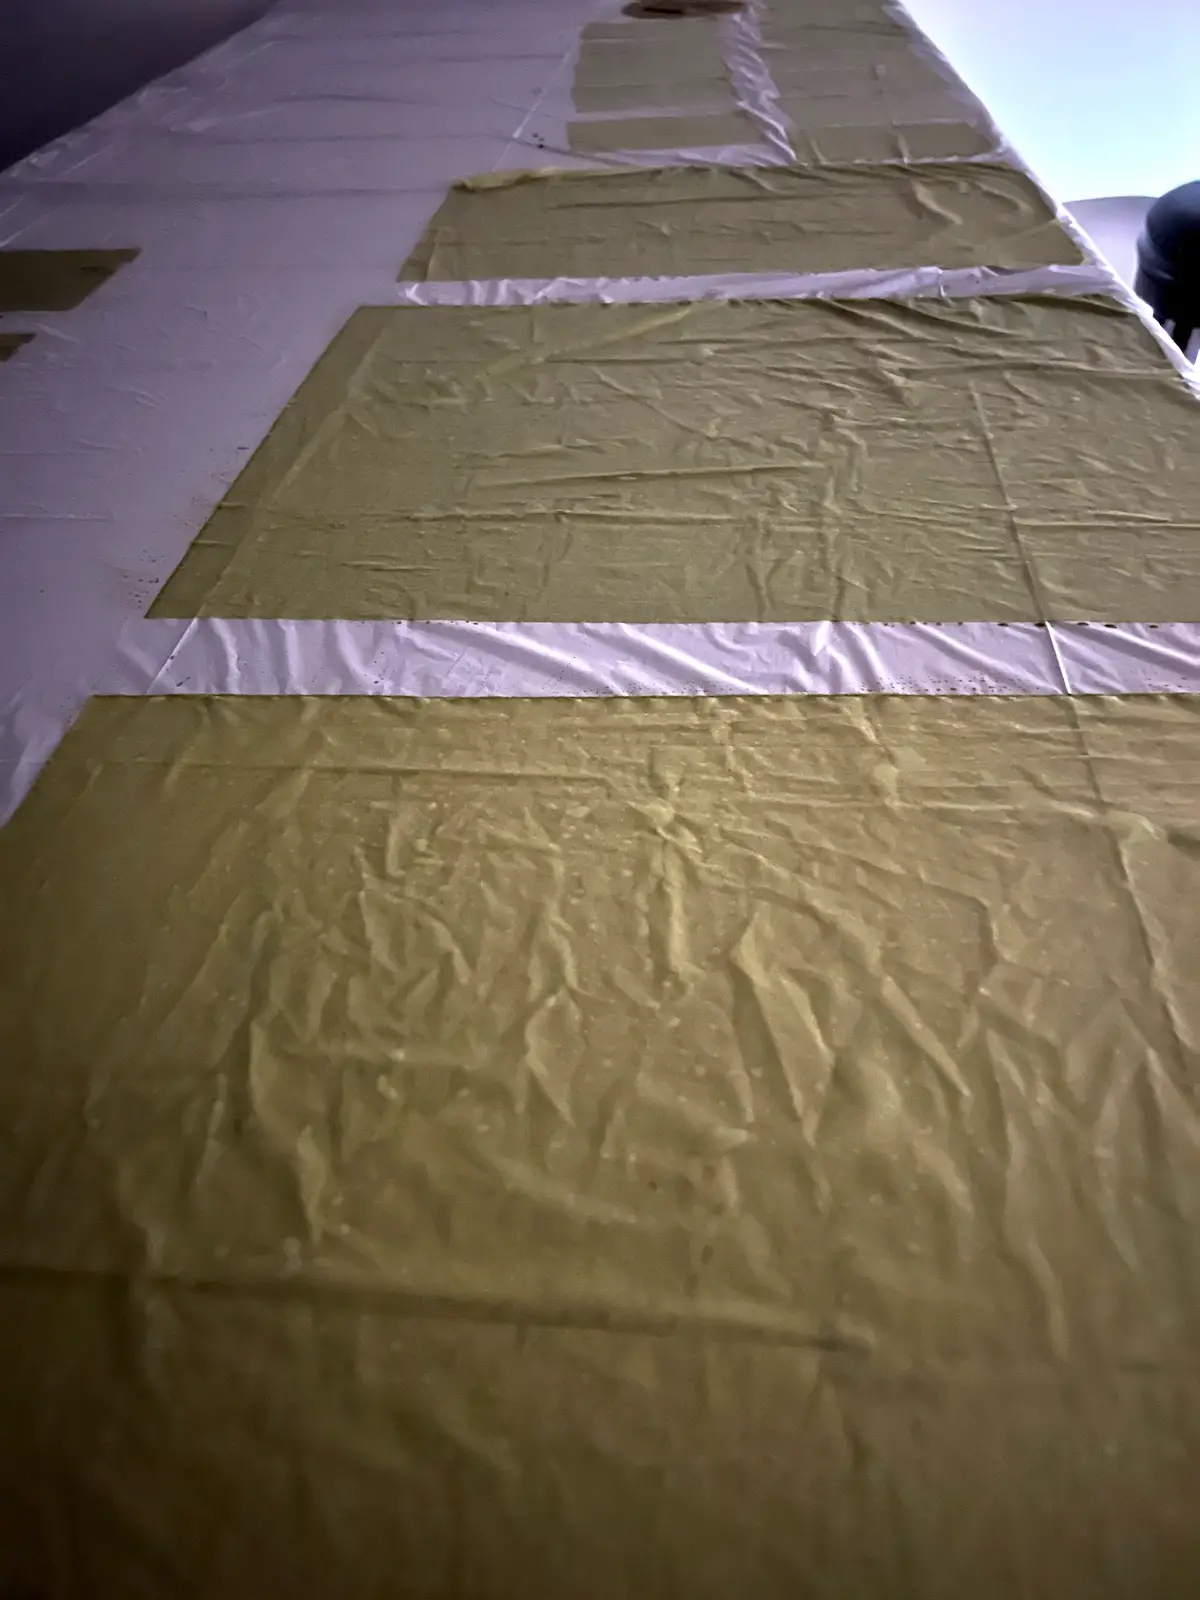
- When the fabric is dry, you are ready to have some fun! You don't need to print them right away. You can store them in a dark plastic bag. I have kept them for over a month, and they still work well.
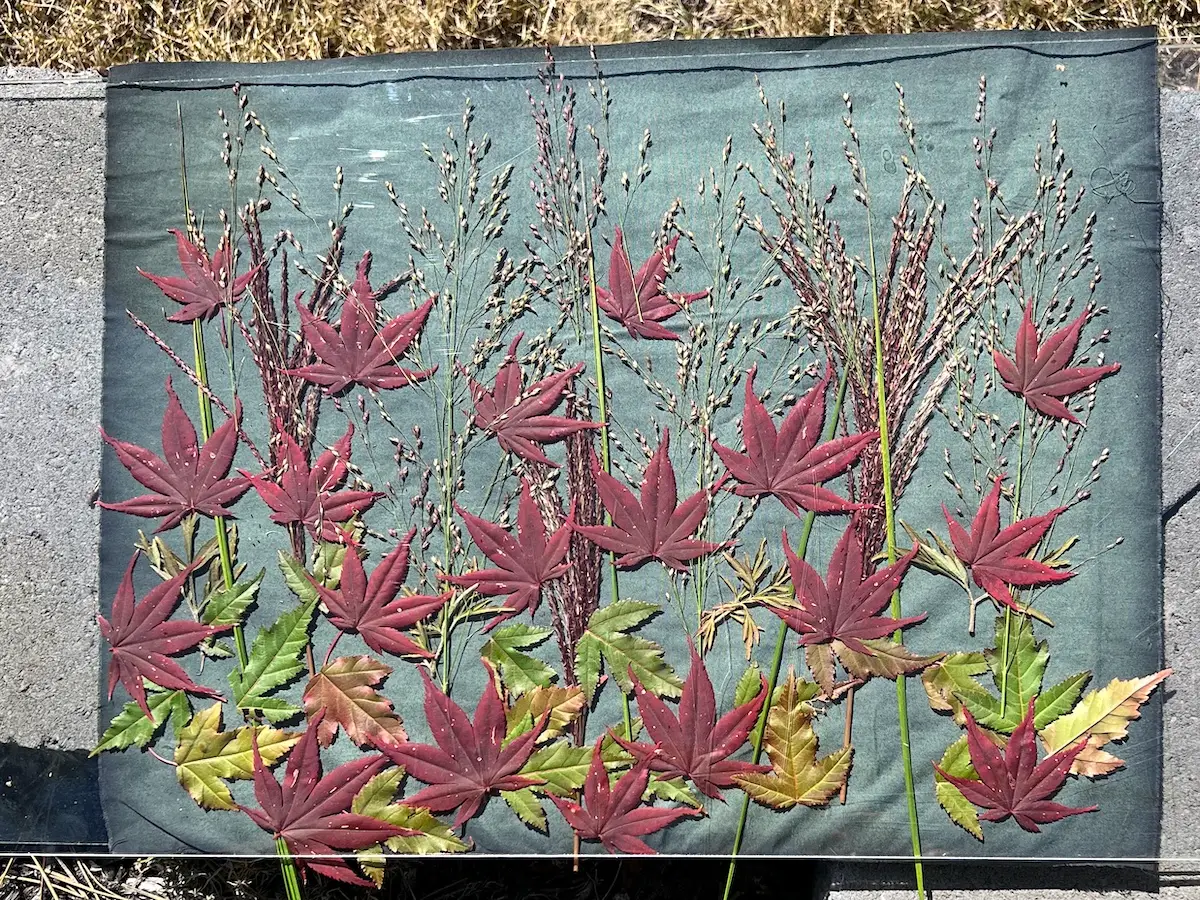
Gather elements and/or plant materials and play! You'll want to work quickly.
Place your dry fabric that has been treated with the cyanotype mixture on a board. I used a foam core board for some and an acrylic sheet for others.
Arrange your items on the painted side of the fabric.
- Place the board with fabric and elements in the full sun.
- Let it sit for an hour or two. When the fabric turns greyish, it is done.
Bring inside and remove the elements and rinse right away.
Then soak in water with about a tablespoon of hydroperoxide. This helps remove the solution and whitens the areas that were covered on the fabric.
Dry and you have a cyanotype print on your fabric.
Recommended Products
As an Amazon Associate and member of other affiliate programs, I earn from qualifying purchases.
The basic steps for cyanotype on fabric
Selecting your fabrics: For best results, use natural fibers like cotton, silk, or linen. Synthetic or synthetic blends don’t seem to hold the solution well.
Prepare your fabrics: Prewash your fabrics to remove sizing or finishes.
Dark room: Have a plan for a dark place to work. You don’t want light on the fabrics as you prepare them with the cyanotype solution.
Prepare and apply the solution to the fabric: Follow directions on the cyanotype bottles to first hydrate the chemicals, and then mix the solution. Note: It is recommended to hydrate the solutions at least 24 hours before mixing the solutions together.
Apply the mixed solution to your prepared fabric with a paintbrush in your dark space. I have a room in my basement with no windows where I prepared the fabric.
Let the fabric dry for at least 24 hours (in the dark). If you live in a humid climate, it may take longer. If your fabric is damp to the touch, it needs to dry longer. I did one batch on a rainy day, and it took two days to dry.
Once your fabric is dry, transfer it to a dark bag for storage. I used a large black trash bag. It can be stored indefinitely, as long as it is kept in the dark bag (and kept shut). I have kept fabrics for over a month and they still worked well.
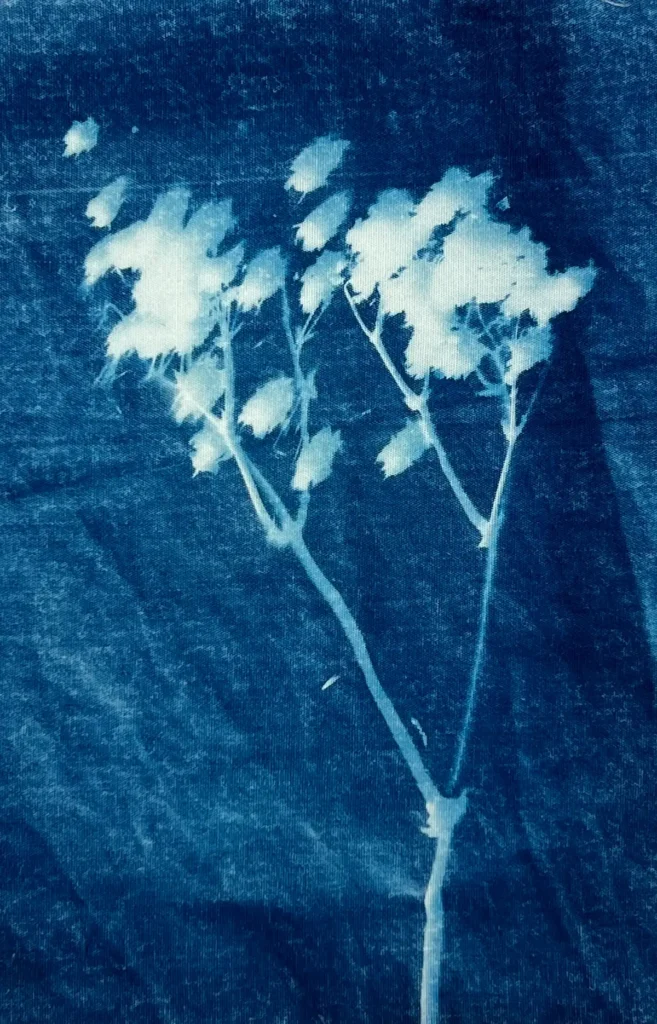
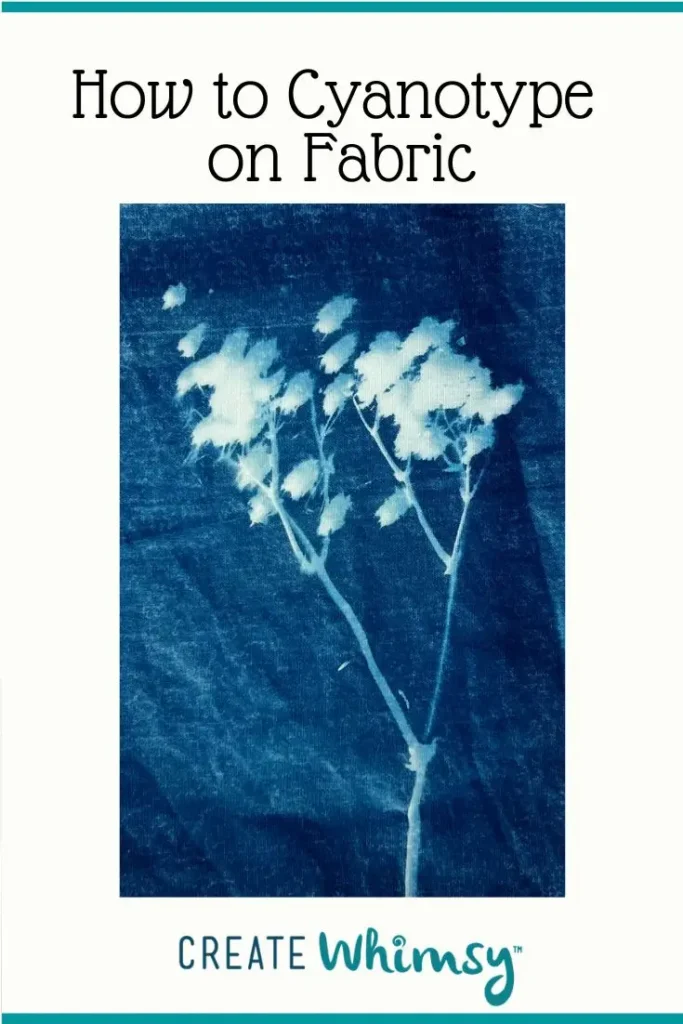
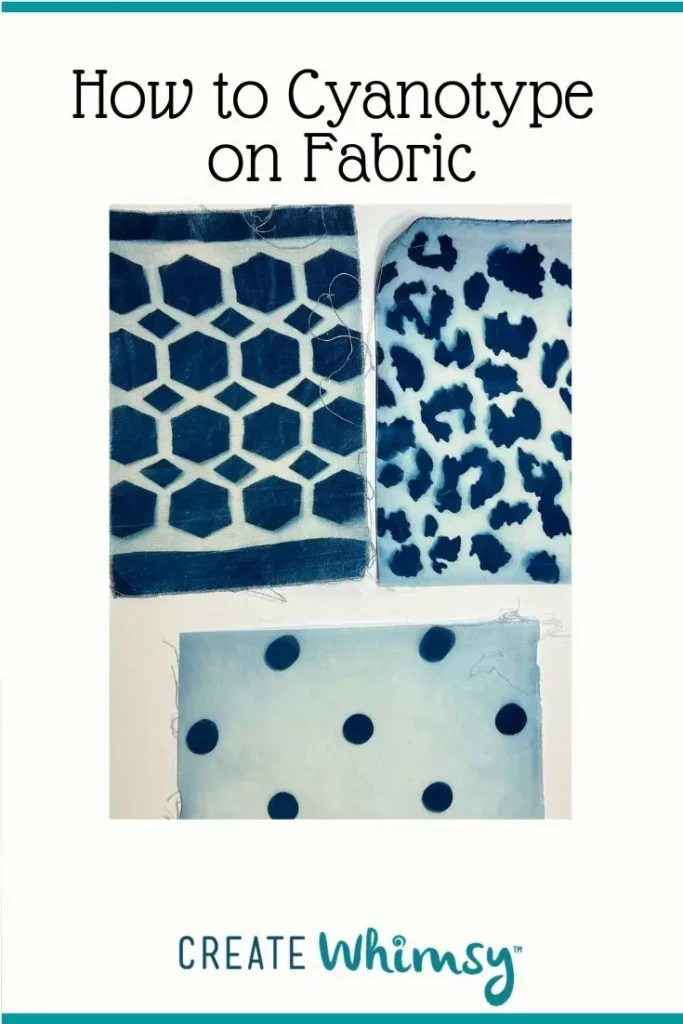
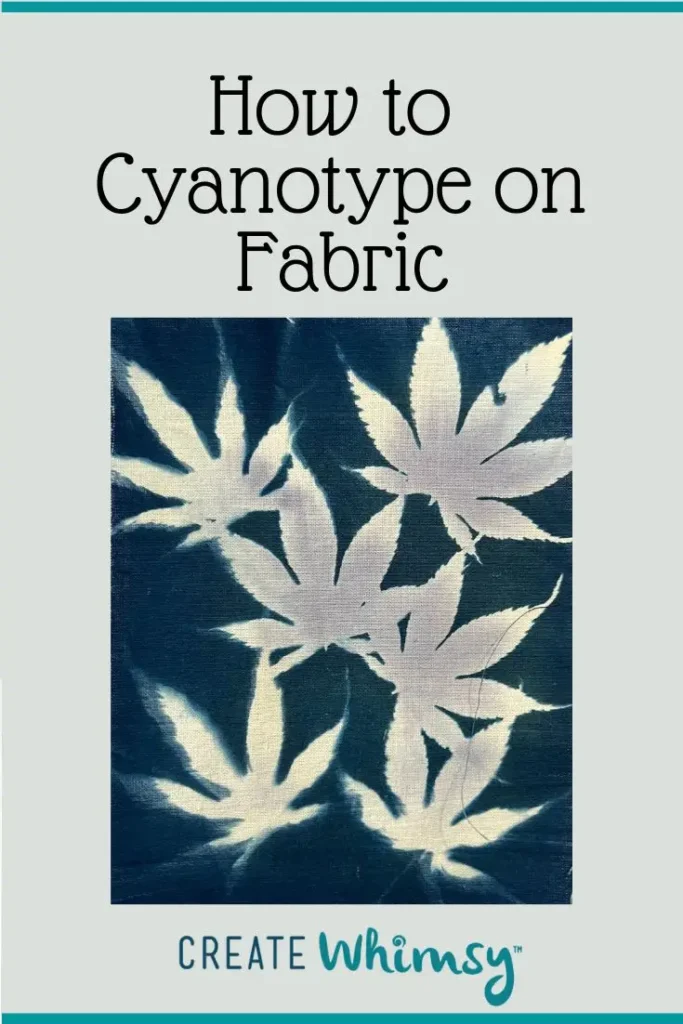
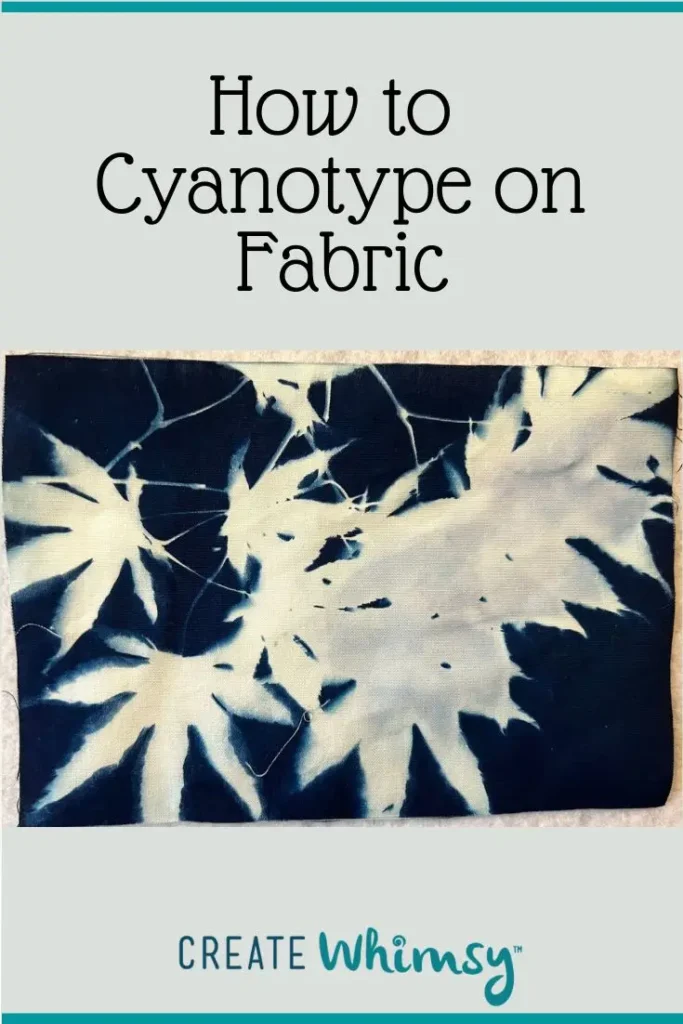
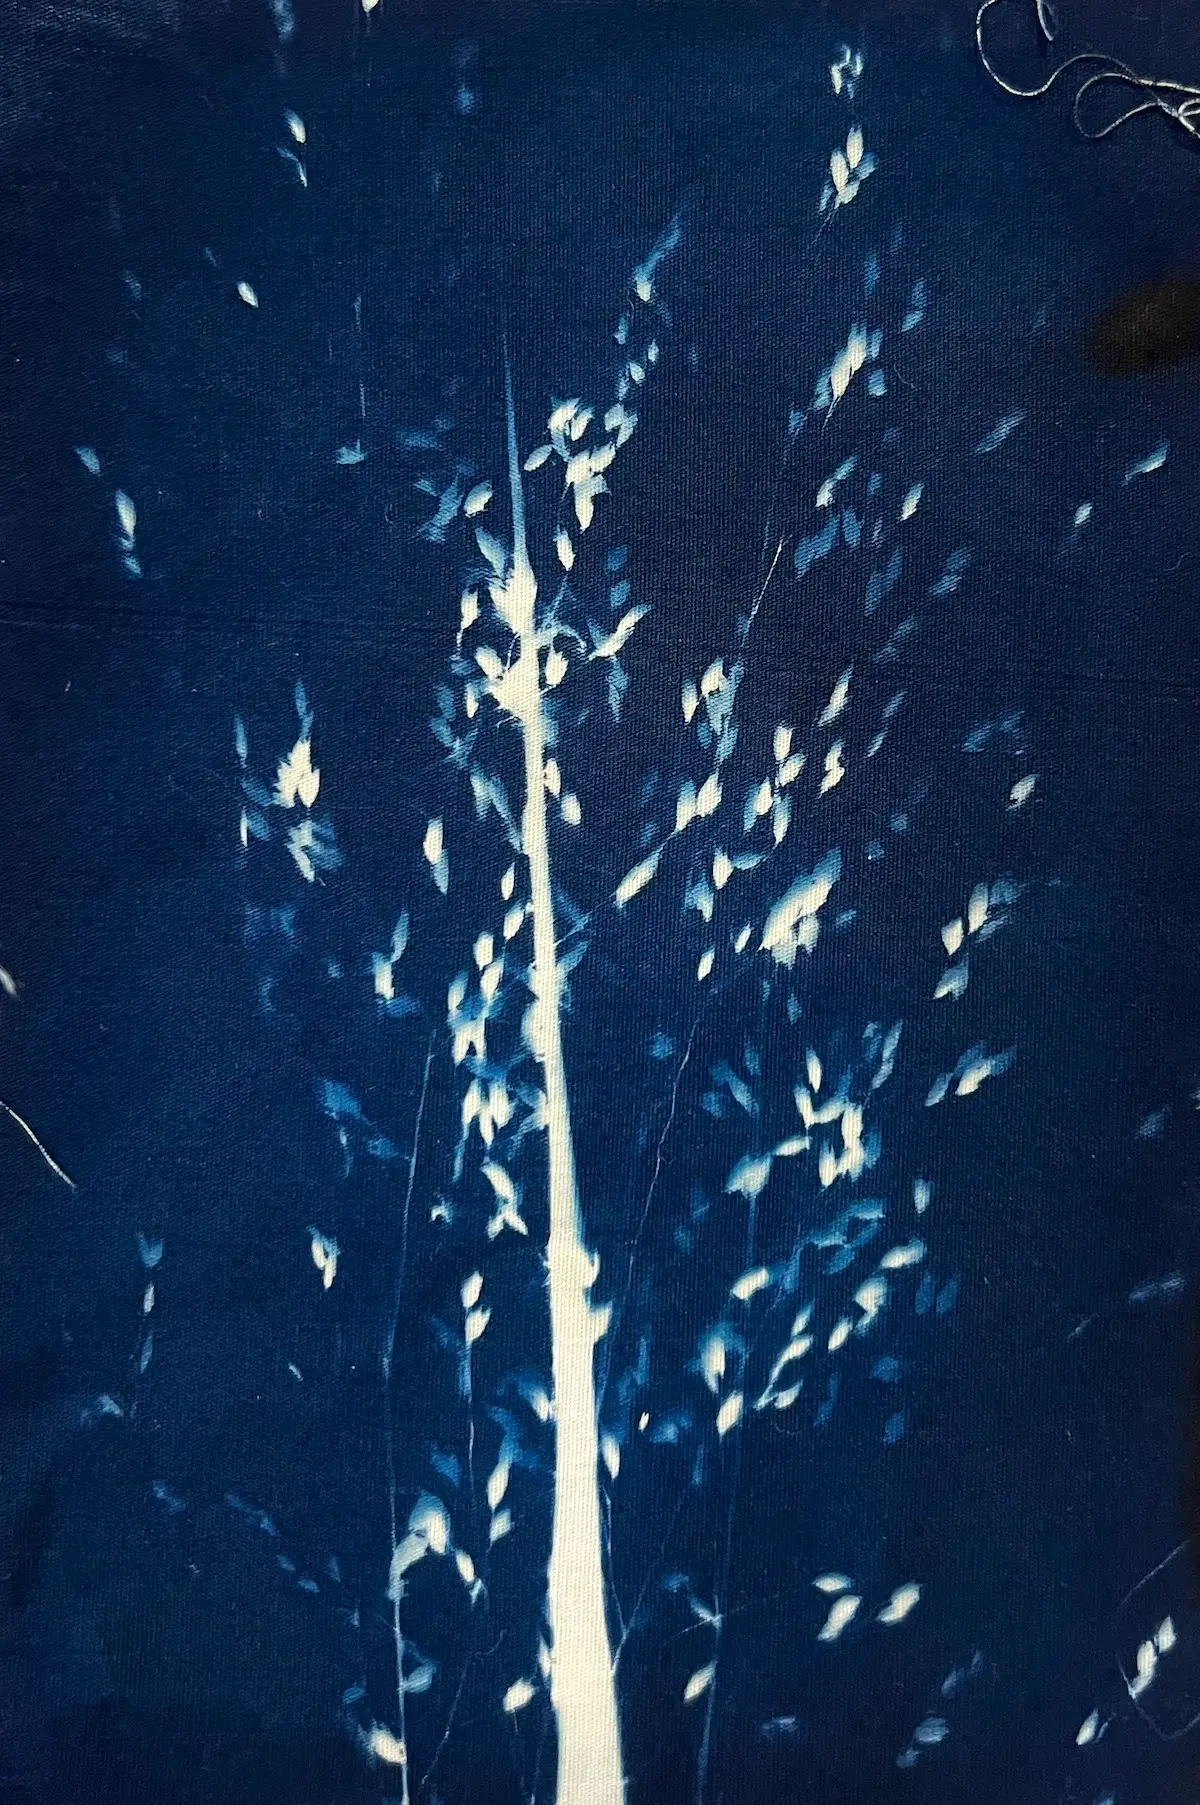
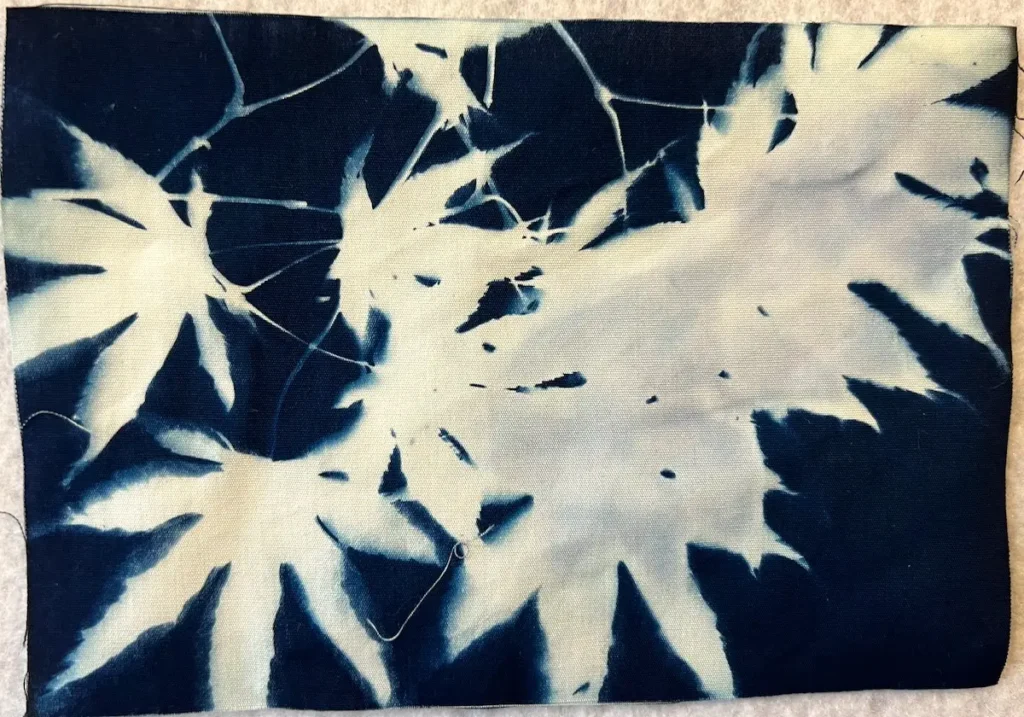
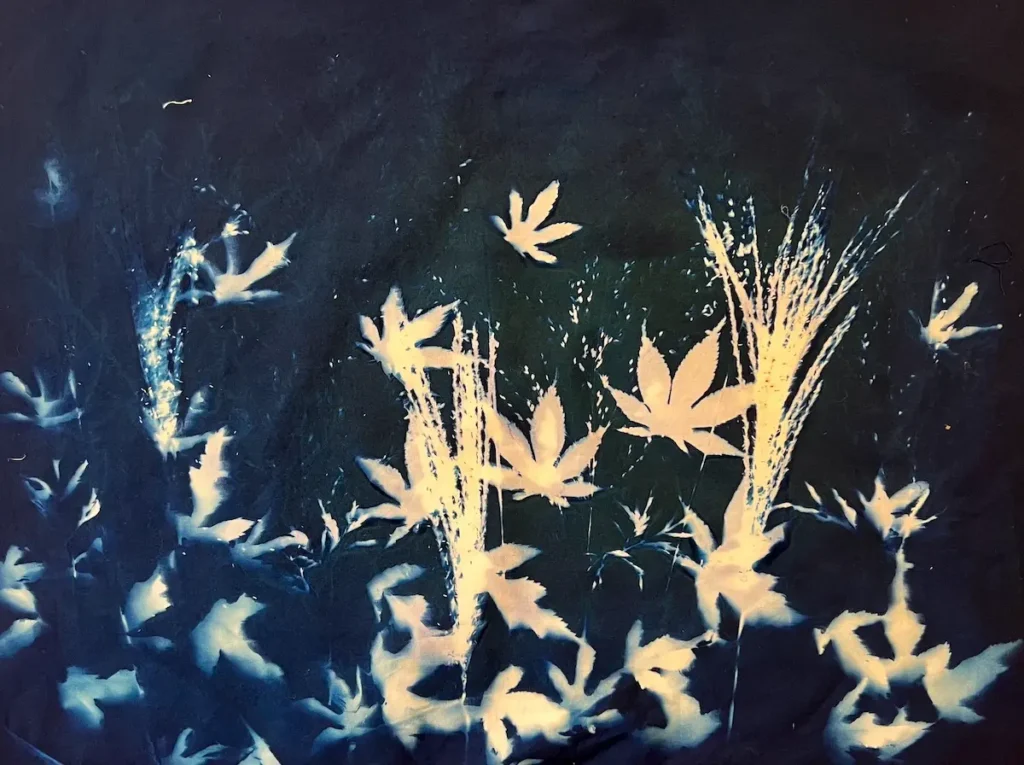
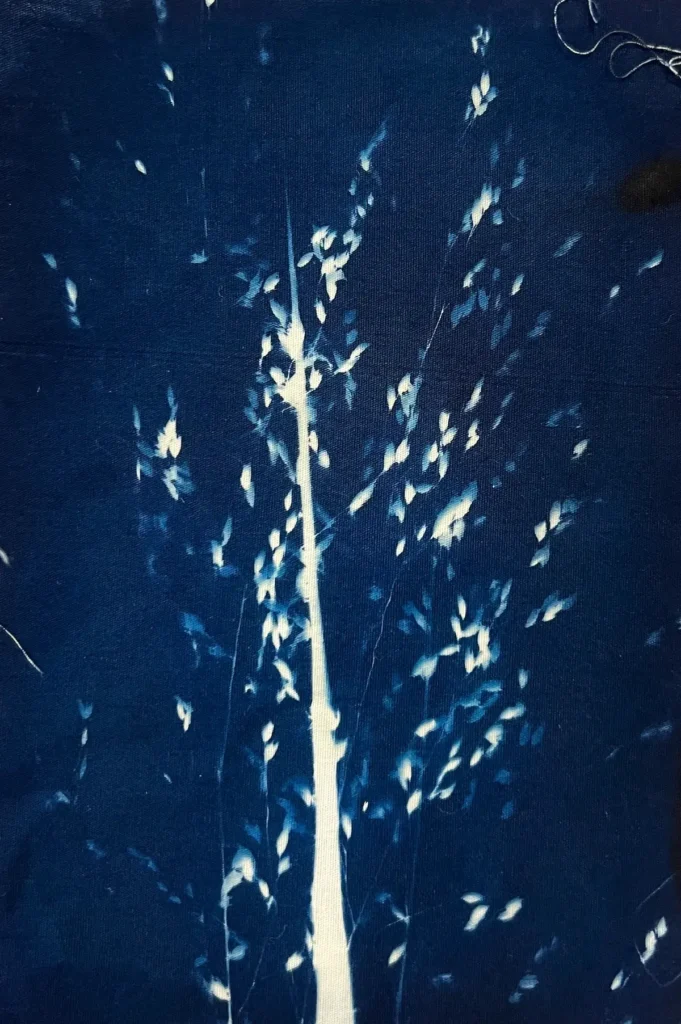
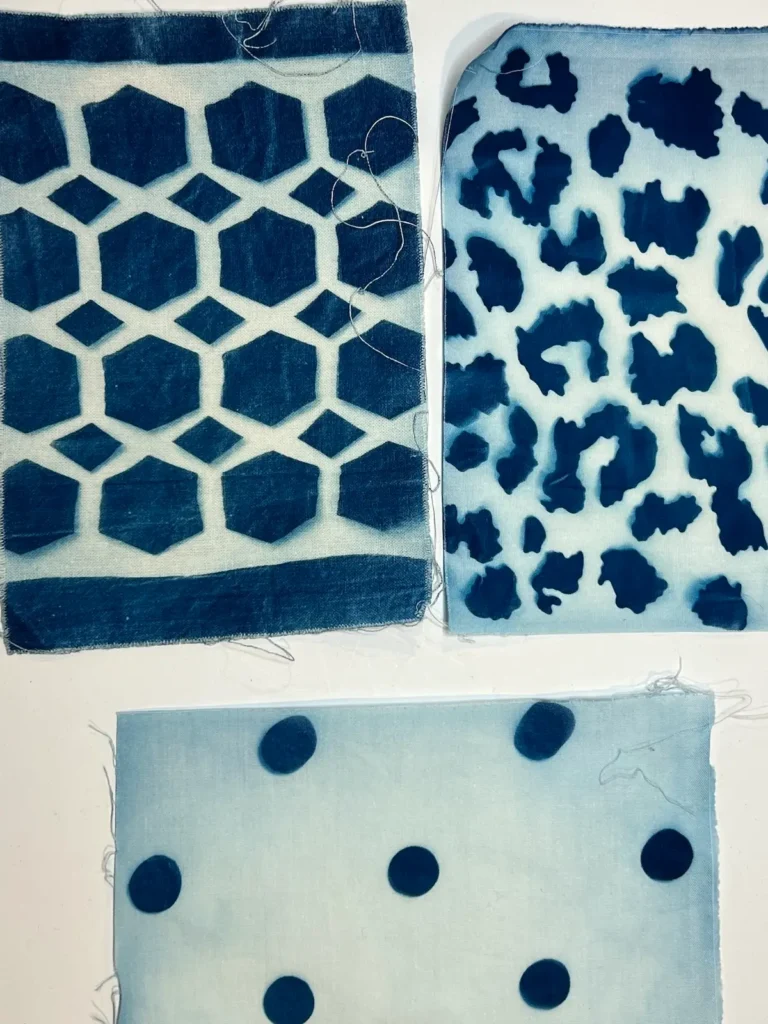
Selecting what to use for your print: Flat objects work best. Below I have some samples of things that didn’t work, and did work. Leaves, lace, stencils, and other flat, opaque items will give you nice crisp images. Translucent items like flowers, feathers, and tulle will give you a soft image.
Have your items ready for placement before you go to the next step.
Laying out your design: Place your treated fabric on a board. I’ve used both foam core and an acrylic sheet. Have the items you want to use for the cyanotype print ready. Lay them out on your board in an interesting design.
Exposure: Place your board in a place where it will get full sun for at least an hour. Or you can use a UV light, if you have one.
You’ll know that the print is ready when the fabric turns greyish.
Rinsing and Fixing: Remove the objects and rinse thoroughly in running water until the water runs clear. Then, soak the fabric in water with about a tablespoon of hydrogen peroxide, which makes the blue color more prominent and the white, whiter.
Can I wash my cyanotype printed fabric?
Yes. Be aware that cyanotypes can fade with repeated washing or sun exposure. You probably don’t want to make something like a bucket hat (sun exposure) or a bib (repeated washings) out of your pretty new cyanotype fabric. 🙂 And, make sure to store your creation out of direct sunlight.
What are some ideas of things to use cyanotype printing fabric?
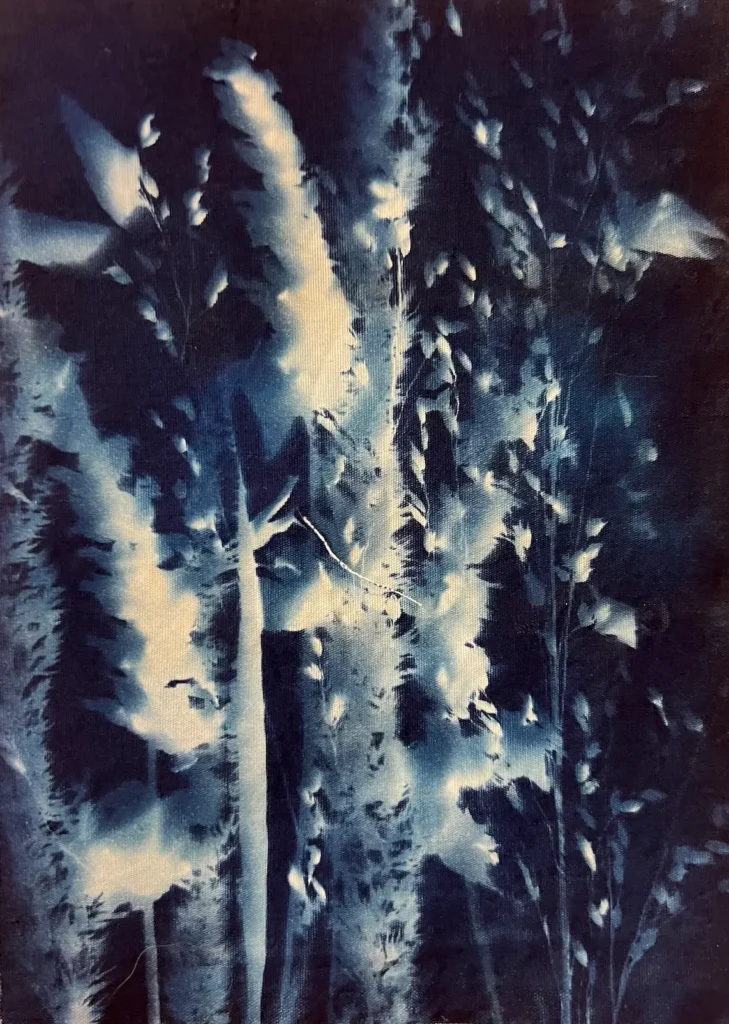
Plant materials are very popular. Leaves, ferns, flowers, grasses are classic cyanotype.
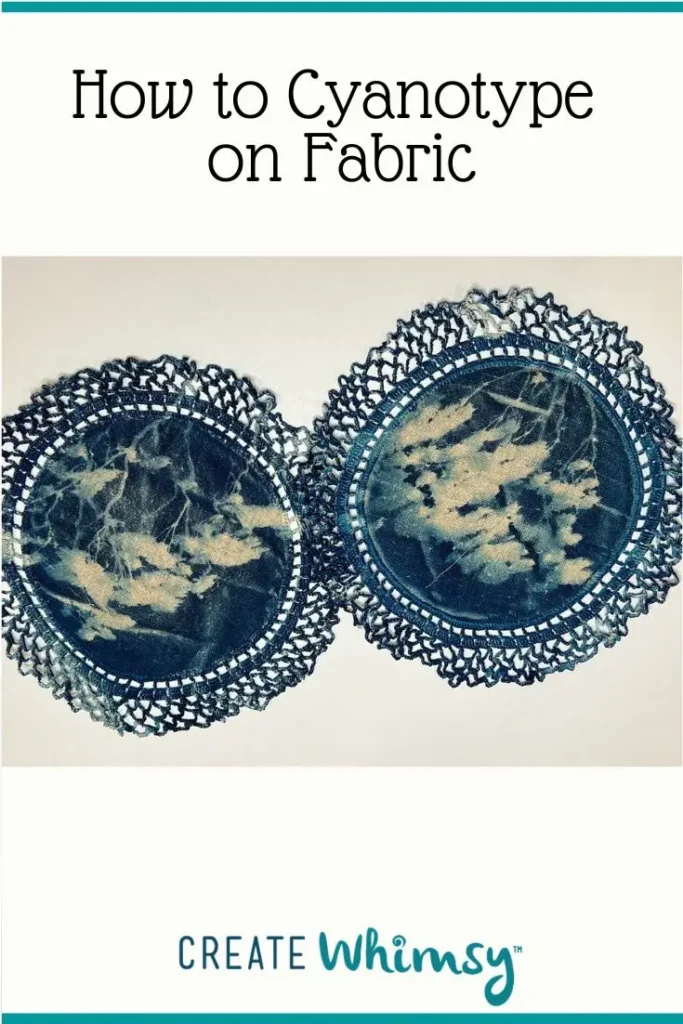
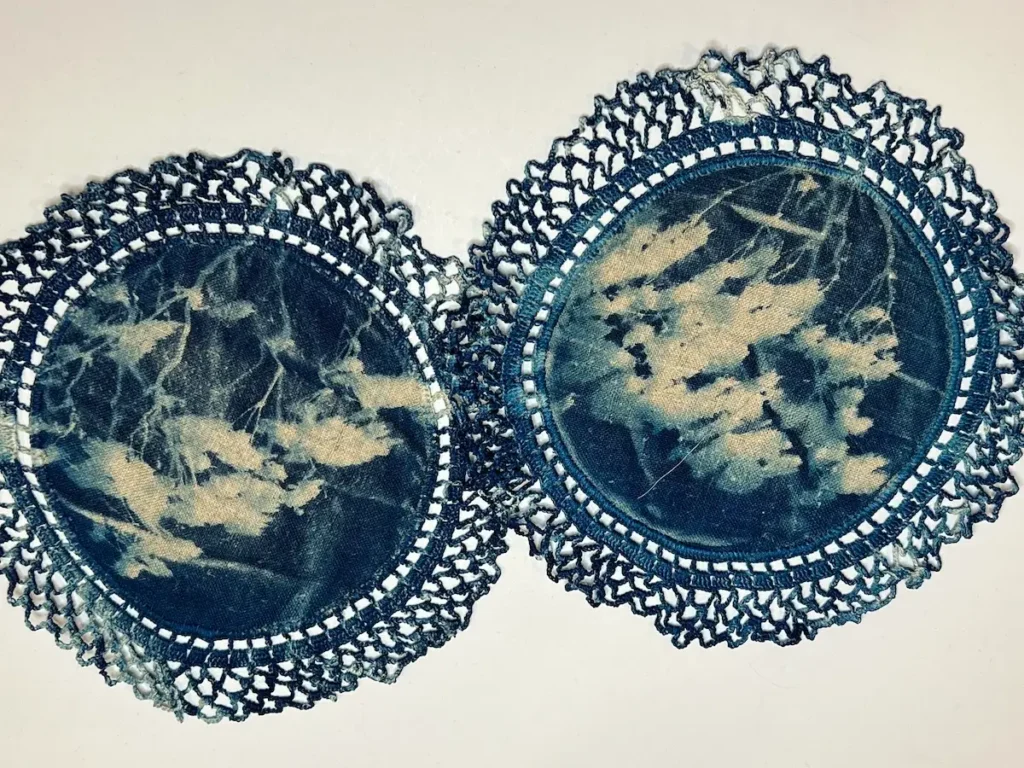
Try using textile overlays, like lace, doilies or mesh.
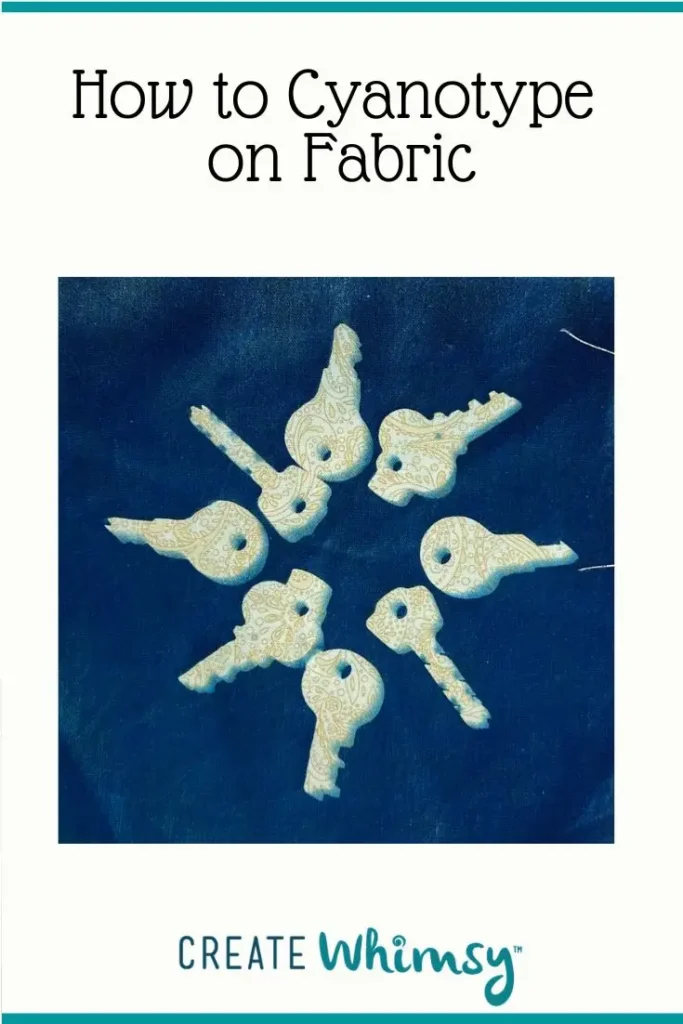
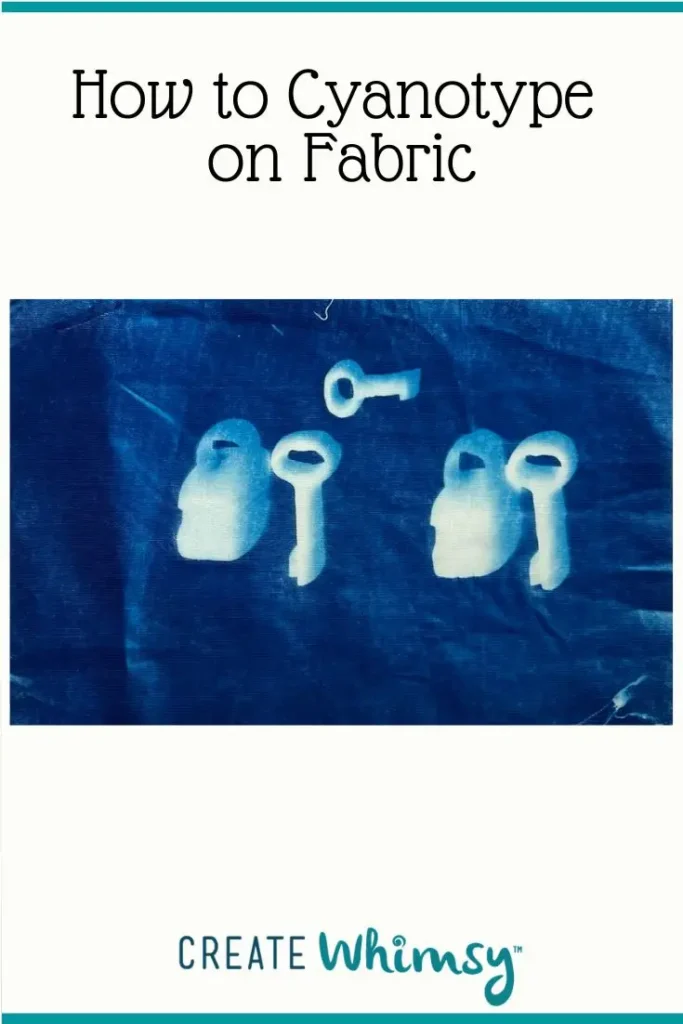
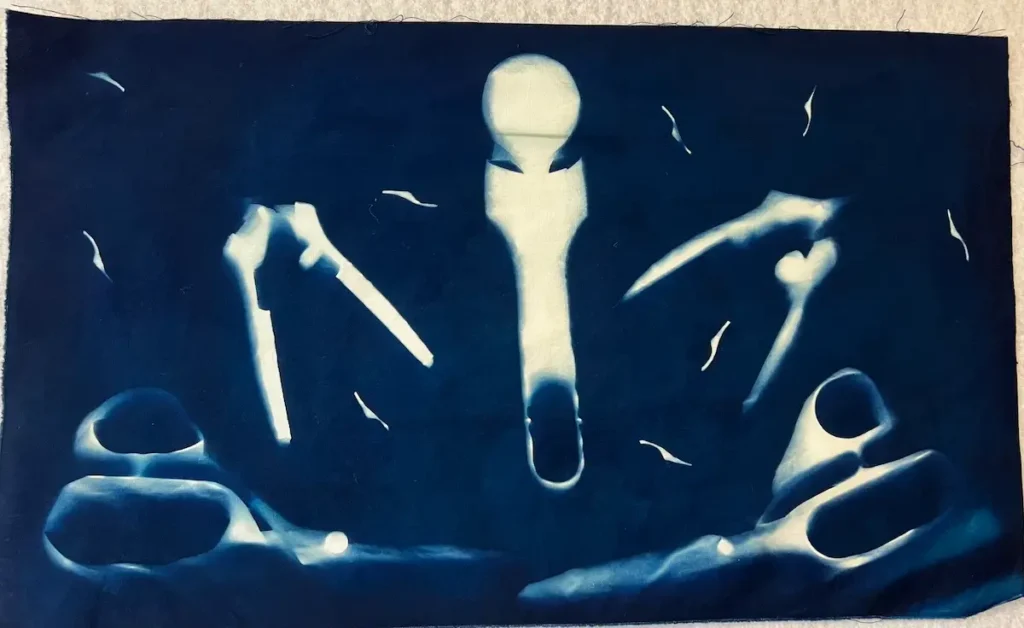
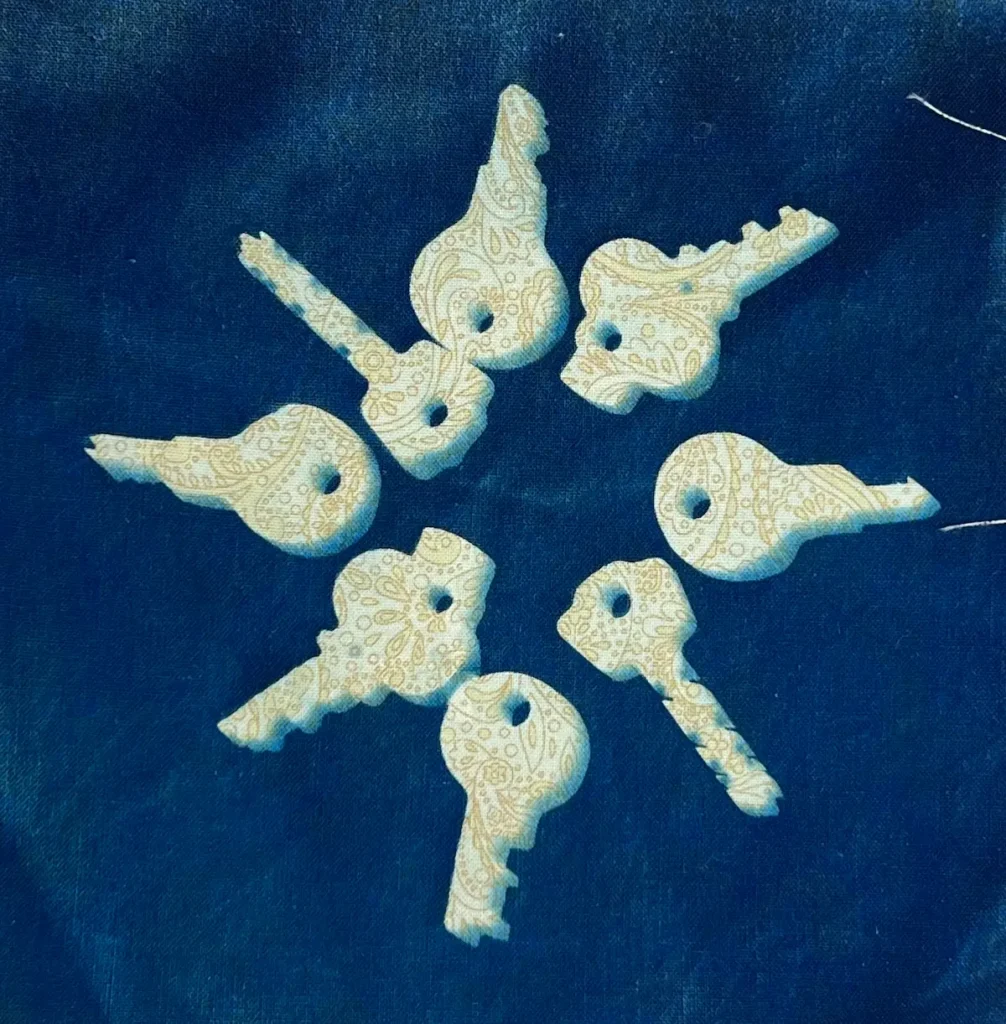
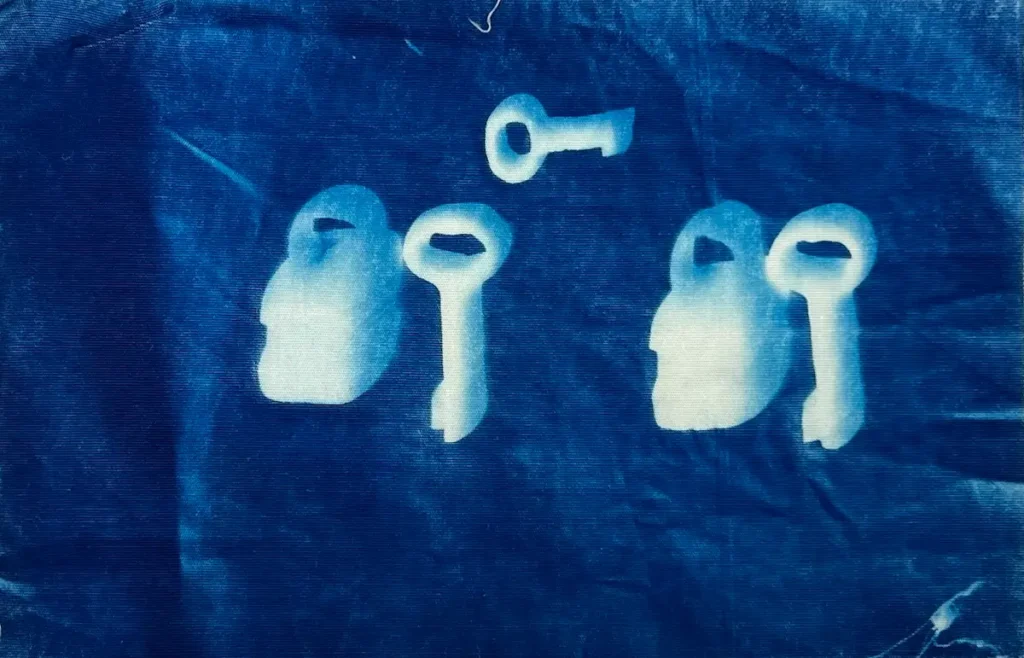
Look around your home for found objects. Keys are popular, jewelry, washers for circles, etc. It works better if the items are flat.

Troubleshooting your cyanotype prints
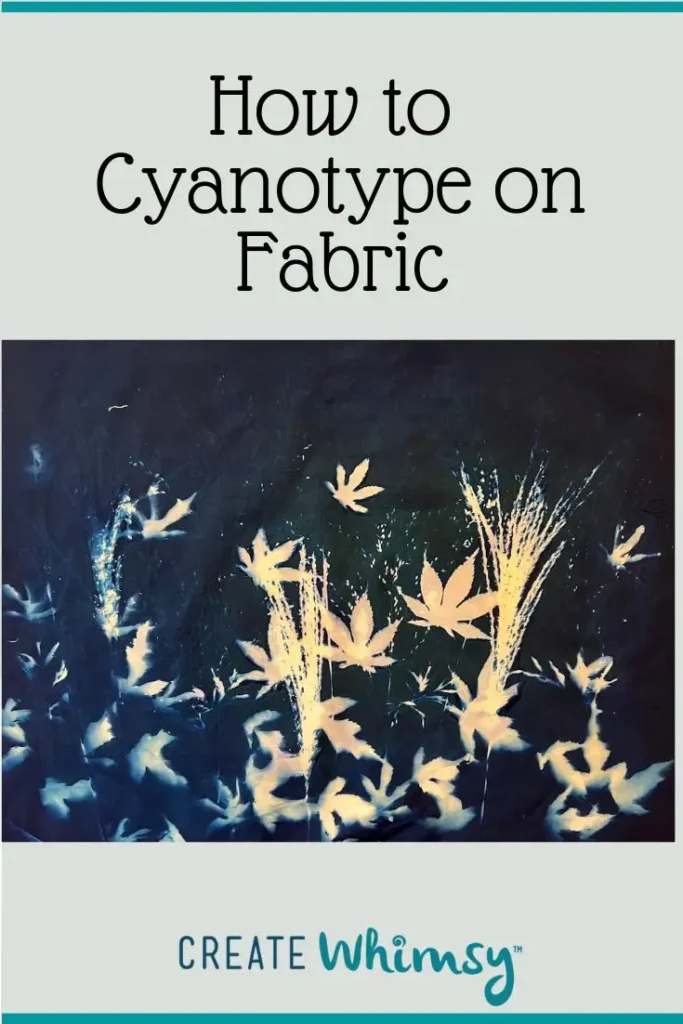
Here are some examples of before, in the sun, and after exposure to show you some things I learned while playing with this surface design technique.
Tip: With lightweight plant materials, consider covering the elements and fabric in the sun with glass or clear acrylic. The plant material cyanotypes in the upper left and middle were covered with clear acrylic. The ones on the lower right were not. It wasn’t a windy day, but there was a little breeze that slightly moved the leaves, allowing the UV to process the chemicals on the fabric. (This was my first attempt – I thought I was a failure!)
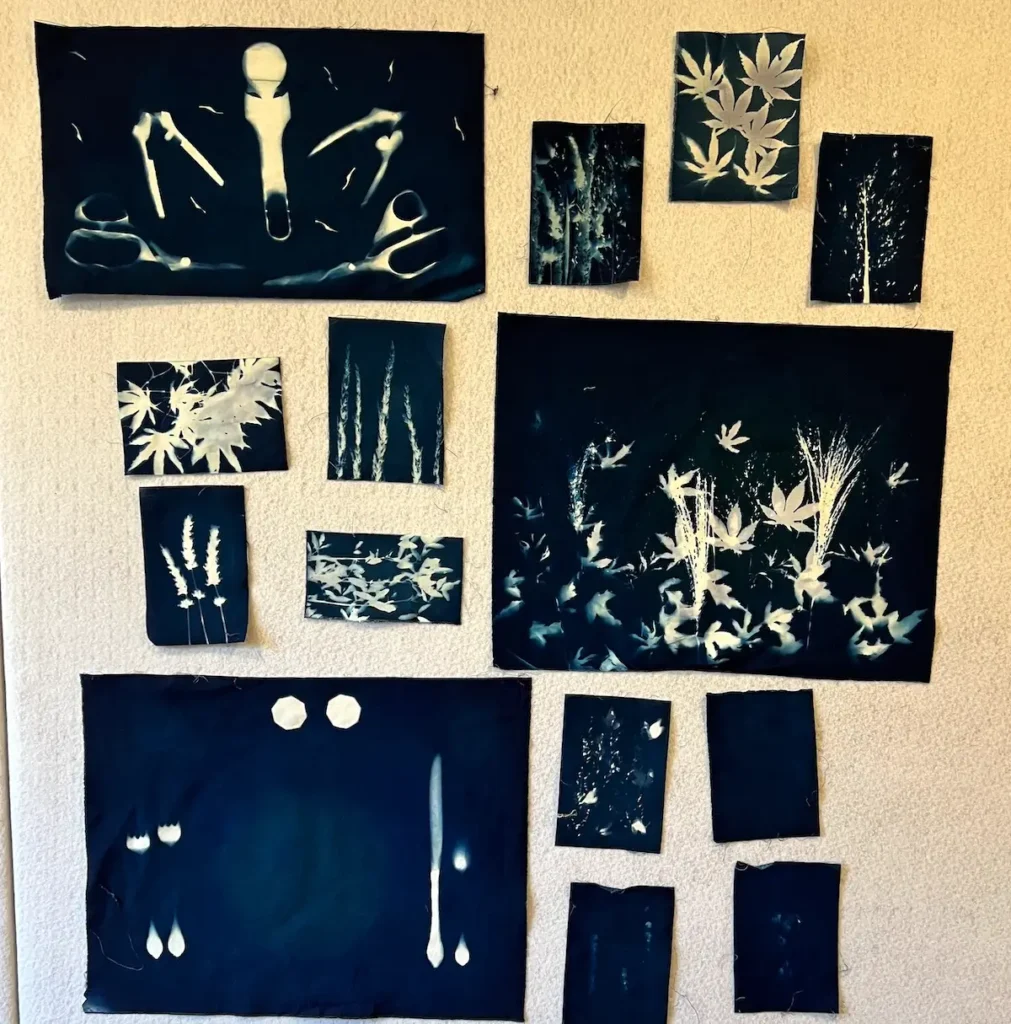
In the above image, the lower left rectangle was a place setting with clear glass plate, drinking glass, and a bowl that are just ghost shadows (if you look closely). The fork, knife, and spoon only transferred the image where they touched the fabric. So – don’t use clear items for your cyanotype. The UV light goes right through them.
Work in dim light or dark room: When preparing the solution and applying the solution to the fabric, work in dim light to a dark room to avoid premature exposure.
Batch prep: If you know you want to play around and try different things, coat multiple pieces of fabric at once. Leave them in the dark to dry. When they are dry, you can store them in a dark plastic bag until you are ready to use them. I’ve been able to use pieces that are over a month old successfully.
Keep it flat: The examples above show how important it is to keep everything flat. The different of leaves and plant material with and without the plexiglass on top are very different. Keeping the elements flat give you sharper prints with details.
Framing your design: If you want a white edge around your design, consider taping off the edges with painter’s tape to frame your design.
Watch the weather: Optimal conditions are a bright and cloudless day in the midday sun. Cloudy or rainy day? Keep your prepared fabric in your black plastic bag for another day.
Project ideas for your cyanotype fabric
First comes to mind fiber art and quilting projects:
– Prepare fabrics for a specific quilt block size. Example: Cut your fabrics at 6-1/2 inches for a finished 6-inch square.
– Make fabric postcards or artist trading cards with your cyanotype fabric.
– Cover a journal or sketchbook with your beautiful handmade fabric
– Include bits in a collage or mixed media piece
Use your beautiful new prints in home decor projects:
– Use botanical cyanotype panels to make pillow covers
– Combine smaller pieces with a background fabric for a table runner. Or, make one long cyanotype
– Cover a lampshade in cyanotype fabric for a glowing effect
– Frame pieces as textile art
Proudly wear your custom cyanotype!
– Incorporate your prints on a tote bag or zipper pouch
– Use cyanotype panels as pockets on an apron or skirt
– Sew cyanotype patches on a denim jacket
– Make bandana-sized square cyanotype prints and use as a scarf or headband
Make one-of-a-kind gifts with your cyanotype fabrics:
– Use meaningful objects for your cyanotype print. Examples are grandma’s lace, keepsakes, key to a house, etc.
– Make bookmarks cut from cyanotype fabric.
– Sachets made from flower prints are a great gift. Make your cyanotype with lavender stems and fill with the dried blooms.
– Make reusable gift bags from your cyanotype fabrics.
How will you use these beautiful fabrics?

Browse through more surface design inspiration and projects on Create Whimsy.