Have you seen quilting with really skinny lines and wondered, “How Did They Do That?”? It’s really easy to add fine-line piecing to your quilting projects.
Over the years, I’ve taken different classes and talked to other quilters about adding skinny lines to their quilts. I’ve tried a lot of different methods – from cutting very specific small pieces and trying to sew them in with perfect seam allowances.
I was playing around with a piece recently where I wanted to have thin lines in my quilt. I was working with a very fiddly fabric that wanted to fray. I tried using a larger piece and then using the stitching line as my sewing guide. Wow – so much easier! Here is my way to add fine lines to your quilts.
How to Add Fine Line Piecing to Your Quilts
Adding fine lines to your quilt is a super simple technique, adding visual interest and movement to your piece. Here is how to insert those adorable skinny lines to your quilt.
As an Amazon Associate I earn from qualifying purchases. Read more about our affiliate linking policy.
Materials
- Fabric for the base that you'll cut to add the fine line
- Fabric for the fine line - I cut it 3/4 inch wide
Tools
- Sewing machine
- Iron
- Pressing surface
- Rotary cutter
- Cutting mat
- Quilter's ruler
Instructions
- Cut a piece of fabric where you want to add a fine line. Cut a piece of the fabric that you want to insert 3/4 inch wide.
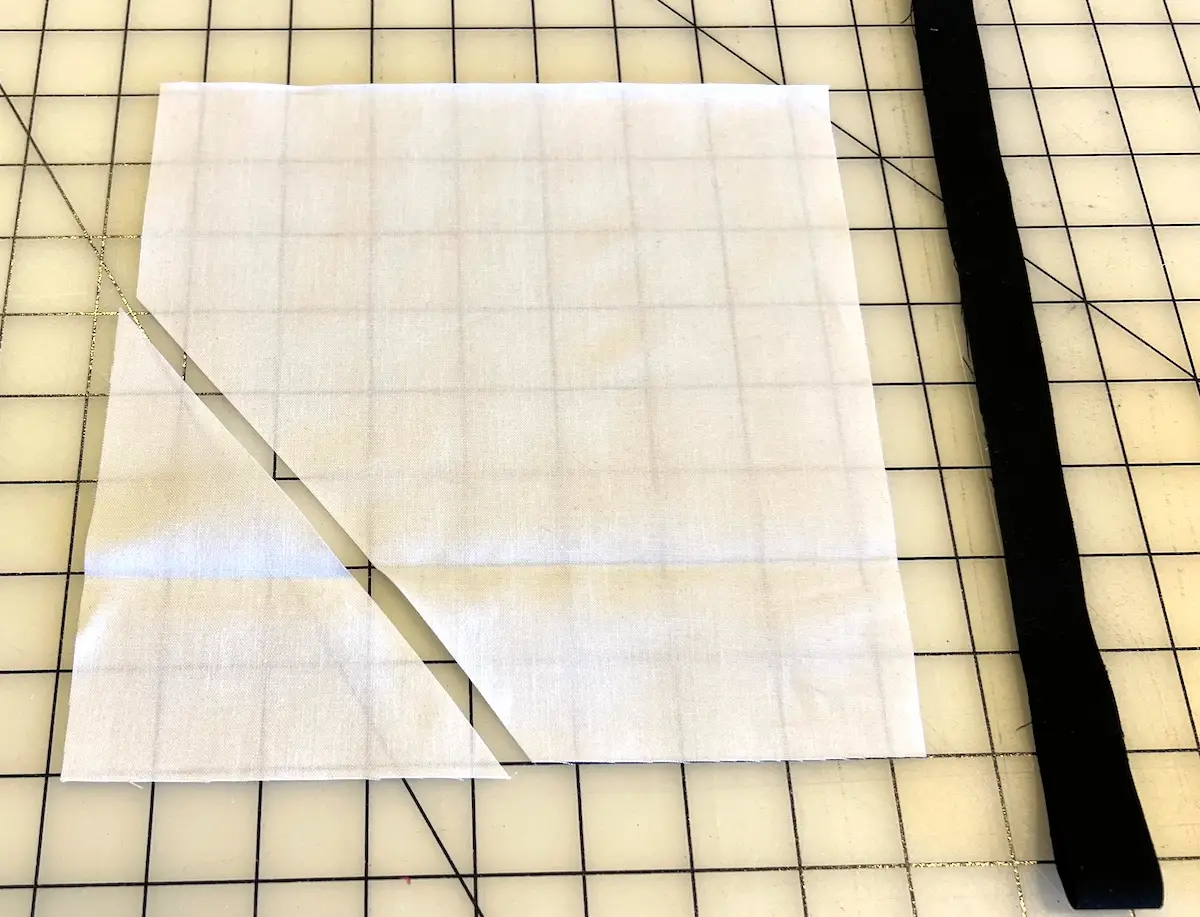
- I'll be inserting the fine line into the white quilt block. I cut the block where I want the line. With right sides together, stitch the skinny strip of fabric to one side of the quilt block with a 1/4 inch seam allowance.
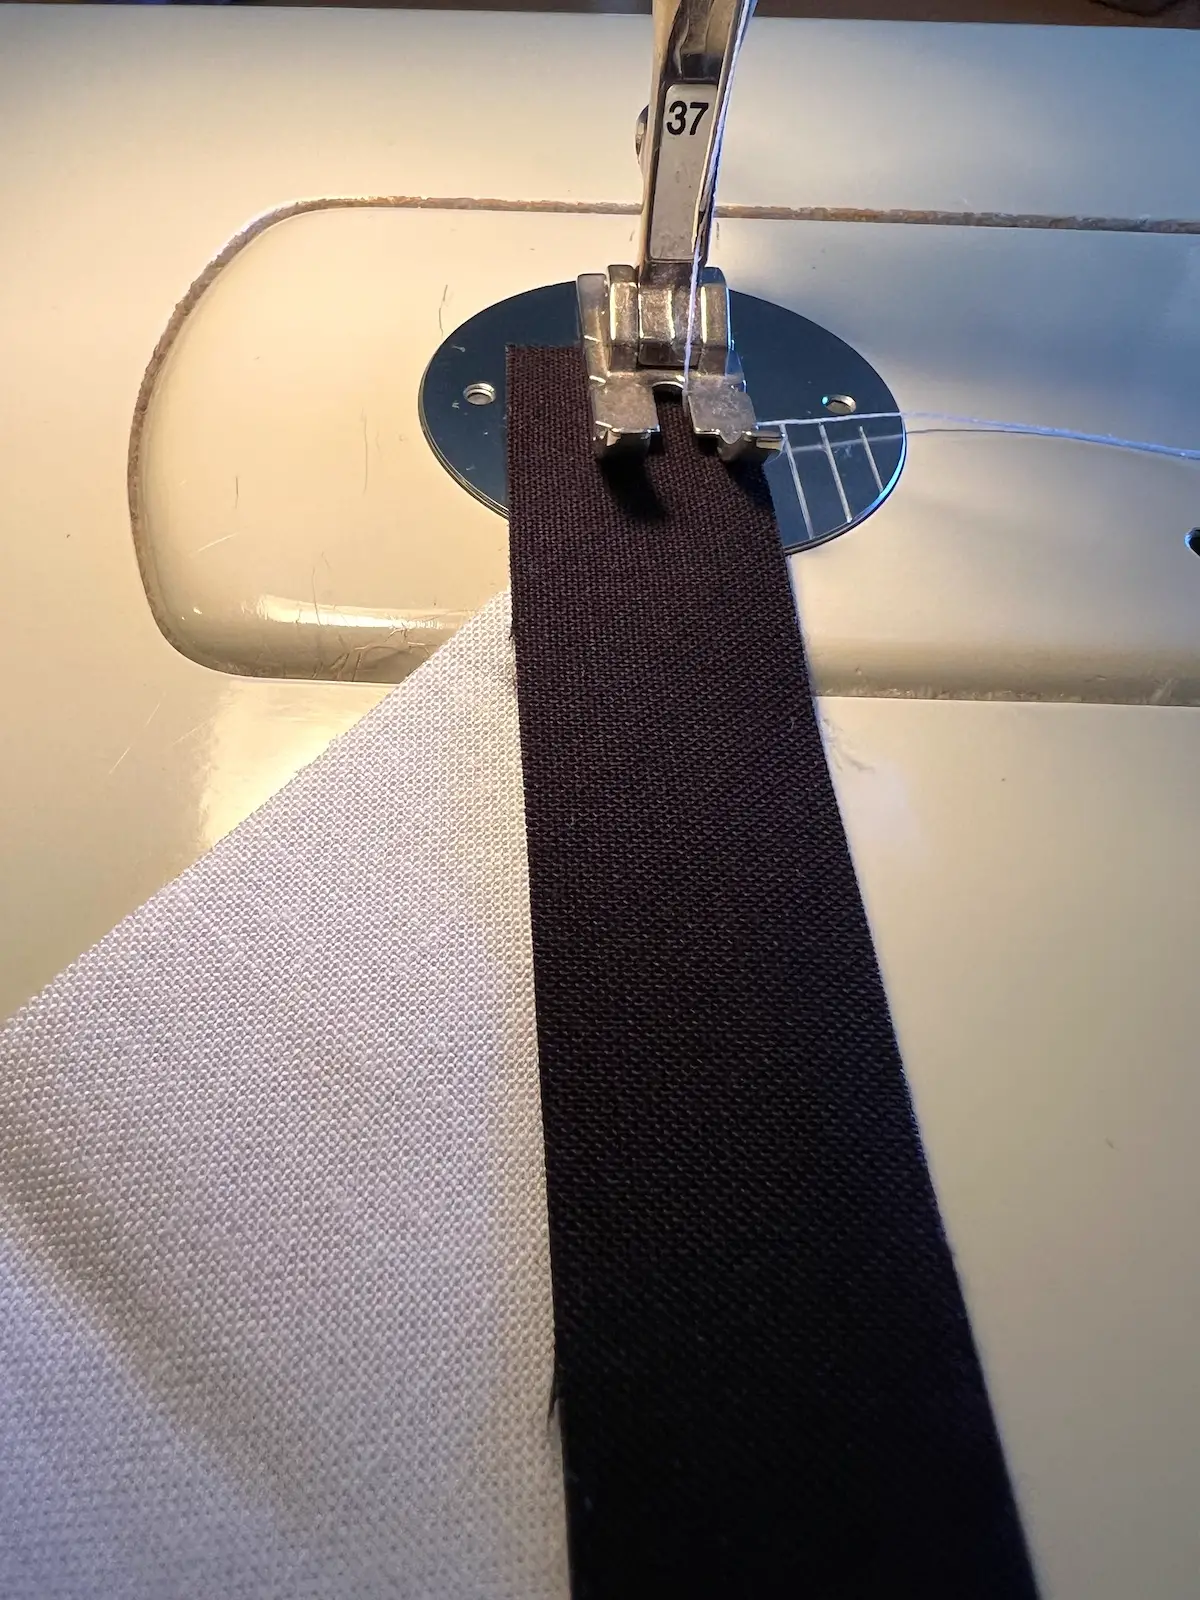
- For the second seam, take the other part of your quilt block and match the raw edge to the raw edge of the insert strip. IMPORTANT: Sew with the insert side up.
With the skinny strip on top, align the raw edge to the other part of your quilt block. Instead of sewing with a 1/4-inch seam allowance, from the raw edge, line up the left edge of your presser foot to the previous stitching line. (See the arrow?)
You can see I've chosen 1/8-inch mark on my presser foot which lines up the previous sewing line with the notch on my presser foot. Use the previoius sewing line as your guide. This gives me a perfect 1/8-inch skinny line.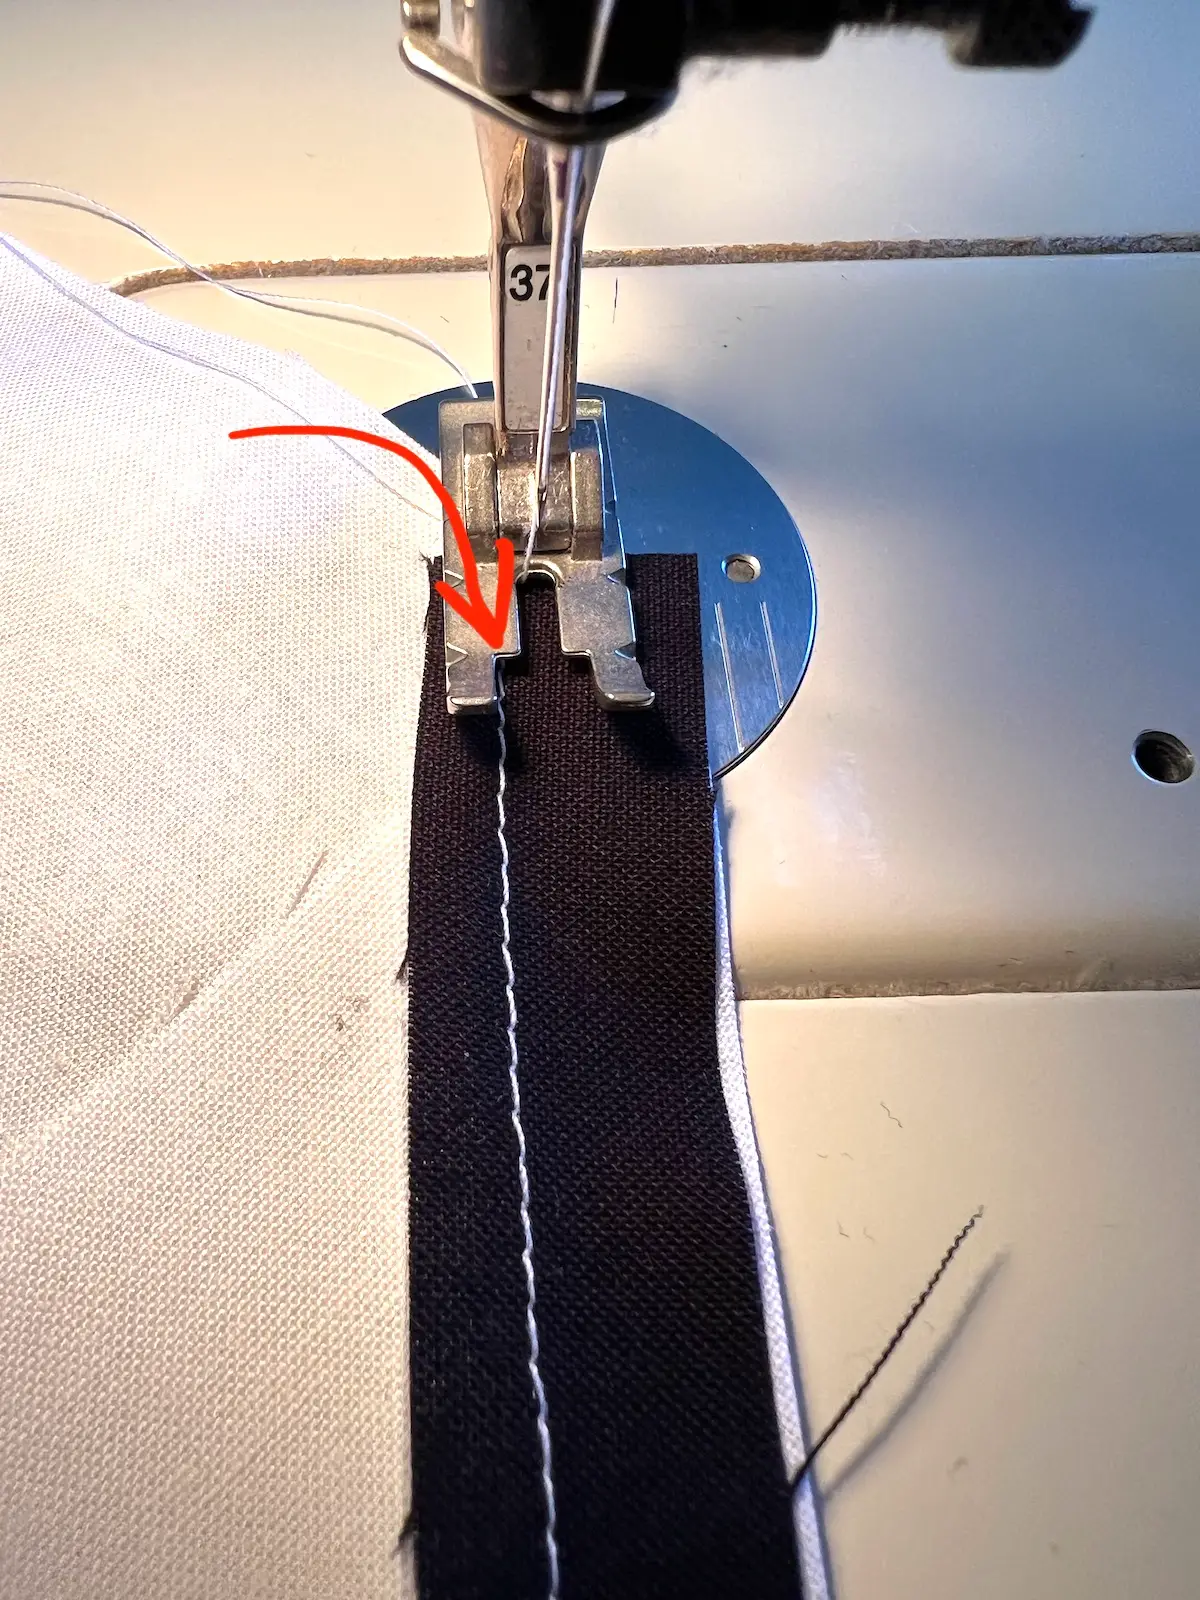
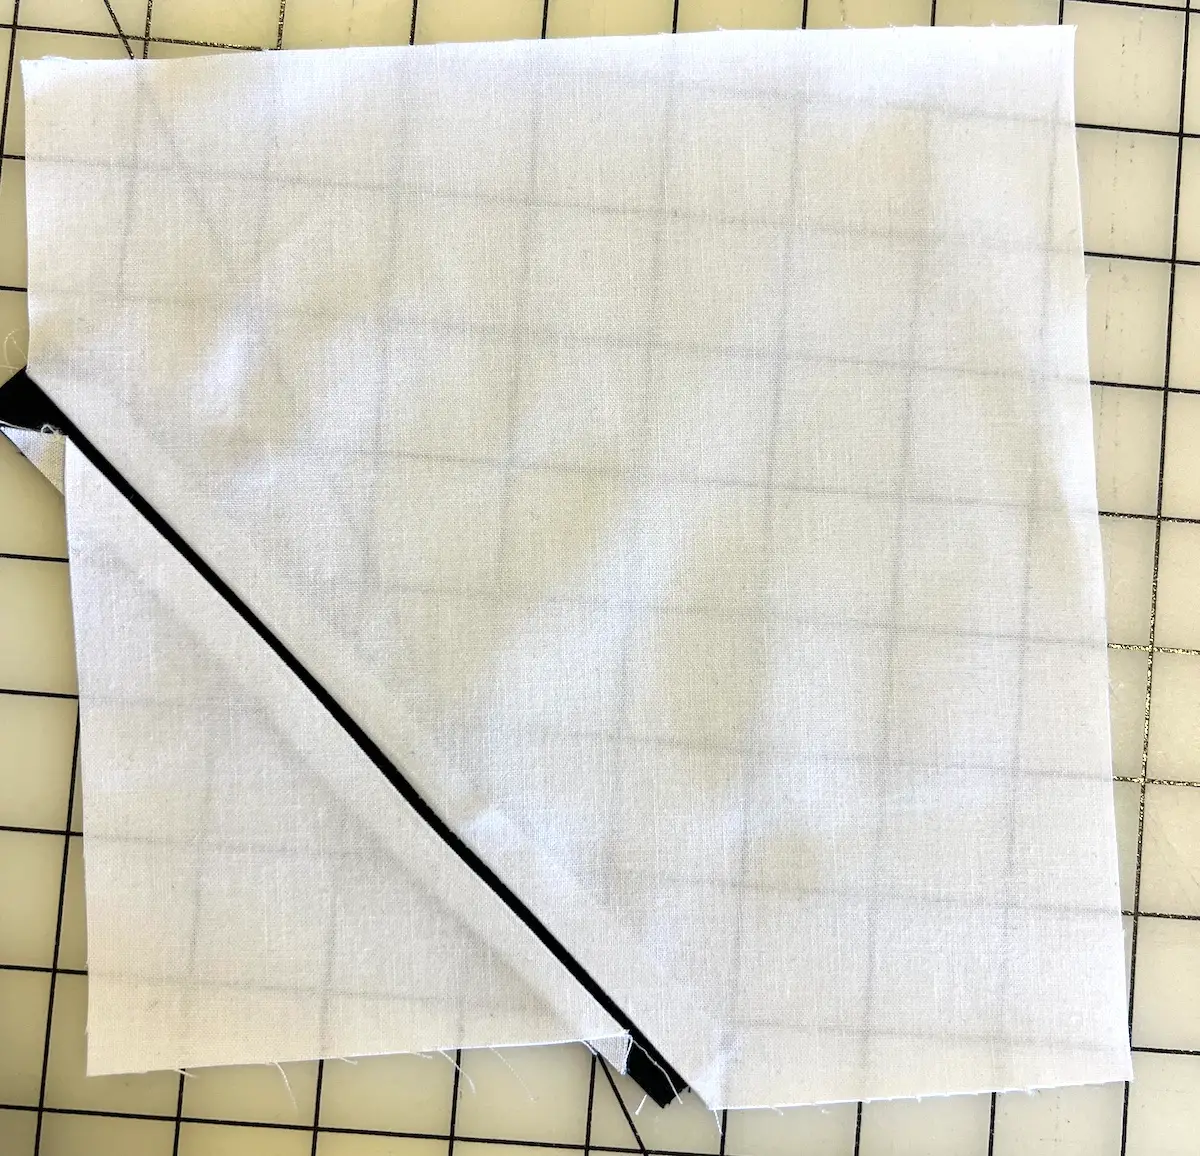
- Press from the back. Here is the first skinny insert into my quilt block. NOTE: I do not trim my seam allowances. I press them away from the insert.
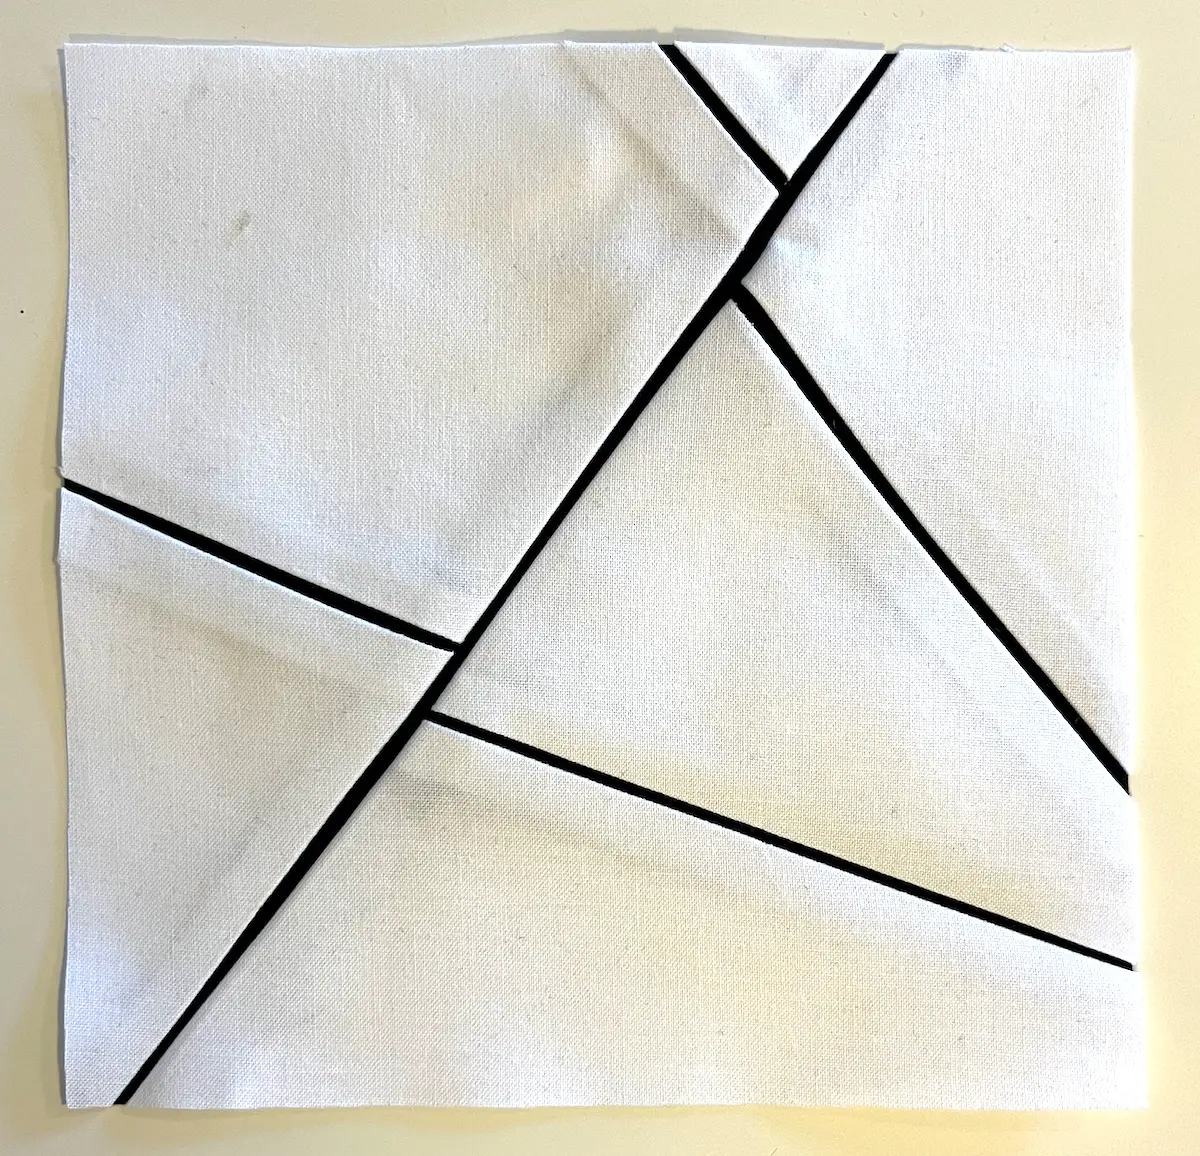
- To add the next skinny line, cut your block again. I like to cut at a different angle. Take a 3/4-inch strip of fabric and sew to one side of your new cut line with a 1/4 inch seam allowance. Then sew again with the insert up, using the stitching line as your guide. I cut this block three (3) times and added a fine line. You can add more or less fine lines to each of your quilt block. Remember: Each time you add another line, the edges of your block get wonkier.
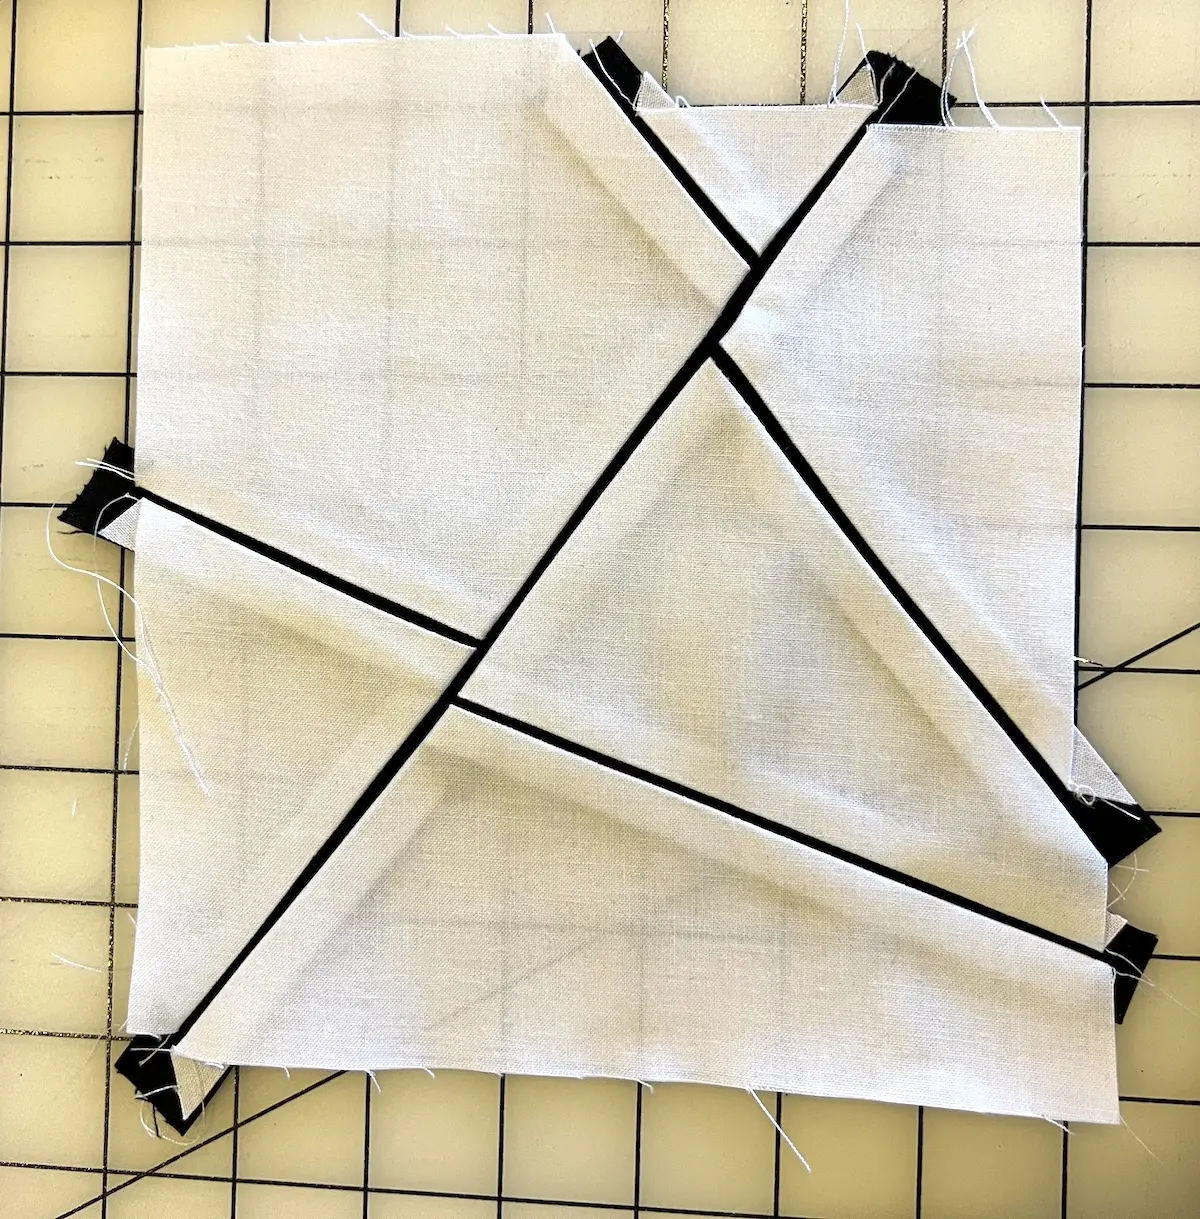
- You can see that the block is no longer square, and it needs to be trimmed up. Trim to your final size and have fun!
Tips and ideas for fine-line piecing
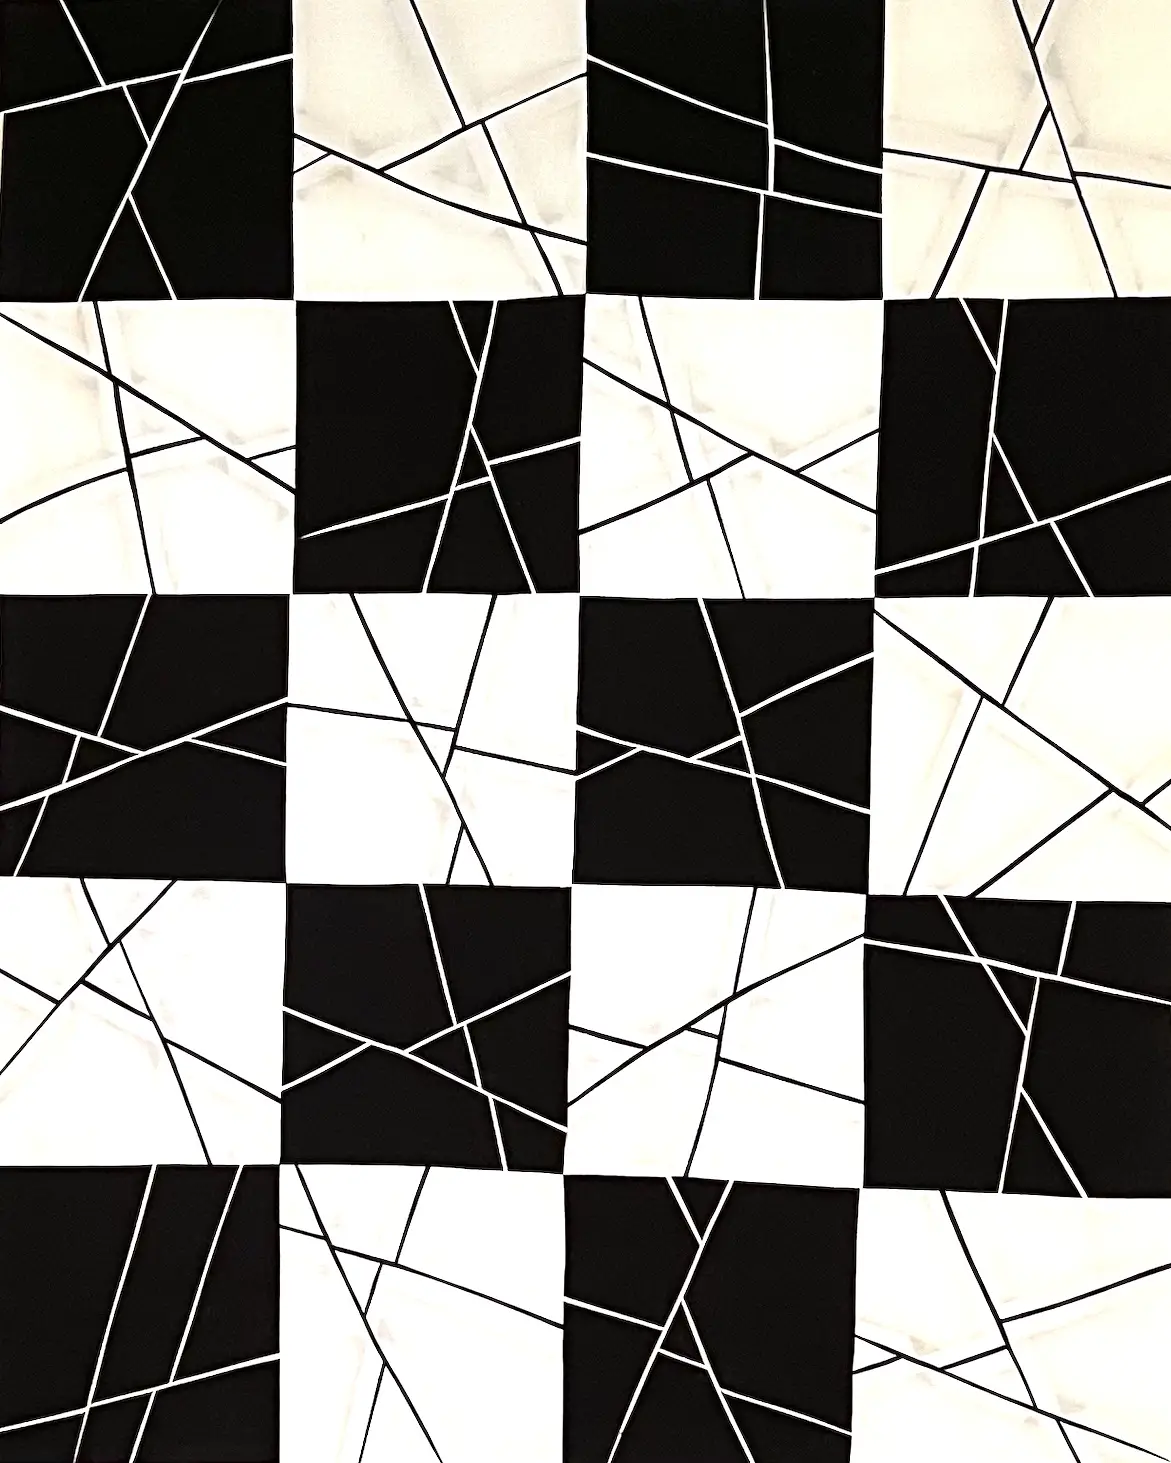
You need to cut your base fabric block quite a bit bigger than your finished block. My rule of thumb is add about 3/4″ to the block for each cut line you’ll be making. For the blocks above, I cut and added three skinny lines. I wanted a 6-1/2 inch block (to finish at 6-inches). I cut the blocks at 8-1/4. You can round up – don’t skimp or your blocks won’t be big enough to trim.
Try different widths of your fine lines to see what you like. Look at the different presser feet you have for your machine and try a few markings for different sizes of lines. I’ve also used the topstitch foot to follow the stitched line and move my needle to the right or left.
Can I use this method with curved skinny lines? Yes! It’s best with gentle curves. The 3/4 inch strip, especially if it is cut from selvedge to selvedge, has enough ‘give’ that it can ease into gentle curves. If you have strong curves, cut your strip on the bias.
Do I trim the insert? I don’t. Since I started with a 3/4-inch insert. I used 1/4-inch for the first seam allowance, and use 1/8-inch in the skinny link, that leaves me with a hair less than 3/8-inch for the second seam allowance. (There is a bit of fabric used in the folds.). I press the seam allowances to the background fabric.
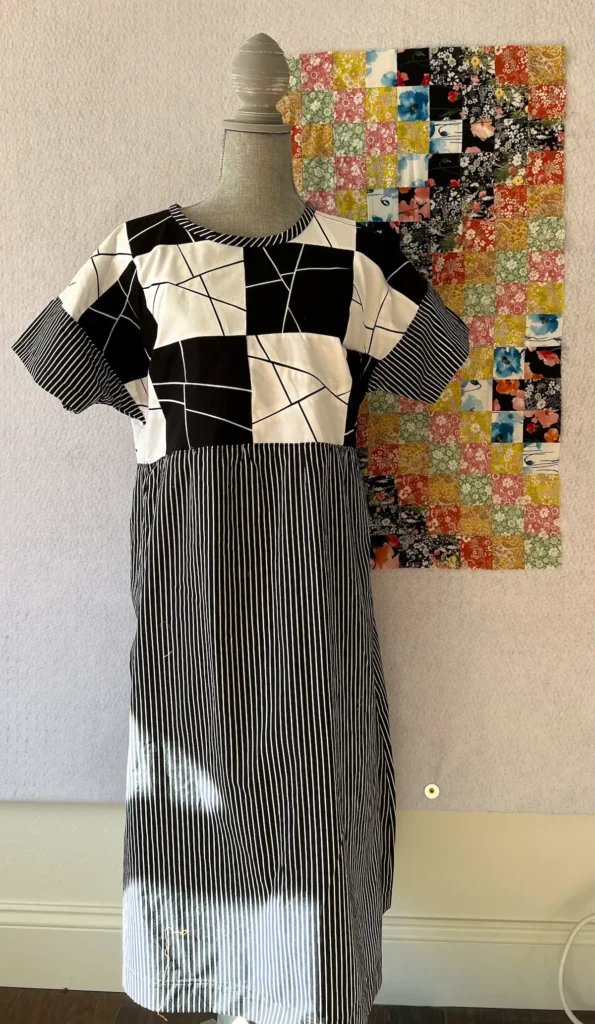
Are fine lines just for quilting? No! I used the sample for this article for a bodice for a dress – I get compliments each time I wear it!
Browse through more quilt tutorials on Create Whimsy.